Project Organization
Master Your Sound: The Ultimate Guide to Sample Library Organization You Can’t Ignore!
Master your sound and unleash your creativity with essential tips for sample library organization that will transform your workflow—discover the secrets inside!
To master your sound, you've got to organize your sample library effectively. An organized library enhances your workflow and creativity, giving you instant access to diverse sound elements when inspiration strikes. Use tools like Loopcloud or ADSR Sample Manager for efficient browsing. Establish clear categories, adopt a consistent naming convention, and regularly scan for duplicates to maintain clarity. Don't forget to back up your samples using external drives or cloud storage to prevent data loss. By refining your organization system, you'll find it easier to access your musical potential, and there's much more to explore on this journey.
Key Takeaways
- Organize your sample library into broad categories and sub-categories for efficient navigation and retrieval.
- Implement consistent naming conventions, including key and BPM, to enhance sound identification.
- Regularly back up your samples using external drives and cloud storage to prevent data loss.
- Use duplicate management software to identify and remove redundant files, optimizing storage space.
- Maintain and update your library frequently to keep it relevant and inspire creativity in your projects.
Importance of Organized Sample Libraries
An organized sample library is essential for any music producer aiming to maximize efficiency and creativity. When your sample libraries are structured well, you can quickly locate and utilize sounds, eliminating the frustrating search through chaotic files. This streamlined access not only saves you time but also keeps your creative flow intact during production sessions.
Imagine diving into a project with everything you need at your fingertips. A well-structured library allows for increased productivity and inspiration, as you'll spend less time digging through unorganized folders.
Plus, when sound samples are easily accessible, you can improve overall project load times, minimizing delays and technical hiccups that can disrupt your workflow.
Organizing your sample libraries effectively reduces frustration and enhances project management. Clear categorization and metadata tagging make it simple to retrieve needed sounds without hassle.
In the long run, an organized sample library not only saves you time but also fosters greater creativity by providing instant access to a diverse range of sounds and samples.
Tools and Techniques for Organization
Effective organization of your sample library relies on the right tools and techniques. Start by utilizing sample library software like Loopcloud and ADSR Sample Manager, which allow you to efficiently browse and tag your samples. This makes retrieval during production sessions a breeze.
For automatic categorization, consider sound library management tools such as Sononym and Algonauts Atlas. They enhance the organization of your growing collection effortlessly.
Define broad categories like Drums, Synths, and Vocals, then further sub-categorize them into specific types, such as Kicks, Snares, and Hi-Hats. This structured approach streamlines your organization system.
Adopt a consistent naming convention for your samples, including key and BPM in the file names. This practice facilitates quick identification and access, saving you valuable time when you're in the creative zone.
Structuring Your Audio Database
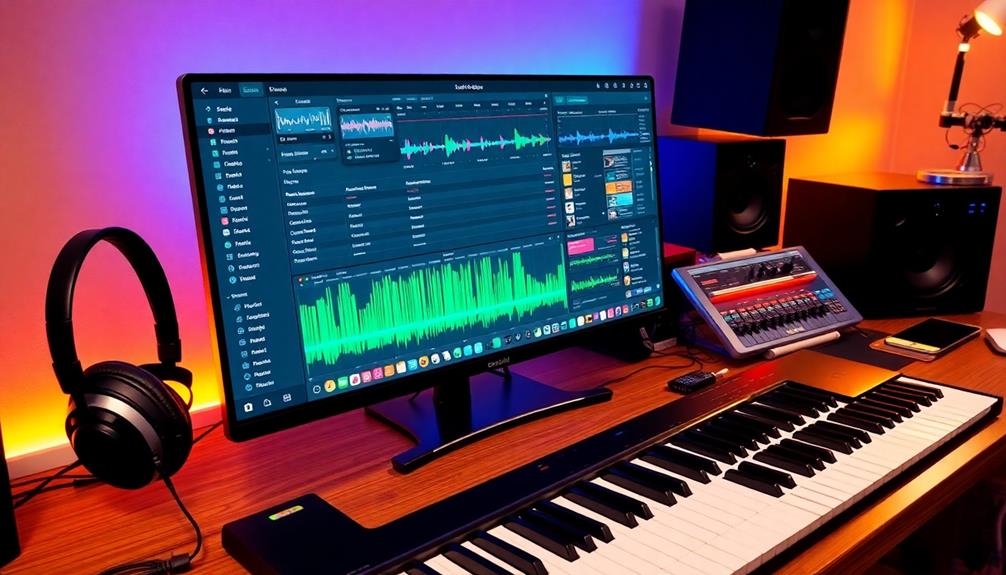
Organizing your audio database requires a clear structure that enhances both navigation and retrieval. Start by implementing a hierarchy system. Create broad categories like Drums and Synths, then break them down into specific sub-categories such as Kicks, Snares, and Hi-Hats. This approach makes it easier for you to locate samples quickly.
Next, utilize consistent naming conventions. Include key, BPM, or other relevant details in your file names to improve searchability. When you need a specific sound, you want to find it without hassle.
Also, address sample rate considerations: use 44.1 kHz for CD quality, 48 kHz for professional video, and 96 kHz for high-resolution audio to guarantee sound integrity.
Regularly scan your library for duplicates using software tools. This practice helps maintain a clean and efficient audio database, maximizing your storage on that external hard drive.
Storage and Backup Solutions
To keep your sample library safe, regular backup practices are essential.
Consider using external storage options like hard drives for reliable, transportable solutions, alongside cloud storage for added security.
For ideal organization, make sure to implement regular air purifier maintenance dos and don'ts that can help you maintain a clean environment for your equipment.
Plus, managing duplicate samples with specialized software can help you maintain an organized and efficient library.
Regular Backup Practices
Backing up your sound library isn't just smart; it's essential for preserving your hard work and creativity. Regular backups prevent loss of samples, ensuring you can access your library even if hardware fails or files are accidentally deleted. Using external hard drives is a reliable option, offering portability and protection.
Consider implementing a backup strategy with a combination of methods. Here's a quick overview:
Backup Method | Pros | Cons |
---|---|---|
External Hard Drives | Portable, easy to use | Physical damage risk |
Network-Attached Storage (NAS) | Centralized access, good for collaboration | Higher setup cost |
Cloud Storage | Off-site safety, accessible anywhere | Monthly fees, internet required |
Employing multiple backup solutions, like combining hard drives and cloud storage, can help reduce the risk of relying on a single point of failure. Plus, regularly scanning for duplicates in your sample library can streamline your storage, freeing up space and improving organization. Prioritize your backups to keep your creative projects safe and sound!
External Storage Options
When it comes to protecting your sound library, selecting the right external storage options is vital for both security and accessibility. You want to guarantee that your samples are safe from hardware failures or accidental deletions.
Here are some reliable solutions:
- External Hard Drives: These are cost-effective and offer a large amount of storage. Regularly back up your samples to safeguard against data loss.
- Network-Attached Storage (NAS): If you collaborate with others, NAS devices allow multiple users to access and share files easily. This can streamline your music production process.
- Cloud Storage: Services like Google Drive or Dropbox provide off-site backups, guaranteeing your samples are safe even if something happens to your local storage.
- Hybrid Solutions: Combining several methods, like using external hard drives alongside NAS and cloud storage, mitigates risks. This way, you have multiple layers of security for your valuable assets.
Remember to take into account sample rate and bit depth when storing your audio files, as higher quality formats need more storage but deliver superior sound fidelity.
Prioritize these external storage options to keep your sound library organized and secure.
Duplicate Sample Management
Duplicate sample management plays an essential role in maintaining an organized and efficient sound library. By utilizing duplicate sample management software, you can easily identify and remove redundant files, freeing up valuable storage space and streamlining your workflow.
Regularly scanning your sample library for duplicates helps you avoid confusion during music production sessions and keeps your creative process flowing smoothly.
Implementing a systematic approach to duplicate management not only optimizes your storage but also enhances project load times. With less unnecessary data for your DAW to process, you'll notice improved performance and responsiveness.
Tools like Sononym and ADSR Sample Manager are invaluable for this task, as they can quickly pinpoint duplicates, allowing for a faster cleanup and better organization of your library.
Maintaining a clean sample library by addressing duplicate samples fosters a more focused and creative environment. When you know exactly what samples you have, you can immerse yourself in your work without the distraction of clutter.
Mastering Sample Management Details
Mastering your sample management details is crucial for any music producer looking to maintain a high-quality library.
To optimize your sample management, consider the following key strategies:
- Choose the Right File Format: Use WAV for high-quality samples, but don't shy away from MP3 for smaller file sizes when necessary.
- Regular Library Maintenance: Update your library regularly by adding new sounds, removing outdated samples, and scanning for malware to keep your collection safe and relevant.
- Consistent Naming Convention: Implement a naming system that includes key, BPM, and other critical details. This makes it easier to locate and use samples quickly.
- Utilize Software Tools: Take advantage of software designed to identify and eliminate duplicate samples. This can streamline your library, saving storage space and reducing clutter.
Building a Personal Library
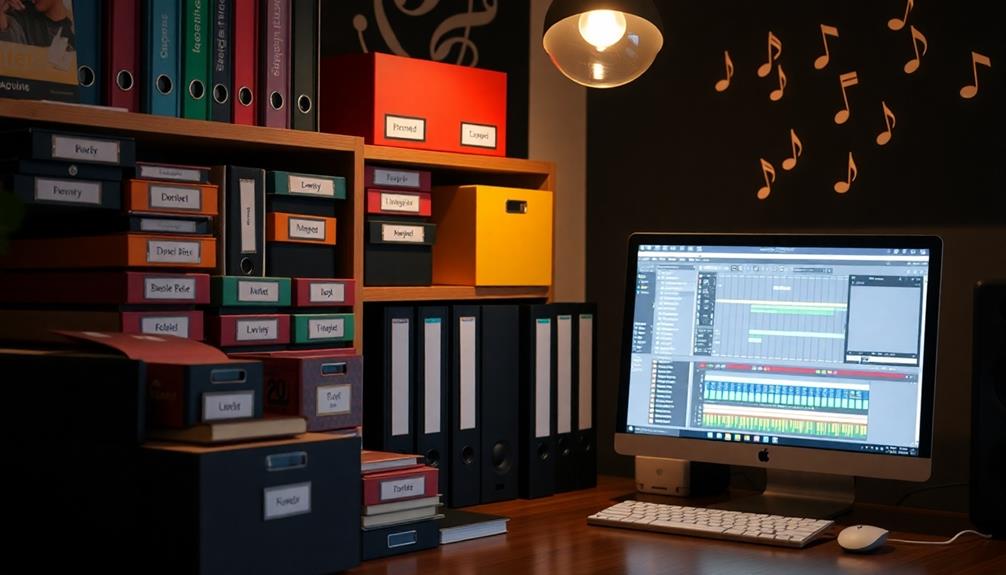
Building a personal sound library is essential for any music producer aiming to cultivate a unique creative space. This library serves as a vital resource for inspiration, allowing you to access distinctive sounds and ideas without depending on external sources. Organizing your collection efficiently ensures that you can quickly find the right elements during the creative process, saving both time and energy. Implementing effective sound library organization tips, such as categorizing samples by type, mood, or genre, can make a world of difference in maintaining workflow. By keeping your library well-structured and personalized, you’ll be better equipped to translate your artistic vision into reality.
One effective way to enhance your personal sound library is by salvaging elements from unfinished tracks. These original sounds can add depth and variety to your projects.
Regularly exploring and organizing your library fosters creativity and helps you identify sounds that could be packaged into sample packs for potential monetization. Establishing consistent habits of saving high-quality sounds and presets from various projects contributes to a more extensive and diverse library, ultimately boosting your productivity.
To streamline your creative process, implement a structured naming convention and categorization system within your personal sound library. This approach makes it easy to quickly identify and retrieve sounds when inspiration strikes.
Frequently Asked Questions
How Do You Organize Your Sample Library?
To organize your sample library, create a clear hierarchy with categories like Drums and Synths. Use metadata tags for easy searching, maintain consistent naming conventions, and regularly clean up outdated samples to optimize efficiency.
What Is the Best Way to Organize Your Music Library?
You've got a treasure trove of music, but how do you uncover its gems? Start by creating clear folders, tagging tracks, and regularly updating your library. Consistency in naming helps you find exactly what you need.
How to Collect Sound Samples?
To collect sound samples, explore online libraries, download free packs, and record unique sounds in your environment. Join forums to exchange samples, and keep track of usage rights to guarantee compliance in your projects.
How to Organize Your Drum Sample?
Organize your drum samples systematically, sorting them into specific sections like Kicks, Snares, and Hi-Hats. Consistently name them with BPM and key, and regularly purge poor-quality pieces for a polished, practical library.
Conclusion
In today's fast-paced music world, having an organized sample library is like having a well-tuned instrument—it makes all the difference in your creative flow. By implementing the strategies you've learned, you'll streamline your process and elevate your sound. Remember, just as artists of the Renaissance meticulously cataloged their work, you too can build a personal library that inspires and empowers your music-making. So, get started, and watch your creativity flourish!
Project Organization
Efficient File Management Tips for Large Sample Libraries
You can transform your overwhelming sample library into an organized haven; discover essential tips that will revolutionize your workflow today!
To efficiently manage large sample libraries, start by organizing your files into a clear folder structure, like top-level folders for sounds and subfolders by category. Use consistent naming conventions that include key details like instrument type and tempo for easy identification. Regularly review and remove duplicates to declutter your collection. Employ tagging software for enhanced organization without changing file names. Consider AI-driven tools for automatic tagging and sync with cloud storage for easy access. These strategies will streamline your workflow and enhance efficiency, allowing you to focus on creativity, all while keeping your library in top shape.
Key Takeaways
- Organize your sample library with a clear folder structure, including categories like Single Hits, Loops, and Vocals for easy navigation.
- Use a consistent naming convention that includes category, type, instrument, key, BPM, and description to enhance clarity and searchability.
- Implement genre-specific tagging systems and folder hierarchies to improve organization and quick access to various sound types.
- Regularly declutter your collection by removing duplicates and unnecessary samples, and create a curated folder for frequently used sounds.
- Establish a robust backup strategy following the 3-2-1 rule to protect your data and ensure efficient storage management.
Organizing Your Sample Library
To kick off organizing your sample library, start by creating a top-level folder named "Sounds." Within this folder, categorize your subfolders by type, such as Single Hits, Loops, and Vocals. This folder structure streamlines your file organization and makes it easy to navigate through your sound libraries.
Next, implement a tree-like structure by further dividing these subfolders based on instrument type, like Percussion and Musical. This way, you can quickly retrieve specific audio files without wasting storage space.
Regularly assess your library and purge redundant samples to maintain efficiency, ensuring each folder holds only the most unique and useful sounds. Regular updates and thoughtful categorization can save time during creative sessions and keep your workflow streamlined. Avoid common pitfalls like overloading folders with similar files or mislabeling them, as these are prime examples of organizing your sound library mistakes. By dedicating time to consistent management, you’ll create a powerful resource that supports your projects seamlessly.
Additionally, consider utilizing tagging software to enhance your sample organization. This allows you to search and categorize your samples without changing their file names or folder placements, giving you more flexibility.
While you'll establish consistent naming conventions later, it's essential to plan for clear, descriptive file names that enhance searchability. By setting up a well-structured sample library now, you'll pave the way for a more manageable and creative workflow in your future projects.
Naming Conventions for Files
When it comes to naming your audio files, using descriptive names is key.
Stick to a consistent format that includes essential details like instrument type and tempo to make your library easier to navigate.
Additionally, incorporating genre-specific tags can enhance organization and streamline your creative process.
Descriptive Naming Practices
Establishing a solid naming convention for your sample library can greatly enhance your workflow. By using descriptive file names, you guarantee that each sample is easily identifiable, which improves searchability and organization. A consistent naming scheme that includes key elements—like category, type, instrument, key, BPM, and a brief description—can streamline your process.
For example, a file named "Drums_Snare_Rock_C#_120_Smooth.wav" provides immediate clarity on its contents.
This practice not only aids in quick retrieval but can also boost your workflow efficiency, potentially increasing your productivity by up to ten times during music production. Regularly revisiting and updating your naming conventions keeps your sample libraries relevant and easy to navigate as they evolve over time.
Don't forget to utilize tagging alongside your descriptive names. Tags facilitate further categorization and allow for rapid access to samples across different software platforms, enhancing your organization even more.
Consistent Format Usage
Maintaining a consistent format in your file naming conventions plays an essential role in effective sample library management. By using a structured approach, like Category_Type_Instrument_Key_BPM_Description.wav, you enhance clarity and organization within your sample library. This consistency not only boosts searchability but also helps you quickly identify and recall specific sounds during production.
Here are a few tips to improve your file management:
- Use descriptive names that clearly indicate the content.
- Stick to a logical structure that makes sense for your workflow.
- Regularly update your naming conventions as your library grows.
Implementing a consistent format reduces the time you spend searching for samples, leading to a more efficient workflow. Additionally, consider tagging files with relevant information, such as instrument type and genre, to further streamline the organization process without altering the file names.
Genre-Specific Tagging Systems
A well-structured genre-specific tagging system can drastically improve how you manage your sample library. Start by implementing consistent naming conventions that use prefixes such as "HipHop_" or "House_" to categorize your samples according to genre. This approach not only helps you organize samples effectively but also enhances the searchability of your sample packs, aligning with the innovative strategies informed by cognitive science discussed in music education's benefits.
For instance, naming a file "House_Bass_G_120bpm.wav" provides essential information at a glance.
Next, create a clear folder hierarchy by organizing samples into subfolders based on genre. This way, each musical style has its own dedicated space, making it quicker for you to find what you need. Regularly review and adjust your tagging system to accommodate new genres or shifts in your production style, ensuring your library remains relevant.
Lastly, consider using tagging software that allows you to add extra metadata, like mood or tempo. This can further refine your searches and improve the organization of your genre-specific sample library.
Tools for Efficient Management
To manage your sample library effectively, consider using AI-driven organization tools that streamline navigation and enhance your workflow.
Implementing a budget for your sample library spending can also help you allocate resources wisely.
Color-coded systems can help you quickly identify sounds, saving you time when searching through extensive collections.
Additionally, exploring sample library delivery services can provide you with a steady stream of fresh sounds while keeping your organization in check.
AI-Driven Organization Tools
Maneuvering a vast sample library can feel overwhelming, but AI-driven organization tools make it a breeze. These tools, like Atlas 2, utilize advanced audio analysis to categorize your audio samples efficiently, greatly enhancing your searchability within extensive libraries.
You'll find that they automatically tag samples based on their sonic characteristics, which means you can spend less time sorting through files and folders.
Here are a few benefits of using AI-driven organization tools:
- Streamlined Retrieval: Tools like Soundly and BaseHead help you access audio files quickly during production.
- Enhanced Creative Workflows: With powerful editing and sequencing capabilities, you can create beats on the fly, especially with drum samples.
- Cloud Storage Integration: Many AI tools sync with cloud storage, ensuring your sample libraries are accessible from anywhere.
Color-Coded Navigation Systems
Color-coded navigation systems revolutionize the way you manage your sample library, making it easier to locate and organize your sounds. By visually categorizing samples based on instrument type, genre, or mood, you can markedly streamline your workflow in music production. Instead of sifting through endless folders, a quick glance at color-coded tags helps you find what you need instantly.
Color | Purpose |
---|---|
Red | Percussion samples |
Blue | Synths |
Green | Vocals |
Yellow | Effects |
Implementing a color-coding scheme not only enhances organization but also reduces cognitive overload. You'll create an orderly workspace that's both visually appealing and intuitive. Many sample management tools allow you to assign specific colors to folders, tailoring the system to fit your preferences.
Additionally, color-coded navigation improves collaboration among multiple users. A consistent visual language for accessing shared sample libraries keeps everyone on the same page. With these systems in place, you'll find that managing your sample library becomes more efficient and enjoyable, allowing you to focus on what really matters—creating great music.
Sample Library Delivery Services
In today's fast-paced music production landscape, utilizing sample library delivery services can greatly enhance your workflow. These services, like LoopCloud and ADSR, offer structured content that makes it easy to access and manage a vast array of samples.
With AI-driven tools for tagging and categorizing, you'll find searching and retrieving sounds markedly faster.
Here are a few benefits of using these services:
- Cloud Storage: Access your sample libraries from anywhere, perfect for collaboration and remote work.
- Subscription-Based Models: Keep your collection fresh with new samples, reducing the hassle of maintaining large, static libraries.
- Integrated Sampling Features: Audition and manipulate samples directly within your DAW, streamlining your workflow and boosting creativity.
Decluttering Your Collection
A well-organized sample library can greatly enhance your creative process, making decluttering an essential task for any music producer.
Start by regularly reviewing your library to identify and remove duplicate samples. This not only frees up valuable storage space but also reduces decision fatigue, allowing you to focus on your music.
Limit the variations of each sample to just 2-3 versions. This practice helps streamline your selection process and emphasizes quality over quantity.
Create a curated "go-to" folder filled with your favorite and frequently used samples to simplify access and boost workflow efficiency.
Implementing a structured naming convention for your files is key to effective organizing. It makes identifying redundant samples easier and aids in the decluttering process.
Don't forget to schedule periodic decluttering sessions to assess the relevance of your samples. This guarantees your library remains efficient and manageable, keeping your creativity flowing.
Backup Strategies for Data
You never know when disaster might strike, making it essential to have solid backup strategies for your sample library. Implementing a backup schedule is vital to protect against data loss from crashes or system failures.
Follow the Rule of Three (3-2-1 rule): keep three copies of your files, store two backups on separate mediums, and one copy offsite for extra security.
Consider these tips for effective backups:
- Use your Digital Audio Workstation's built-in backup features to automate the process, minimizing the risk of losing important files.
- Schedule frequent backups, especially near project completion, to guarantee the most recent versions of your samples are saved.
- Regularly purge unused audio files to reduce storage size, making your backups more efficient and focused on relevant content.
Streamlining Project Practices
Efficient project practices can transform your music production workflow, making it smoother and more enjoyable. Start by implementing a structured folder hierarchy for your sample library. Use top-level folders like "One Shots" and "Loops" to simplify navigation. Descriptive file naming is essential; include the category, type, instrument, key, BPM, and a brief description to enhance organization and searchability.
Here's a quick reference table to help you streamline your project practices:
Practice | Description |
---|---|
Folder Hierarchy | Organize samples into clear categories. |
File Naming | Use descriptive names for easy identification. |
Regular Assessment | Remove duplicates and unused samples. |
Tagging Features | Categorize sounds without changing file names. |
Go-To Folder | Create a curated folder for frequently used samples. |
Regularly decluttering your sample library keeps your workspace efficient, reducing decision fatigue. Utilize tagging in your sample management software for versatile searching. Finally, verify your project files and sound effects are organized by file format for seamless plugin management. By following these practices, you'll enhance your workflow and get the most out of your music production sessions.
Frequently Asked Questions
How Do I Organize My Sample Library?
To organize your sample library, create a clear folder structure, use consistent naming conventions, and regularly remove duplicates. Consider tagging software for added flexibility and maintain separate folders for current and archived samples to streamline access.
How Do You Manage Files Effectively?
Did you know that 80% of professionals spend time searching for files? To manage your files effectively, create a clear folder structure, use descriptive names, regularly declutter, and leverage management tools for better organization and access.
How to Organize Files as a Producer?
To organize files as a producer, create clear folders for different types of sounds, use consistent naming conventions, regularly delete duplicates, and consider tagging for better searchability, ensuring your workflow remains efficient and streamlined.
What Are the Different Types of Sample Library?
You'll find various sample library types, like One-Shots for specific sounds, Loops for repeating segments, SFX for ambient effects, Vocal libraries for human elements, and Virtual Instruments that replicate real instrument sounds.
Conclusion
By implementing these efficient file management tips, you'll not only save time but also enhance your creativity. Imagine diving into your projects without the frustration of misplaced samples or endless searching. What if you could access your sounds in seconds? The organization, naming conventions, and backup strategies discussed will transform your workflow. So, are you ready to take control of your sample library and unleash your full potential? The next step is yours—don't wait any longer!
Project Organization
Checklist for Organizing Tracks Before Finalizing a Mix
Check out this essential checklist for organizing your tracks before finalizing a mix, and discover key strategies that can transform your mixing process.
To organize your tracks before finalizing a mix, start by ensuring every track is clearly labeled and grouped logically. Use color coding for easy navigation and remove any unused or duplicate tracks to minimize clutter. Balance levels between tracks, focusing on kick and bass placement for a strong foundation. Address any phase and frequency overlaps and check for automation accuracy. Make sure your listening environment is optimized, and consider referencing professional tracks for guidance. Finally, document your mixing decisions and changes. Explore these strategies further to elevate your mixing game even more.
Key Takeaways
- Clearly label all tracks for easy identification and navigation during the mixing process.
- Group similar instruments or vocal tracks together to streamline mixing workflow.
- Utilize color coding to differentiate track categories, such as drums, vocals, and guitars.
- Remove unused or duplicate tracks to minimize clutter and enhance focus.
- Regularly review and solo tracks to identify and address any glitches or unwanted noises.
Preparation and Setup
When you plunge into mixing, having everything in place can make all the difference, both in your focus and productivity. A well-organized workspace setup reduces distractions, allowing you to dive deeper into your creative process.
Start by saving layouts of your preferred window combinations; this way, you can quickly return to a familiar setup for future sessions. Assigning these layouts to function keys helps you access essential tools in a flash, improving your workflow.
Next, focus on organizing tracks logically. Verify all tracks are named correctly, so you can easily navigate through your session. Clear and concise track names save time and prevent frustration during the mixing process. Consistent color coding or grouping similar instruments can further streamline the workflow, making it easier to identify different sections at a glance. Additionally, ensure unused tracks are hidden or deleted to reduce clutter and maintain a clean workspace. Having a solid session preparation checklist for recording not only enhances efficiency but also lets you focus more on the creative aspects of your project.
Consider utilizing hardware controllers, like a fader box, as they enhance your tactile experience, giving you intuitive control over levels and effects.
Track Review and Cleanup
As you review your tracks, start by soloing each one to catch any glitches or unwanted noises that need fixing.
This focused inspection helps you identify and address issues before they become problems in the mix.
Don't forget to mute or archive any unused elements to keep your workspace tidy and efficient.
Solo Track Inspection
Soloing each track in your mix is an essential step for identifying clicks, pops, and unwanted noises that mightn't be noticeable in the full mix. By checking each track individually, you can pinpoint audio clipping and poor recordings, ensuring that every element meets quality standards before diving into the mixing process.
As you solo, pay close attention to automation cuts and alignment issues. These problems often become clear when you focus on one track at a time, allowing you to address any inconsistencies affecting the mix's overall clarity.
This is also an excellent opportunity to assess your sound design decisions. Evaluate how each track contributes to the overall sound, ensuring they enhance rather than detract from the mix.
Furthermore, soloing can help uncover buried elements that may need adjustments or enhancements for better balance and presence. Taking the time to inspect each track this way prepares you for a more polished final mix.
Mute Unused Elements
Cleaning up your mix often starts with muting unused elements. By doing this, you can declutter your mixing session and focus on the essential tracks that truly contribute to the overall sound.
This practice not only improves clarity but also helps maintain headroom, which is vital for a polished final product. Additionally, understanding the importance of a well-structured music production workflow can greatly enhance your mixing process, allowing for a more efficient approach to track management and overall sound quality music production workflow.
Here's a quick checklist to guide you:
- Identify Non-Contributing Elements: Use the mute test to pinpoint tracks that don't add value.
- Solo Tracks: Regularly solo tracks to catch any unwanted noises like clicks or pops that need fixing.
- Archive Unused Takes: If a take doesn't fit, either mute it or archive it to reduce visual clutter.
- Regular Review: Periodically review your tracks to confirm everything in your mix sounds good and serves a purpose.
Level Balancing Techniques
Achieving a well-balanced mix is essential for a polished sound, and it starts with level balancing techniques.
Begin by establishing a relative level balance among your tracks. Make sure no individual track dominates the mix; this preserves the integrity of the overall sound. Aim for your master fader to remain at unity (0 dB) while setting individual track levels between -3 to -6 dB. This will prevent clipping and maintain headroom for further processing.
Next, employ the Mute Test. Mute elements one at a time to evaluate their contribution to the mix. This helps you identify any non-essential tracks that can be removed, enhancing clarity and making your mix sound better.
Adjusting track levels also creates a sense of space, ensuring that each instrument occupies its own frequency range without clashing with others.
Stereo Imaging Strategies
When you're mixing, using pan controls effectively can really shape the stereo field and create a balanced sound.
By slightly positioning instruments away from the edges, you keep the focus while avoiding listener fatigue.
Don't forget about dynamic panning automation, which can add movement and interest to your mix.
Pan Control Techniques
Effective pan control techniques are essential for creating a compelling stereo image in your mix. By strategically positioning your instruments across the stereo soundstage, you can enhance clarity and spatial definition.
Here are some key strategies to reflect upon:
- Slight Off-Center Positioning: Use pan controls to place instruments about 20-30% to one side. This prevents listener fatigue while keeping focus on the main elements.
- Center Low Frequencies: Always keep kick and bass centered. This retains punch and clarity, ensuring a solid foundation for your mix.
- Distribute Higher Frequencies: Spread higher-frequency instruments across the stereo field. This creates a fuller sound and enhances the overall listening experience.
- Automate Panning: Introduce dynamic changes by automating panning throughout the song. This keeps your mix engaging and allows certain elements to shine in different sections.
Dynamic Panning Automation
Dynamic panning automation can transform your mix by allowing real-time adjustments in stereo placement. This technique enhances the spatial experience by moving sounds across the stereo field throughout the track.
By utilizing dynamic panning automation, you create a sense of depth and movement, making your mix feel more engaging—especially during shifts or climactic moments.
Automating pan positions can help avoid frequency masking by clearing space for each element. This way, instruments like guitars or synths can be heard distinctly within the mix. Remember to keep low-frequency elements, such as kick drums and bass, centered to maintain punch and clarity.
To keep your listeners hooked, consider varying the panning positions of certain instruments throughout the song. This adds excitement and dynamic contrast, ensuring your mix sounds good and keeps the audience engaged.
Experiment with subtle shifts in panning to evoke different emotions and highlight various sections of your track. With thoughtful implementation, dynamic panning automation becomes a powerful tool in your mixing arsenal, elevating your sound to new heights.
Phase and Frequency Checks
Identifying phase and frequency issues early in the mixing process is vital for achieving a polished sound. If you ignore these factors, you'll likely end up with a mix that sounds weak or muddied.
Here's a checklist to guide your phase and frequency checks:
- Check for Phase Issues: Use phase metering plugins or switch to mono to spot any out-of-phase waveforms. This can help you avoid weak sounds in your mix.
- Center Low Frequencies: Make sure low frequencies, like kick and bass, are centered in the stereo field. This retains punch and clarity while minimizing phase cancellation.
- Evaluate Frequency Overlaps: Listen for frequency overlaps between instruments. If you boost a frequency in one track, consider cutting it in another to prevent masking and maintain clarity.
- Use Equalization (EQ): Carve out distinct frequency spaces for each instrument. Guarantee all elements occupy their own sonic territory, which will enhance the overall mix.
Solo Track Assessment
When you solo each track, you can pinpoint unwanted noises like clicks and pops that might get lost in the mix.
It's also vital to check for automation accuracy and guarantee volume levels are consistent, as this boosts clarity.
Identify Unwanted Noises
To effectively pinpoint unwanted noises in your mix, start by soloing each track to isolate its sound. This process allows you to identify any unwanted noise—like clicks, pops, or background hums—that may not be noticeable in the full mix.
Pay special attention to the beginning and end of each track, as this is often where unwanted artifacts or abrupt cuts occur.
Here's a quick checklist to help you identify unwanted noises:
- Listen Closely: Solo each track and focus on any irregular sounds that disrupt the audio.
- Inspect Start/End: Check for abrupt cuts or unwanted artifacts at the start and end of tracks.
- Use Tools: Utilize spectral analysis tools or noise reduction plugins to visualize and eliminate problematic frequencies.
- Check Automation: Verify there are no automation cuts or alignment issues that can cause sudden sound changes.
Check Automation Accuracy
After you've identified unwanted noises, the next step is verifying your automation points are accurate. Solo each track to evaluate the automation settings carefully. Listen for any abrupt changes in volume or effects that might disrupt the mix's flow. Check that all automated parameters, like panning and EQ adjustments, are smooth and enhance the overall sound.
Parameter | Desired Effect | Adjustment Needed |
---|---|---|
Volume | Consistent dynamics | Smooth out volume jumps |
Panning | Balanced stereo image | Adjust for even spread |
EQ | Clear tonal definition | Fine-tune frequencies |
As you assess, pay attention to the timing of automated effects. Confirm they sync with the musical elements they support. Document any necessary adjustments to your automation settings; this can greatly improve clarity and maintain the track's emotional impact. By meticulously checking automation accuracy, you set the stage for a polished final mix that truly resonates with your audience.
Optimize Track Clarity
Soloing each track is vital for optimizing track clarity. By listening to each track individually, you can identify and address any unwanted noises, such as clicks or pops, that mightn't be noticeable in the full mix.
This evaluation is essential for guaranteeing that all your tracks sound their best before finalizing the mix.
Here's a quick checklist to help you with your solo track evaluation:
- Identify Noise: Listen for any clicks, pops, or other artifacts that need fixing.
- Check Clipping: Confirm there's no audio clipping and that each recording maintains high fidelity.
- Evaluate Elements: Solo tracks to uncover buried elements, evaluating their contribution and making adjustments to achieve balance.
- Spot Automation Issues: Pay attention to automation cuts and alignment problems, as these can reveal discrepancies that require correction.
Reference Track Comparison
Having a solid reference track can make all the difference in achieving a polished mix. When you compare your mix to a reference track, you can evaluate the overall loudness, confirming your mix stands up to professionally mixed songs. This comparison helps you make certain your track is competitive in volume, which is essential in today's music landscape.
Next, assess the stereo width and panning of your elements against the reference track. This allows you to identify imbalances and enhance the spatial clarity of your mix. Pay attention to the depth and front-to-back placement of sounds in the reference track, as this can greatly improve the three-dimensional quality of your mix.
Moreover, use the reference track to evaluate the tonal balance of your mix. By referencing the frequency distribution in the track, you can pinpoint areas of frequency masking or imbalance that need adjustment.
Ultimately, let the reference track guide your mixing decisions, helping you tweak elements that mightn't translate well compared to established professional standards. This way, you can guarantee your mix achieves the quality and impact you're aiming for.
Listening Environment Considerations
A well-considered listening environment can greatly impact the quality of your mix. To guarantee you're set up for success, focus on the following key aspects:
- Acoustic Treatment: Make sure your space is acoustically treated. This minimizes reflections and standing waves, which can distort your mix perception.
- Monitor Positioning: Use high-quality studio monitors positioned at ear level and arranged in an equilateral triangle. This setup provides an accurate sound representation, essential for critical listening.
- Playback Systems: Regularly check your mix across various playback systems, like headphones, car stereos, and portable speakers. This helps identify any inconsistencies in different listening environments.
- Volume Consistency: Maintain a consistent volume level during your mixing sessions. This practice prevents ear fatigue and allows you to maintain a balanced perspective on your mix's dynamics.
Additionally, don't forget to take breaks during mixing sessions. Giving your ears a rest lets you return with a refreshed perspective, enabling a more accurate evaluation of your mix.
Prioritizing these considerations will help you create a better final product.
Final Touches and Adjustments
As you approach the final stages of your mix, guarantee you're paying attention to those essential last touches and adjustments that can elevate your track.
Start by inserting 1-2 bars of silence at the beginning and end of your mix. This step prevents cutting off the first note and allows reverb and delay tails to fade out properly, creating a smoother listening experience.
During this phase, continuously tweak levels, EQ, and effects, using automation for precise adjustments. Focus on your kick drum, as it's often the backbone of your mix. Adjust its level to make sure it sits perfectly within the overall sound.
Take breaks to return to the mix with fresh ears; this practice helps you evaluate your work more effectively. It's a good time to establish a clear definition of when your mix is "done." Setting a deadline can keep you focused and prevent endless revisions.
Document any changes you make to maintain a clear record of your decisions and track evolution. Remember, one track can undergo significant transformation with these final touches, so take the time to make sure every element shines.
Documentation and File Management
Effective documentation and file management play an essential role in the mixing process, guaranteeing you can navigate your project with ease. By implementing a structured approach, you can avoid confusion and streamline your workflow.
Here are some key strategies to enhance your organization:
- Backup your session: Store your session in two separate locations to prevent data loss. Save a new version specifically for mix preparation to guarantee a clean slate.
- Use consistent naming conventions: Give your tracks clear and concise names. This practice helps facilitate easy identification and navigation while mixing, making the process smoother.
- Organize audio files: Create subfolders categorized by track type (e.g., drums, guitars). This organization notably improves the mix engineer's workflow and overall session clarity.
- Export audio files properly: Retain the folder structure when exporting audio files. Guarantee the folder is named with the artist, song name, and tempo for better clarity during mixing.
Additionally, include a written document outlining any tempo changes and reference songs used during recording. This documentation provides context and aids in understanding the project, enhancing the mixing process.
Frequently Asked Questions
How to Organize Tracks for Mixing?
To organize tracks for mixing, categorize them logically, use consistent naming, group related tracks, color code for visibility, and create a rough mix. This'll streamline your workflow and enhance clarity during the mixing process.
How to Prepare a Track for Mixing?
To prepare a track for mixing, you should name each track clearly, categorize them logically, solo tracks to check for noise, consolidate audio files, and create a rough mix to guide your mixing process effectively.
How to Finish a Mix?
Think of your mix as a garden. You've nurtured it; now, prune the excess, adjust the sunlight, and listen to nature's whispers. With fresh ears, define "done" and let your masterpiece bloom beautifully.
Conclusion
As you wrap up your mixing journey, remember that a well-organized track is like a well-rehearsed band—everything flows harmoniously. Embrace the art of fine-tuning, and don't shy away from a little extra polish here and there. With your careful attention to detail, you're not just finalizing a mix; you're crafting an experience. So, take a step back, admire your handiwork, and let the music speak for itself. Your masterpiece is just a breath away!
Project Organization
Easy Workflow Tips for Managing Collaborations
Transform your team’s collaboration with easy workflow tips that boost productivity and clarity—discover how to elevate your collaborative efforts today!
Managing collaborations effectively can really boost your team's productivity. Start by streamlining communication channels; set clear guidelines for using platforms and hold regular check-ins. Define roles clearly to avoid confusion and duplication of effort. Use workflow automation tools to save time on task management and document sharing. Keep expectations clear with measurable goals and deadlines. Foster a collaborative culture by recognizing contributions and encouraging open communication. Finally, monitor progress with performance metrics to identify areas for improvement. Dive deeper into these strategies to unleash your team's full potential and enhance collaborative efforts even further.
Key Takeaways
- Establish clear communication channels and guidelines to minimize misunderstandings and enhance collaboration.
- Define roles and responsibilities to prevent duplicated efforts and ensure accountability among team members.
- Utilize project management tools to centralize updates, streamline task management, and create a single source of truth.
- Implement regular check-ins and feedback sessions to foster open communication and address any issues promptly.
- Leverage workflow automation tools to save time on task assignments and streamline information flow between systems.
Benefits of Effective Collaborations
Effective collaborations can boost project completion times by up to 30%, making them a game-changer for any team. When you engage in effective collaboration, you harness diverse perspectives, leading to innovative solutions that improve outcomes.
By using collaboration tools, you can bridge communication gaps and guarantee that all team members are aligned, reducing the chances of errors. Additionally, incorporating cultural intelligence (CQ) in your collaboration strategies can further enhance team dynamics and problem-solving capabilities.
Clear communication is essential. With effective collaboration, you create a shared understanding of goals and roles, which fosters accountability among team members. This alignment keeps everyone focused and engaged, driving projects forward smoothly.
Furthermore, organizations that prioritize collaboration see a remarkable 50% increase in employee satisfaction, translating to higher retention rates and overall productivity.
In addition to enhancing innovation, effective collaboration minimizes miscommunication by providing a single source of truth for your team. This real-time communication helps everyone stay on the same page, reducing the likelihood of mistakes that can derail progress.
Identifying Workflow Challenges
Many teams face workflow challenges that can derail progress if left unaddressed. Identifying these issues early is essential for maintaining effective collaboration among team members. Here are some common workflow challenges you might encounter:
- Unclear communication channels leading to misunderstandings
- Undefined roles resulting in duplicated efforts and missed tasks
- Over-reliance on email causing information overload
- Insufficient integration between tools creating silos
- Ineffective conflict resolution strategies disrupting teamwork
Each of these challenges can create significant roadblocks in your projects. When communication is unclear, team members may not know their responsibilities or deadlines, causing delays.
Undefined roles can lead to overlapping work, which not only wastes time but also frustrates everyone involved. Additionally, relying too much on email for updates can flood your inbox, making it hard to track what's important.
Without proper tool integration, departments may work in isolation, limiting collaboration. Finally, poor conflict resolution can leave issues unresolved, ultimately slowing down your progress.
Streamlining Communication Channels
To streamline communication channels, you need to establish clear guidelines that specify which platforms to use, like email or messaging apps.
Incorporating regular check-ins can further enhance communication and guarantee that everyone is on the same page, particularly in scenarios like end of life planning where clarity is essential.
Centralizing discussions on project management tools can help keep everyone informed and reduce confusion.
Centralized Communication Platforms
Centralized communication platforms, like Slack or Microsoft Teams, greatly enhance how teams collaborate by bringing all discussions, files, and updates into one easily accessible location.
These tools reduce the risk of miscommunication and lost information, making it easier for collaborative teams to stay in sync. By integrating with project management tools and prioritizing content relevance and authority, these platforms support a holistic approach to project management and teamwork.
Here are some key benefits of using centralized communication platforms:
- Consolidation: All discussions and files are in one place.
- Integrations: Seamlessly connect with project management and document-sharing tools.
- Real-time Feedback: Instant messaging boosts decision-making speed.
- Asynchronous Communication: Team members can engage across time zones without needing constant interaction.
- Increased Efficiency: Using one platform can lead to a 20% boost in team productivity.
Clear Communication Guidelines
Establishing clear communication guidelines is vital for streamlining communication channels and enhancing team collaboration. When you set these guidelines, you reduce misunderstandings, which studies show can boost team productivity by up to 25%.
Start by implementing multiple communication channels, such as dedicated chat rooms or project management tools. This way, team members can engage in discussions relevant to their specific tasks and projects.
Next, establish preferred times for meetings and communication to accommodate diverse schedules. This promotes inclusivity and guarantees everyone can participate in discussions.
Consider creating rules for inclusive conversations, allowing every team member to contribute. This fosters a culture of collaboration and enhances team morale.
Don't forget the importance of regularly soliciting feedback on your communication practices. This helps you identify areas for improvement, enabling your team to refine its strategies to enhance communication continuously.
By focusing on clear communication and structured engagement, you'll create a more efficient and harmonious team environment where everyone feels valued and heard.
Keep these guidelines in mind, and watch your collaboration flourish.
Utilizing Workflow Automation Tools
To maximize your team's efficiency, utilizing workflow automation tools can streamline task management and enhance communication.
By integrating existing systems, you can create a seamless environment where everyone stays informed and aligned.
This approach not only saves time but also improves collaboration across your projects.
Streamlining Task Management
Streamlining task management involves leveraging workflow automation tools to enhance team productivity and collaboration.
With the right tools, you can create a seamless environment that allows your team members to work together efficiently. Here are some strategies to take into account:
- Use project management software (PMS) to consolidate tasks, files, and timelines in one accessible platform.
- Implement automation tools like Zapier to automate task assignments and updates based on changes in your PMS.
- Leverage file-sharing platforms like Google Drive for simultaneous document editing, cutting down on time spent merging changes.
- Utilize version control systems to track document changes, minimizing errors from miscommunication.
- Regularly assess and optimize your workflow automation processes to adapt to your team's evolving needs.
Enhancing Team Communication
Effective communication is key to successful collaboration, especially when teams are using workflow automation tools. These tools, like Slack and Asana, streamline communication by centralizing project updates and enabling real-time discussions. You'll find that this can reduce the time spent on meetings by up to 30%, allowing your team to focus more on actual work.
By utilizing automated notifications and reminders, you can keep team members informed about deadlines and task assignments, minimizing the risk of miscommunication. Integration capabilities in these tools connect with other applications, ensuring everyone has access to the same information and reducing errors due to outdated data.
Features like commenting and tagging in collaborative tools facilitate immediate feedback and idea sharing, which enhances team engagement and boosts collaboration efficiency.
Regularly monitoring performance metrics through automation tools allows you to assess your communication effectiveness and identify areas for improvement. By focusing on these aspects, you can foster a more cohesive team dynamic and elevate your overall collaboration efforts.
Embrace these tools, and watch how they transform your team's communication landscape.
Integrating Existing Systems
Integrating existing systems with workflow automation tools can greatly enhance your team's efficiency and productivity.
To make this integration successful, consider the following tips:
- Choose tools with strong API capabilities for seamless data exchange.
- Map out current processes to identify integration points and optimize workflows.
- Prioritize user-friendly tools with intuitive interfaces to encourage team adoption.
- Utilize pre-built integration templates to speed up setup and guarantee best practices.
- Regularly review integrations to identify bottlenecks as your team's needs evolve.
Setting Clear Expectations
At the heart of successful collaborations lies the importance of setting clear expectations. By establishing clear objectives from the start, you align your team's efforts and maintain focus on common goals. It's vital to communicate individual roles and responsibilities explicitly to prevent confusion and reduce duplicated efforts.
Key Element | Description |
---|---|
Clear Objectives | Align team efforts around common goals. |
Defined Roles | Prevent confusion by clarifying responsibilities. |
Specific Deadlines | Guarantee accountability and track progress. |
Setting specific deadlines for tasks and milestones helps you effectively manage project timelines. Utilizing project management tools to document and share expectations creates a single source of truth for your team. Regular check-ins are essential; they foster communication and allow you to discuss progress while addressing any misunderstandings. This culture of transparency enhances team collaboration, guaranteeing everyone is on the same page. By prioritizing these strategies, you'll create a more efficient and productive collaborative environment.
Encouraging Team Accountability
Holding team members accountable is essential for maintaining momentum and achieving project goals. To encourage team accountability, consider these effective strategies:
- Establish clear roles: Define individual responsibilities to eliminate confusion and guarantee everyone knows what's expected.
- Set measurable goals: Communicate specific, achievable objectives and deadlines that foster a sense of ownership among team members.
- Implement regular check-ins: Schedule consistent progress updates where team members can report on their tasks, reinforcing accountability.
- Utilize collaborative tools: Leverage platforms that track task completion and milestones, providing visibility into each member's progress.
- Recognize achievements: Celebrate individual and team successes to reinforce positive behavior and encourage ongoing accountability.
Fostering a Collaborative Culture
Creating a collaborative culture is fundamental for any team's success, as it encourages open communication and shared responsibility. When you establish collaboration as a core value, it fosters an environment where team members feel valued and empowered to contribute toward common goals.
Regular check-ins and team-building activities strengthen interpersonal relationships, helping to create a supportive atmosphere that boosts morale.
Implementing clear communication guidelines is imperative. It reduces misunderstandings and promotes transparent interactions among team members. This clarity is essential for effective collaboration and guarantees everyone is on the same page.
Recognizing and rewarding contributions reinforces these collaborative efforts, motivating individuals to engage actively in team dynamics.
Additionally, leveraging diverse perspectives enhances creative problem-solving. By promoting inclusivity within your team, you tap into collective intelligence, leading to better outcomes.
A successful team thrives on collaboration, where every voice is heard, and every idea is considered. By prioritizing these elements, you can create a thriving culture that not only drives productivity but also fosters innovation.
Embracing a collaborative culture is the key to revealing your team's full potential.
Monitoring Progress and Metrics
Monitoring progress and metrics is essential for enhancing team collaborations and guaranteeing projects stay on track. By regularly tracking key performance indicators (KPIs), you can measure effectiveness and pinpoint areas for improvement.
Here are some strategies to take into account:
- Use project management tools with built-in analytics to visualize your team's progress.
- Schedule periodic check-ins to review collaboration metrics and align with project goals.
- Implement feedback loops to gather insights from team members about the collaboration process.
- Leverage automated reporting features to streamline data collection and keep everyone informed.
- Analyze project completion rates and task turnaround times to identify bottlenecks.
These practices foster accountability and transparency, allowing your team to adapt quickly. By consistently monitoring KPIs and utilizing the right tools, you can guarantee your collaborations are efficient and productive.
Continuous Improvement Strategies
Building on the insights gained from monitoring progress, continuous improvement strategies are essential for enhancing collaboration within your team. Start by regularly soliciting team feedback on collaboration tools and processes. This helps identify areas for improvement and guarantees alignment with your team's needs.
Utilize performance metrics to assess how effective your collaboration strategies are. This allows you to make data-driven adjustments, assuring that collaboration happens more smoothly.
Implement routine check-ins to discuss how well collaboration is working. These discussions can reveal necessary adjustments based on team dynamics and project requirements.
Stay updated on industry trends in collaboration technologies. By adopting new tools, you can enhance workflows and foster better teamwork.
Encourage a culture of continuous learning and adaptation among team members. This promotes innovative approaches to collaboration and boosts overall efficiency.
Frequently Asked Questions
What Are the 4 Key Elements of Managing Collaboration Process?
To manage collaboration effectively, you need clear objectives, defined roles, effective communication channels, and adaptability. These elements help keep your team focused, accountable, engaged, and capable of responding to challenges with innovative solutions.
What Are the 7 Keys of Collaboration?
To enhance collaboration, you should focus on clear communication, shared goals, defined roles, reliable technology, strong leadership, trust-building, and continuous feedback. Each key element strengthens teamwork and drives successful outcomes for your projects.
How Do You Manage Collaboration?
Did you know that 86% of employees blame lack of collaboration for workplace failures? To manage collaboration effectively, you should set clear guidelines, use project management tools, and encourage regular check-ins to enhance communication and teamwork.
What Are the Four Parts of Collaboration in a Flow Process?
The four parts of collaboration in a flow process are initiation, communication, coordination, and evaluation. You'll set goals, share updates, align tasks, and assess outcomes to improve teamwork and achieve better results together.
Conclusion
By implementing these easy workflow tips, you'll find that managing collaborations can be both efficient and enjoyable. You might worry that these changes will take too much time, but remember, investing a little effort now will save you hours later. Clear communication and accountability foster stronger team dynamics, making your projects run smoother. Embrace these strategies, and you'll not only improve productivity but also create a more engaging and collaborative work environment for everyone involved.
-
Vetted7 months ago
10 Best Laptops for Music Production in FL Studio: Top Picks for Beat Makers
-
Music Production7 months ago
Maria Von Trapp’s Legacy & The Sound of Music
-
Music Production7 months ago
Christopher Plummer: Legendary Actor’s Legacy
-
Vetted7 months ago
15 Best Music Production Blogs Every Music Producer Should Follow
-
Vetted7 months ago
15 Best Laptops for Music Production Under $300: Top Budget-Friendly Options
-
Music Production7 months ago
Find Do-Re-Mi Picnic Meadow Directions Here!
-
Music Production7 months ago
Exploring Heather Menzies: Career & Legacy
-
Music Production5 months ago
How to Work in Music Production: Start Your Career Today!