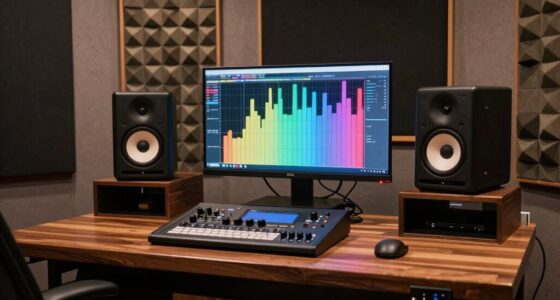
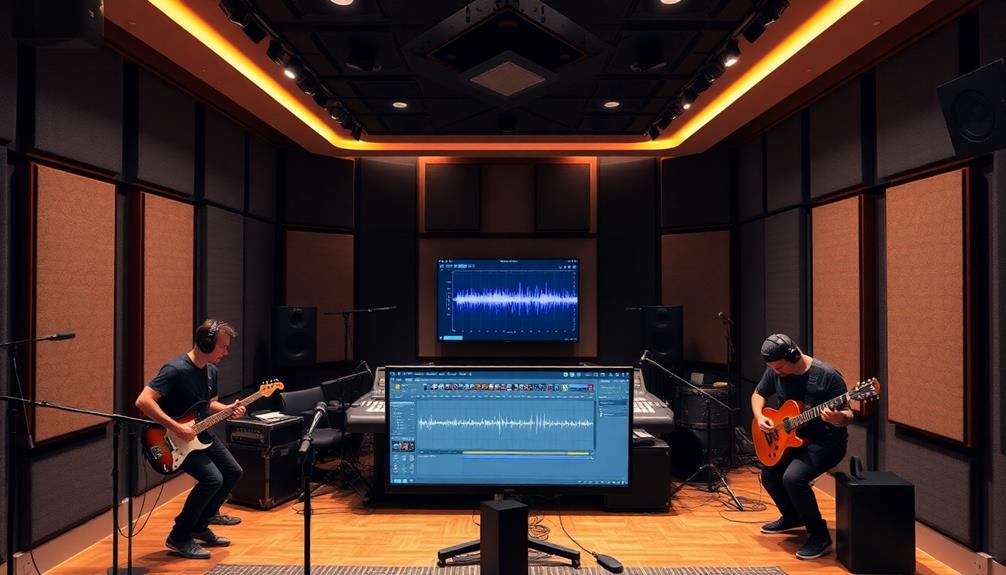
Technical Skills
Bring Vocals to Life! The Ultimate Vocal Production Masterclass
Optimize your vocal production skills and discover techniques that will elevate your music; your journey to professional-sounding tracks starts here.
If you want to bring your vocals to life, mastering vocal production is vital. You'll learn essential recording techniques like mic placement and room acoustics to capture the best sound. Effective editing strategies, such as timing alignment and pitch correction, can enhance your overall quality. You'll also explore processing methods that shape your vocals using EQ, compression, and creative effects. Finally, mastering advanced mixing techniques will help guarantee your vocals stand out. With all these skills, you can transform your tracks into professional-sounding masterpieces. Stick around, and you'll uncover tips that elevate your vocal production even further.
Key Takeaways
- Master recording techniques, including mic placement and room acoustics, to capture professional-quality vocals.
- Utilize effective vocal editing strategies like comping and pitch correction for polished performances.
- Apply processing techniques, such as compression and EQ, to enhance vocal clarity and presence.
- Implement advanced mixing techniques, including panning and automation, to create engaging vocal-centric tracks.
- Continuously improve your workflow by experimenting with new software and production methods for optimal results.
Importance of Vocal Production
Understanding the importance of vocal production is fundamental for anyone looking to create professional-sounding recordings. This process isn't just about hitting the right notes; it's about crafting an emotional journey that resonates with listeners. When you invest time in mixing vocals, you elevate the overall quality and impact of your music.
Vocal processing plays a significant role in this journey. Research shows that listeners can detect pitch corrections about 70% of the time, so you'll want to approach vocal processing with care to avoid sounding overly manipulated.
Each stage—recording, editing, and mixing—directly influences the final sound, making it essential to pay attention to detail throughout your editing sessions.
Effective vocal production techniques not only enhance professional vocals but also shape how your audience feels. A well-produced vocal can evoke strong emotional responses, important for genres ranging from pop to rock.
Remember to take regular breaks during the production process; this helps combat ear fatigue and leads to better decision-making when evaluating vocal quality. Prioritizing these aspects will set you on the path to creating unforgettable music.
Recording Techniques for Success
To achieve great vocal recordings, you need to focus on essential mic placement and room acoustics.
Position your microphone about 6-8 inches from your mouth and slightly off-axis to capture the best sound.
Additionally, consider DIY acoustic treatments to enhance your recording environment and minimize unwanted noise.
Essential Mic Placement Tips
Achieving the best vocal sound starts with the right microphone placement. Position your mic about 6-8 inches away from the vocalist, slightly off-axis at mouth level. This setup enhances sound clarity while minimizing plosive sounds that can disrupt your vocal recording.
In a world where technology is rapidly evolving, Apple's commitment to user data protection is a reminder of the importance of maintaining quality in every aspect of audio production. To further reduce plosives, use a pop filter; it's a small investment that greatly boosts the quality of your vocal takes.
It's also essential to take into account your recording environment. Aim for minimal background noise, as even subtle distractions can muddy your final product. If you can, treat your recording space acoustically to achieve a more professional sound.
Remember, every voice is unique, so don't hesitate to experiment with mic distance and angle. Small adjustments can yield different tonal qualities, allowing you to tailor the microphone placement to the specific voice and desired sound character.
Lastly, encourage vocal warm-ups before recording. This practice not only enhances the overall vocal performance but also helps in delivering better inflections and energy, vital for an emotional delivery.
Get these elements right, and you'll set the stage for outstanding vocal recordings!
DIY Acoustic Treatment Techniques
While proper mic placement lays the foundation for great vocal recordings, the acoustics of your recording space can make a significant difference in the final sound quality.
To enhance your recording quality, consider DIY acoustic treatment techniques that are budget-friendly and effective. Regular cleaning of your air purifiers can also improve air quality in your recording space, thereby reducing unwanted noise.
Start by creating acoustic panels: gather materials like wood for frames, fill them with rockwool, cover with fabric, and hang them strategically around your space. This will help absorb sound and reduce reflections.
In addition to panels, installing bass traps in the corners of your room is essential. These will control low-frequency sound waves, minimizing muddiness and enhancing clarity in your recordings.
If you're looking for cost-effective solutions, thick blankets and carpets can also work wonders, absorbing excess noise and improving the overall acoustics in less-than-ideal environments.
Effective Vocal Editing Strategies
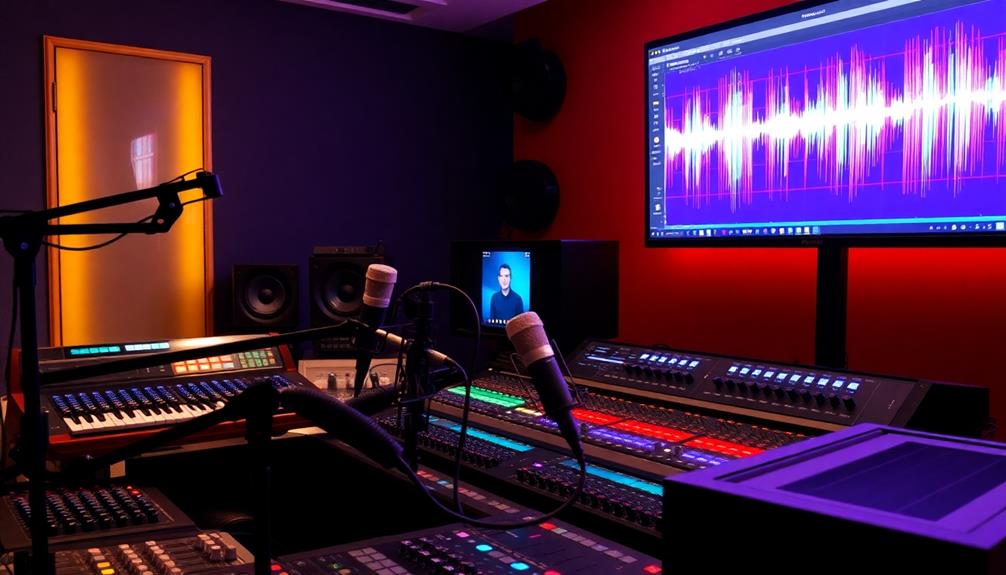
When you're editing vocals, timing alignment and pitch correction are essential for achieving a polished sound.
You can use tools like Elastic Audio to sync your vocals perfectly with the music, while pitch correction software helps you fine-tune any inaccuracies.
Timing Alignment Techniques
Timing alignment is often essential in vocal editing, as it guarantees that your vocal phrases sync rhythmically with the instrumental tracks. This enhances the overall groove and feel of your song, making it more engaging for listeners.
Here are some effective techniques you can use:
- Vocal Comping: Compile the best takes from multiple recordings to improve timing cohesion. This creates a polished final product that feels tight and professional.
- Critical Listening: Pay attention to the rhythmic placement of your vocals. Identify areas that need adjustment to assure each phrase contributes to the track's momentum.
- Subtle Time Stretching: Use this technique to align vocal performances with the beat. It helps integrate them seamlessly into the mix while preserving their expressive character.
- Utilize Tools: Software like Pro Tools' Elastic Audio allows for precise timing adjustments without affecting pitch, keeping the natural quality of your vocal performance intact.
Pitch Correction Methods
Pitch correction is a significant aspect of vocal editing that can transform a good performance into a great one. By using industry-standard software like Auto-Tune or Melodyne, you can guarantee your vocals sound polished without losing their character.
Before diving in, though, it's important to identify the track's key and scale; this helps you apply pitch correction that aligns harmoniously with the underlying music.
To achieve the best results, focus on subtle pitch correction techniques. This approach allows you to preserve natural vibrato and emotional expression in the vocals, which are crucial for connecting with listeners.
You can also integrate timing adjustments within your audio workstation, utilizing tools like Pro Tools' Elastic Audio to make sure the corrected vocal phrases align rhythmically with the instrumental track.
Processing and Shaping Vocals

Effective vocal processing is essential for achieving a polished and professional sound in your mix. By focusing on the right techniques, you can greatly enhance your vocal production. Here are some key steps to reflect upon when processing and shaping vocals:
- High-Pass Filter: Start with a gentle high-pass filter around 80-100 Hz to eliminate unnecessary low frequencies. This helps prevent muddiness in your vocal sound.
- Compression: Use a compressor with low ratios (2:1 to 4:1) to maintain consistent vocal levels. This subtle dynamic control keeps the performance intact without squashing it.
- De-essing: Employ multi-band compressors targeting the 5-8 kHz range for effective de-essing. This reduces harsh sibilance, ensuring a smoother overall sound.
- Saturation and Effects: Add saturation to introduce harmonics and enhance richness.
For depth, apply creative effects like short plate reverb or subtle slapback delay, but do so judiciously to avoid muddiness.
Mixing Vocals Like a Pro
Mastering the art of mixing vocals is essential for creating a standout track that captivates listeners. To achieve a professional vocal mix, you need to balance levels with other instruments, ensuring your vocals are clear and prominent without overshadowing the entire track.
Start by applying EQ techniques to identify and adjust any problematic frequencies. This will enhance your vocal clarity, giving your performance a polished, professional sound.
Next, don't overlook the power of compression. By using compression specifically designed for vocals, you can smooth out the dynamic range, ensuring consistent volume levels and adding sustain for a fuller sound.
Consider incorporating panning techniques to create spatial effects that enhance your vocal's presence in the stereo field, making the mix feel more immersive.
Automation is key in your vocal mixing process, allowing you to make dynamic adjustments in volume, panning, and effects throughout the track. This keeps your listeners engaged and maintains their interest.
Advanced Mixing Techniques
Advanced mixing techniques can take your vocal production to the next level, guaranteeing your tracks stand out in a crowded soundscape. By employing these strategies, you'll enhance clarity and emotional impact in your vocal tracks.
For instance, understanding the importance of a well-structured music production workflow can greatly streamline your mixing process, allowing for more creative exploration music production workflow.
Here are four key techniques to take into account:
- Group/Buss Routing: Route your vocal tracks to a bus for collective EQ adjustments and to create space within the mix. This helps maintain a cohesive sound across all elements.
- Automation: Use automation to dynamically adjust vocal levels between verses and choruses. This technique creates contrast and keeps listeners engaged throughout your track.
- Dynamic Range Enhancement: Enhance the emotional depth of your vocals by implementing volume automation, allowing for subtle shifts that reflect the song's narrative.
- Vocal Doubling: Apply vocal doubling and delay effects to add thickness and presence to your vocals. This technique guarantees they stand out without overwhelming the mix.
Regularly review your mixes with spectrum analyzers to maintain vocal clarity and integration with other elements.
These advanced mixing techniques will elevate your productions and captivate your audience!
Finalizing Vocal-Centric Tracks
Finalizing vocal-centric tracks is an important step in the production process, guaranteeing that your vocals shine while maintaining harmony with the rest of the mix. Start by reviewing all your vocal takes for cohesiveness and clarity. It's vital that the vocals sit well within the mix without overpowering other elements.
Using mastering tools can enhance vocal presence and polish, so be certain to test playback across various systems to achieve peak performance.
Consider stem mastering, which allows you to make separate adjustments to vocal groups, providing flexibility during this stage. This guarantees clarity and balance, making your final track sound natural.
Implement quality control measures by checking for phase coherence and utilizing spectrum analyzers to identify frequency imbalances.
Incorporating AI innovations, like modern pitch correction and voice cloning technology, can also streamline your workflow. However, remember to navigate the ethical considerations that come with these advancements in vocal production.
Continuous Improvement in Vocal Production
Continuous improvement in vocal production is essential for staying relevant in an ever-evolving industry.
To make sure you're on top of your game, consider these strategies for growth:
- Embrace New Software: Staying updated with the latest tools can enhance your workflow and help you adapt to shifts in vocal production technology.
- Experiment with Styles: Regularly trying out different techniques allows you to discover innovative approaches that can lead to improved creativity in your work.
- Analyze Successful Productions: Take time to dissect what works in other vocal productions. This analysis can reveal effective methods and strategies you can adapt to your projects.
- Engage in Workshops: Participating in workshops and online courses not only helps you learn new skills but also exposes you to fresh perspectives and insights from industry experts, fostering continuous skill development.
The Impact of AI in Production
The rise of AI in vocal production is transforming the way you approach music creation. AI innovations, like modern pitch correction tools and voice cloning technology, greatly enhance your workflow efficiency. By automating tedious tasks, these tools allow you to focus more on the creative aspects of music production.
Research shows that AI-driven vocal tuning can cut manual editing time by up to 50%, enabling you to achieve professional quality faster.
With AI algorithms analyzing vocal performances, you can receive suggestions for best pitch and timing adjustments. This helps maintain the natural character of a voice while elevating the overall sound. As a music producer, integrating these AI tools into your workflow has become increasingly common; a 2023 survey reveals that 67% of industry professionals utilize AI software to enhance their vocal tracks.
However, ethical considerations arise with the use of AI in vocal production. Concerns over the authenticity of AI-generated performances and the potential misuse of replicating artists' voices without consent highlight the need for responsible use.
Balancing innovation with ethics will be vital as you navigate this evolving landscape in music production.
Frequently Asked Questions
How Loud Should Vocals Be Before Mastering?
Vocals should peak around -6 dB to -3 dB before mastering. Aim for an average loudness of -12 LUFS to -6 LUFS, ensuring they blend well with the mix while preserving dynamic range.
How Do You Master Vocals Like a Pro?
To master vocals like a pro, review edits for clarity, enhance presence with mastering tools, and test mixes across systems. Separate vocal groups for adjustments, check for phase coherence, and address frequency imbalances. Stay updated on innovations.
How to Make Vocals Sound Fatter?
To make vocals sound fatter, layer multiple takes, apply gentle compression, boost low-mid frequencies, and use saturation plugins. Add reverb and delay sparingly for depth, ensuring clarity remains in your mix. Experiment and adjust!
Is Pro Tools the Best for Vocals?
If you're looking for the best software for vocals, Pro Tools stands out. Its powerful editing features, intuitive tools, and extensive plugin support help you achieve polished, professional-sounding vocal tracks for any genre.
Conclusion
In the world of music production, mastering vocal techniques is like sculpting a masterpiece from marble; it requires patience, precision, and creativity. By honing your recording, editing, and mixing skills, you'll bring your vocals to life, enchanting listeners with every note. Embrace the advancements in technology, and continually seek improvement in your craft. With dedication and the right techniques, you'll elevate your vocal productions, transforming them into unforgettable experiences for your audience. Keep pushing your boundaries!
Technical Skills
Master Sidechain Compression! Create the Perfect Pulse in Your Tracks
Kickstart your music production skills by mastering sidechain compression; discover how to create an irresistible rhythmic pulse that transforms your tracks.
Mastering sidechain compression helps you create a vibrant pulse in your tracks. Start by inserting a compressor on your target track, usually a bass or pad, and set your kick drum as the sidechain input. Adjust the threshold, ratio, attack, and release to achieve that rhythmic "pumping" effect. Use high-pass filtering to maintain low-end clarity while enhancing vocal presence. Experiment with different source-target setups for unique interaction and consider ghost tracks for precision. With the right settings, you can elevate your mix's energy and clarity. There's much more to explore that'll elevate your sound even further.
Key Takeaways
- Use sidechain compression to enhance clarity and reduce muddiness in dense arrangements by managing competing frequency ranges effectively.
- Set up a compressor with moderate ratio and fast attack to achieve a rhythmic "pumping" effect, especially in EDM tracks.
- Explore ghost track triggering for precise control over dynamics, allowing for complex sidechain effects without altering original audio elements.
- Automate compressor settings to create evolving rhythmic textures, syncing attack and release times with the track's tempo for impactful dynamics.
- Implement high-pass filtering on the sidechain input to preserve low-end integrity while allowing mid and high frequencies to drive compression.
Overview of Sidechain Compression
Sidechain compression is an essential technique in modern music production that can transform your tracks. This audio processing method uses the signal from one track, often a kick drum, to control the compression on another track. By doing this, you create a dynamic relationship that enhances clarity in your mixes.
In dense arrangements, sidechain compression prevents muddiness and overlapping frequencies, allowing each element to shine.
To get the most out of a sidechain compressor, you need to adjust your compressor settings carefully. Key parameters like threshold, ratio, attack, and release play a significant role in shaping the sound. For instance, a fast attack and short release can create that signature rhythmic "pumping" effect, commonly found in electronic dance music (EDM).
This not only adds energy and movement to your tracks but also helps in creating space for other elements in the mix.
You can apply sidechain compression creatively across various instruments and vocals, making it a versatile tool in your music production arsenal. Mastering this technique will help you achieve polished and professional sound quality, elevating your productions to the next level.
Benefits of Sidechain Techniques
One of the key advantages of using sidechain techniques in music production is the clarity it brings to your mixes. By employing sidechain compression, you can allow certain frequency ranges, such as kick drums, to duck competing elements. This prevents muddiness and guarantees that each sound occupies its own space in the mix.
Moreover, sidechain techniques add a pumping effect, which creates a rhythmic pulse that energizes your tracks, particularly in electronic dance music (EDM). This dynamic movement engages listeners and enhances the overall groove. Implementing sidechain compression on bass lines guarantees they're punchy without overpowering other elements, maintaining their presence effectively.
Additionally, the technique promotes better vocal clarity by ducking instrumentals during vocal phrases, letting the vocals shine without compromising the mix's quality. Sidechain filtering further refines this process, allowing you to control which frequencies trigger the compressor while preserving low-end integrity.
Benefit | Description | Importance |
---|---|---|
Clarity | Reduces muddiness by managing frequency ranges | Enhances mix quality |
Dynamic Movement | Creates a rhythmic pumping effect | Engages listeners |
Vocal Presence | Allows vocals to stand out | Maintains overall mix quality |
Setting Up in Logic Pro X
To set up sidechain compression in Logic Pro X, start by inserting the Compressor plugin on the track you want to affect, like a bass or pad track.
Next, you'll need to select your source signal for the sidechain. This is typically a kick drum or another rhythmic element, which you can choose from the sidechain drop-down menu in the Compressor settings.
To keep your mix clean, create a ghost track by copying the kick drum onto a new track, muting it, and routing its output. This way, it won't be heard but will still trigger the compressor.
Now, adjust the compressor's threshold to determine when the compression activates, and set a moderate ratio to maintain some natural dynamics in the target track.
Choosing Your Source and Target
When you're selecting your source track for sidechain compression, a kick drum's strong low-end presence is often your best bet.
The target track should share a similar frequency range, like bass lines or pads, to keep your mix clear.
Don't hesitate to experiment with different combinations, as unique sources and targets can lead to creative results that enhance your sound.
Source Track Selection
Selecting the right source and target tracks for sidechain compression is essential for achieving dynamic balance in your mix. Typically, you'll want to use a kick drum or another rhythmic element as your source track. This provides a clear and consistent trigger for the compressor, ensuring precise control over the dynamics.
When it comes to your target track, aim for elements that occupy a similar frequency range, such as bass lines, synths, or pads. Incorporating actionable tips and strategies can further refine your approach and enhance the overall sound.
One effective technique is creating a ghost track from your source signal. This allows you to maintain the original sound while utilizing its dynamics to control the compression on the target track. Just make sure to route your ghost track correctly as the sidechain input in the compressor settings to achieve the desired dynamic effects.
Don't hesitate to experiment with different source and target combinations. The unique rhythmic interactions you create can lead to creative results that enhance your mix.
Ultimately, effective source track selection is key to ensuring clarity and a punchy sound, especially in kick and bass interactions.
Target Track Considerations
Understanding how to choose your target track for sidechain compression is key to crafting a polished mix. Start by selecting elements that share a similar frequency range with your source track. For instance, pairing a bass line with a kick drum can effectively manage frequency clashes and maintain clarity in your mix.
Typically, your source track is a rhythmic element like a kick or snare, which should stand out in the mix to create a strong dynamic response on the target track. You might also consider using a ghost track—a muted copy of the source signal—to trigger the compressor on the target track. This way, you can control which elements are ducked without adding any unwanted noise.
Additionally, pay attention to the attack and release settings on your compressor. Tailoring these to your track's tempo and rhythmic structure will greatly impact how well the compressor reacts and integrates with the overall groove.
Don't hesitate to experiment with different instruments as target tracks, such as pads or synth leads, to uncover unique rhythmic interactions that enhance the overall movement of your composition through sidechain compression.
Compressor Configuration Essentials
Configuring a compressor for sidechain compression involves several key steps that can dramatically enhance your mix.
Start by selecting a suitable trigger source, typically your kick drum, to influence the dynamics of the target track effectively. Next, set the threshold level so the compressor activates only during the peaks of the kick signal. This approach guarantees minimal gain reduction during quieter passages, preserving the overall integrity of your mix.
Use a moderate ratio of around 4:1 to control the amount of compression without overly squashing the target track. This allows you to maintain its natural dynamics while achieving the desired ducking effect.
Adjust the attack time to be quick enough to respond to the kick drum, allowing for fast engagement and a more pronounced effect. Meanwhile, set the release time to complement your track's tempo, assuring smooth recovery.
Lastly, consider applying a sidechain filter, specifically a high-pass filter, to the sidechain input. This prevents low frequencies from triggering the compressor, keeping low-end elements like bass intact and clear in your mix.
Following these steps will set you up for successful sidechain compression.
Advanced Sidechain Techniques
In this section, you'll uncover advanced sidechain techniques that can elevate your mixes.
Experimenting with ghost track triggering can create unique rhythmic effects, while sidechain filtering methods help you maintain clarity in bass-heavy tracks.
Plus, using dynamic parameter automation allows you to tailor your compression for different sections, enhancing the overall musicality.
Ghost Track Triggering
Ghost track triggering offers an innovative approach to sidechain compression, allowing you to control dynamics without cluttering your mix. This technique involves creating an inaudible duplicate of a rhythmic element, like a kick drum, which acts as your sidechain input.
To set it up, simply create a new audio track, copy the desired trigger element, mute it, and route its output to the compressor's sidechain input on the target track.
Using ghost track triggering gives you precise control over the dynamics of your target track. You can tailor the compressor's threshold, ratio, attack, and release settings to achieve varied rhythmic responses.
This flexibility lets you craft complex and creative sidechain effects that enhance your track's groove.
Moreover, this technique opens up opportunities for experimenting with different timing and patterns, enhancing the dynamic interplay between instruments. By doing so, you create a more engaging listening experience.
Sidechain Filtering Methods
Taking your sidechain compression to the next level involves exploring sidechain filtering methods. By implementing sidechain filtering with techniques like a high-pass filter, you can precisely control which frequencies trigger your compressor on another track. This guarantees low frequencies don't overly compress, helping maintain clarity in your mix.
Here are four effective sidechain filtering methods to reflect on:
- Target Frequency Range: Set your sidechain filter to focus on frequencies between 100Hz and 16kHz, allowing mid and high frequencies to drive the compression, keeping bass intact.
- Use External EQ: Incorporate an external EQ in tandem with sidechain filtering. This helps tailor specific instruments, enhancing or reducing their influence on the compressor's response.
- Dynamic Automation: Experiment with automating the filter settings. By adjusting the frequency response throughout the track, you can create an evolving sound that captivates your listeners.
- Experiment with Filter Types: Try different filter types, like low-pass or band-pass filters. This can lead to unique ducking effects, enhancing the rhythmic and dynamic qualities of your mix.
Dive into these techniques and elevate your sidechain compression game!
Dynamic Parameter Automation
Dynamic parameter automation transforms sidechain compression into a highly responsive tool for your mixes. By allowing real-time adjustments to compressor settings—like threshold, ratio, attack, and release—you can enhance the effectiveness of sidechain compression throughout various sections of your track. This means you can create a more engaging listening experience that evolves with the music.
When you automate the attack and release times, you'll generate pronounced rhythmic effects that sync perfectly with your track's tempo and feel. This not only adds a dynamic pulse but also helps maintain clarity during dynamic changes by managing sidechain threshold levels. With careful automation, you can avoid over-compression and minimize pumping artifacts, ensuring that every element in your mix remains balanced.
Furthermore, integrating sidechain filtering with dynamic parameter automation gives you precise control over which frequencies are affected. This allows you to target specific instruments for ducking while preserving the integrity of your overall mix.
Experimenting with these techniques across multiple tracks can lead to intricate, evolving rhythmic textures, making your mix feel alive and responsive to the musical elements at play. Embrace dynamic parameter automation, and watch your mixes come to life!
Creative Applications in Mixing
In the world of mixing, sidechain compression offers exciting creative possibilities that can transform a track's energy. By strategically ducking elements such as synth pads or vocal effects during key rhythmic hits, you can enhance the overall groove and let prominent instruments shine through.
Here are some inventive ways to apply sidechain compression in your music production:
- Duck Non-Rhythmic Elements: Apply sidechain compression to strings or ambient sounds for a dynamic movement that makes your track feel alive.
- Use High-Pass Filtering: Prevent low frequencies from triggering the compressor by using a high-pass filter on the sidechain input, ensuring clearer mixes while keeping kick drums and bass lines punchy.
- Experiment with Settings: Tweak sidechain ratios and attack/release settings for varied effects, from subtle pulsing to more pronounced ducking, matching the vibe of your track.
- Utilize Ghost Tracks: Create unique rhythmic patterns by using a ghost track as a sidechain trigger for creative elements, adding unexpected musicality without altering the original audio source.
With these techniques, you can reveal the true potential of sidechain compression in your mixes.
Tips for Clarity and Impact
To achieve clarity and impact in your mix, you'll want to optimize your compressor settings for the best results.
Monitor gain reduction closely to guarantee your sidechain compression enhances rather than overwhelms your mix.
Tailoring your frequency selection can also make a significant difference, helping you maintain the integrity of your tracks while achieving that desired punch.
Optimize Compressor Settings
Achieving clarity and impact in your mix hinges on optimizing the compressor settings. When you fine-tune these parameters, you can create the perfect pulse that enhances your track without losing its essence.
Here are some key tips to help you get started:
- Adjust the Threshold: Set this level so that the compressor activates appropriately, allowing for noticeable gain reduction while keeping the target track's presence intact.
- Utilize a Moderate Ratio: Aim for around 4:1. This helps maintain natural dynamics while effectively controlling the dynamics of the track in relation to the sidechain input.
- Fine-Tune the Attack Time: Set it to a fast response (1-10ms) to guarantee the compressor reacts quickly to the kick drum or rhythmic element, achieving that snappy pumping effect.
- Set an Appropriate Release Time: Typically between 50-100ms, this allows the compressor to return smoothly without causing audible artifacts or excessive pumping.
Monitor Gain Reduction
Monitoring gain reduction is essential for maintaining clarity and impact in your mix. By visually observing the meter on your compressor plugin, you can guarantee that compression is applied effectively without squashing your track's dynamics. Aim for a gain reduction of 3-6 dB for subtle adjustments, while more aggressive settings can reach up to 10 dB for pronounced rhythmic effects.
Gain Reduction (dB) | Effect |
---|---|
0-2 | Minimal impact |
3-6 | Subtle adjustments |
7-10 | Pronounced rhythm |
>10 | Risk of squashing |
Utilize the makeup gain feature after compression to restore your track's overall level, guaranteeing it sits well in the mix without losing presence. Regularly switch between bypassing the compressor and engaging it to critically listen for clarity. This helps you make informed decisions based on how your track interacts with other elements. Additionally, consider using visual aids, like your DAW's metering tools, to monitor gain reduction during specific sections, allowing for precise adjustments that enhance your mix.
Tailor Frequency Selection
Crafting a clear and impactful mix hinges on your ability to tailor frequency selection during sidechain compression. By focusing on the right frequencies, you can maintain the integrity of your bass line while achieving the desired punch in your mix. Here are some tips to help you refine your frequency selection:
- Use a High-Pass Filter: Set the cutoff between 150-200 Hz on the sidechain input to avoid low frequencies triggering excessive compression. This preserves clarity in your mix.
- Target Specific Frequency Ranges: Apply sidechain compression to frequencies between 100 Hz and 16 kHz to guarantee only competing elements are affected, leaving your low end intact.
- Experiment with Attack and Release: Adjust these settings to sync with your track's tempo. A musical response enhances your mix's rhythm and pulse.
- Utilize Visual Aids: Monitor compression effects using meters or waveform analysis. This helps you fine-tune settings for ideal clarity and impact.
Troubleshooting Common Issues
Troubleshooting common issues with sidechain compression can make a considerable difference in your mix.
First, verify that the sidechain input is correctly routed to the compressor on the target track. Incorrect routing can prevent the desired ducking effect from occurring. If your kick drum or sidechain trigger isn't producing expected results, check the gain levels of both the source and target tracks to confirm they're balanced.
If the compressor isn't engaging as intended, revisit the threshold level. It should be set appropriately for the dynamics of the source signal to achieve the desired gain reduction.
To avoid excessive pumping or unnatural artifacts, adjust the attack and release settings on the compressor. These should match the tempo and rhythmic feel of your track.
When facing muddiness or lack of clarity, consider applying a high-pass filter on the sidechain input. This can help prevent low frequencies from overly influencing the compression response.
Resources for Further Learning
Improving your skills with sidechain compression doesn't stop with troubleshooting; there are plenty of resources available to deepen your understanding and application of this technique.
By exploring these options, you can enhance your production skills and take your music production to the next level.
Here are some valuable resources to take into account:
- YouTube Channels: Check out Reaper Mania and ADSR Music Production Tutorials for thorough video guides on sidechain compression techniques and their practical applications across various genres.
- Online Communities: Join forums like Gearspace and Facebook groups focused on music production. Engaging with experienced users can provide insights into effective sidechain practices.
- DAW Documentation: Utilize the official documentation for your Digital Audio Workstation (DAW) to understand the specific functionalities of sidechain compression tools and plugins available in your software.
- Online Courses: Think about enrolling in platforms like Mix Elite Academy, which offer extensive lessons on mixing, compression, and overall music production strategies.
Frequently Asked Questions
What Is the Best Sidechain Compression Setting?
To find the best sidechain compression settings, start with a 4:1 ratio, set the threshold around -10 dB to -20 dB, and adjust attack and release times between 10-30 ms and 50-150 ms, respectively.
What Is Sidechain Compression on Master?
Ever wondered how to create that dynamic pulse in your tracks? Sidechain compression on the master involves using a compressor triggered by a rhythmic element, enhancing your mix's cohesion without sacrificing its lively energy.
Should You Sidechain Compression?
You should definitely consider sidechain compression if you want a clearer mix. It helps prevent frequency clashes, enhances rhythm, and keeps your kick drum punchy while maintaining the bass line's presence without muddiness.
What Is the Best Ratio for Sidechain?
The best ratio for sidechain compression really depends on your track's needs. Start with 4:1 for balance, but don't hesitate to experiment with lower or higher ratios to find what fits your sound best.
Conclusion
Now that you've mastered sidechain compression, you're ready to create tracks that pulse with energy like a classic 80s synth. Remember to experiment with different sources and settings to find your unique sound. Keep refining your techniques, and don't hesitate to troubleshoot along the way. With practice, you'll transform your mixes into rhythmic masterpieces that captivate listeners. So plug in, turn up the volume, and let your creativity flow!
Technical Skills
Double the Power! Parallel Processing Techniques for a Richer, Fuller Sound
Harness the secrets of parallel processing to elevate your audio quality—discover techniques that can transform your sound in ways you never imagined.
To double your audio processing power, embrace parallel processing techniques that create a richer, fuller sound. By layering multiple tracks and using effects like reverb and delay, you can enhance depth without overwhelming the original audio. Parallel compression adds punch and warmth by blending processed signals with untouched ones. Techniques like vocal layering and careful panning elevate your mix further, ensuring clarity and vibrancy. Experiment with plugin tools and set up auxiliary channels to manage your workflow efficiently. Keep exploring these strategies, and you'll reveal even more secrets to achieve a compelling audio experience.
Key Takeaways
- Doubling enriches music by layering multiple recordings, creating a fuller and more vibrant sound experience.
- Parallel compression enhances dynamic range without sacrificing punch, blending compressed and uncompressed signals for warmth.
- Utilizing reverb and delay in auxiliary channels adds depth while preserving the original audio signal's clarity.
- Vocal layering introduces natural variations in timing and pitch, enhancing richness and organic feel in vocal performances.
- Strategic panning and effective effects selection maintain balance, ensuring clarity while achieving a polished and engaging mix.
Understanding Doubling in Music
Doubling in music is like adding layers to a cake; it enriches the sound and enhances the overall experience. When you record the same musical part multiple times, you create a fuller, more vibrant mix. This technique, known as doubling, introduces natural variations in timing and pitch that breathe life into your tracks. It's a favorite among audio engineers, as it can be applied to a variety of instruments, from guitar to keyboard to bass.
By maintaining the natural dynamics of the original recording, doubling effectively thickens the sound while preserving its unique character. You'll find that this versatility allows you to explore different genres without compromising the integrity of your music.
Additionally, effective doubling often involves careful panning and mixing techniques, which help each layer coexist harmoniously in the final mix.
The beauty of doubling lies in its organic quality, celebrating human imperfections and resulting in a more engaging listening experience. So, as you immerse yourself in your next project, consider how you can use doubling to add depth and warmth, creating a rich tapestry of sound that captivates your audience.
Benefits of Doubling Techniques
When you incorporate doubling techniques into your music production, you open up a range of benefits that can considerably enhance your tracks. Doubling layers multiple recordings of the same part, introducing natural variations in timing and pitch, resulting in a fuller, richer sound. This approach works across various instruments—like guitar, keyboard, and bass—allowing you to maintain the original character while achieving a thicker texture.
In genres such as rock and pop, where a fuller mix is essential, doubling adds depth and energy to your overall production. By embracing the imperfections in performance, it introduces an organic quality that makes your music more relatable and alive. Plus, utilizing doubling techniques can elevate your mix without sacrificing the natural dynamics of your original recordings.
Here's a quick overview of the benefits of doubling:
Benefit | Description |
---|---|
Fuller Sound | Layers create a richer audio experience. |
Enhanced Depth | Adds energy and dimension to the mix. |
Organic Quality | Celebrates human imperfections for relatability. |
Essential Parallel Processing Methods
Essential parallel processing methods can considerably transform your audio productions, allowing you to enhance sound without sacrificing the original dynamics. By employing these techniques, you can achieve a fuller, more vibrant mix that maintains the integrity of your tracks.
Here are three essential methods to contemplate:
- Parallel Compression: This technique, often called New York compression, involves duplicating your audio track, applying heavy compression to the duplicate, and blending it back with the original. You'll retain those punchy transients while adding body and warmth.
- Reverb and Delay: By routing your audio to an auxiliary track, you can add depth with reverb or delay effects. This approach enhances spatial characteristics without overwhelming the original signal. You'll find the perfect balance of wet and dry sounds.
- Dynamics Processing: Experimenting with different dynamics processing techniques can give your mix a unique character. You can shape the sound to fit your creative vision while keeping the original essence intact.
Utilizing these essential parallel processing methods can lead to enhanced mix quality, flexibility in sound design, and endless possibilities for creativity in your audio projects.
Setting Up Parallel Chains
When setting up parallel chains in your DAW, you'll first want to familiarize yourself with the routing methods specific to your software.
This understanding will help you effectively blend wet effects with your dry signal, achieving the perfect balance for your mix.
Routing Methods Overview
Setting up parallel chains for sound processing can greatly enhance your mixing capabilities, and understanding the routing methods available is key.
Different Digital Audio Workstations (DAWs) offer various capabilities, so familiarize yourself with your specific DAW's features for efficient routing.
Here are three effective routing methods you can use:
- Track Duplication: Duplicate your original signal onto a new track for separate processing. This keeps the integrity of the original sound while allowing for creative effects.
- Analog Workflow: Use conventional parallel techniques that mimic analog console workflows. This approach provides intuitive control over your mix and effects application.
- Internal Plugin Routing: Some plugins manage parallel routing internally, streamlining your workflow and minimizing manual setups.
Blending Wet and Dry
To achieve a well-balanced mix, blending wet and dry signals is essential in setting up parallel chains. Start by duplicating your source audio track, creating a parallel version where you'll apply effects. This way, you maintain the integrity of the original dry signal while experimenting with different processing options on the new track.
Utilize aux return channels to control the wet signal level separately. This allows you to adjust how much of the processed sound you want to incorporate without overwhelming the dry signal. Many digital audio workstations (DAWs) offer intuitive routing options for parallel processing, making it easy to manage these signals effectively.
When mixing it back, adjust the channel faders to find the perfect balance. Don't hesitate to experiment with varying levels of wetness; this can lead to unique sonic characteristics that enrich your audio.
The key is to enhance the sound without losing the essence of the original track. By carefully blending the wet and dry signals, you can achieve a fuller, more dynamic mix that captivates your listeners.
Advanced Doubling Techniques
Utilizing advanced doubling techniques can greatly enhance the depth and width of your mixes. By incorporating methods like mid-side processing, you can separate the center and stereo signals, giving you enhanced control over stereo width and spatial placement. This allows your mix to breathe and feel more alive.
Here are three ways to elevate your sound using advanced doubling techniques:
- Wider Soundstage: Blend processed side channels with untreated mid channels to create a richer stereo experience.
- Dynamic Textures: Use varying dynamics, articulation, or octaves while doubling to introduce unique textures that maintain the original character of your sound.
- Enhanced Clarity: Employ automation on doubled tracks, dynamically adjusting levels and effects to confirm clarity and prevent muddiness.
Choosing the Right Effects
When you're choosing effects, think about how each one can enhance your track's sound characteristics without overpowering the original elements.
Balancing depth and clarity is key, so consider how effects like reverb or delay interact with your mix.
Experimenting with different combinations will help you find the perfect blend for a polished, professional sound.
Effect Selection Criteria
Choosing the right effects for your mix involves evaluating several key factors that influence the final sound. By applying effective selection criteria, you can enhance your tracks while maintaining clarity and definition. Here are three essential factors to assess:
- Sonic Qualities: Think about the desired characteristics. Do you need depth from reverb, rhythmic complexity from delay, or harmonic enhancement from saturation? Each choice should align with your track's essence.
- Clarity with Modulation Effects: Prioritize modulation effects like chorus that can widen the sound without overwhelming the mix. You want your original signal to shine through, so avoid muddiness.
- EQ Adjustments: Use parametric EQ to tailor effects to specific frequency ranges. This helps address issues like room tone and mic proximity buildup, ensuring your sound remains crisp and well-defined.
Experiment with blending different effect types in parallel processing to create unique textures.
Just remember, the selected effects should complement each other and the overall mix. With careful evaluation, you can achieve a rich, fuller sound that captivates your listeners.
Balancing Sound Characteristics
Balancing sound characteristics in your mix is essential for achieving a polished and professional result. When you choose the right effects, you can enhance your track without overpowering the original audio.
For instance, using reverb can add depth, while delay introduces rhythmic complexity, enriching your mix. Saturation is another powerful tool; it enhances harmonic content and adds warmth, helping you achieve that perfect balance.
Modulation effects like chorus can provide width and movement, but be cautious. Over-modulation can lead to muddiness, so aim for clarity. High-pass filters are your allies in this process, effectively eliminating unwanted low-end noise and keeping your mix clean and focused on the desired frequencies.
Parallel processing is where the magic happens. By blending processed signals with dry originals, you retain the dynamics of your original audio while enhancing the overall character of the track.
This technique allows for creative sound design, making your mix feel fuller and more engaging. Remember, it's all about balancing sound characteristics to create a rich listening experience that resonates with your audience.
Enhancing Vocals With Doubling
Doubling vocals is a powerful technique that can transform your recordings by layering multiple takes of the same performance. By doing this, you create a richer, fuller sound that captures the essence of your vocal delivery.
When you implement doubling vocals, consider these key emotional enhancements:
- Natural Variations: Layering takes introduces slight differences in timing and pitch, giving your vocals a more organic feel.
- Enhanced Stereo Image: Panning your doubled tracks strategically can make the lead vocal stand out while adding depth, creating a more immersive listening experience.
- Increased Emotional Impact: Layering different takes for harmonies or textures can greatly boost the song's emotional resonance.
Utilizing parallel processing is essential here. It allows you to blend compressed and uncompressed vocal tracks, preserving clarity while enhancing presence.
Plus, adding effects like reverb and delay to your doubled vocals creates a sense of space and dimension without overpowering the lead.
When you embrace these techniques, your vocals won't only shine but also evoke stronger feelings in your audience, making your music truly unforgettable.
Creative Applications of Doubling
When you layer multiple vocal takes, you not only enrich the sound but also create an enchanting choral effect that enhances your mix.
For instruments, experimenting with panning and timing variations can transform simple doubled tracks into a lush, immersive experience.
Let's explore these vocal and instrument doubling strategies to elevate your productions.
Vocal Layering Techniques
Vocal layering can transform a simple vocal track into a lush, immersive experience. By recording multiple takes of the same part, you can create a sound that's not just fuller but also richer.
To enhance your vocal production, consider exploring advanced mixing techniques that can further elevate your sound. Here are three techniques to elevate your vocal layering:
- Adding Harmonic Depth: Use different vocal takes to create harmonies. Each layer introduces unique qualities, making the overall sound larger and more engaging.
- Strategic Panning: Spread your layered vocals across the stereo field. This technique widens the mix while keeping the lead vocal clear and prominent, ensuring it stands out in the mix.
- Dynamic Effects Automation: Apply reverb and delay selectively on individual layers. This adds interest and depth throughout the track without overwhelming it, enhancing the overall richness of your vocal performance.
Balancing these layers is essential. Pay attention to avoid muddiness; each element should complement the others.
With thoughtful vocal layering, you'll create an emotive experience that captivates listeners, making your tracks unforgettable. Immerse yourself in the creative possibilities, and watch your sound transform!
Instrument Doubling Strategies
If you want to add depth and richness to your tracks, instrument doubling is a powerful technique worth exploring. This method involves recording the same part multiple times, layering each take to create natural variations in timing and pitch. By doing this, you'll achieve a thicker, more textured sound that enhances your mix.
To effectively implement instrument doubling, choose parts that could benefit from additional warmth and dimensionality. Capture those subtle differences during recording to enrich the overall tone and dynamics.
Once you have your doubled tracks, pan them strategically across the stereo field. This will create a sense of space and depth, allowing each layer to shine while contributing to the fuller mix.
Experiment with octave variations, different dynamics, or articulations between the doubled parts. This adds extra texture and makes your instrumentation feel more alive and organic.
Don't forget to leverage digital tools for artificial doubling, which can help you achieve that fuller sound without sacrificing the original character of your instruments. With these strategies, your tracks won't only sound richer but also resonate more deeply with your listeners.
Mixing Strategies for Depth
Creating depth in a mix is essential for achieving a professional sound, and mixing strategies play a crucial role in this process. By utilizing parallel processing, you can blend a compressed signal with the dry original, enhancing richness without sacrificing integrity.
Here are three effective strategies to contemplate:
- Auxiliary Channels: Implement auxiliary return channels for applying effects like reverb and delay. This keeps your dry signal balanced while creating a spacious atmosphere in the mix.
- Panning Techniques: Experiment with panning multiple layers of vocals or instruments in parallel. This widens the stereo image, preventing a cluttered sound stage, and gives your mix room to breathe.
- Dynamic Range Management: Leverage parallel compression to maintain transient punch while adding sustain. This enriches the dynamic range, ensuring your mix feels alive and engaging.
Tools for Effective Processing
Utilizing the right tools is essential for effective parallel processing in sound production. Start by incorporating plugins like Vitamin Sonic Enhancer and Manny Distortion to add harmonic richness and excitement to your tracks. These tools can notably enhance your sound when used in parallel processing techniques.
Don't forget to conduct A/B testing with plugins like the CLA-2A Compressor and C6 Multiband Compressor. This helps you determine the best settings for achieving your desired vocal sound and dynamics, ensuring your processing is on point.
Implementing a color-coding system within your DAW can also streamline your workflow, allowing you to manage and differentiate various parallel processing paths easily.
To maintain clarity while enhancing depth, leverage aux return channels to blend processed signals with the dry originals, especially for effects like reverb and delay.
Frequently Asked Questions
What Is Parallel Processing in Sound?
Parallel processing in sound means you duplicate an audio signal, apply effects to the copy, and blend it back with the original. This technique enhances sound without losing the original dynamics, adding depth and richness.
What Is Parallel Processing Technique?
Did you know that 70% of professional mixers use parallel processing? This technique involves duplicating your audio signal, applying effects, and blending it back, enhancing your sound while preserving the original dynamics beautifully.
What Are Two Examples of Parallel Processing?
Two examples of parallel processing include applying reverb on a snare drum to enhance spaciousness, and using parallel compression to maintain punchy dynamics in vocals while blending a heavily compressed track with the original signal.
Is the Human Brain Capable of Parallel Processing?
Like a skilled conductor leading an orchestra, your brain can handle multiple tasks at once. Yes, it's capable of parallel processing, allowing you to juggle different sensory inputs and cognitive functions seamlessly.
Conclusion
So, you've learned all about doubling techniques, but here's the twist: you might just end up making your music sound too rich! Imagine creating a track that's so full, it practically spills out of your speakers, drowning your listeners in a sea of sound. But hey, who wouldn't want to swim in a wave of lush harmonies? Just remember, while you're doubling the power, don't forget to leave a little room for clarity—because even the richest cake needs some frosting!
Technical Skills
Beyond the Basics! Advanced Delay Techniques to Transform Your Mixes
You’ll discover groundbreaking delay techniques that can elevate your mixes, but there’s so much more to explore beyond the basics.
To transform your mixes using advanced delay techniques, start by mastering tempo syncing and experimenting with various delay types, like ping pong and tape delay. Automate delay parameters to craft unique textures and maintain dynamic energy. Incorporate forward and reversed delays to create smooth shifts and anticipation in your tracks. Don't forget to adjust feedback settings; this adds depth and clarity while preventing muddiness. Use these techniques to enhance spatial qualities and groove. Keep exploring these concepts, and you'll reveal even more innovative strategies to elevate your sound.
Key Takeaways
- Utilize ping pong delay in re-pitch mode for captivating stereo effects and enhanced texture in percussive elements and synths.
- Automate delay time and feedback levels to create dynamic shifts and rhythmic variations that maintain listener engagement.
- Incorporate forward and reversed delays to bridge sections smoothly and build anticipation during transitions.
- Experiment with subdividing quarter note delays into 8th and 16th notes for increased pace and rhythmic complexity.
- Layer textures by adjusting the wet/dry mix and using feedback creatively to enrich soundscapes without causing muddiness.
Understanding Delay Basics
Delay is a powerful audio effect that adds depth and dimension to your mixes by creating repetitions of the original sound at specific time intervals. By controlling the delay time, you can achieve a variety of textures, enhancing your track's overall musicality.
Many delay plugins offer tempo syncing, allowing the delay effect to align perfectly with your song's BPM. This guarantees rhythmic consistency and adds an engaging groove to your music.
When you apply the echo effect, you're mimicking natural sound reflections, which helps create a sense of space in your recordings. This effect can make a track feel more immersive and alive.
Additionally, delay can enhance musical texture without overwhelming the mix. By combining delay with reverb, you can clarify elements and make them stand out.
Different types of delays, such as ping pong or tape delay, provide unique ways to manipulate your sound. These variations can alter the rhythmic complexity of percussion and melodic lines, making your mix more dynamic.
Understanding these basics of delay will set the foundation for more advanced techniques, allowing you to explore new creative possibilities in your music production.
Creative Delay Techniques
While exploring advanced mixing techniques, you'll find that creative delay applications can drastically elevate your sound. One of the best ways to achieve this is by utilizing ping pong delay set to re-pitch mode. This method creates unique stereo effects by alternating the delayed signal between the left and right channels, adding depth to your mix.
Another effective technique is automating delay time with sync off. This allows you to create creative pitched effects that transform rhythmic elements and inject a sense of movement into your track.
Additionally, forward and reversed delays can facilitate smooth shifts across fills, enhancing the overall flow of your arrangement and keeping listeners engaged.
Don't forget about subdividing quarter note delays into 8th and 16th notes. This creates rhythmic variation that adds complexity to percussive elements, maintaining a dynamic groove.
Finally, implementing feedback duration on delays can effectively bridge drum fills, allowing for seamless shifts while preserving a cohesive sound throughout your mix.
Advanced Delay Calculations
Understanding advanced delay calculations is essential for achieving precise timing in your mixes. To calculate a quarter note delay, use the formula 60,000 divided by the BPM of your track. This gives you the delay time in milliseconds, ensuring your rhythmic elements stay in sync.
You can also create rhythmic variation by subdividing quarter notes into 8th and 16th notes. This adds interest and keeps your listeners engaged. Don't forget to explore plugin parameters; for instance, setting a ping pong delay to re-pitch mode can yield unique effects, enhancing the overall texture of your mix.
Here's a quick reference table to help visualize these concepts:
Note Type | Calculation Formula | Delay Time (ms) |
---|---|---|
Quarter Note | 60,000 / BPM | (Calculated Value) |
8th Note | (60,000 / BPM) / 2 | (Calculated Value) |
16th Note | (60,000 / BPM) / 4 | (Calculated Value) |
Automating Delay Effects
Automating delay effects can transform your mix by allowing you to creatively adjust parameters like delay time and feedback in real-time.
By syncing with the tempo of your track, you'll add dynamic changes that enhance musical phrases and shifts.
Experimenting with different automation strategies gives you the power to craft unique sounds that keep your listeners engaged.
Creative Automation Strategies
Creative automation strategies can elevate your mixing game, especially when it comes to delay effects. By automating delay time without sync, you can create unique pitched effects that dynamically alter the sound throughout your track. This adds depth and interest, making your mix stand out.
Consider adjusting the feedback duration to connect drum fills. This technique promotes a seamless shift that enhances the flow of your track. You can also bounce these sections to audio for further manipulation, allowing for even more creativity.
Don't forget to utilize both forward and reversed delays in your automation. This approach generates smooth shifts and unexpected textures, enriching the mix's complexity. Implementing tempo-synced delay settings guarantees that rhythmic elements align perfectly with your track's groove, allowing you to layer sounds intricately without losing timing.
Lastly, experiment with automating the wet/dry mix of your delay effects. By dynamically adjusting the prominence of the delay, you maintain listener interest and engagement, keeping your mix fresh and engaging.
With these creative automation strategies, you'll transform your delay effects and elevate your overall sound.
Syncing With Tempo
Sync your delay effects with the track's tempo to guarantee rhythmic consistency and enhance your mix's groove. By automating delay time in your Digital Audio Workstation (DAW), you can make sure the delays are perfectly timed with your music.
Consider using different subdivisions like 1/8th or 1/16th notes to create rhythmic variations that add depth. You can calculate the exact delay time in milliseconds using the formula 60,000/BPM.
Utilizing tempo-synced delays allows you to achieve creative effects that complement your arrangement, such as ducking or cascading echoes. These effects keep everything cohesive and intriguing for the listener.
Additionally, automating feedback and the wet/dry mix of your delay can further enhance these tempo-synced effects, creating dynamic changes that evolve throughout the track.
Don't hesitate to experiment with various delay types, like ping pong or reverse delays, while syncing with the tempo. This experimentation can lead to unique textures and shifts, enriching your mixes.
Dynamic Parameter Adjustments
Building on the importance of syncing your delay effects with your track's tempo, dynamic parameter adjustments can take your mixes to the next level. Automating delay allows you to make real-time adjustments, enhancing your mix's dynamic quality. By changing the wet/dry mix throughout the track, you can create echoes that feel either prominent or subtle, adding depth and interest.
Implementing tempo-synced delay automation guarantees that your echoes align perfectly with the beat, maintaining rhythmic consistency while enhancing the groove. This prevents the echoes from feeling disjointed, making the mix feel more cohesive.
You should also experiment with automated delay modulation. Adjusting feedback levels or delay times can lead to unique pitched effects and engaging shifts that keep listeners engaged.
Additionally, utilizing envelope followers in your DAW allows you to automate delay parameters based on the dynamics of your input signal. This creates responsive effects that react to the audio, enriching the overall texture of your mix.
Incorporating these techniques won't only elevate your delay effects but also transform your entire mix into a more dynamic and engaging experience.
Utilizing Feedback for Depth
You can enhance spatial depth in your mix by utilizing feedback in your delay effects.
By layering repeated sounds that gradually decay, you create rich audio textures that fill the sonic landscape.
Experimenting with feedback timing and levels not only adds rhythmic variations but also helps you craft more dynamic and engaging tracks.
Enhancing Spatial Depth
Delving into the domain of feedback in delay effects can particularly elevate the spatial depth of your mix. By allowing repeated echoes to overlap and blend, you create a rich, immersive quality that captivates your audience. Experimenting with feedback duration not only bridges shifts, like drum fills, but also maintains listener engagement throughout the track.
When adjusting the feedback level, you can achieve varying textures; higher settings yield lush, ambient soundscapes while lower settings guarantee clarity and precision. This flexibility in mixing techniques allows you to tailor the depth according to your artistic vision.
Automating feedback controls adds another layer of dynamism, enabling you to create movement and progression, especially during drops or climactic moments. Incorporating both forward and reversed delays alongside feedback further enhances spatial depth, crafting a complex and layered sound environment.
Creating Rhythmic Variations
Releasing the potential of feedback in delay effects can transform your rhythmic patterns, adding depth and intrigue to your mix. By experimenting with feedback duration, you can create rich, evolving textures that enhance the complexity of your sound without overwhelming it. This technique is particularly effective for bridging shifts between sections, such as drum fills, allowing for seamless movement in your arrangement.
Automated feedback levels introduce dynamic variations, injecting interest and tension into your rhythmic patterns. During build-ups and drops, this automation can elevate the energy, making your mix feel more alive.
Additionally, incorporating both forward and reversed delays with feedback can yield unique rhythmic variations, offering unexpected twists to traditional patterns.
You can also control the feedback mix to dictate how pronounced the delays are in your mix. This flexibility allows you to choose between subtle depth enhancement or more pronounced rhythmic effects as needed.
Layering Textures Effectively
Building on the rhythmic variations achieved through feedback, layering textures effectively can elevate your mix to new heights. By utilizing feedback in your delay effects, you can create rich, evolving textures that develop over time. Feeding the output of the delay back into the input results in a denser sound, perfect for crafting complex soundscapes that add depth and movement.
Incorporating techniques such as field recording can also enrich your sound palette, bringing an element of realism to your compositions. Experimenting with different delay time settings, like ping pong mode, creates a sense of space. This allows sounds to bounce between left and right channels, enhancing the immersive experience for your listeners.
Adjusting feedback duration and modulation further helps in bridging gaps during shifts, such as drum fills or drops, ensuring smooth continuity. Layering multiple delayed signals with varying feedback levels can produce a lush, textured sound while maintaining clarity. This approach enables you to achieve a polished and professional mix.
Remember to balance your textures carefully; too much feedback can muddy your mix, while the right amount will add an engaging depth that keeps listeners interested. Embrace these techniques to transform your mixes into a dynamic auditory experience.
Transition Techniques With Delay
Smooth shifts can greatly enhance the flow of your track, and using advanced delay techniques is a powerful way to achieve this. By incorporating forward and reversed delays, you can create seamless changes that keep your listeners engaged. Automated frequency shifters applied to delay feedback add depth, making these changes dynamic and interesting.
Here's a quick reference table to guide your change techniques:
Technique | Description | Effect on Track |
---|---|---|
Forward Delay | Plays the sound after a set time | Smoothly bridges sections |
Reversed Delay | Plays the sound backward before the original | Creates anticipation and tension |
8th Note Delay | Sets delays to 8th note subdivisions | Increases pace, enhancing urgency |
Implementing ping pong delay in re-pitch mode accentuates changes, giving you a sense of movement across the stereo field. Bouncing delay effects to audio before changing can provide unique sonic textures that you can further process, enhancing your creative outcomes. By mastering these techniques, you'll elevate your tracks and keep your audience captivated.
Enhancing Mixes With Ping Pong
Ping pong delay is an essential tool for enhancing your mixes, as it creates an enchanting stereo effect by alternating delayed signals between the left and right channels. This technique notably enhances the stereo image, adding depth and dimension to your tracks.
By setting the feedback of a ping pong delay, you allow for multiple repeats, which can enrich the texture of percussive elements or synths, making them more engaging.
Adjusting the delay time is vital; it enables you to sync the effects with the tempo, creating rhythmic variations that layer seamlessly with your sounds. Experimenting with ping pong delay in re-pitch mode can also yield unique tonal shifts, transforming the original sound into something fresh and dynamic.
One of the most powerful aspects of using ping pong delay is automating parameters like delay time and feedback. When you do this, you craft intricate shifts that maintain listener interest and keep the arrangement lively.
Incorporating these techniques won't only elevate your mixes but also provide a mesmerizing listening experience that stands out. So jump in and start experimenting with ping pong delay to reveal new creative possibilities!
Practical Tips for Effective Delay
Releasing the full potential of delay effects can transform your mixes and elevate your sound design. To create interesting and unique characteristics in your tracks, consider using ping pong delay set to re-pitch mode. This technique enhances the stereo image, making your mixes more dynamic.
You can also automate delay time while keeping sync off. This adds a layer of complexity and rhythm to your tracks, giving them a fresh twist. For precise timing, calculate quarter note delay using the formula 60,000/BPM to guarantee everything aligns perfectly with your track's tempo. This creates a cohesive groove that keeps listeners engaged.
Experiment with forward and reversed delays to promote smooth changes between different sections of your track, like fills and drops. This allows for a seamless flow that maintains listener interest.
Additionally, incorporating 8th note shaker patterns with delay can ramp up the energy of your arrangement, especially as full loops return, enhancing the overall momentum.
Frequently Asked Questions
What Is the Delay Technique?
The delay technique creates echoes of your original sound, repeating after a set time. You can enhance your mix's spatial quality, synchronize with tempo, and explore unique effects to add depth and interest.
When to Use Predelay?
When you want to emphasize a vocal in a ballad, use shorter predelay for intimacy. If you're mixing a spacious instrumental, opt for longer predelay to enhance depth and separation, creating a more engaging listening experience.
How to Use Delay Mixing?
To use delay mixing effectively, apply ping pong delays for stereo effects, automate delay times for unique pitches, and experiment with forward and reversed delays to create smooth shifts while enhancing rhythmic complexity through subdivisions.
What Is Delay in Music?
"Good things come to those who wait." Delay in music creates echoes of sound, enhancing your mix's texture. By syncing it to tempo, you can add rhythmic depth, making your track feel fuller and more dynamic.
Conclusion
Now that you've opened the secrets of advanced delay techniques, it's time to paint your mixes with a vibrant palette of sound. Think of delay as your trusty brush, adding depth and texture to every note. Embrace creativity, automate for precision, and let feedback echo like whispers in a canyon. With these tools, you're not just mixing; you're crafting sonic landscapes that transport listeners to new domains. Immerse yourself, experiment, and watch your music come alive!
-
Vetted4 months ago
10 Best Laptops for Music Production in FL Studio: Top Picks for Beat Makers
-
Music Production4 months ago
Maria Von Trapp’s Legacy & The Sound of Music
-
Music Production4 months ago
Christopher Plummer: Legendary Actor’s Legacy
-
Vetted4 months ago
15 Best Laptops for Music Production Under $300: Top Budget-Friendly Options
-
Vetted4 months ago
15 Best Music Production Blogs Every Music Producer Should Follow
-
Vetted4 months ago
12 Best Music Production Laptops for FL Studio – Create Beats Anywhere
-
Music Production3 months ago
How to Work in Music Production: Start Your Career Today!
-
Music School4 months ago
How to Start Music School: Practical Tips for Beginners!