
To optimize your audio interface, set your buffer size carefully: smaller buffers reduce latency but increase CPU load, while larger buffers improve stability but add delay. Make certain your input and output routes are correctly assigned for smooth workflow, and sync your clock with a stable source or external device to prevent jitter. Keep your drivers and firmware updated to boost performance. If you want to fine-tune your setup, there’s more valuable information ahead.
Key Takeaways
- Adjust buffer size to balance low latency and CPU load, preventing audio glitches during recording or playback.
- Ensure correct input/output routing for seamless signal flow and minimal noise or errors.
- Set sampling rate to optimize sound quality without introducing excessive latency.
- Configure clock sources properly, using internal or external clocks to maintain synchronization and stability.
- Keep drivers and firmware updated to improve performance, reduce latency, and ensure compatibility.
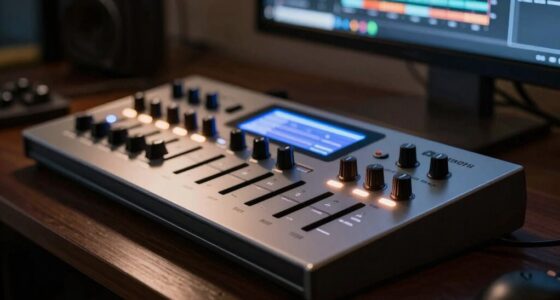
Setting up your audio interface correctly is vital for achieving the best sound quality and minimizing latency during recording and playback. One of the key aspects of this process is optimizing latency, which affects how quickly you hear your recordings and how responsive your setup feels. To do this, you need to focus on input/output configuration, guaranteeing that your device is set up to handle your specific recording needs efficiently. Proper input/output configuration allows your interface to communicate seamlessly with your DAW, reducing delays and preventing dropouts. Start by selecting the correct sample rate and buffer size, which directly influence latency; a smaller buffer size decreases latency but increases CPU load, so find a balance that your system can handle without glitches. Adjusting these settings ensures that your audio flows smoothly, with minimal delay between input and output.
Next, pay attention to the input/output routing within your DAW and interface software. Make sure each input is assigned correctly to the corresponding track, and outputs are routed to the appropriate speakers or headphones. This setup minimizes confusion during recording sessions and prevents unwanted noise or signal routing errors that could introduce latency or degrade sound quality. Many interfaces also allow you to customize direct monitoring options, giving you real-time audio feedback without latency, which is vital for performance and precision. Confirm that direct monitoring is enabled if available, as it bypasses the computer’s processing and provides immediate sound.
Beyond input/output configuration, consider the interface’s clocking settings. Proper clock synchronization ensures all digital components work in harmony, preventing jitter and timing issues that can cause artifacts or latency spikes. Most interfaces automatically lock to a stable clock source, but if you’re using multiple digital devices, selecting a dedicated master clock or syncing to an external clock source can improve overall stability. This step helps maintain consistent latency performance, especially during complex recording sessions involving multiple devices. Additionally, configuring your interface to operate at the optimal sampling rate can significantly impact both sound quality and latency.
Lastly, regularly update your interface drivers and firmware, as manufacturers often release improvements for latency optimization and stability. Ensuring your system is running the latest software minimizes compatibility issues and enhances input/output performance. When all these elements—latency optimization, input/output configuration, and clocking—are properly managed, you’ll experience a more responsive, clear, and professional-sounding recording environment. Taking the time to fine-tune these settings might seem technical, but doing so pays off with smoother workflows and higher-quality results every time you record or mix.
Frequently Asked Questions
How Do I Troubleshoot Audio Dropouts Caused by Buffer Settings?
To troubleshoot audio dropouts caused by buffer settings, start by lowering the buffer size to reduce latency issues, but guarantee it’s not too low to cause strain on your CPU. Update your audio drivers to improve compatibility and performance. If problems persist, check your system’s CPU and RAM usage, close unnecessary applications, and consider increasing the buffer size slightly. These steps can help stabilize your audio performance.
What Are the Risks of Setting Buffer Size Too Low?
Setting your buffer size too low increases buffer latency, which can cause audio glitches and dropouts during recording or playback. You might experience choppy sound, timing issues, or crackling noises because your system struggles to process data quickly enough. To avoid these risks, balance your buffer size; too low causes problems, while too high introduces noticeable delay. Adjust carefully based on your project needs.
How Does Clocking Affect Audio Synchronization Across Devices?
Imagine you’re recording with multiple devices; clocking guarantees they stay in sync. Proper clock synchronization keeps audio aligned across all gear, preventing glitches or phase issues. If one device’s clock drifts, your recordings can become out of sync, causing timing problems. Accurate clocking maintains device alignment, ensuring smooth, cohesive sound. You’ll notice clearer recordings and fewer editing headaches when your devices are properly synchronized through reliable clocking.
Can Incorrect Safety Settings Damage My Audio Interface?
Incorrect safety configurations can indeed damage your audio interface. If you don’t set safety options properly, you risk hardware damage from power surges or overvoltage. Always make certain your safety settings are correctly configured for your setup. Proper safety configurations protect your hardware by preventing electrical issues, giving you peace of mind and ensuring longevity. Regularly check these settings to avoid accidental damage and keep your audio interface functioning smoothly.
What Is the Optimal Buffer Size for Live Recording Sessions?
For live recording sessions, set your buffer size between 128 and 256 samples to balance low latency with stable performance. This ideal buffer size helps with latency management, ensuring your recordings are timely without glitches. Make sure your drivers are optimized, as poorly configured drivers can cause delays or dropouts. Adjusting your buffer size within this range allows you to maintain smooth monitoring and accurate playback during real-time recording.
Conclusion
Now that you’ve got a handle on buffer sizes, safety, and clocking, you’re all set to optimize your audio interface like a pro. Remember, don’t be afraid to tweak settings as you go—think of it as your own personal jukebox, fine-tuning to get the perfect sound. Keep your system stable and avoid those pesky glitches, just like a wise old maestro guiding his orchestra. With these tips, your recordings will be smooth as silk—no DeLorean required!