
To design your own signature synth patches from scratch, start by choosing and tuning oscillators to create a unique tone. Experiment with different waveforms and blend multiple sounds for richness. Use filters and resonance to shape the character, then add modulation like LFO or FM to create movement. Incorporate effects such as reverb or delay for depth. Fine-tune parameters and save your patches for future use—ongoing exploration will help you craft your perfect sound.
Key Takeaways
- Understand your synth’s oscillator options and experiment with waveform combinations to create unique tonal foundations.
- Use modulation (LFO, FM, envelopes) strategically to add movement, complexity, and character to your patches.
- Adjust filter types, cutoff, and resonance to shape the tonal brightness and create signature timbres.
- Fine-tune envelope parameters and harmonic content to craft expressive, polished sounds tailored to your style.
- Save, organize, and document your patches for easy recall and iterative development of your signature sounds.
Understanding the Basics of Synthesizers
Since synthesizers are the foundation of creating unique sounds, understanding how they work is essential. Your first step is grasping synth architecture, which refers to the internal layout and components that produce sound. Knowing the sound design fundamentals helps you manipulate these elements effectively. A typical synthesizer includes oscillators, filters, envelopes, and modulators, each shaping the final tone. Oscillators generate raw waveforms, while filters sculpt the sound by filtering frequencies. Envelopes control how a sound evolves over time, and modulators add movement and complexity. Digital sound synthesis is a technique that allows for the creation of entirely new sounds through electronic processes. By understanding these core parts and their functions, you gain the ability to craft a wide range of sounds from scratch. This foundational knowledge sets the stage for creating your signature patches with confidence.
Selecting the Right Oscillators for Your Sound

Choosing the right oscillators is key to shaping your sound, so consider the different wave types and how they influence your tone. Pay attention to tuning options and frequency ranges to make certain your sound fits your project. Don’t forget to explore modulation possibilities, as they can add movement and complexity to your patches. Additionally, understanding the fundamental principles of sound can help you make more informed decisions when designing your patches.
Oscillator Types and Waves
Oscillator types and waveforms are the foundation of your synth sound, shaping the character and texture of your patches. Different waveforms, such as sine, square, saw, and triangle, each have unique sonic qualities influenced by their waveform symmetry. For example, sine waves are smooth and pure, while saw waves are bright and aggressive. Additionally, oscillator synchronization allows you to create complex timbres by forcing one oscillator to lock onto the phase of another, adding richness and movement. Choosing the right waveform and leveraging synchronization helps craft your signature sound. Understanding the role of AI in media and entertainment can also inspire innovative uses of synthesis in modern sound design.
Tuning and Frequency Range
How you tune your oscillators and set their frequency range directly shapes your synth’s overall sound. Precise tuning guarantees your oscillators stay in harmony, avoiding dissonance or unwanted shifting pitches. Tuning precision is crucial when creating consistent, musical patches, especially for layered sounds or complex textures. The frequency spectrum you choose influences how your sound interacts with other elements in a mix. Narrower ranges can focus your tone, while wider ranges unlock more sonic possibilities. Consider whether you need a stable, fixed frequency or a dynamic, modulating tone. Adjusting the oscillator’s tuning and frequency range carefully allows you to craft sounds that are both expressive and well-balanced, giving your patches clarity and character. This foundational step is key to achieving your desired sonic signature.
Oscillator Modulation Options
Selecting the right oscillator modulation options allows you to shape your sound’s movement and complexity. LFO modulation is perfect for adding vibrato, tremolo, or evolving textures, while FM synthesis creates rich, metallic tones through frequency modulation. Choosing the right oscillators depends on your desired sonic character and how you want to manipulate them. For dynamic sounds, combine multiple oscillators with different waveforms and modulate their pitch or amplitude. Experiment with sync or ring modulation for unique textures. Here’s a quick overview:
| Modulation Type | Effect | Use Case |
|---|---|---|
| LFO modulation | Adds movement and vibrato | Rhythmic, evolving patches |
| FM synthesis | Creates complex timbres | Metallic, bell-like tones |
| Oscillator Sync | Sharp, aggressive sounds | Leads, basslines |
| Ring Modulation | Disrupts harmonic content | Experimental textures |
Additionally, understanding sound vibrations can help you select the most effective modulation techniques to enhance your synth patches.
Crafting Unique Waveforms and Timbres

Start experimenting with different wave shapes to create unique sounds that stand out. Try blending multiple oscillators to add complexity and richness to your timbres. This approach allows you to craft truly personalized waveforms that define your signature sound. Incorporating virtual instruments can further expand your sonic palette and inspire new ideas.
Experiment With Wave Shapes
Experimenting with wave shapes allows you to create distinctive sounds that set your patches apart. By exploring different wave shape variations, you can craft unique tonal qualities and textures. Try modifying basic waveforms like sine, square, saw, and triangle to see how their harmonics influence the sound. Waveform blending is also a powerful tool—combining two or more wave shapes can produce complex, evolving timbres. Don’t hesitate to experiment with subtle and extreme variations; even slight adjustments can markedly impact your patch’s character. The key is to listen closely and trust your ear. This experimentation helps you discover new sonic possibilities, giving your patches a personalized edge that truly reflects your creative vision. Additionally, understanding how different wave shapes interact can enhance your ability to design complex textures that add depth and richness to your sound palette.
Blend Multiple Oscillators
Have you ever wondered how to create more complex and dynamic sounds? Blending multiple oscillators is a powerful technique that lets you do just that. Using layering techniques, you can combine different waveforms—sine, saw, square—to craft unique textures and timbres. Start by tuning each oscillator slightly differently to add depth and richness. Experiment with blending textures by adjusting their volumes and phase relationships, creating interesting interactions. You can also use detuning or modulation to introduce movement and complexity. The key is to listen carefully as you layer, ensuring the combined sound remains balanced and vibrant. With practice, blending multiple oscillators allows you to design patches that are far more expressive and tailored to your musical vision. Embracing artistic expression can further inspire innovative sound design and creativity in your synthesizer patches.
Shaping Your Sound With Filters and Resonance

Filters are powerful tools for shaping your sound, allowing you to emphasize or attenuate specific frequency ranges. By adjusting the filter cutoff, you can sculpt the brightness or dullness of your patch. Resonance control adds emphasis at the cutoff point, creating a peak that enhances certain frequencies. Experimenting with these controls helps you craft unique tones and textures. Use the table below to understand common filter types and their effects:
| Filter Type | Effect |
|---|---|
| Low-pass | Removes high frequencies |
| High-pass | Removes low frequencies |
| Band-pass | Isolates a specific frequency band |
| Notch | Removes a narrow band of frequencies |
Mastering filter cutoff and resonance will give your patches character and clarity. Additionally, understanding how different filter types influence your sound helps you make more informed decisions during the sound design process.
Modulation Techniques to Add Movement

Adding movement to your synth patches is essential for creating dynamic and engaging sounds. LFO modulation is a powerful tool to achieve this, allowing you to subtly or dramatically alter parameters like pitch, filter cutoff, or amplitude over time. Experiment with different wave shapes—sine, square, or sawtooth—to craft varied motion. Vibrato techniques, using LFOs to modulate pitch, can add expressiveness and texture to your sound, whether gentle or intense. Syncing the LFO to the tempo creates rhythmic pulsations that enhance groove. By layering these modulation techniques, you can prevent your patches from feeling static, giving them a lively, evolving character. Mastering LFO modulation and vibrato techniques enables you to inject life into your patches, making your sound more enthralling and unique. Additionally, understanding modulation techniques can help you achieve more complex and expressive textures in your synth design.
Incorporating Effects for Character and Depth

Incorporating effects into your synth patches can remarkably enhance their character and depth, transforming simple sounds into complex, immersive textures. Reverb effects add space and ambiance, making your sounds feel larger and more atmospheric. Use them to create a sense of environment or to give your patch a dreamy quality. Delay effects, on the other hand, introduce echo and repetition, adding rhythmic interest and complexity. Subtle delay can thicken your sound, while longer settings can create a spacious, almost surreal atmosphere. Experiment with different reverb and delay parameters to find the perfect balance that complements your patch’s personality. Combining these effects thoughtfully can turn a basic sound into a rich, textured signature tone that stands out in your mix.
Fine-Tuning Parameters for Your Signature Voice

After applying effects to shape your sound, the next step is to fine-tune the parameters to craft your signature voice. Focus on adjusting harmonic complexity to add richness and depth, making your sound stand out. Use envelope shaping to control how your sound evolves over time, emphasizing attack, decay, sustain, and release for expressive results.
Consider these key adjustments:
- Increase harmonic complexity with subtle detuning or added modulation for a thicker sound
- Refine envelope shaping to enhance attack and release, giving your patch more character
- Tweak filter settings to emphasize or soften certain frequencies, matching your desired tonal balance
These small tweaks will help you sculpt a unique, polished voice that truly represents your signature style.
Saving and Managing Your Custom Patches
Once you’ve crafted your signature patches, it’s essential to save and organize them properly so you can easily recall and modify your sounds later. Effective patch organization involves creating clear labels and categorizing patches by style or purpose, making browsing simpler. Implementing backup strategies is equally important; regularly saving copies of your patches to external drives or cloud storage protects against data loss. Consider maintaining different folders for current projects, backups, and experimental sounds to streamline your workflow. Naming conventions should be consistent, with descriptive titles for quick identification. By establishing a solid system for saving and managing your custom patches, you ensure that your creative work remains secure and accessible, allowing you to focus on developing your unique sound without frustration.
Tips for Experimenting and Developing Your Style

To develop your signature sound, start by actively exploring different synthesis techniques and sounds rather than sticking to familiar presets. This approach fuels your creative inspiration and broadens your genre exploration. Don’t be afraid to push boundaries and experiment with unconventional methods—this is how unique patches emerge.
Consider these tips:
- Immerse yourself in new synthesis types (FM, wavetable, granular) to discover fresh textures.
- Combine elements from different genres to develop your own style.
- Record your experiments, analyze what works, and refine your approach over time.
Frequently Asked Questions
How Do I Ensure My Patches Are Compatible Across Different Synth Models?
To guarantee your patches are compatible across different synth models, you need to address standardization challenges and firmware compatibility. Use common parameter settings and avoid proprietary features that may not be supported everywhere. Test your patches on multiple devices if possible, and keep firmware versions in mind. By focusing on universal controls and maintaining flexibility, you help your patches work seamlessly across various synths, reducing compatibility issues.
What Are Common Mistakes to Avoid When Designing Custom Patches?
Avoid accidental anomalies by attending to common mistakes in patch design. You might overlook the importance of careful parameter modulation, which can muddy your sound. Be mindful of waveform selection, as choosing the wrong wave can cause clutter or confusion. Don’t neglect detailed fine-tuning, and always test across different settings. Staying attentive guarantees your patches stay polished, precise, and perfectly suited to your signature sound, avoiding common pitfalls.
How Can I Organize and Categorize Multiple Patches Efficiently?
To organize and categorize multiple patches efficiently, start with clear patch naming conventions that include details like sound type or intended use. Use cataloging techniques such as folders or tagging within your DAW or synth software, making it easy to locate specific patches quickly. Regularly update and back up your library to prevent loss. This approach keeps your patches structured, saves time, and enhances your workflow.
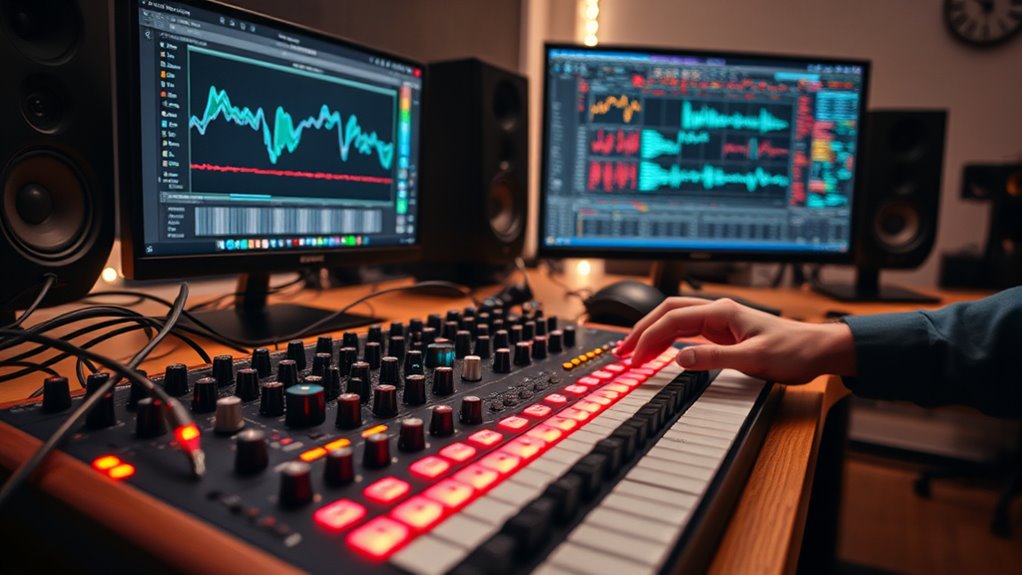
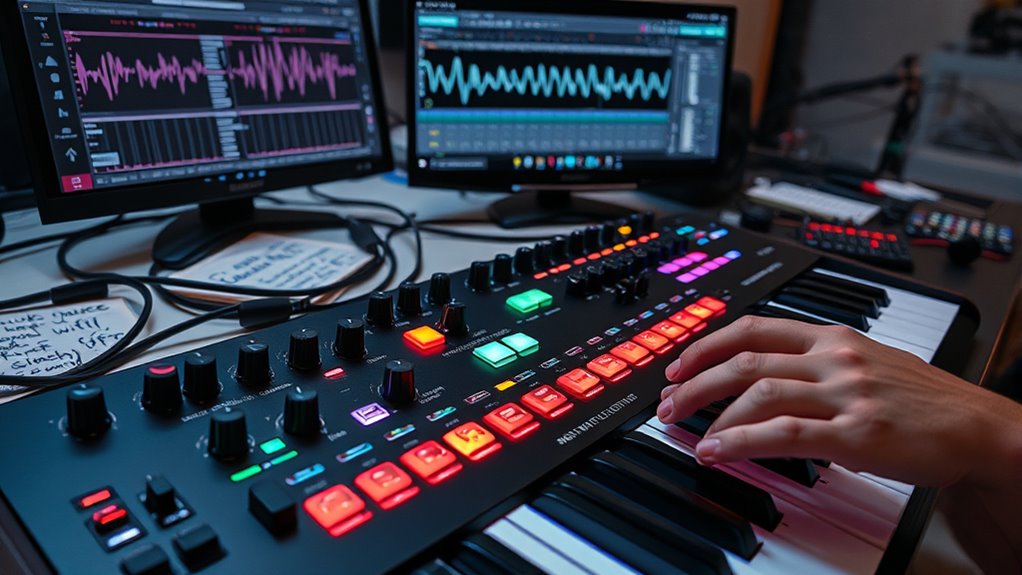
What Tools or Software Can Assist in Visualizing My Sound Design Process?
To visualize your sound design process, you can use visualization tools like oscilloscopes and spectrum analyzers to see your sound waves and frequency spectrum in real-time. Sound design software such as Ableton Live, FL Studio, or Logic Pro often include built-in visualization features that help you understand how parameters affect your sound. These tools allow you to experiment visually, making it easier to craft your signature patches with precision and creativity.
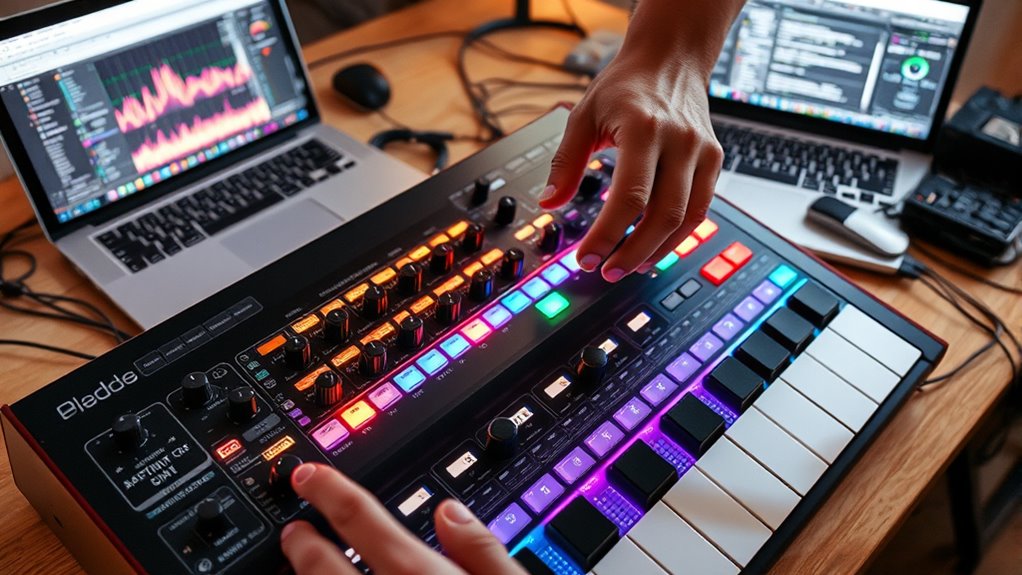
How Do I Incorporate External Hardware or Controllers Into My Patch Design?
Think of your setup as a musical orchestra, ready to be directed. To incorporate external hardware or controllers, you’ll want to set up MIDI integration and hardware mapping within your synth software. Connect your controllers via USB or MIDI cables, then assign controls like knobs or pads to specific parameters. This hands-on approach transforms your external gear into an extension of your creative mind, giving you dynamic control over your patches.
Conclusion
Your signature synth patches are like keys to a secret garden—each one revealing a new world of sound. As you experiment and refine, you’re planting seeds of creativity that grow into your unique sonic landscape. Remember, every tweak is a step closer to your musical identity. Trust your instincts, nurture your patches, and soon you’ll find yourself wandering through a lush, vibrant soundscape you’ve cultivated from scratch.