Connect with us

Sound Design

Build the Perfect Beat: How to Create Your Own Drum Kits From Scratch

Master the art of crafting unique drum kits from everyday objects and unlock a world of creative sound possibilities waiting to be discovered.

Published

on

create custom drum kits

You can build the perfect beat by creating your own drum kits from scratch using everyday objects. Start by experimenting with items like pillows, boxes, or even rice-filled containers to capture unique sounds. Layer multiple recordings to add depth and clarity, and apply techniques like normalization and EQ shaping to refine your samples. Don't forget to explore pitch manipulation and compression for enhanced dynamics. By continuously experimenting and recording, you'll craft an impressive library of sounds. If you're keen for tips on expanding your creativity and techniques, there's plenty more to discover! Remember to pay attention to rhythm and timing as you piece your sounds together, ensuring that each layer complements the others seamlessly. By fine-tuning each element and trusting your creative instincts, you can craft beats that hit hard and leave a lasting impression. Keep pushing boundaries and incorporating unconventional ideas to make your music truly stand out.

Key Takeaways

  • Experiment with everyday objects like pillows and boxes to record unique kick and percussion sounds, enhancing your drum kit's originality.
  • Layer multiple sounds together to create depth and complexity in your drum kits, ensuring a richer audio experience.
  • Apply sound processing techniques such as normalization, EQ shaping, and compression to refine your samples for clarity and punchiness.
  • Explore pitch manipulation and time-stretching to customize the tonal quality of your drum sounds for added creativity.
  • Continuously build a library of unique sounds through recording and experimentation, keeping your drum kits fresh and exciting.

Exploring Sound Creation Techniques

innovative sound design methods

When you immerse yourself in exploring sound creation techniques, you'll discover a world of possibilities using everyday objects. You can utilize items like pillows and towels to create unique kick sounds by experimenting with the impact and resonance they produce.

Don't shy away from making weird sounds; they can lead to surprising results.

Try layering multiple sounds together to enhance the depth and complexity of your drum kits. This approach results in richer and more textured kick drum elements that stand out.

As you record, manipulate pitch and apply time-stretching techniques to your sounds for unique sonic effects. These transformations can really change the character of your drum sounds.

Make sure to continuously record and build an extensive library of unique sounds. Refine these recordings through processing chains that include normalization, EQ shaping, and compression for ideal clarity and punchiness.

Advertisement

Don't forget to explore different environments, like empty boxes, to capture diverse kick drum textures. Each location can offer different methods to experiment with, providing you an even broader foundation for your custom drum kits.

Your creativity is the limit!

Mastering Sound Processing Methods
advanced audio engineering techniques

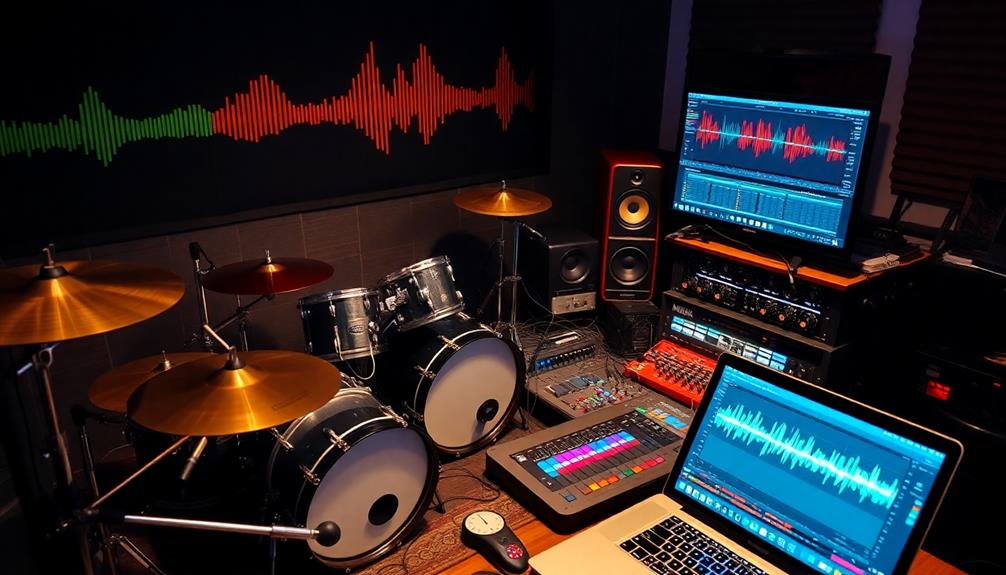
Mastering your sound processing methods is vital for achieving polished and professional drum kits. To guarantee your drum sounds stand out, focus on these key techniques:

  1. Normalization: Apply normalization techniques to enhance sound levels and clarity. This makes each drum hit prominent in your mix, preventing any elements from getting lost.
  2. EQ Shaping: Utilize EQ shaping to adjust frequency ranges. Low cuts remove unwanted muddy frequencies, while boosts enhance desirable tones, giving you better control over your drum kit's sound.
  3. Compression: Use compression, especially for kick sounds, to add punchiness. Adjust the attack and release settings to highlight the transient peaks and make your kicks more impactful.
  4. Clipping: Incorporate clipping to introduce a distorted effect. This adds character and texture to your sounds, giving them a unique edge that can set your drum kit apart.

Consistently monitoring levels during recording is essential. It prevents clipping and guarantees that your processed sounds maintain their integrity and quality, resulting in a professional-sounding drum kit.

Crafting Unique Kick Drum Sounds

creating distinctive kick drum

After honing your sound processing skills, it's time to focus on crafting unique kick drum sounds that can elevate your tracks.

Start by experimenting with everyday objects like pillows and towels. Record the thuds and thumps they produce, then layer these sounds to add depth and complexity to your kick drum.

Next, utilize pitch manipulation techniques. Adjust the pitch and try time stretching to enhance the character of your samples.

Don't hesitate to explore different environments; recording kick sounds from empty boxes can yield distinct textures that transform into usable kick drums.

Advertisement

Once you have your samples, apply processing techniques such as normalization, EQ shaping, and compression. This refinement guarantees your kick sounds are punchy and clear.

Designing Shaker and Percussion Sounds
creating shaker percussion sounds

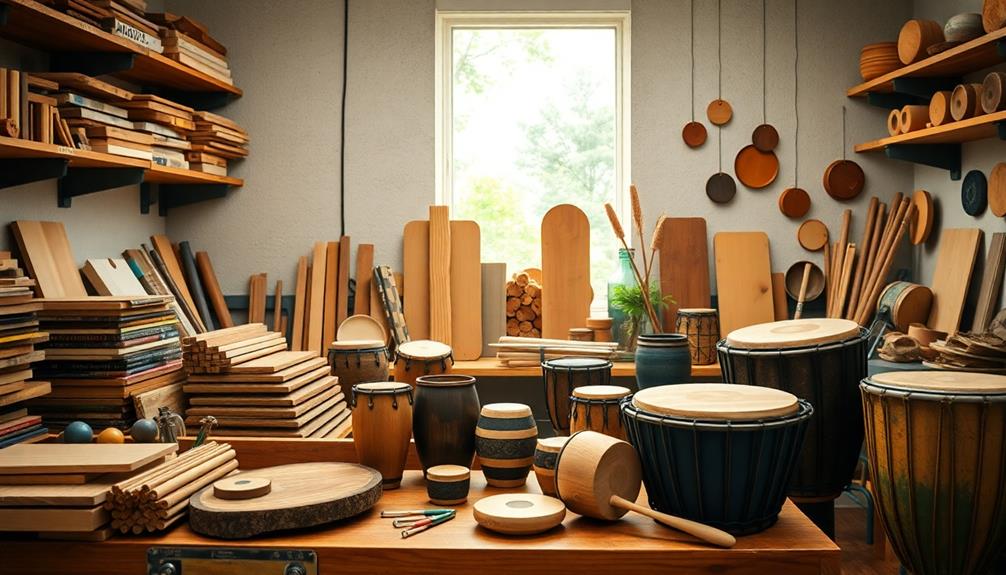
When designing shaker and percussion sounds, you should start by experimenting with various everyday objects to find unique tones.

Once you've captured your sounds, processing them for clarity is essential to guarantee they fit seamlessly into your mix.

Sound Selection Techniques

Creating unique shaker and percussion sounds can greatly enhance your drum kit's character. To achieve this, you'll want to explore various sound selection techniques that foster creativity and depth in your beats.

Here are four methods to examine:

  1. Experiment with Everyday Objects: Use items like pill bottles or boxes to capture interesting sounds. You'd be surprised at the unique textures you can produce with common objects.
  2. Layer Your Sounds: Record a variety of percussive sounds and mix them together. This layering technique can create rich, complex textures that make your shakers stand out.
  3. Engage with Online Resources: Tap into tutorials and community feedback. Engaging with fellow sound designers can introduce you to innovative methods and broaden your skill set.
  4. Utilize Creative Processing: Apply effects like fading, chorus, or delay to your recordings. This can add depth and make your shaker and percussion sounds more dynamic and engaging.

Processing for Clarity

Often, achieving clarity in your shaker and percussion sounds requires thoughtful processing techniques that highlight their unique qualities. Start by normalizing your recorded sounds to enhance their overall levels, ensuring they sit well in the mix. This simple step boosts the clarity and presence of your percussive elements, similar to how regular cleaning is essential for peak performance in air purifiers.

Next, apply fading techniques to eliminate abrupt starts and ends in your audio clips. Smoother shifts can markedly improve how your shaker and percussion sounds blend with other instruments.

Advertisement

Don't forget to utilize EQ; remove unwanted frequencies while boosting desired ranges to refine the definition of your sounds. Experimenting with effects can also elevate your percussion textures. Adding chorus and delay to your shaker sounds enriches their texture, creating a more dynamic audio experience.

Additionally, record a variety of sounds using containers and household items. Process these recordings with normalization and EQ to uncover unique percussive textures for your drum kits.

Creative Layering Methods

In the quest for unique shaker and percussion sounds, layering plays an essential role in enhancing your drum kits. By creatively combining different audio elements, you can craft sounds that stand out and add depth to your tracks.

Here are some effective methods for layering shaker and percussion sounds:

  1. Daily Objects: Experiment with everyday items like pill bottles or rice-filled containers. These can yield unique shaker sounds that introduce texture to your drum kits.
  2. Multiple Layers: Combine various shaker noises or subtle background textures. Layering different sounds creates a richer and more complex audio experience, making your rhythm section more interesting.
  3. Sound Processing: Use techniques like normalization and EQ shaping to enhance clarity in your recordings. This helps eliminate unwanted frequencies and guarantees that each layer cuts through the mix.
  4. Effects: Incorporate effects such as chorus and delay to add depth and dimension. These effects can transform ordinary sounds into something more enchanting, making your percussion stand out in any mix.

Continuously experiment with these methods, and you'll discover endless possibilities for crafting the perfect shaker and percussion sounds.

Utilizing Everyday Objects for Sounds

everyday objects create sounds

Every musician's environment is filled with potential sound sources just waiting to be explored. You can find unique kick sounds by striking everyday items like pillows and towels. These common objects demonstrate the versatility in sound design that you can tap into, much like how the best heat pumps utilize advanced technology for efficiency.

Don't stop there; experiment with various materials such as empty boxes or crumpled paper. You'll discover distinctive percussive effects that can greatly enhance your drum kit's diversity.

Advertisement

When you layer sounds created from these everyday items, you can build richer kick drum textures, adding depth to your beats. Focus on utilizing lower frequency sources, as they're vital for crafting authentic kick sounds that resonate well in your music production.

Recording multiple sound variations from everyday objects gives you a vast library to work with. This allows for continuous experimentation and refinement of your drum kits, ensuring you keep your sound fresh and exciting.

Layering and Pitch Manipulation

sound design techniques explored

Layering sounds is a powerful technique that can elevate your drum kits to new heights. By combining multiple kick drum sounds, you can create a richer texture that enhances the overall impact of your beats.

Don't be afraid to play around with different frequencies and characteristics—this experimentation can lead to more dynamic and engaging drum kits.

Pitch manipulation is another valuable tool in your arsenal. By adjusting the tonal quality of your kick drums, you can craft unique sounds that fit the vibe of your track perfectly.

Here are some strategies to contemplate:

Advertisement
  1. Blend Low and High Frequencies: Layer high-frequency elements with low-frequency kicks to add depth and complexity.
  2. Utilize Time Stretching: Transform ordinary sounds into compelling percussive elements by stretching or compressing their duration.
  3. Record Continuously: Keep recording and processing layered sounds to build an extensive library of unique kicks.
  4. Experiment Boldly: Don't hesitate to tweak pitch and layering; the unexpected can often yield the most exciting results.

With these techniques, you'll gain greater creativity and customization in your drum kit creation.

Enhancing Sounds With Compression

optimizing audio dynamics processing

Compression is an essential technique for enhancing the sounds of your drum kits, particularly when it comes to kick drums. It controls the dynamic range, making your kick sound more consistent and impactful in the mix.

By adjusting the attack and release settings, you can customize how the kick responds: faster attack times highlight the initial punch, while longer release times help sustain the sound.

To apply compression effectively, set a ratio between 2:1 and 4:1, which determines how much the signal reduces once it hits the threshold level. This shaping process is crucial for defining the character of your kick.

However, always monitor your levels during compression. Too much can lead to unwanted clipping, distortion, and a loss of clarity.

You might also want to experiment with sidechain compression. This technique allows the kick drum to pop out more prominently by dynamically reducing the volume of other elements whenever the kick hits, creating a rhythmic pumping effect that adds energy to your track.

Use these compression techniques to elevate your drum sounds and achieve a polished, professional mix.

Advertisement

Engaging With Learning Resources

interactive educational resource utilization

Exploring a variety of learning resources can greatly enhance your drum kit creation skills. By tapping into multiple avenues, you'll find valuable insights and techniques that can elevate your sound design. For instance, you might want to check out advanced mixing techniques that can improve your overall production quality.

Here are some essential resources to evaluate:

  1. Video Tutorials: Platforms like YouTube offer countless step-by-step guides on sound creation. You'll learn how to design unique drum sounds from scratch, making the process engaging and interactive.
  2. Online Communities: Engaging with forums and communities allows you to connect with fellow producers. Share your experiences, seek advice, and receive constructive feedback that can refine your skills.
  3. Experimentation: Many resources stress the importance of trying out different materials and environments. This experimentation can lead to discovering unique sounds that set your drum kits apart.
  4. Social Media Groups: Join music production groups on platforms like Facebook or Reddit. These groups keep you updated on the latest techniques, trends, and tools in drum sound design, ensuring you're always in the loop.

Building a Creative Community

fostering collaborative artistic spaces

Building a creative community around your drum kit projects can greatly enrich your experience and skills. Engaging with online platforms like YouTube opens up a world of video tutorials, allowing you to learn diverse sound creation techniques while sharing your own discoveries.

By participating in forums and social media groups focused on music production, you foster collaboration and receive valuable feedback, refining your drum kit designs and sparking new ideas.

Don't underestimate the power of local workshops and meetups. Joining these events enhances your learning and offers hands-on experiences, connecting you directly with fellow producers. It's a fantastic way to network and gain insights that you won't find online.

Sharing your original drum kits on platforms like SoundCloud or Bandcamp not only builds your personal brand but also invites constructive criticism from the community, fueling your growth.

Ultimately, actively contributing to discussions and sharing your experiences strengthens community ties. By promoting a culture of support and innovation, you'll inspire others and create a vibrant environment for all aspiring producers.

Advertisement

Embrace these opportunities, and watch your creativity flourish!

Frequently Asked Questions

How Do You Make a Drum From Scratch?

To make a drum from scratch, select a resonant material like a cardboard box. Experiment with striking it using sticks or hands, and record multiple hits to layer sounds for a unique drum effect.

How to Make Your Own Drum Pack?

To make your own drum pack, start recording unique sounds from everyday objects. Process them with EQ and compression, layer different elements, and keep refining your samples for a diverse, dynamic collection ready for music production.

How Do You Make Drum Kits Sound Good?

To make your drum kits sound good, think of layering sounds like painting with vibrant colors. Add compression for punch, experiment with pitch, and use EQ to sculpt frequencies, creating a dynamic and rich auditory experience.

What Makes a Good Drum Kit?

A good drum kit's got diverse sounds like kick, snare, and hi-hats. Quality samples matter, so guarantee they're well-recorded. Layering, customization, and sound processing techniques make your kit unique and polished for any genre.

Advertisement

Conclusion

In your journey to create the perfect drum kit, remember that 80% of professional producers use custom sounds to set their tracks apart. By exploring sound creation techniques and mastering processing methods, you can craft unique kicks, shakers, and percussion that resonate with your personal style. Don't hesitate to experiment with everyday objects and connect with a creative community. Embrace the process, and you'll discover a world of possibilities waiting to enhance your music production.

Advertisement

Sound Design

Create and Sell! How to Build Your Own Sample Pack From Scratch

Master the art of crafting a unique sample pack from scratch and discover the secrets to boosting your music career—are you ready to unlock new possibilities?

Published

on

build your own sample pack

You can create and sell your own sample pack from scratch to elevate your music production and engage with your audience. Start by understanding sampling basics—focusing on quality and originality. Record unique sounds from your environment and make certain they're clean and well-edited. Use professional equipment to capture high-quality audio and organize your samples clearly. Once your pack is ready, develop a solid marketing strategy. Promote it on social media with engaging content to attract buyers. By following these steps, you'll not only enhance your creativity but also open up new revenue streams for your artistry. There's more to explore, so keep going!

Key Takeaways

  • Identify a unique theme or concept to guide your sample pack creation and attract potential buyers.
  • Record high-quality, original sounds using professional equipment and clean environments for the best results.
  • Edit and organize your samples with clear naming conventions and metadata for easy navigation and usability.
  • Develop a strategic marketing plan, utilizing social media and engaging promotional materials to reach your target audience.
  • Offer your samples as royalty-free to attract users while ensuring legal compliance with copyright laws.

Reasons to Create Sample Packs

benefits of sample pack creation

Creating sample packs offers numerous benefits that can elevate your music production journey. When you create a sample pack, you're not just compiling sounds; you're developing unique sounds that enhance your individual production style. This fosters creativity and innovation in your music, pushing your artistic boundaries.

Additionally, leveraging advancements in AI in content creation can streamline your sound design process, allowing you to produce high-quality samples more efficiently. Bespoke sample packs can inspire you to break free from standard workflows, leading to fresh musical ideas and compositions.

Moreover, selling sample packs opens up financial opportunities beyond just music sales or performances. By generating high-quality, royalty-free sounds, you provide valuable resources to fellow producers while establishing a secondary revenue stream.

Engaging with your fans through custom samples not only builds your brand but also creates a community around your work, encouraging collaboration and interaction within the music scene.

The creative process of sound design involved in creating loops and one-shots not only boosts your personal artistic growth but also contributes considerably to the wider music production landscape. By sharing your original sounds, you're helping other creators while solidifying your place in the industry.

Advertisement

Understanding Sampling Basics

fundamentals of sampling techniques

Sampling plays an essential role in music production, allowing you to pull from existing audio sources or craft original sounds for fresh compositions. It's a technique that has shaped genres like hip-hop and electronic music, enabling you to recontextualize sounds into something unique.

As you initiate your production career, it's important to focus on quality over quantity when creating your sample pack. Authentic sampling emphasizes using original sound sources instead of relying solely on commercial packs, which may lack the creativity you want to express.

Creative sampling encourages you to explore various themes, instruments, and environments, leading to the development of distinctive sound profiles that set your work apart.

However, don't overlook the legal aspects of sampling. Understanding copyright laws and usage rights is essential to avoid complications when creating and distributing your sample packs.

Consider offering royalty-free samples to attract more users while ensuring you're compliant with legal standards. By mastering these basics of sampling, you'll be well-equipped to create a compelling and innovative sample pack that resonates with other producers and musicians alike.

Tips for Effective Sampling

effective sampling techniques guide

When crafting your sample pack, focusing on specific themes or concepts can greatly enhance its appeal to your target audience. Think about what makes your samples unique. Experiment with recording unique sounds from everyday environments, as these can provide interesting elements to your collection.

Additionally, consider how maintaining a clean sound environment can influence the quality of your recordings, similar to how air purifier maintenance dos and don'ts can affect air quality.

Advertisement

Utilizing high-quality recording techniques is vital. Invest in professional microphones and audio interfaces to guarantee clarity and impact in your samples. While creating your drum kits, make sure every sound is crisp and polished. Experiment with layering sounds and applying effects like EQ, compression, and reverb to add depth and character to your samples. When you create your own drum kits, focus on originality and balance, ensuring each element complements the others seamlessly. This approach will help you stand out and give your productions a unique and professional edge.

The editing process is just as important. Apply effects like EQ, reverb, and compression to add depth and character to your sounds. This will help your samples stand out in a crowded market.

To maximize versatility, always test your samples in various production contexts. Make sure they can seamlessly fit into different genres and styles. This way, producers will find your pack more appealing and useful for their projects.

Recording and Editing Techniques

audio production skills guide

To achieve high-quality recordings for your sample pack, focus on using professional microphones and audio interfaces. Aim for a sample rate of 44.1 kHz and a bit depth of 24-bit to capture ideal clarity.

Implement acoustic treatment in your recording space to minimize unwanted reflections and background noise, guaranteeing a cleaner sound capture. Additionally, consider utilizing essential accessories that can greatly improve your sound capture quality.

When it comes to editing, trim your recordings to eliminate silence and noise, and normalize volume levels for consistency across your samples. Applying effects like EQ, reverb, or delay can enhance the overall character of your recordings.

Advertisement

For seamless loops, make certain your edits create a continuous sound without glitches, and consider applying short fades to avoid pops at the beginning or end of one-shot samples.

Organizing your samples is vital. Use clear and descriptive naming conventions to make exploring your library easier. Additionally, tag your samples with metadata for better searching and accessibility during the production process.

Marketing Your Sample Pack

promoting your sample pack

Marketing your sample pack effectively can considerably increase its visibility and sales potential. Start by developing a solid marketing strategy that outlines a clear release date and identifies your target audience.

Create engaging promotional materials that grab attention, like eye-catching cover art and compelling product descriptions that highlight the unique features of your drum sample pack.

Utilize social media platforms, such as Instagram and YouTube, to share demo videos and audio snippets. These visuals will showcase the versatility and quality of your sample pack, attracting potential buyers.

Don't forget to engage with your audience through consistent posts and interactions; this builds a community around your product.

Advertisement

Consider offering limited-time discounts or bundle deals to create a sense of urgency among customers, encouraging them to make a purchase.

Additionally, implement email marketing strategies to keep your audience engaged. Encourage sign-ups for newsletters that provide updates, exclusive content, and promotions related to your sample pack.

Frequently Asked Questions

How to Create and Sell Sample Packs?

To create and sell sample packs, you'll need to choose a genre, record high-quality sounds, edit them carefully, and develop a marketing strategy. Focus on originality and connect with your audience effectively to boost sales.

Can You Make Money Selling Sample Packs?

Imagine nurturing a garden; each sample pack you create is a unique flower. If you cultivate quality and share your blooms wisely, you'll find they can attract a bounty, turning effort into profit.

Do Producers Buy Sample Packs?

Yes, producers buy sample packs because they streamline creativity and enhance production quality. You'll find that many prefer them for their royalty-free sounds, saving time while ensuring access to unique, versatile options that fit their styles.

Advertisement

Where Can I Sell My Sample Packs?

You've crafted your sonic treasures; now it's time to share them. Consider platforms like Bandcamp or Splice for wider reach, and don't forget social media to showcase your creations directly to enthusiastic listeners.

Conclusion

Creating your own sample pack is like planting a seed in a garden; with the right care and attention, it can blossom into something beautiful and profitable. By understanding sampling basics, honing your recording skills, and effectively marketing your pack, you can cultivate a thriving resource for musicians and producers. So, grab your tools, release your creativity, and watch your unique sound grow into a flourishing part of the music community. Start building your sonic legacy today!

Continue Reading

Sound Design

Genre-Specific Sound Design Tips! How to Nail the Perfect Sound for Any Style

With essential tips for genre-specific sound design, discover how to elevate your tracks and unlock your creative potential—your perfect sound awaits!

Published

on

crafting genre specific sound design

To nail genre-specific sound design, start by understanding the unique traits of each genre. Choose sounds that enhance the vibe—like synthesized tones for electronic music or organic instruments for acoustic styles. Layer your sounds carefully, pairing low and high frequencies for depth, and use EQ to maintain clarity. Don't forget the importance of recording authentic audio elements to enrich your projects. Focus on balancing and mixing to guarantee your track translates well across different systems. Exploring new tools can also unleash creative potential. There's much more to master as you refine your craft and elevate your sound!

Key Takeaways

  • Understand the unique characteristics of each genre, including instrumentation, tempo, and sound palettes, to enhance authenticity and vibe.
  • Select high-quality sounds that fit the genre, as sound selection is often more impactful than mixing techniques.
  • Layer sounds thoughtfully, balancing low and high frequencies, while using EQ to ensure clarity in your mix.
  • Record authentic audio elements to create an immersive experience, capturing unique sounds that may be absent in studio recordings.
  • Continuously learn and adapt by engaging with sound professionals and utilizing technology to refine your sound design skills.

Understanding Genre Characteristics

recognizing literary genre traits

When you immerse yourself in sound design, understanding the characteristics of different genres is essential for crafting authentic tracks. Each genre has its unique traits, from instrumentation to production techniques. For instance, electronic genres rely heavily on synthesized sounds and robust percussion, while acoustic genres highlight organic instruments and live recordings. Recognizing these distinctions helps you make informed choices about sound layering.

Tempo is another critical factor; EDM typically sits between 120-130 BPM, while hip-hop ranges from 70-100 BPM. These differences influence the overall vibe of your tracks. Additionally, familiarize yourself with genre-specific sound palettes—country music often showcases acoustic guitars and fiddles, while rock leans on electric guitars and drums.

Using reference tracks can greatly enhance your understanding of these genres. Analyzing common chord progressions and song structures helps you create authentic soundscapes. For example, pop often follows a verse-chorus-verse format, while jazz incorporates complex harmonies and improvisation.

Importance of Sound Selection

crucial for effective communication

Choosing the right sounds is vital in sound design, as it fundamentally shapes the vibe and theme of your track. Sound selection often proves to be more impactful than traditional mixing techniques like EQ and compression; if you don't pair your sounds correctly, those techniques can complicate things.

A well-curated sound palette can elevate your production remarkably, making it essential to carefully consider each sound you use.

As a music producer, you might struggle with decision fatigue due to the overwhelming number of sample and preset options available. To combat this, focus on a specific genre and limit your choices to high-quality packs. Techniques like hot swapping for real-time sound previewing and A/B testing can streamline your sound selection process, helping you guarantee that the sounds you choose align with your track's intended vibe.

Advertisement

Additionally, organizing your samples into categories and creating custom folders in your DAW can enhance accessibility. This way, you can quickly find and utilize quality sounds during production, making your workflow more efficient and effective.

Techniques for Layering Sounds

sound layering techniques guide

Sound selection lays the groundwork for your track, but layering techniques can elevate it to another level. To master the art of layering sounds in your sound design, focus on a few key strategies:

  1. Frequency Ranges: Pair low-frequency sounds, like a deep bass, with higher-pitched elements, such as synths. This combination creates a fuller sound without frequency masking.
  2. Multiple Samples: Layer different samples of the same instrument, adjusting each layer's volume and effects. This technique adds richness and dynamism to your mix.
  3. Attack and Release: Experiment with varying the attack and release settings of your layered sounds. This can yield complex textures that enhance emotional impact and depth.

To maintain clarity in your layered sounds, use EQ to carve out space for each layer, ensuring they complement rather than compete with one another.

Recording Authentic Audio Elements

capturing genuine sound details

Recording authentic audio elements is vital for creating an immersive experience in film. When you focus on recording sound effects (SFX) on location, you capture unique sounds that enhance the realism of your project. Studio recordings often lack the character that location audio provides, so make it a priority to explore different environments.

To achieve the best results, utilize multiple microphones during on-set dialogue recording. This approach guarantees clear audio, especially in dynamic settings where background noise can interfere. Collaborate with your crew to allocate time specifically for capturing sound effects within your production schedule. This planning is critical for integrating authentic audio elements into your film's soundscape.

Don't underestimate the power of unique location sounds; they contribute considerably to the overall atmosphere. Recording realistic ambient sound helps create a cohesive auditory experience that aligns beautifully with your visual storytelling.

Regularly reviewing and integrating these sounds into the editing process allows you to identify opportunities for enhancing the audio landscape. By focusing on these techniques, you'll enrich the final product and elevate the viewer's experience.

Balancing and Mixing Strategies

optimal mixing techniques explained

Achieving a well-balanced mix is essential for any film project, as it directly impacts the emotional tone and clarity of storytelling. To effectively balance different tracks, you need to take into account the following strategies:

  1. Prioritize Dialogue: Confirm that dialogue remains clear and prominent. It's the backbone of storytelling, so adjust levels to prevent background noise from overwhelming it. The integration of advanced latest breakthroughs in machine learning tech can also assist in enhancing dialogue clarity through improved audio processing techniques.
  2. Utilize Panning and EQ: Employ panning to create a spatial mix, allowing sounds to occupy their own place in the stereo field. EQ adjustments can help carve out frequencies for each element, enhancing clarity and emotional intensity.
  3. Volume Automation: Use volume automation to dynamically adjust levels throughout the scene. This technique allows you to emphasize key moments and maintain interest without losing coherence in the overall mix.

Regularly reference your mix on different playback systems, like headphones and speakers, to confirm it translates well across environments.

Incorporating feedback loops between sound and visual elements during editing will lead to greater cohesion, resulting in a more immersive experience for your audience. Balancing these elements effectively will elevate your film's impact.

Advertisement

The Role of Music and Silence

music s impact on silence

Music and silence are powerful tools in film sound design, shaping the audience's emotional journey and enhancing storytelling. The right music sets the genre and emotional tone, guiding viewers' expectations and reactions through auditory cues. Whether it's a haunting melody or an upbeat rhythm, music can evoke specific feelings, adding depth to your narrative and compensating for visual limitations.

Strategically using silence can amplify emotional intensity during critical scenes, focusing the audience's attention on performances and heightening their impact. When you blend music and silence effectively, you create a dynamic interplay that elevates tension and emotional engagement.

Remember, background music should complement the on-screen action without overshadowing it. Your actors' performances need to remain the focal point while the music enriches the story.

Subtle musical choices can weave themes and subtext into your film, making the narrative more profound. Consequently, pay close attention to the balance between music and silence; it's essential for a compelling sound design.

Utilizing Technology in Sound Design

innovative sound design techniques

Incorporating technology into sound design opens up a world of creative possibilities.

You're going to use tools that not only enhance your workflow but also help you craft unique sounds that work well for specific genres.

Here are three vital tech elements you should consider:

Advertisement

1. Digital Audio Workstations (DAWs): Tools like Ableton Live allow you to manipulate and loop sounds easily, which is key for creating those genre-specific textures that make your tracks stand out.

2. Plugins and Software Synthesizers: With options like Serum or Omnisphere, you can explore a vast array of sounds.

These tools let you customize your sound palette, ensuring you develop dynamic soundscapes that resonate with current trends.

3. MIDI Controllers and Automation: These technologies enhance your precision, enabling you to make real-time adjustments.

This capability is essential for aligning your sound design with the unique characteristics of your chosen genre.

Advertisement

Continuous Learning and Adaptation

evolving knowledge and skills

In the ever-evolving world of sound design, staying ahead means embracing continuous learning and adaptation. This journey involves regularly exploring new tools, techniques, and software advancements that can enhance your creativity and efficiency.

Don't hesitate to engage in live calls or workshops with experienced producers; they can provide real-time feedback and insights that help you grow. Additionally, leveraging AI in Business can inspire innovative approaches to sound design, helping you to automate certain processes and focus on creativity.

Experimentation is key, so try out different sound selection strategies and layering techniques. You might just discover something new that defines your unique sound.

Participating in online communities and forums allows you to share knowledge and seek advice, keeping you updated on industry trends and best practices.

Regular practice is essential. Reflecting on past projects helps you identify your strengths and weaknesses, enabling you to improve continuously.

As you adapt to the changing landscape of sound design, remember that each experience is an opportunity. Keep going, keep learning, and embrace the evolution of your craft.

Advertisement

Collaborating With Sound Professionals

partnering with audio experts

While collaborating with sound professionals can seem intimidating, it's a game-changer for enhancing your audio projects.

These experts, like sound designers and engineers, bring invaluable skills to the table, helping you create immersive audio experiences tailored to your genre.

To guarantee a successful collaboration, make sure to:

  1. Communicate Your Vision: Clearly express your project's narrative style and emotional tone to align the sound design with your vision.
  2. Involve Them Early: Bringing sound professionals into the fold early on allows for seamless integration of sound design into your visual storytelling, enhancing overall cohesiveness.
  3. Encourage Collaboration: Foster an environment where creative experimentation thrives, enabling sound professionals to contribute unique perspectives and innovative techniques.

Frequently Asked Questions

What Are the 4 Elements of Sound Design?

The four elements of sound design are dialogue, sound effects, foley, and music. You'll need to guarantee each part works together to create an engaging and immersive audio experience for your audience.

Where Do Sound Designers Get Their Sounds?

You can find sounds by exploring sample libraries like Splice or Loot Master. Engaging in online communities helps you discover recommendations, while field recordings and custom creations guarantee your projects feature unique, tailored audio elements.

How Do You Make the Best Sound?

To make the best sound, you need to carefully select and layer sounds that fit your vibe. Experiment with different textures and frequencies, and don't hesitate to organize your samples for quicker access during production.

How Do You Break Into Sound Design?

Did you know that over 80% of sound designers start as hobbyists? To break into sound design, immerse yourself in learning, experiment with DAWs, network with professionals, and seek constructive feedback to refine your skills.

Advertisement

Conclusion

To truly master genre-specific sound design, you've got to embrace the journey of exploration and creativity. Think of your soundscapes as a vibrant tapestry, where every thread adds depth and richness. By honing your skills, collaborating with others, and staying open to new ideas, you'll craft auditory experiences that resonate. So, let your imagination roam free, and remember, the symphony of sound awaits your touch—just waiting to transform your visions into reality. Dive into the endless possibilities that technology and innovation provide, using creative sampling techniques to explore uncharted auditory territories. By blending unconventional sounds with familiar tones, you can evoke emotions and tell stories that captivate your audience. Remember, the key to standout sound design lies in pushing boundaries while staying true to the essence of the genre you’re shaping.

Continue Reading

Sound Design

Sound That Stands Out: How to Build Complex, Layered Sounds Like a Pro

Transform your audio creations by mastering layering techniques that captivate listeners—discover the secrets to achieving professional-quality sound today.

Published

on

mastering complex layered sounds

To build complex, layered sounds that stand out, start by combining multiple audio tracks. Focus on frequency management to prevent muddiness and use EQ to carve out space for each layer. Panning techniques can enhance spatial separation, giving each element room to shine. Begin with two complementary sounds, gradually adding layers for richness. Don't forget modulation effects like reverb and chorus to elevate emotional impact. Regularly evaluate your mix to maintain balance and cohesion. Mastering these skills will set you on the path to professional-quality sound, and there's much more to explore about refining your craft.

Key Takeaways

  • Start with complementary patches and gradually layer sounds to create clarity and richness in your mix.
  • Use EQ to manage frequency overlap and prevent muddiness, ensuring each layer has its own space.
  • Incorporate modulation effects like chorus and reverb to enhance emotional impact and add depth to your sounds.
  • Regularly evaluate your mix in different environments to identify issues and maintain balance across layers.
  • Experiment with octaves and intervals to add complexity and dynamic interest to your melodies.

Understanding Sound Layering

mastering audio texture techniques

When you're delving into sound layering, it's vital to understand how combining multiple audio tracks can elevate your music. Sound layering lets you create a rich, textured sound that captivates listeners. To achieve this, you'll want to layer different sounds effectively, making sure they occupy distinct frequency ranges. This prevents muddiness and keeps your mix clear.

Using EQ is a powerful tool in this process. It allows you to carve out space for each layer, helping them sit well together in the mix. You might also experiment with panning sounds differently to create spatial separation, giving each layer its own sonic space.

Consider using multiple instances of the same patch with slight variations, like detuning, to add depth and richness to your audio. Regularly evaluating your mix is fundamental. This guarantees all layers work together cohesively, maintaining a balance that prevents any single layer from overpowering others.

Effective Layering Techniques

mastering clothing layering strategies

Building on your understanding of sound layering, effective layering techniques are essential to achieving a polished and professional sound in your music. Start with two complementary patches and gradually add more layers, making certain each layer has a distinct role in the mix. This approach maintains clarity and prevents muddiness, which is vital for complex audio.

Additionally, employing actionable tips and strategies can help you refine your layering process and enhance your overall sound design.

Use slight detuning on multiple instances of the same patch to enrich the texture without overcrowding the mix. Experiment with panning to create spatial separation between layers, enhancing the overall depth and texture of your sounds. Employ EQ to carve out specific frequency ranges for each audio track, preventing frequency masking and guaranteeing clarity.

Advertisement

Incorporate modulation effects such as chorus, reverb, and automation to add depth and movement to your layered sounds. These techniques enhance their emotional impact, making your mix more engaging.

Finally, regularly evaluate your mix by listening in different environments. Make adjustments as needed to maintain balance and confirm that all layers contribute positively to the overall sound.

Choosing the Right Sounds

selecting appropriate audio elements

Choosing the right sounds is essential for creating a compelling mix that resonates with listeners. When layering different sounds, prioritize complementary tones and textures to guarantee a harmonious blend. Experimenting with experimental octaves and intervals can add complexity and interest, enriching your melodic elements.

Here's a quick reference table to guide your sound selection:

Sound Type Characteristics Emotional Impact
Percussive Sounds Sharp, rhythmic Energetic, uplifting
Ambient Pads Soft, ethereal Calm, introspective
Bass Elements Deep, resonant Powerful, grounding

Utilizing high-quality sample libraries gives you access to well-crafted sounds, enhancing your mix. When you layer several sounds, think about how they interact; stacking sounds improperly can lead to a cluttered mix. Regularly reference professional tracks within your genre to inspire your choices and identify effective sound combinations. Understanding the emotional impact of each sound will help align your selections with the intended feel of your track, ultimately making your music more engaging.

Common Layering Challenges

layering difficulties encountered often

Layering sounds can present a host of challenges that can trip up even seasoned producers. One of the most common layering challenges is finding sounds that complement each other without clashing. If you don't manage your mix properly, you risk creating a cluttered sound that lacks clarity and definition.

Over-relying on presets can also lead to uninspired layering; exploring custom sound design is essential to craft unique sound combinations. Additionally, understanding the differences between machine learning and AI can offer insights into how algorithm-driven tools can assist in sound selection and layering.

Advertisement

Striking the right balance between experimenting with sounds and maintaining your original vision is vital. You want to create a cohesive sound that resonates emotionally, but mismatched emotions can lead to disjointed tracks.

Keep the emotional impact of your chosen sounds in mind as you layer them, ensuring they align with your overall theme.

Be cautious of phase cancellation as well; layering identical sounds can cause significant issues in your mix, resulting in muddiness.

Advanced Layering Strategies

strategic layering techniques applied

To create truly enchanting layered sounds, start by selecting complementary patches that enhance each other, much like how Blue Skies and Lemonade captures the essence of a perfect day.

Then, incorporate modulation and effects techniques to add movement and complexity, making your mix feel alive.

Complementary Sound Selection

A well-crafted sound selection can greatly enhance your music's overall impact. By focusing on complementary sounds, you can layer multiple elements that boost each other's qualities. For instance, pairing a bright synth with a warm pad creates a rich harmonic texture that enthralls listeners.

Advertisement

Don't shy away from using distinct sounds, like combining a punchy kick drum with a soft, ambient pad; this contrast adds dynamic interest and keeps your mix engaging.

To create new layers of complexity, experiment with different octaves and intervals for your melodic elements. Layer several melodies, each in a unique range, to produce a fuller sound that resonates on various levels. Incorporating sounds from different genres, such as blending acoustic instruments with electronic elements, can also lead to innovative soundscapes.

Regularly evaluate how each sound interacts within the frequency spectrum. Adjusting your EQ settings guarantees clarity and cohesion, preventing frequency masking that can lead to muddiness.

Modulation and Effects Techniques

When crafting complex, layered sounds, modulation and effects techniques play a pivotal role in enhancing your mix. Utilizing modulation effects like chorus, flanger, or phaser can add movement and richness to your layered sounds, creating a sense of depth and complexity that captivates listeners.

Here are three advanced techniques to reflect upon:

Advertisement
  1. Automation of Modulation: Dynamically adjust parameters like depth and rate to keep your sounds evolving throughout the track, maintaining listener engagement.
  2. Sidechain Compression: This technique allows you to create rhythmic pulsing effects between layers, ensuring certain elements pop while keeping a cohesive sound without clutter.
  3. Pitch Modulation: Experiment with slight detuning or vibrato to introduce a unique texture to your sounds, enhancing their emotional impact and richness.

Additionally, applying reverb and delay strategically enhances the spatial dimensions of your mix, allowing each layer to coexist beautifully without overcrowding.

Final Mixing Techniques

advanced audio mixing methods

Steering the final mixing process requires a keen ear and strategic techniques to confirm your track achieves its full potential. Start with careful EQ adjustments to manage frequency overlap; this guarantees each sound occupies its own space, enhancing clarity and preventing muddiness.

High-pass filtering non-bass elements can greatly reduce low-frequency clutter, allowing the kick and bass to resonate more effectively.

Next, layer on top of your sound design by employing compression judiciously. This technique controls dynamics, balancing the mix while preserving the emotional impact of your track. Consider using parallel compression to maintain dynamics and enhance perceived loudness without sacrificing the essence of your sounds.

Don't forget about volume automation, which can create dynamic interest throughout your track. By adjusting levels, you confirm key elements, like vocals and lead instruments, maintain prominence without overpowering other layers.

Finally, always reference your mix across various playback systems—headphones, studio monitors, and consumer speakers—to gain insights into how well your mix translates in different environments.

With these mixing techniques, you'll craft a polished track that stands out.

Advertisement

Frequently Asked Questions

How to Properly Layer Sounds?

To properly layer sounds, start with two complementary ones, then gradually add more. Use EQ to prevent clashes, pan for spatial separation, and incorporate modulation effects for depth, ensuring clarity and balance throughout your mix.

What Is the Layering of Different Sounds Called?

The layering of different sounds is called sound layering or audio layering. You combine multiple audio tracks to create a richer texture, enhancing depth and fullness, making your music more engaging and dynamic for listeners.

How Do You Make Your Own Unique Sound?

Sure, just slap together the same old sounds and expect magic! Instead, immerse yourself in layering, tweak those effects, explore unique samples, and regularly test your mix to uncover the unique sound you're truly capable of creating. Don’t fall into the trap of thinking you need expensive gear or fancy software to innovate—sometimes the most groundbreaking ideas come from working within limitations. Experiment boldly, and don’t shy away from unconventional techniques like resampling or modulation. Even when you use stock plugins for sound design, there’s a wealth of potential waiting to be unlocked with some creativity and a willingness to push boundaries.

How Do You Make Something Sound Fuller?

To make something sound fuller, layer complementary sounds with different frequencies, use slight detuning, and apply spatial effects like reverb. Adjust volume and panning for clarity, ensuring each layer enhances the overall richness. Experiment and refine!

Conclusion

So, you thought creating complex, layered sounds was just about slapping a few tracks together? Think again! Mastering the art of sound layering requires finesse, intention, and a willingness to experiment. By understanding the nuances of layering, choosing the right sounds, and tackling common challenges, you can elevate your music to a professional level. Who knew that crafting standout sounds could be such a meticulous yet rewarding journey? Now, go ahead—make some noise!

Advertisement
Continue Reading

Affiliate disclaimer

As an affiliate, we may earn a commission from qualifying purchases. We get commissions for purchases made through links on this website from Amazon and other third parties.

Advertisement

Vetted

affordable home studios guide affordable home studios guide
Vetted4 weeks ago

15 Best Professional Home Studios Under $1000 for Aspiring Creators

Learn how to build your dream home studio for under $1000 with expert tips and gear recommendations that will elevate...

christmas gifts for musicians christmas gifts for musicians
Vetted4 weeks ago

The Ultimate Gift Guide: 14 Best Christmas Music Production Gifts for Every Aspiring Musician

With 14 unique gift ideas for aspiring music producers, discover the perfect present that will elevate their creative journey this...

affordable thunderbolt audio interfaces affordable thunderbolt audio interfaces
Vetted4 weeks ago

15 Best Thunderbolt Audio Interfaces Under $500: Affordable Options for Aspiring Musicians

The top 15 Thunderbolt audio interfaces under $500 offer exceptional quality and features—discover which one will elevate your music production...

affordable dynamic microphones guide affordable dynamic microphones guide
Vetted4 weeks ago

15 Best Dynamic Microphones Under $150 for Every Budget and Need

Hunt for the perfect dynamic microphone under $150? Discover the top 15 picks that cater to every budget and need,...

optimal studio monitor placement optimal studio monitor placement
Vetted4 weeks ago

15 Best Monitor Positioning Tips for Optimal Studio Acoustics

Get ready to transform your sound with these 15 essential monitor positioning tips that will elevate your studio acoustics to...

top wireless studio peripherals top wireless studio peripherals
Vetted4 weeks ago

13 Best Wireless Peripherals for Studio Use – Enhance Your Creative Workflow

Discover the 13 best wireless peripherals that can elevate your studio experience, but wait until you see how they can...

affordable guitar audio interfaces affordable guitar audio interfaces
Vetted4 weeks ago

15 Best Audio Interfaces for Guitar Under $250 – Affordable Picks for Every Musician

Navigate through our top 15 audio interfaces for guitar under $250, and discover which affordable pick could elevate your music...

top easter music sales top easter music sales
Vetted4 weeks ago

The 9 Best Easter Music Production Sales You Can’t Miss This Season

Unlock incredible deals on Easter music production sales, including must-have resources that promise to elevate your craft—discover what you can't...

optimal studio monitor stands optimal studio monitor stands
Vetted4 weeks ago

15 Best Monitor Stands for an Optimal Studio Setup – Enhance Your Workspace Today

Boost your studio setup with the 15 best monitor stands that enhance sound and organization—discover which options will transform your...

top drum pads for producers top drum pads for producers
Vetted4 weeks ago

15 Best Drum Pads for Beat Making: Elevate Your Music Production Game

Looking to enhance your music production? Discover the 15 best drum pads that will take your beat-making skills to the...

top spring sale gear top spring sale gear
Vetted4 weeks ago

The 2 Best Spring Sale Studio Gear Picks You Can’t Miss

Discover the top two must-have studio gear picks this spring that will elevate your workouts and photography skills—find out what...

affordable music production kits affordable music production kits
Vetted4 weeks ago

14 Best Complete Music Production Setups Under $1000 for Aspiring Producers

Explore the 14 best music production setups under $1000 that will elevate your creativity and gear up your journey—discover the...

Trending

Copyright © 2024 The Sound of Music Guide Affiliate disclaimer As an affiliate, we may earn a commission from qualifying purchases. We get commissions for purchases made through links on this website from Amazon and other third parties.