In your studio, signal flow starts with your instrument or microphone capturing sound, then routes through your mixer, audio interface, or DAW for processing. You adjust effects, EQ, and compression along the way to shape the tone. Finally, the processed signal reaches your speakers, headphones, or recording device. Ensuring each step is properly connected and optimized prevents noise and distortion, and if you keep exploring, you’ll gain a deeper understanding of how all these elements work together seamlessly.
Key Takeaways
- The signal flow begins at the instrument or microphone, directing sound to subsequent devices without noise or distortion.
- Proper routing through mixers, audio interfaces, and DAWs ensures accurate signal delivery and control.
- Signal processing such as EQ, compression, and effects shape the sound before final output.
- Processed audio is routed to speakers, headphones, or recording devices, maintaining signal integrity.
- Final stages involve mixing, mastering, and output device connection to deliver high-quality, professional sound.

Have you ever wondered how a sound travels from your instrument to your speakers? It’s a fascinating process that involves careful planning and understanding of signal flow in the studio. When you start recording or mixing, the journey begins with your instrument or microphone generating an audio signal. This signal then needs to be directed through various devices, which is where audio routing comes into play. Audio routing determines the path your sound takes, whether it’s going to an audio interface, a mixer, or a digital audio workstation (DAW). Proper routing guarantees your signal arrives at the right destination without noise or distortion, giving you control over how your sound is processed and manipulated.
Understanding signal flow ensures your sound reaches the right destination clearly and without distortion.
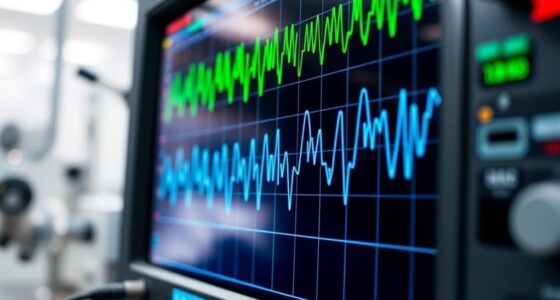
Once the signal reaches your DAW or mixing console, signal processing begins. This step is vital because it shapes the tone, dynamics, and overall quality of your sound. You might add EQ to cut or boost certain frequencies, apply compression to control dynamics, or insert effects like reverb and delay. These processes are performed in real-time or through offline rendering, depending on your setup. Signal processing allows you to enhance your sound creatively and technically, making adjustments that suit your artistic vision. It’s important to understand how each plugin or processor affects the signal, as each change influences the final mix. Additionally, understanding the science behind sound healing can inspire new ways of creatively shaping your audio for emotional impact.
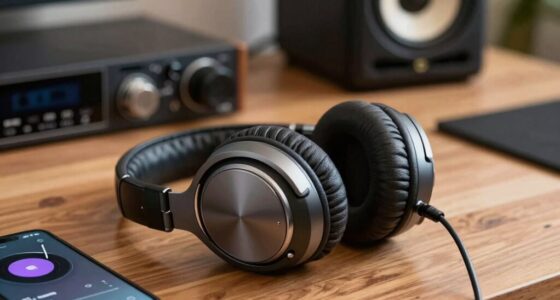
From there, the processed audio is routed to the output stage, which could be speakers, headphones, or recording devices. During this stage, the signal’s level, clarity, and fidelity are finalized. If you’re recording, your audio interface converts the analog signal into digital data, ready for storage. If you’re mixing, the processed signals are combined and balanced to create a cohesive sound. The entire process relies heavily on proper audio routing to guarantee signals don’t get lost or degraded along the way. Good routing practices help prevent feedback, noise, and phase issues, which can ruin a mix or recording.
Finally, your final mix or master is sent out through the speakers or headphones, allowing you to hear the results of your work. Every step in the signal flow, from initial capture to final playback, depends on your understanding of how signals are routed and processed. Mastering this flow guarantees you can troubleshoot problems quickly and achieve clean, professional sound. Whether you’re recording vocals, guitars, or programming synthesizers, knowing how signal processing and routing work together makes a significant difference in delivering high-quality audio. It’s the backbone of any successful studio session, empowering you to control your sound from start to finish.
Frequently Asked Questions
How Does Digital Signal Processing Differ From Analog in Studio Setups?
Digital signal processing differs from analog in studio setups because it involves digital conversion, where analog signals are transformed into digital data for manipulation. Unlike analog versus, which processes signals continuously, digital processing offers precise control, easier editing, and effects that are consistent. You benefit from lower noise and improved clarity, but it requires conversion steps that can introduce latency. Overall, digital processing provides flexibility and accuracy that enhance your studio workflow.
What Are Common Troubleshooting Steps for Signal Loss Issues?
When troubleshooting signal loss, start by checking your cable routing for loose or damaged cables. Make certain all connections are secure and properly plugged in. Verify equipment grounding to prevent interference or ground loops. If issues persist, test each component individually, replace suspect cables, and confirm power supplies are stable. These steps help identify where the signal breaks down and restore proper flow through your studio setup.
How Do Different Microphones Affect Overall Signal Flow?
Different microphones affect your signal flow based on their placement and polar pattern. If you place a cardioid microphone close to the source, it captures more direct sound and reduces background noise, improving clarity. Using an omnidirectional microphone captures ambient sound, which can add depth but may introduce noise. Choosing the right polar pattern and proper microphone placement guarantees your signal flows smoothly, maintaining quality and reducing issues like feedback or signal loss.
What Role Does Acoustics Play in Signal Quality?
Think of your studio as a musical garden; acoustics shape how sound blooms. Room acoustics and sound reflection directly influence your signal quality by adding clarity or unwanted echo. Poor acoustics cause sound waves to bounce chaotically, muddying your recordings. Good acoustics, however, nurture clean, precise signals, ensuring your audio flows smoothly from source to output. You control this environment to keep your sound vibrant and true.
How Can I Optimize Signal Flow for Live Recording Sessions?
To enhance signal flow during live recording sessions, focus on clear signal routing and strategic equipment placement. Keep cables organized to prevent interference and accidental disconnections. Place microphones and instruments to minimize noise and feedback, ensuring ideal sound capture. Use patch bays or mixers to streamline routing, and position gear for easy access and minimal signal degradation. Regularly check connections and levels to maintain high-quality recordings throughout the session.
Conclusion
Understanding signal flow from end to end helps you troubleshoot issues quickly and make sure your recordings sound their best. Many believe that mastering this flow guarantees perfect audio, but real-world variables like equipment quality and setup can still cause hiccups. By consistently studying and testing your signal path, you can identify and fix problems before they affect your sound. Remember, even the most experienced engineers rely on a solid grasp of signal flow to achieve professional results.