
To create professional spaces in your mix, you need to master reverb and its various types, like plate or hall. Start by managing your frequencies; use high-pass filters to clear out low-end muddiness and identify resonant frequencies. Panning is essential—distribute instruments as they'd sit in a live setting for balance. Don't forget about pre-delay settings; they enhance clarity by preventing overlapping sounds. Layer different textures and utilize EQ on reverb sends to keep your mix clean. By experimenting with these techniques, you'll soon craft mixes that captivate listeners. There's plenty more to discover for your mixing journey.
Key Takeaways
- Choose the right type of reverb (plate, hall, room) to match the desired ambiance of your mix.
- Utilize pre-delay settings to enhance clarity by allowing initial sounds to be heard before the reverb effect.
- Implement high-pass filters on reverb sends to prevent low-frequency buildup and maintain mix clarity.
- Balance panning across the stereo field to create a natural and immersive listening experience.
- Experiment with layering and texturing sounds, using different reverbs and delays to add depth and richness to the mix.
Understanding Reverb Basics
As you immerse yourself in mixing, understanding reverb basics is essential for creating professional-sounding tracks. Reverb simulates the natural reflections of sound in a space, adding depth and ambiance to your mix. Different types of reverb, like plate, hall, and room, each offer unique characteristics that can enhance specific elements. For example, hall reverb can make vocals soar, while room reverb might tighten up drums.
Key parameters of reverb, such as pre-delay, decay time, and diffusion, let you shape the spatial quality of the sound. Pre-delay controls how long it takes for the reverb to kick in, creating a sense of distance. Decay time affects how long the reverb lingers, and diffusion determines how smoothly the reflections blend together.
To maintain clarity in your mix, don't forget to utilize EQ on your reverb sends. Filtering out low frequencies can prevent muddiness, ensuring your sounds remain crisp while still feeling spacious.
Also, consider whether to use mono or stereo reverb: mono provides focus, while stereo enhances width. Choosing the right type is vital for achieving the soundstage you envision.
Techniques for Creating Space
Creating space in your mix is essential for achieving a professional sound that feels immersive. By employing a few key techniques, you can enhance clarity and depth, allowing each element to shine without overcrowding your mix.
Effective sound design plays a critical role in this process, as it helps to create audio elements that complement the overall composition. Here are three effective methods for creating space:
1. Utilize Filters: Isolate kick drum and bass frequencies using filters to prevent low-end clutter. This helps maintain clarity in higher frequency instruments, giving each element its own space.
Techniques like field recording can also provide authentic sounds that enhance this effect.
2. Adjust EQ: Use EQ adjustments to resolve frequency clashes. Techniques like sweeping and reductive EQ can eliminate muddiness, enhancing overall space and clarity in your mix.
3. Panning and Silence: Carefully pan elements across the stereo field to achieve a balanced mix. Incorporating silence strategically can emphasize key parts, while layering sounds with different textures adds dimensionality, further creating space.
Importance of Mixing Space

Mixing space plays an essential role in defining the overall quality of your audio projects. A well-structured mixing space enhances clarity and definition, ensuring that each element shines through without frequency masking. When you create a professional mix, you want to achieve width, depth, and dimension, factors that greatly contribute to listener engagement and enjoyment.
If your mixes lack spatial quality, you might end up with narrow sounds that fail to utilize the full stereo field. This diminishes the audio experience and can make your tracks feel flat. Properly managing the balance between left and right channels is vital; every element should hit at similar levels without crowding each other out.
Additionally, incorporating silence strategically can emphasize key elements in your mix, highlighting the importance of space. By allowing certain sounds to breathe, you create a dynamic range that captivates your audience.
Frequency Management Strategies
Effective frequency management is essential for achieving a polished mix, especially when you want each instrument to shine without competing for sonic space.
By strategically manipulating frequencies, you can guarantee clarity and definition throughout your mix. Here are three key strategies to take into account:
- Use High-Pass Filters: Apply high-pass filters to remove unnecessary low-end frequencies from instruments like guitars and vocals. This helps carve out space in the mix, allowing high frequencies to stand out.
- Identify and Reduce Resonant Frequencies: Utilize sweeping EQ techniques to find and cut resonant frequencies that may cause muddiness. This not only clarifies individual sounds but also enhances the overall balance.
- Embrace Reductive EQ Techniques: Focus on cutting frequencies instead of boosting them for greater clarity. This approach can help create more space within your mix, especially in the high frequencies.
Tools for Effective Mixing
Tools for effective mixing can greatly enhance your project's overall sound quality. Start with a Digital Audio Workstation (DAW), which provides a flexible environment for integrating various plugins, including reverb and delay. These tools help you create a spatial quality in your mix that pulls listeners in.
Utilizing EQ tools allows you to make precise frequency adjustments, which is essential for carving out space for each element and preventing frequency masking. To widen your soundstage, stereo imaging tools effectively distribute sounds across the left and right channels, creating an immersive experience.
Don't underestimate the power of metering tools that monitor levels and dynamics. They guarantee all elements of your mix are balanced and contribute to the overall clarity. Finally, using effects like well-adjusted reverb and delay sends adds depth and space without compromising the clarity of individual elements.
Here's a quick overview of essential mixing tools:
| Tool Type | Purpose |
|---|---|
| DAWs | Flexible mixing environment |
| EQ Tools | Frequency adjustments |
| Stereo Imaging | Widening soundstage |
| Metering Tools | Monitoring levels and dynamics |
Common Mixing Mistakes
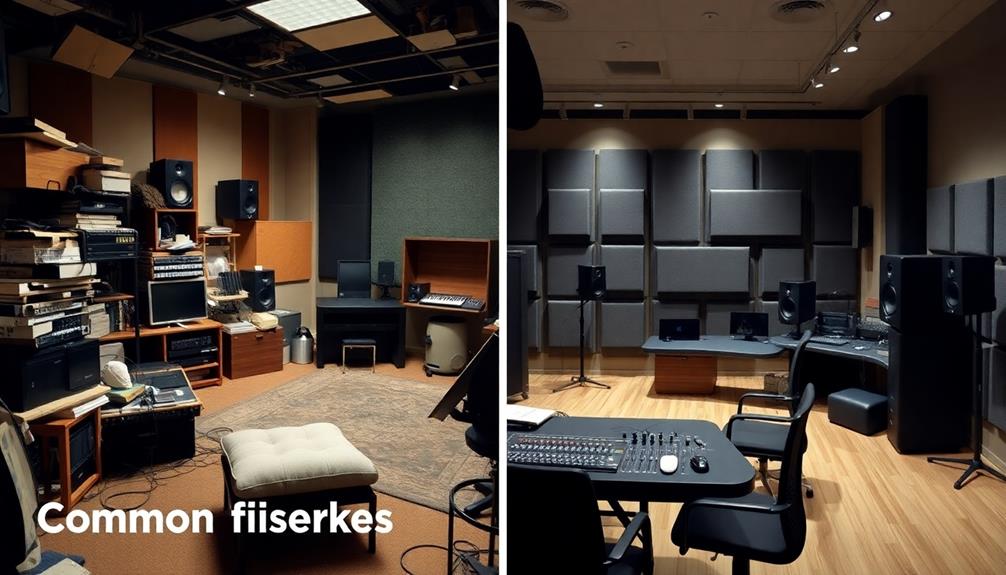
When mixing, you might find yourself overusing reverb, which can muddy your sound and obscure important details.
Ignoring panning balance can also lead to an unbalanced mix, where instruments clash instead of complementing each other.
Let's explore these common mistakes and how to avoid them for a cleaner, more professional sound.
Overusing Reverb Effects
Reverb can be a powerful tool in music mixing, but overusing it often leads to muddiness and a lack of definition in your sound.
One thing to keep in mind is that too much reverb applied to all elements creates a disjointed soundstage, making it hard for listeners to appreciate each instrument's details.
Here are three common pitfalls to avoid:
- Long Reverb Tails: Using a reverb with a long tail can cause overlapping instruments, leading to frequency masking and diminished clarity.
- Neglecting Pre-Delay: Ignoring pre-delay settings results in a lack of clarity. Pre-delay allows the listener to hear the dry sound before the reverb kicks in, keeping the mix more defined.
- Low-Frequency Build-Up: Failing to filter out low frequencies in your reverb sends can introduce unwanted muddiness. Reverb naturally adds low-end frequencies, which can cloud your mix further.
Ignoring Panning Balance
Overusing effects like reverb can obscure the clarity of your mix, but ignoring panning balance can create an equally detrimental soundstage. When you neglect panning, certain elements may dominate, leading to a confusing listening experience. To achieve a professional mix, consider the following guidelines:
| Instrument | Suggested Pan Position | Effect on Mix |
|---|---|---|
| Main Vocals | Center | Maintains focus and clarity |
| Background Vocals | Slightly Left/Right | Creates space and depth |
| Guitars | Left/Right | Mimics live performance setup |
| Drums | Center with slight spread | Balances the rhythm section |
Panning instruments to reflect a live setup not only enhances clarity but also avoids frequency masking. Heavy panning to one side skews the stereo image, giving a flat sound. Aim for balanced levels between channels for a cohesive mix. Use visual waveforms in your DAW to identify any panning imbalances. Making these adjustments can vastly improve your mix's overall engagement and professionalism. Remember, proper panning is one of the key elements in creating an immersive listening experience.
Panning Techniques for Clarity

How can you create a clear and engaging mix through effective panning techniques? By strategically positioning your instruments in the stereo field, you can enhance the spatial quality of your mix. Here are three key panning techniques to take into account:
- Natural Positioning: Place instruments where they'd naturally occur in a live setting. This not only adds realism but also helps listeners navigate the mix more intuitively.
- Balanced Background Vocals: Use equal panning for background vocals, spreading them out in opposite directions. This creates a wider soundstage while keeping the main vocal centered for clarity and focus.
- Avoid Heavy Panning: Steer clear of heavy panning to one side, as it can lead to an unbalanced mix. Aim for even distribution across the stereo field to maintain listener engagement.
Additionally, visualizing waveforms in your DAW can help you spot any imbalances in panning.
Implementing mono sounds for certain elements can also save space, allowing for richer layering of stereo effects.
Enhancing Mix With Effects

While adding effects can elevate your mix, it's crucial to use them thoughtfully to enhance clarity and depth.
Reverb, when used judiciously, can add spatial depth, enriching the listener's experience by creating ambiance without overwhelming primary elements. Start by applying high-pass filters to your reverb; this prevents low-end buildup and keeps your mix clear and focused.
Utilizing pre-delay settings in reverb helps maintain clarity, allowing the main elements to shine through while still achieving that desirable sense of space.
Layering different types of reverb can create a complex, rich effect, but remember to adjust each layer's send levels. This guarantees clarity and avoids muddiness, which can detract from your mix's overall impact.
Vocal Mixing Techniques

When mixing vocals, you'll want to prioritize clarity to make sure your main vocal stands out.
Panning background vocals can add depth, while reverb layering enhances the overall texture without losing that essential focus.
Balancing these elements is key to creating a professional sound in your mix.
Vocal Clarity Techniques
Achieving vocal clarity in your mix is essential for a polished sound. To guarantee your lead vocal stands out, consider these techniques:
- Center Your Main Vocals: Keep your lead vocal in the center of the mix. This creates a focal point, making it easier for listeners to connect with the song.
- Panning Background Vocals: Subtly pan your background vocals to the sides. This enhances spatial separation without causing interference, allowing your lead vocal to shine.
- Utilize Reverse Reverb: Implement the Reverse Reverb technique to enrich the texture of your vocals. This adds depth while preserving clarity, ensuring that your lead vocal remains prominent.
In addition, experiment with Canyon Reverb for those expansive effects while maintaining consistent settings across mixes.
Adjust send levels for reverb and delay, ensuring they complement rather than overwhelm your vocals.
Finally, focus on subtle enhancements with your VMR settings, particularly for hook vocals that need to stand out.
This careful attention to detail will elevate your mix, resulting in a professional sound that keeps your lead vocal at the forefront.
Reverb Layering Methods
Building on the techniques for vocal clarity, reverb layering can greatly enhance the depth and dimension of your mix. Start by utilizing different types of reverb, such as plate and hall, to create a rich, immersive sound while keeping your lead vocal clear.
Adjust the pre-delay setting for each layer to maintain presence in the mix, allowing the reverb to carve out space without muddying the articulation.
Experiment with various send levels for each reverb layer. Subtle levels can enrich the vocal texture without overpowering the original sound.
To further refine your reverb layering methods, apply EQ on your reverb returns. High-pass filters help remove low-end buildup, while tailoring mid and high frequencies prevents frequency clashes with the main vocal.
Consider adding a delay alongside your reverb. This combo can add richness and fullness, but make sure the delay time complements the track's tempo and rhythm.
Panning for Depth
Panning plays a crucial role in crafting depth within your vocal mix, allowing each element to shine without competing for space. By strategically positioning your background vocals and supporting elements away from the center, you create a wider soundstage that emphasizes clarity and focus on the main vocal.
Here are three key techniques for effective panning for depth:
- Equal Panning: Distribute vocal stacks evenly in opposite directions to enhance depth and dimension. This prevents crowding in the center, letting each layer stand out distinctly.
- Natural Instrument Panning: Pan instruments as they'd be placed in a live setting. This practice not only fills the stereo field effectively but also creates a more immersive listening experience.
- Monitor Balance: Avoid heavy panning to one side, as it can lead to an unbalanced mix. Keep an eye on levels and adjust panning to maintain equilibrium between left and right channels.
Utilizing visual waveforms in your DAW can also help identify imbalances, ensuring that all elements contribute to a cohesive and professional mix.
Embrace these panning techniques to achieve a rich, dynamic vocal mix.
Tips for Continuous Improvement

Improving your mixing skills is a continuous journey that can greatly enhance the quality of your tracks. To take your reverb game to the next level, regularly experiment with different reverb settings and types—like plate, hall, or room. Each can provide a unique spatial quality without muddying everything else in your mix.
Additionally, exploring automation in business can inspire creative ways to apply dynamics in your mixes. Seek feedback from peers and listeners, as they can offer valuable insights into your use of reverb and overall mix clarity. Experimenting with techniques like professional risers and transitions can enhance the emotional impact and flow of your mixes, creating a more engaging listening experience. Don’t hesitate to revisit your sessions to fine-tune these elements, as subtleties in transitions often make a significant difference. Remember, a well-balanced mix is the result of iterative improvements and thoughtful attention to detail.
Don't forget to stay updated on the latest mixing techniques and tools. Follow industry professionals and participate in online forums or workshops dedicated to audio mixing.
Practice using automation on reverb sends to dynamically adjust the effect during different sections of a song. This approach enhances emotional impact while maintaining clarity.
Additionally, keep a reference library of well-mixed tracks that effectively use reverb. This can inspire your mixing choices and serve as a benchmark for your progress over time.
Frequently Asked Questions
How to Create Space With Reverb?
To create space with reverb, you'll want to use mono reverb for focus, apply pre-delay for clarity, and layer different types while adjusting send levels to maintain balance and prevent muddiness in your mix.
How Can I Make My Mixes Sound More Professional?
Did you know that 70% of listeners notice mix clarity? To make your mixes sound more professional, use high-pass filters, implement panning, and reference across systems. Focus on clarity, balance, and spatial quality for outstanding results.
How to Create Space in Your Mixes?
To create space in your mixes, use high-pass filters on non-bass instruments, pan elements thoughtfully, apply reverb with pre-delay, and utilize reductive EQ to avoid clashes. Experiment with silence for dynamic emphasis.
How Do You Make Spaces for Vocals in a Mix?
To make spaces for vocals in your mix, use EQ to clear out low frequencies, apply reverb with a short pre-delay, and pan background vocals off-center. Experiment with layering effects for added depth without losing clarity.
Conclusion
Incorporating reverb effectively can transform your mixes, adding depth, clarity, and professionalism. By mastering reverb basics, experimenting with panning techniques, and managing frequencies, you'll create immersive spaces that captivate listeners. Embrace the art of mixing by enhancing your tracks with thoughtful effects and refining your vocal techniques. Stay curious, keep practicing, and always seek improvement. Remember, the right reverb doesn't just fill the space—it elevates your music to new heights. So, let your creativity flow!