To plan your studio upgrade path, start by clearly defining your production goals, whether it’s mixing, mastering, or sound design. Assess your current setup and identify gaps or issues, like monitor placement or acoustic treatment, that could hinder your progress. Match new gear to your specific needs, focusing on quality and compatibility. Prioritize improvements that enhance accuracy and clarity. Keep an eye on your evolving goals to make smart choices—more insights can help you create a truly effective studio environment.
Key Takeaways
- Define your specific production goals to identify essential gear upgrades that enhance your workflow.
- Prioritize acoustic treatment and monitor placement to ensure your current gear performs optimally before additional investments.
- Match new equipment to your skill level and project scope, avoiding unnecessary or overly advanced gear.
- Establish a budget aligned with your goals, balancing quality and affordability to maximize value.
- Plan incremental upgrades, evaluating the impact of each change on your sound quality and workflow efficiency.

Upgrading your studio can considerably enhance your workflow and creative output, but it requires careful planning to guarantee the investment pays off. One of the most critical aspects of this process is optimizing your monitor placement. Properly positioning your monitors ensures you’re hearing a true representation of your mix, which is essential for making accurate decisions. You want your monitors to be at ear level and forming an equilateral triangle with your head to minimize listening fatigue and stereo image issues. Avoid placing monitors directly against walls or on stands that transmit vibrations, as this can color your sound. Instead, use stands or isolation pads to reduce unwanted reflections and vibrations that can distort your perception. Small adjustments in monitor placement can dramatically improve clarity, imaging, and bass response, so take your time experimenting with angles and distances until your sound feels balanced and natural.
Alongside monitor placement, investing in acoustic treatment is vital to creating an environment conducive to accurate listening. Acoustic treatment isn’t just about noise reduction; it’s about controlling the room’s reflections, resonances, and standing waves that can skew your perception of sound. Start by identifying reflective surfaces—like glass, hard walls, or ceilings—and treat them with absorptive materials such as acoustic panels or foam. Bass traps in corners help manage low-frequency buildup, which is crucial for a balanced mix. Diffusers can scatter sound evenly across the room, preventing flutter echoes and dead spots. When planning your acoustic treatment, consider your room’s size and shape, and prioritize treatments that target problem frequencies. Doing so will help you achieve a more neutral listening environment, making your mixes translate better across different systems. Additionally, utilizing a high-quality home theatre projector can enhance your visual environment, ensuring your workspace is as immersive as your audio setup.
Both monitor placement and acoustic treatment are interconnected; poor placement can be exacerbated by an untreated room, and vice versa. Before investing in new gear, assess your current setup and make incremental adjustments. Focus on establishing a stable, well-balanced listening environment that reflects your goals—whether that’s producing vocals, mixing electronic music, or mastering. Remember, upgrading your studio isn’t just about buying the latest equipment but about creating a space where your gear can perform at its best. Correct monitor placement and proper acoustic treatment are foundational steps toward that goal. Once you’ve optimized those elements, your new gear will serve you more effectively, helping you produce professional-quality work that truly matches your creative vision.
Frequently Asked Questions
How Do I Prioritize Upgrades for Limited Budgets?
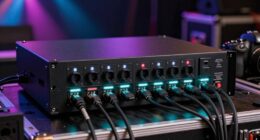
To prioritize upgrades on a limited budget, start by evaluating your most essential needs and allocate your budget accordingly. Focus on upgrade sequencing by upgrading the gear that will have the biggest impact first, like your audio interface or monitors. Save for less critical items and plan your budget allocation carefully, ensuring each upgrade brings you closer to your goals without overspending. This approach maximizes your resources effectively.
What Equipment Is Essential for Beginner Studios?
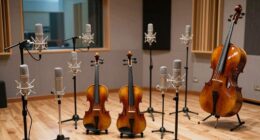
You need essential equipment like a good microphone, headphones, and a reliable audio interface. Focus on improving room acoustics with bass traps and diffusers, and use soundproofing techniques to minimize noise. These steps help you get clear recordings and a professional sound without overspending. Prioritizing acoustic treatment and soundproofing alongside your gear guarantees your beginner studio is functional and ready for quality production.
How Can I Future-Proof My Studio Investments?
Think of your studio as a garden that needs perennial plants to thrive. To future-proof, invest in adaptable gear that enhances studio acoustics and guarantees software compatibility. Opt for versatile equipment that can grow with your skills and tech advancements, avoiding quick obsolescence. Regularly update your setup, and stay informed about new innovations, so your studio remains a lush, vibrant space, ready for whatever creative season comes next.
What Are Common Pitfalls During Studio Upgrades?
You should watch out for equipment compatibility issues, which can cause delays and extra costs. Don’t rush upgrade timing; upgrading too early or too late can hinder progress and waste resources. Always research gear that integrates well with your current setup. Avoid neglecting your actual goals, and carefully plan each step. Staying patient and strategic helps you prevent common pitfalls and ensures your studio upgrade is smooth and effective.
How Do I Measure Success After Upgrading?
You should measure success by tracking your progress against specific benchmarks. For example, 75% of successful studio upgrades see improved sound quality or workflow efficiency within three months. Set clear goals, then review your performance regularly to gauge improvements. By measuring progress this way, you can identify if your upgrade meets your goals, ensuring your investment aligns with your creative needs and helps you reach new heights.
Conclusion
Ultimately, upgrading your studio should align with your goals. For example, if you’re aiming to produce professional vocals, investing in a high-quality microphone and acoustic treatment makes sense. Imagine starting with basic gear, then gradually adding a preamp and monitor speakers as your skills grow. Keep your focus on what’s essential for your sound, and upgrade intentionally. This way, your studio evolves efficiently, helping you reach your creative dreams without unnecessary expense.