
TL;DR
Acoustic dampening isn’t the same as soundproofing. Proper placement of panels and mic, combined with ventilation, transforms a closet into a workable vocal booth. Distance and sealing gaps matter most.
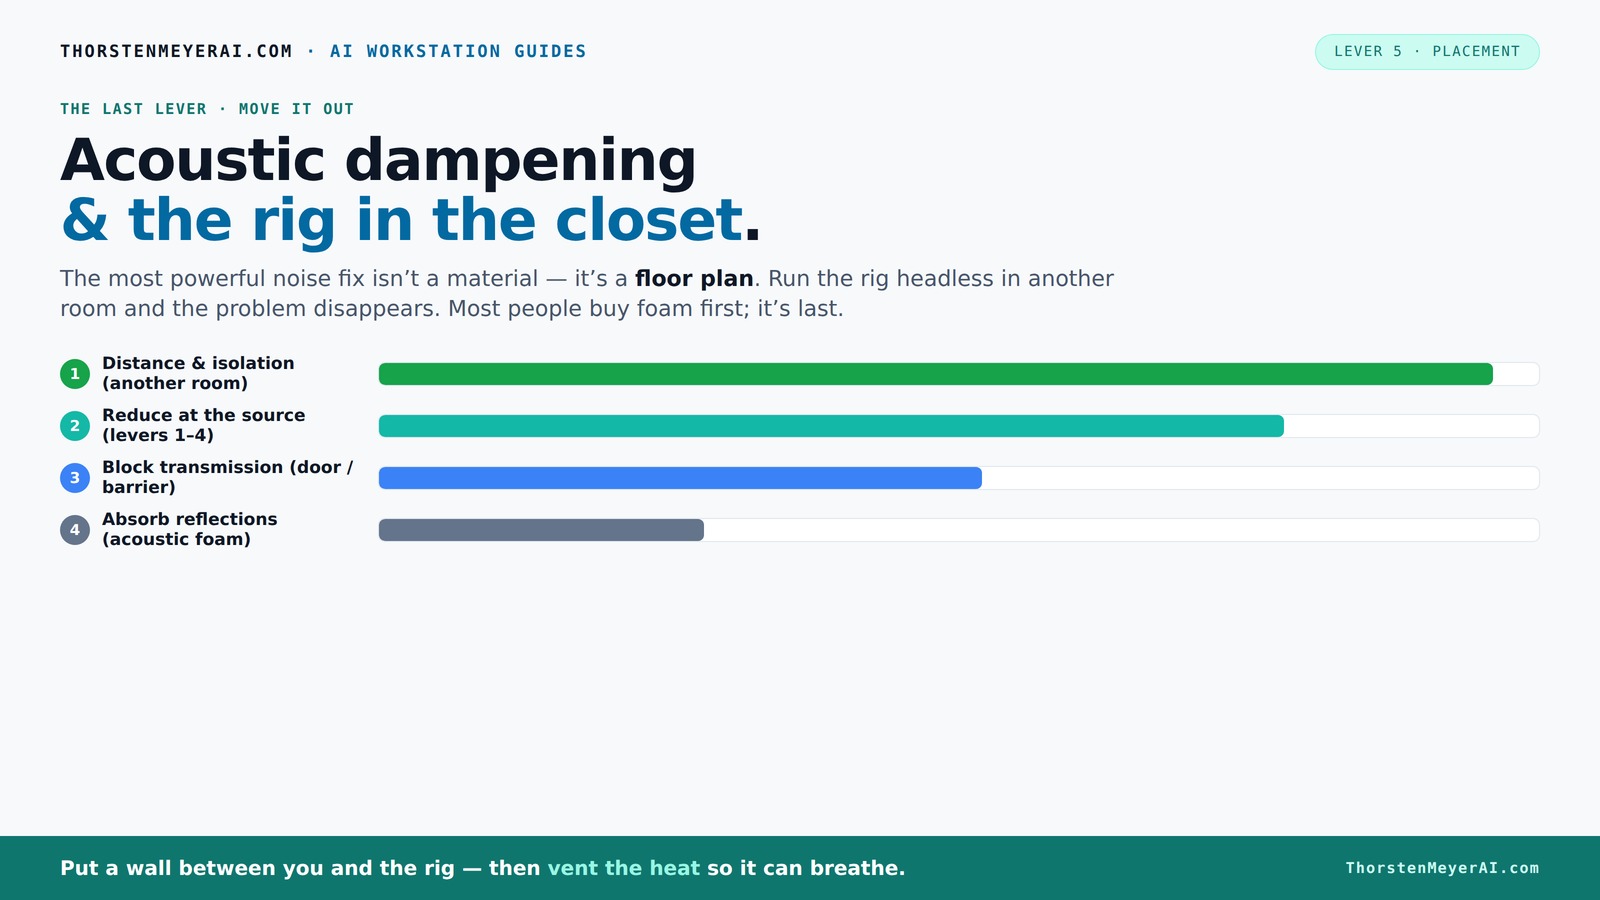
Acoustic dampening
& the rig in the closet.
The most powerful noise fix isn’t a material — it’s a floor plan. A rig you can’t hear because it’s in another room beats any amount of foam. Tap the approaches in Part 1 to see what actually works.
(another room)
(levers 1–4)
(door / barrier)
(acoustic foam)
Contain the noise, not the heat
Key Takeaways
- Acoustic dampening reduces echo but doesn’t block sound transmission; sealing gaps is essential for noise control.
- Place panels at reflection points first—mainly behind and around the microphone—then treat corners for bass and low-end issues.
- Sealing the door with blankets or weatherstripping cuts down sound leaks more than a dozen foam panels. You might also find useful this resource about acoustic setup. For more ideas, see this guide on acoustic dampening and setup.
- Ventilation is vital—use quiet fans or ducting to prevent heat buildup without compromising sound isolation.
- Treat the room progressively: start with reflection control, then seal gaps, then add ventilation. It’s a layered approach.

Focusound 52 Pack Acoustic Foam Panels 1" x 12" x 12" Sound Proof Foam Panles Soundproofing Noise Cancelling Wedge Panels for Home Office Recoding Studio with 300PCS Double-Side Adhesive
- Soundproofing Design: Triangular grooves for noise absorption
- Includes Adhesive Tape: 300pcs double-sided adhesive for easy installation
- Easy Shape Recovery: Reforms after soaking in water
As an affiliate, we earn on qualifying purchases.
As an affiliate, we earn on qualifying purchases.
Why Acoustic Dampening Isn’t the Same as Soundproofing (And Why It Matters)
Acoustic dampening and soundproofing are often confused, but they solve different problems. Dampening reduces echo and reflections inside a space—think of it as softening the room’s voice. Soundproofing, on the other hand, blocks sound from escaping or entering—like sealing a vault. In a closet, your goal is usually dampening to improve clarity, not total sound isolation.
For example, adding foam panels on the walls will soften the echo, making vocals sound warmer and less boxy. But if you want to prevent your neighbors from hearing your singing, you need to seal gaps around the door and add mass or barriers. Knowing the difference helps you set realistic expectations and choose the right materials.
Understanding this distinction is crucial because it influences your approach: dampening is about improving the internal sound quality, while soundproofing involves creating a barrier. Over-investing in soundproofing in a small closet can lead to unnecessary complexity and cost, while focusing on effective dampening can drastically enhance clarity without major modifications.
Where to Place Acoustic Panels and Why It Matters
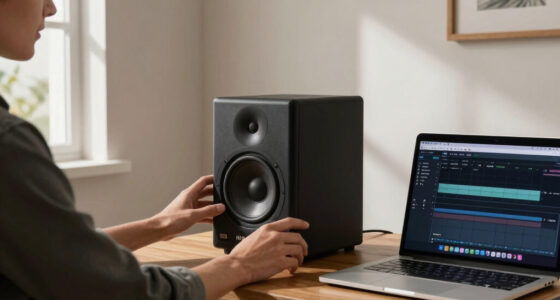
Placing your acoustic panels in the right spots makes all the difference. Start by identifying your primary reflection points: the wall behind your mic, the ceiling above, and the wall directly opposite. These are the spots where sound bounces most and creates echo or comb filtering.
For example, if you record vocals, position panels at ear level behind and around the mic. Use a mirror to find reflection points—any spot where you see the mic in the mirror is a good panel placement. In tiny closets, covering more surfaces helps tame flutter echoes and low-end buildup caused by hard surfaces.
Think of it like giving your sound a softer landing—placing foam where sound hits hardest reduces harshness and makes your recordings clearer. But it's important to understand that not all reflection points are equal; prioritizing the most problematic spots yields the best results and avoids over-treatment that can dull the room's natural liveliness.
Do You Need Bass Traps in a Tiny Closet? When They Help and When They Don’t
Bass traps are designed to tame low-frequency issues—those deep, boomy sounds that make your voice or instruments sound muddy. In a tiny closet, bass buildup can happen fast because the small space creates standing waves. If you notice a 'boxy' or 'boomy' sound, bass traps in the upper corners can help by absorbing these problematic low-end frequencies before they reflect and reinforce each other.
However, for most small closet setups used mainly for vocals or voice-over, bass traps aren’t always necessary. They become essential only if you’re working with loud, bass-heavy sources or notice significant low-end resonance that muddies your recordings. Treating the walls and ceiling with broadband absorption often provides enough control without the added complexity of bass traps.
For example, a YouTuber recording vocals in a closet found that adding corner bass traps reduced muddiness during loud singing sessions—saving their recordings from sounding hollow. But if your recordings sound clear and tight without noticeable low-end issues, investing in bass traps may be unnecessary and could even deaden the sound further if overused.
How Much of the Closet Should You Cover? The Balance Between Absorption and Space
In small spaces, more isn’t always better—over-treating can deaden your sound or make the room feel unnatural. Start by covering the reflection points, the door, and ceiling. Then, add panels to the corners for bass management if needed. A good rule: treat the surfaces that cause the most echoes and reflections, but be mindful of overdoing it.
For example, a tiny closet with parallel walls can cause flutter echoes and a boxy sound. Covering 50-70% of the reflective surfaces with foam or blankets usually balances clarity with liveliness. If the room sounds dead or muffled, remove some panels or add diffusers to restore some natural ambiance. The goal is to reduce harsh reflections without making the space sound dead or unnatural, which could negatively impact your recordings' warmth and presence.
Think of it like seasoning a dish—you want enough to taste the flavor, but not so much that it’s overwhelming. Learn more about acoustic treatment strategies at leluxart.com. For more on room treatment balance, visit this site about handmade crafts and DIY acoustic projects. Carefully balancing treatment ensures your recordings sound natural and professional.
Sealing the Door and Gaps: The Cheapest, Most Effective Soundproof Hack
The door is often the weakest link for sound leakage in a closet. Sealing gaps and cracks is the simplest way to cut down on noise escape. Use weatherstripping, draft stoppers, or hung blankets to block gaps around the door frame. This approach directly reduces sound transmission, which is especially important if you’re recording at high volume or want to prevent sound bleed.
For example, hanging a thick moving blanket over the door can reduce leakage by 10-20 dB—making your recordings much cleaner and less likely to disturb others. Sealing the gaps around outlets and vents with acoustic caulk further prevents sound leaks. These simple, inexpensive fixes often provide the most noticeable improvement in noise isolation and are worth prioritizing before investing in complex treatments.
Think of it as putting a lid on a pot—it keeps the sound from escaping and makes your recordings cleaner and less distracting for others. The tradeoff is that while sealing improves isolation, it can also make ventilation more challenging, so plan accordingly to maintain airflow without sacrificing soundproofing.
Ventilation and Power: Keeping Your Closet Studio Cool and Functional
Ventilation is often overlooked, but it’s crucial. A sealed closet traps heat, especially with a powerful mic or audio interface running for hours. Without proper airflow, your gear can overheat, potentially causing noise issues or damage. You need a way for heat to escape without letting sound leak out, which requires careful planning.
Options include installing a quiet exhaust fan, ducting air in and out, or using a small, low-noise AIO liquid cooling system. These solutions keep your gear cool and your room comfortable while minimizing noise transmission. Proper ventilation also helps prevent humidity buildup, which can damage equipment and affect recording quality.
For example, a streamer in a small closet installed a quiet inline fan with ducting, maintaining temperatures below 80°F even after hours of recording—without increasing noise levels. Balancing ventilation with soundproofing is key: using ducting and quiet fans ensures your space remains cool and functional without compromising your acoustic isolation goals.
Putting It All Together: Your Step-by-Step Closet Soundproofing Plan
- Identify your primary reflection points with a mirror or by ear.
- Place absorption panels at these reflection points—walls, ceiling, and door.
- Add bass traps if low-end issues are present, especially in the corners.
- Seal gaps around the door and outlets with weatherstripping or acoustic caulk.
- Set up ventilation: install a quiet exhaust fan or duct system.
- Test your setup with a loud source, then tweak panel placement and sealing as needed.