To achieve a clean chain from your mic to your converter, start by setting your preamp gain to hit around 75-80% of max during loud parts, giving you enough headroom. Make sure each device in your chain is properly calibrated to avoid distortion or noise. Maintain consistent levels through each stage to keep your signal clear and free from artifacts. Keep your gain staging disciplined—continue exploring to discover how fine-tuning each step refines your sound.
Key Takeaways
- Calibrate each stage of the signal chain to ensure consistent, optimal levels, preventing distortion and noise.
- Set microphone preamp gain to 75-80% of maximum during loudest peaks for adequate headroom.
- Maintain proper gain structure through compressors, EQs, and converters to preserve signal clarity.
- Regularly monitor levels to avoid clipping, distortion, and excessive noise at every processing point.
- Use equipment calibration and level checks to establish a clean, professional, and balanced recording chain.
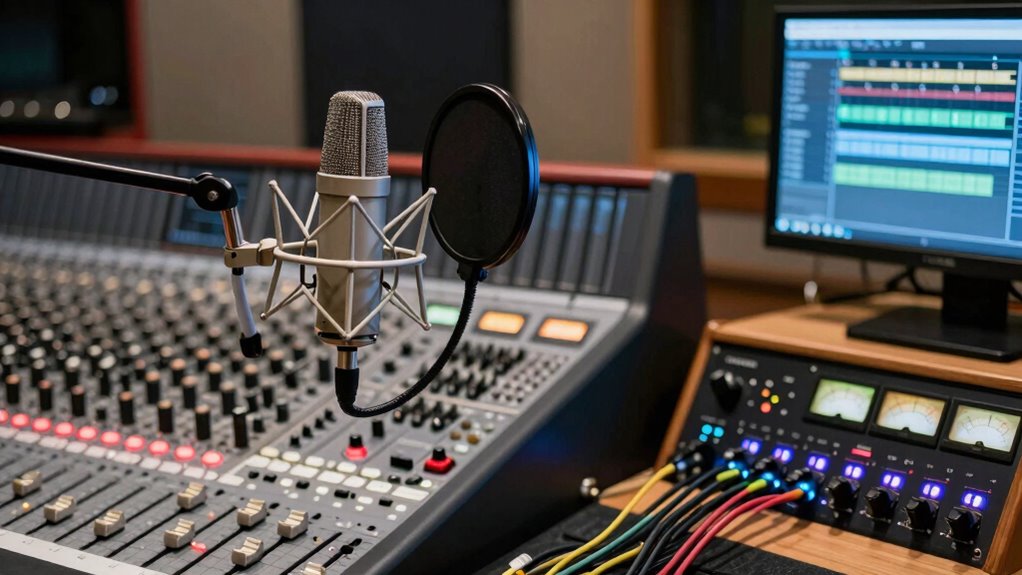
Gain staging is a fundamental process in recording and mixing that guarantees your audio signals are optimized at every stage. When you start with proper gain staging, you ensure your signal remains clean and clear from the moment it leaves the microphone to the final conversion. The first step is understanding how to achieve signal clarity by carefully managing levels throughout your chain. This means paying close attention to equipment calibration—making sure each piece, from your mic preamp to your audio interface, is set correctly to avoid distortion or noise. If your equipment isn’t calibrated properly, even the best microphones can produce muddy or noisy recordings. Proper calibration helps maintain consistent levels, allowing your signal to stay within an ideal range, which is vital for capturing detail and nuance. Additionally, understanding how to manage equipment calibration is essential to prevent issues that compromise clarity.
The key to effective gain staging is setting the right input levels at each stage. When you connect your microphone to a preamp, start by adjusting the gain so that the loudest parts of the performance hit around 75-80% of the preamp’s maximum level. This provides enough headroom to prevent distortion from sudden peaks. You don’t want to push the preamp too hard, as excessive gain can introduce unwanted noise, compromising your signal clarity. Conversely, setting it too low risks losing detail in quieter passages and increasing the chance of noise floor issues later in the chain. Once you’ve established a healthy level at the preamp, check the output levels and ensure your audio interface is calibrated to receive a clean, strong signal without clipping.
From there, focus on maintaining consistent levels through each subsequent piece of gear. Whether it’s a compressor, EQ, or converter, each device should be set so that it processes the signal without adding distortion or noise. Think of gain staging as a series of controlled handoffs—each step ensures the signal remains strong, clean, and free of artifacts. Proper calibration of your equipment at every stage helps you avoid common problems like clipping, hissing, or muddiness. When your gain structure is solid, mixing becomes more straightforward because you’re working with a high-quality, well-maintained signal. This foundation allows for better control over dynamics and tone, resulting in a clearer, more professional sound. Ultimately, mastering gain staging from mic to converter isn’t just about levels—it’s about creating a clean, balanced chain that captures your performance at its best.

YWBL-WH High Gain Microphone Amplifier, Mic Power Audio Amp with ALC Automatic Control for Recording & Headphone Listening
Better Designs: This stereo switch box ensures losslessas well as strong anti interference performance, very
As an affiliate, we earn on qualifying purchases.
As an affiliate, we earn on qualifying purchases.
Frequently Asked Questions
How Do I Troubleshoot Excessive Noise in My Gain Staging Chain?
To troubleshoot excessive noise, first check for ground loop issues by ensuring all equipment shares a common ground or using ground lift adapters. Next, verify that phantom power is only enabled when your mic requires it, as unnecessary phantom power can introduce noise. Keep cables organized and away from electrical interference, and reduce gain levels gradually. These steps help identify and eliminate noise sources, creating a cleaner audio chain.
What Are the Best Practices for Gain Staging Vocals?
When gain staging vocals, you should start with proper microphone placement to capture a clear signal. Set your preamp gain just enough to avoid distortion but guarantee a strong signal. Keep your levels around unity gain to prevent noise. Adjust preamp settings as needed for the vocalist’s dynamics, and monitor the input levels regularly. Proper gain staging ensures clean vocals with minimal noise and ideal headroom.
How Does Cable Quality Affect Gain Staging Accuracy?
Ever wonder how cable quality impacts your gain staging? Poor shielding can introduce noise, messing with your levels, while low-quality connectors might cause signal loss or distortion. These issues make it harder to accurately set gain, leading to inconsistent sound. You can avoid this chaos by choosing cables with solid shielding and reliable connectors, ensuring your signal stays clean and your gain staging remains precise, giving you confidence in every recording.
Can Improper Gain Staging Damage My Audio Interface?
Improper gain staging can potentially harm your audio interface if levels are too high, risking overloads and damage. By understanding gain staging fundamentals, you can set appropriate input levels to avoid clipping and protect your equipment. Always monitor levels closely, keep signals within safe ranges, and avoid pushing your interface beyond its limits. This proactive approach ensures both ideal sound quality and long-term audio interface protection.
How Do I Adjust Gain for Different Microphone Types?
To adjust gain for different microphone types, first consider their impedance and phantom power needs. For dynamic mics, keep gain lower since they produce strong signals, while condenser mics often require higher gain and phantom power. Always match your microphone’s impedance to your interface’s input, and enable phantom power only for condenser mics. Adjust gain until you achieve a clear, strong signal without clipping or distortion.

Focusrite Scarlett Solo 3rd Gen USB Audio Interface for Guitarists, Vocalists, Podcasters or Producers to record and playback studio quality sound
Pro performance with great pre-amps – Achieve a brighter recording thanks to the high performing mic pre-amps of…
As an affiliate, we earn on qualifying purchases.
As an affiliate, we earn on qualifying purchases.
Conclusion
By mastering gain staging from mic to converter, you create a clear, pristine signal path—like a smooth highway for your audio. Neglect it, and your sound becomes a tangled traffic jam, muddy and chaotic. Think of each gain stage as a crucial checkpoint, ensuring clarity and quality. When you get it right, your mix flows effortlessly, transforming raw inputs into polished tracks. Conversely, poor gain staging leaves your sound lost in the noise—so prioritize it to achieve professional results.

The Gain Changer: A Foundation To A Better Mix
As an affiliate, we earn on qualifying purchases.
As an affiliate, we earn on qualifying purchases.

Audyssey Official ACM1HB Replacement Calibration Microphone for AVRs, Audyssey Measurement Microphone for Denon, Marantz, Onkyo, Integra, Teac & Tascam AV Receiver, Supports MultEQ, XT & XT32
GENUINE AUDYSSEY CALIBRATION MIC – Designed for Denon, Marantz, Onkyo, Integra, Teac & Tascam AVRs; this authentic replacement…
As an affiliate, we earn on qualifying purchases.
As an affiliate, we earn on qualifying purchases.