
To craft drums like kicks, snares, and hats through synthesis, you start by shaping basic waveforms—sine for kicks, noise for hats, and combined signals for snares—using waveform modulation. Then, adjust envelope settings to control attack, decay, sustain, and release, giving each sound punch, brightness, or sharpness. Fine-tuning these elements helps you create unique, expressive drum sounds from scratch. Continue exploring how waveform shaping and envelopes release endless possibilities in drum synthesis.
Key Takeaways
- Drum synthesis begins with basic waveforms like sine for kicks, noise for hi-hats, and combined tones for snares.
- Envelope shaping controls attack, decay, sustain, and release to tailor the punch, length, and character of each drum sound.
- Combining waveform shaping and envelope modulation allows for creating unique, expressive drum textures from scratch.
- Kicks typically use sine waves with resonant filtering, while snares blend tonal and noise components for a snappy sound.
- Hi-hats primarily utilize noise waveforms shaped by quick envelopes for brightness and openness.

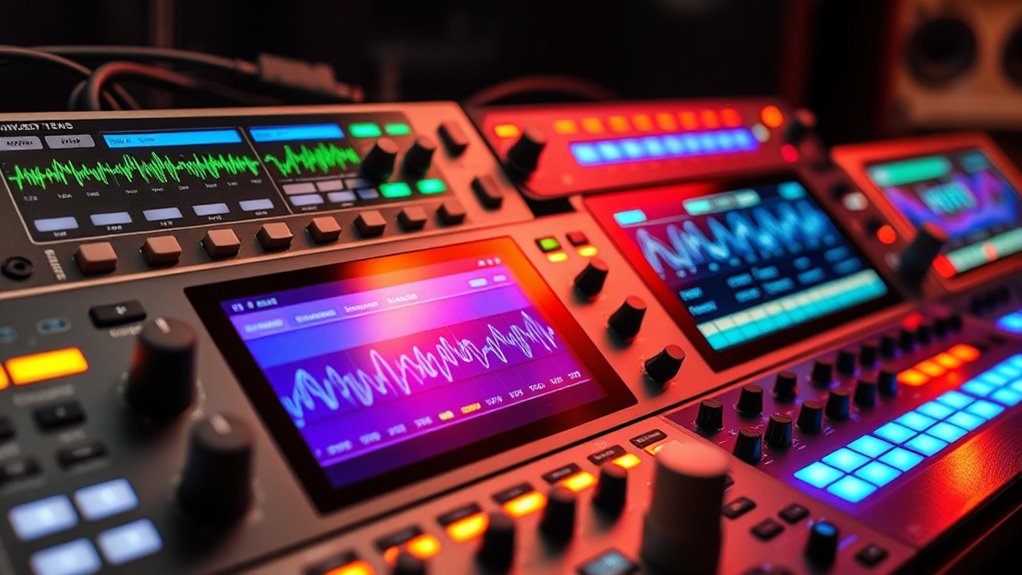
Have you ever wondered how electronic drum sounds are created from scratch? It all starts with understanding the core techniques behind synthesizing kicks, snares, and hi-hats. One of the fundamental processes is waveform shaping, which involves selecting and modifying basic waveforms like sine, square, or sawtooth waves. These waveforms serve as the raw material for your drum sounds. For example, a kick drum often begins with a sine wave because of its deep, smooth tone. By shaping this waveform—either by adding harmonics or blending it with other waveforms—you can craft a more punchy or resonant sound. Waveform shaping gives you control over the tonal quality, allowing you to mold the initial sound into something that fits your desired style. waveform shaping is essential for creating unique drum textures and tones.
Waveform shaping is key to creating punchy, resonant electronic drum sounds from basic waveforms.
Envelope modulation plays a vital role in transforming these raw waveforms into convincing drum hits. With envelope modulation, you manipulate how the sound evolves over time—controlling parameters like attack, decay, sustain, and release. For kicks, a quick attack and a rapid decay are typical, creating that sudden punch that hits right at the start. By adjusting the envelope, you can emphasize the initial transient for more impact or soften the decay for a more subtle, subdued sound. Snares benefit from a different approach: a sharp attack combined with a quick decay, often with an added noise component. Envelope modulation helps shape both the tonal body and the noise element, giving you the ability to craft a snappy, aggressive snare or a more subdued one, depending on your needs.
For hi-hats, the process is slightly different. You might start with a noise waveform because hi-hats are characterized by their bright, metallic sound. Applying envelope modulation to the noise allows you to control how quickly the sound opens and closes, which directly influences the “chick” or “tss” sound. Rapid attack and decay settings produce crisp, short hi-hats, while longer envelopes can create more open, sustained sounds. Combining waveform shaping with envelope modulation gives you a vast palette of possibilities. You can fine-tune the attack for punch, shape the decay for length, and manipulate the harmonic content to match your track’s energy.
In essence, waveform shaping and envelope modulation serve as the building blocks of electronic drum synthesis. They empower you to craft unique, expressive sounds from simple waveforms, giving you the flexibility to design kicks, snares, and hats that perfectly sit in your mix. Mastering these techniques will enable you to move beyond presets and develop your signature drum sounds from the ground up.

Roland JUPITER-X Professional Iconic Synthesizer with Legendary Sound and Design. Featuring ZEN-Core Synthesis System, Ever-expandable, 5 Parts, Built for Studio and Stage.
JUPITER-X combines classic Roland design and premium build quality with a powerful new synth engine. It faithfully recreates…
As an affiliate, we earn on qualifying purchases.
As an affiliate, we earn on qualifying purchases.
Frequently Asked Questions
How Do I Choose the Right Synthesis Method for Each Drum Type?
You should choose your synthesis techniques based on each drum’s characteristic sound. For punchy kicks, go for sine or square wave synthesis to create deep, resonant tones. For snappy snares, noise-based synthesis offers the sharp attack you need. Hats benefit from high-frequency noise synthesis for brightness and texture. Matching the synthesis method to the drum’s characteristic sound guarantees your drums sound natural or creatively distorted, depending on your style.
What Are the Best Plugins for Drum Synthesis?
Perfect plugins produce powerful percussion with precision. For drum sound design, try plugins like Xfer Serum, which excels at synthesis techniques, or Native Instruments’ Kontakt for versatile sampling. Serum offers superb sound sculpting, while Kontakt provides extensive drum libraries. Additionally, plugins like D16 Drumazon and TAL-NoiseMaker deliver classic synthesis sounds. These tools help you craft unique, compelling drums, ensuring your beats break through with brilliance and clarity.
How Can I Make Synthesized Drums Sound More Natural?
To make synthesized drums sound more natural, focus on adding subtle variations that mimic human voice and acoustic textures. Use modulation and randomness in your synth parameters, like pitch and velocity, to avoid mechanical repetition. Incorporate gentle noise layers or samples of real drums to enhance authenticity. By blending these elements, you create a more lively, organic feel that resonates with listeners and bridges the gap between synthetic and natural sounds.
What Are Common Mistakes in Drum Synthesis?
You might be trapping your drums in a muddy swamp by overprocessing or causing phase cancellation, which silences your groove. Common mistakes include overusing effects, making your sounds lose clarity, and ignoring phase relationships that can thin out your drums. To avoid these pitfalls, keep your processing subtle and check phase alignment regularly. Remember, less is often more—allow your drums to breathe and resonate naturally.
How Do I Layer Synthesized and Sampled Drums Effectively?
To layer synthesized and sampled drums effectively, start with solid layering techniques by blending samples carefully to match their tonal qualities and decay. Use EQ to carve out space for each element, ensuring they don’t clash. Adjust volume levels for balance, and apply compression to glue the layers together. Experiment with panning and subtle effects to add depth, creating a cohesive, powerful drum sound that combines the best of both worlds.

Donner DED-80 Electronic Drum Set with 4 Quiet Mesh Pads, 180+ Sounds, 2 Pedals, Throne, Headphones, Sticks, and Melodics Lessons
【The total Electric Drum Set】The Donner DED-80 drum set features a double-layered mesh high-density structure for a realistic…
As an affiliate, we earn on qualifying purchases.
As an affiliate, we earn on qualifying purchases.
Conclusion
Now that you’ve explored the world of drum synthesis, you realize there’s more beneath the surface. With each parameter you tweak, new possibilities emerge—unexpected textures, sounds you never imagined. The true power lies in your hands, waiting to be unbarred. But beware: the deeper you go, the more you’ll discover. Are you ready to push boundaries and create sounds that could redefine your music? The journey has only just begun.
Alesis Module Mount – Mounting Plate for Multi-Pad Electronic Percussion Instruments – Mounts to Any Drum Hardware
The Ultimate Companion for Your Multipad -Mounting plate for Alesis electronic percussion instruments -the ultimate solution to take…
As an affiliate, we earn on qualifying purchases.
As an affiliate, we earn on qualifying purchases.
drum waveforms and envelope generator
As an affiliate, we earn on qualifying purchases.
As an affiliate, we earn on qualifying purchases.