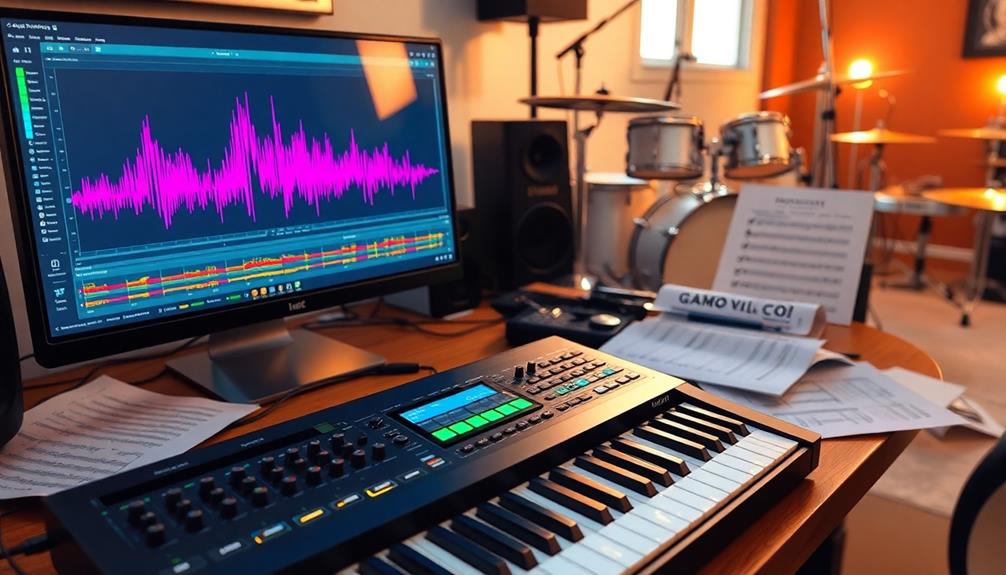
To create dynamic drum grooves with MIDI, start by ensuring your MIDI controller is properly set up in your DAW. Choose a drum kit suited for your genre, whether it's acoustic for rock or electronic for hip-hop. Use the piano roll to program your patterns, varying the timing and velocity for a more human feel. Incorporate fills and ghost notes to add complexity and keep listeners engaged. Don't forget to experiment with dynamic adjustments and humanization techniques for added authenticity. There's much more to explore regarding groove creation and fine-tuning your tracks for peak impact.
Key Takeaways
- Select an appropriate drum kit for your genre to ensure the right sound foundation for your groove.
- Utilize the piano roll or MIDI grid to program kick, snare, and hi-hat patterns with variations in timing and velocity.
- Apply humanization techniques by shifting notes and randomizing velocities to mimic the nuances of live drumming.
- Incorporate fills and swing to maintain listener engagement and enhance the overall groove feel.
- Experiment with groove templates from live performances to create MIDI patterns that capture authentic rhythmic qualities.

Alesis Nitro Max Kit Compact Electric Drum Kit with Quiet Mesh Pads, 10" Dual-Zone Snare, Bluetooth, 440+ BFD Sounds, Drumeo, USB MIDI, Kick Pedal
- Designed for Beginners: Premium 8-piece electronic drum set with quiet mesh heads
- Bluetooth Connectivity: Built-in Bluetooth for wireless audio and MIDI
- Realistic Snare: 10-inch dual-zone mesh snare for authentic feel
As an affiliate, we earn on qualifying purchases.
As an affiliate, we earn on qualifying purchases.
Getting Started With MIDI

When you're getting started with MIDI, it's crucial to make certain your MIDI controller is connected and properly configured within your Digital Audio Workstation (DAW). This setup allows for seamless interaction with virtual instruments, making it easier to create dynamic drum grooves.
Familiarize yourself with your DAW's interface, especially the MIDI track setup. This knowledge will help you efficiently create and modify drum patterns.
Start by creating a new MIDI track and selecting a drum kit that fits your genre. Using the piano roll or MIDI grid, program your drum patterns. This visual approach lets you adjust each note's timing and velocity, ensuring your patterns sound just right.
To enhance the realism of your drum grooves, introduce slight timing variations and different velocities to your MIDI notes. These adjustments mimic the nuances of human drumming, giving your beats a more authentic feel.
Drum Kit Selection

Choosing the right drum kit can make or break your track, as each genre has its own unique sound preferences. For instance, rock often calls for acoustic kits, while hip-hop leans toward electronic kits. You'll want to guarantee the drum sound aligns with your musical style.
Here's a quick overview of different options:
| Genre | Recommended Drum Kit | Key Features |
|---|---|---|
| Rock | Acoustic Drum Kit | Natural feel, real snares |
| Hip-Hop | Electronic Drum Kit | Punchy kicks, versatility |
| EDM | Sample Pack | Customizable, layered sounds |
Built-in drum kits in most DAWs offer a quick start, but don't overlook third-party sample packs for more unique sounds. Consider one-shots with varied velocities to create a dynamic feel in your programming. Dedicated drum VSTs like Addictive Drums 2 or Superior Drummer 3 provide extensive libraries and customization options, enhancing your production quality.
Understanding Drum Grooves

To create engaging drum grooves, you need to grasp the core drum patterns that form the backbone of your rhythm.
Understanding how to analyze these grooves helps you identify what makes each style unique and effective.
Core Drum Patterns
At the heart of every compelling drum groove lie core drum patterns, which mainly consist of the kick, snare, and hi-hat. These three different drum elements form the foundation for most genres of music. A classic example is the four-on-the-floor beat commonly found in rock music, where you hear a steady kick drum on each beat, paired with snare and hi-hat accents.
The relationship between the kick and snare is essential; together, they create the primary rhythmic drive that establishes the groove of your track. Experimenting with different placements of the kick and snare can lead to unique feels.
Hi-hat patterns also play a significant role in shaping your drum grooves. By varying dynamics and incorporating open and closed hits, you can add texture and complexity to your rhythm.
To gain a deeper understanding of effective drum grooves, listen to existing songs in various genres. Analyzing their rhythmic elements will provide you with inspiration and insight, helping you develop your own dynamic drum patterns using MIDI.
Groove Analysis Techniques
When diving into groove analysis techniques, breaking down existing drum patterns is one of the most effective ways to understand the nuances that define different genres. Start by examining the relationship between kick, snare, and hi-hat, as they form the backbone of any cohesive drum groove. Pay attention to the main beats, as they dictate the overall rhythm, while also exploring ghost notes that add subtle complexity and richness.
To maintain listener engagement, focus on the use of fills. These dynamic changes can elevate your composition, providing excitement and variation. Additionally, implementing swing in your patterns can enhance the groove, capturing the feel of live performances and adding that human touch to your MIDI programming.
Here's a simple breakdown of key elements in groove analysis:
| Element | Description | Genre Example |
|---|---|---|
| Main Beats | Core rhythm foundation | Four-on-the-floor (EDM) |
| Ghost Notes | Subtle accent notes adding texture | Funk and Jazz |
| Fills | Shifting beats for excitement | Rock and Pop |
| Swing | Human feel enhancing groove | R&B and Hip-Hop |
Humanization Techniques

To give your MIDI drum patterns a more organic feel, you can use timing adjustments and velocity variation techniques.
By shifting notes slightly off the grid and tweaking the velocity of individual hits, you'll mimic the natural nuances of a live drummer.
These simple changes can elevate your drum grooves, making them sound authentic and dynamic.
Timing Adjustments
While many producers rely on the grid for precision, applying timing adjustments through humanization techniques can breathe life into your MIDI drum patterns. When you shift notes slightly, you create an organic sound that mimics the natural feel of live drumming.
Here are three effective ways to implement timing adjustments:
- Utilize the 'Humanize' Function: Most DAWs have this feature, allowing you to randomize timing. You can easily shift notes by 2-3% before or after the grid, enhancing the groove.
- Target Specific Notes: Instead of applying timing adjustments to every note, focus on particular hits, like snare or kick. This selective approach keeps the musical integrity intact while adding a dynamic musical experience.
- Create Variations in Patterns: Experiment with different timing adjustments across your drum tracks. This practice mimics the inconsistencies of live drumming, making your beats feel looser and more engaging for listeners.
Velocity Variation Techniques
After fine-tuning timing adjustments, you can take your MIDI drum patterns to the next level by focusing on velocity variation techniques. Adjusting the velocity of individual notes creates dynamic variation, making your performance sound more lifelike. For instance, set kick drum velocities higher (100-127) while keeping snare hits varied between 70-100. This balance adds authenticity to your rhythm.
Utilizing ghost notes with lower velocities (30-50) adds subtle complexity without overpowering the main beats. You can also experiment with randomization features in your DAW, introducing slight, unpredictable velocity changes that enhance the human feel of your drum grooves. Additionally, velocity curves in your MIDI editor allow tailored dynamic responses, helping you fine-tune the impact of each drum hit.
Here's a quick reference to help you visualize these techniques:
| Drum Element | Velocity Range |
|---|---|
| Kick Drum | 100 – 127 |
| Snare Hit | 70 – 100 |
| Ghost Notes | 30 – 50 |
Recording Live Performances

Recording live drum performances can bring a unique energy and authenticity to your music that MIDI programming often lacks. The richness and texture of real drums create a compelling backdrop for your tracks. To guarantee you capture that essence effectively, keep these three tips in mind:
1. Use high-quality microphones: Investing in good mics will greatly enhance the clarity and depth of your recorded drum sounds. Proper mic placement is vital, so experiment to find the sweet spot for each drum.
Additionally, consider using essential accessories to further improve sound capture.
2. Capture the performance: When recording, let the drummer play freely, focusing on capturing their groove and nuances. This approach leads to authentic sounds that MIDI programming can't replicate.
Allowing the drummer to express their creativity can elevate the overall recording quality.
3. Utilize groove templates: After recording, you can extract groove templates from your live performances. This allows you to create MIDI patterns that reflect the feel of the original session, bridging the gap between live sound and digital manipulation.
Mixing and Fine-Tuning

Mixing and fine-tuning your drum tracks is vital for achieving a polished sound that enhances your overall production. Start by balancing the volume levels of your kick, snare, and hi-hat. This guarantees each element complements the others and fits well within the mix.
Additionally, incorporating techniques like HEPA filtration can help eliminate distracting background noise in your recording environment, allowing your drum sounds to shine through more clearly.
Next, experiment with panning positions for each drum sound. This creates depth and dimension in the stereo field, making your track more engaging for listeners.
Utilizing EQ adjustments on individual drum tracks is essential for sculpting the tonal balance. By emphasizing the unique character of each drum sound, you can prevent frequency clashes that muddy your mix.
Applying different reverbs can also add ambiance and sustain, helping your drum sounds blend seamlessly without overpowering other elements.
Frequently Asked Questions
How to Make MIDI Drum Groove?
To make a MIDI drum groove, start by choosing a drum kit that fits your style. Program kick, snare, and hi-hat patterns, adjust velocities, add ghost notes, and experiment with swing for a lively feel.
How Can I Make My MIDI Drums More Realistic?
To make your MIDI drums more realistic, incorporate ghost notes, utilize your DAW's humanize function, experiment with swing settings, and layer different samples. Regularly analyze professional tracks for inspiration on dynamics and rhythmic variations.
How Do You Add Grooves to Drums?
Imagine you're crafting a jazz track; you add subtle ghost notes on the snare and adjust the swing. Play with velocity and fills, keeping your patterns engaging, and you'll create infectious, dynamic grooves that captivate listeners.
How Do You Humanize MIDI Drums?
To humanize MIDI drums, you'll want to introduce slight timing variations, adjust velocities, and incorporate ghost notes. Experimenting with these techniques will help you create a more natural and engaging drum performance.
Conclusion
As you weave your dynamic drum grooves, think of yourself as a painter, splashing vibrant colors onto a canvas. Each beat is a brushstroke, breathing life into your composition. Just like a skilled artist, you can blend rhythms and techniques, creating a masterpiece that resonates with your audience. Embrace the journey, allowing your creativity to flow like a river, shaping the landscape of sound around you. With practice and passion, your grooves will dance like flames, igniting the spirit of every listener.