Connect with us

Technical Skills

EQ Like a Pro! The Complete Guide to Mastering Equalization

The ultimate guide to mastering equalization reveals essential tips and techniques, but are you ready to transform your mixing skills?

Published

on

mastering equalization techniques guide

If you want to EQ like a pro, mastering the basics is key. Understanding frequency bands—from sub-bass to highs—helps you shape the tone of each instrument. Use gain, frequency, and Q settings wisely to boost or cut specific frequencies. Prioritize subtractive EQ for clarity and utilize high-pass filters to eliminate unwanted low-end rumble. Pay attention to the mix context to avoid clutter and guarantee separation between elements. Avoid common mistakes, like overusing EQ, which can lead to an unnatural sound. Stick around to discover more essential tips and techniques that elevate your mixing game.

Key Takeaways

  • Understand the frequency spectrum to identify and enhance specific ranges for each instrument and vocal, ensuring clarity and balance.
  • Utilize subtractive EQ techniques to cut problematic frequencies, reducing clutter and improving overall mix quality.
  • Implement high-pass filters to eliminate unnecessary low-end rumble, typically below 140Hz, for a cleaner sound.
  • Apply narrow Q settings for precise cuts and wider Q settings for smoother boosts, tailoring your adjustments effectively.
  • Regularly reference tracks from similar genres to guide your EQ decisions and maintain context within your mix.

Understanding EQ Basics

emotional intelligence fundamentals explained

Understanding EQ basics is essential for any audio engineer or music producer. EQ, or equalization, lets you adjust the balance of specific frequencies in your sound, enhancing clarity and eliminating muddiness. The frequency spectrum ranges from 20Hz to 20kHz, divided into distinct bands like Sub-Bass, Bass, Low Mids, Mids, Upper Mids, and Highs.

By learning to boost or cut these frequencies, you can refine individual elements in your mix.

The three main controls in EQ are Gain, Frequency, and Q. Gain determines how much you'll boost or cut a specific frequency, while Frequency selects the exact point you want to modify. Q refers to the bandwidth of your adjustment, allowing you to narrow or widen the impact of your changes.

When making EQ adjustments, always consider how these changes will affect the overall mix. Each instrument has its own characteristic frequencies that contribute to the final sound.

Importance of EQ in Mixing

eq s role in mixing

EQ plays an essential role in mixing, shaping the tone and character of each instrument to create a balanced and cohesive sound. By adjusting frequencies, you guarantee clarity and separation within the overall mix. Proper EQ in music helps eliminate frequency overlaps that can lead to a cluttered sound, allowing each instrument to occupy its own sonic space.

To highlight the importance of effective EQ techniques, consider the following table:

Advertisement
Action Frequency Range Purpose
Cutting Frequencies 200-600Hz Enhances clarity, prevents muddiness
Boosting High Frequencies Above 8kHz Adds brightness and airiness
Mixing in Context Full Mix Guarantees harmony among elements
Adjusting Overall Volume All Frequencies Balances the final output

When you cut problematic frequencies and boost desirable ones, you make your mix sound good and engaging. Remember, mixing in context is key; always apply EQ adjustments while listening to the full mix to achieve the best results. Prioritize clarity, and your mix will shine.

Frequency Spectrum Overview
understanding frequency spectrum analysis

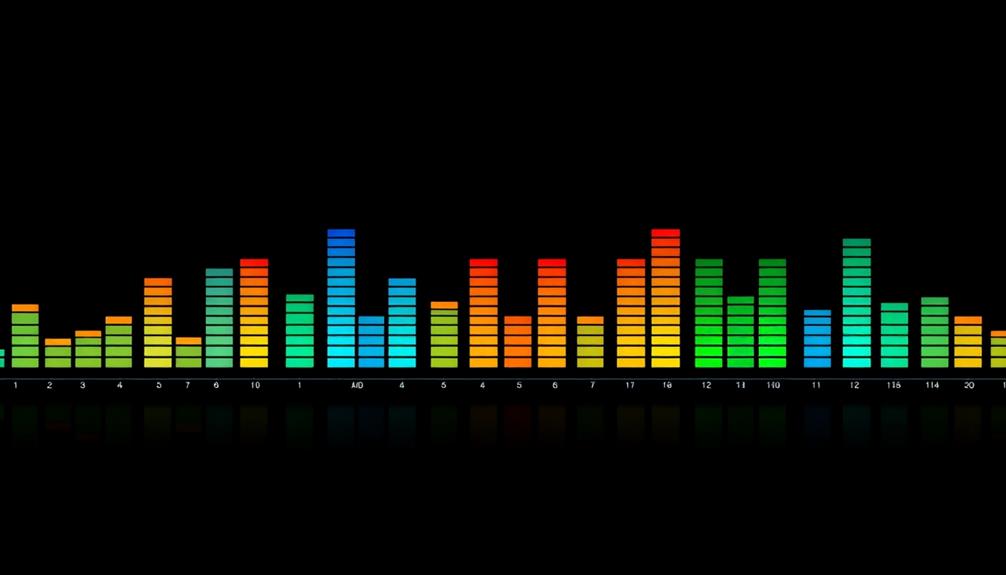
To effectively use EQ, you need to understand the frequency spectrum, which ranges from 20Hz to 20kHz.

Each section plays a unique role in shaping your sound, from the rumble of sub-bass to the clarity of mids and the brightness of highs.

It's also essential to take into account frequency masking, as it can obscure important details in your mix and affect overall clarity.

Frequency Range Breakdown

The frequency spectrum, spanning from 20Hz to 20kHz, divides into distinct sections, each playing a essential role in shaping sound. Understanding these frequency ranges helps you make informed EQ choices, allowing you to create a balanced mix. Here's a quick breakdown:

Frequency Range Key Characteristics EQ Applications
Sub-Bass (20-60Hz) Provides rumble and movement Adds depth to bass elements
Bass (60-200Hz) Adds body and warmth Fills out the low end
Midrange (200Hz-3kHz) critical for clarity Highlights vocals and instruments
Upper Mids (3-8kHz) Defines and attacks sounds Enhances presence and detail
Highs (8kHz-20kHz) Adds airiness and brightness Brightens the overall mix

Impact of Frequency Masking

Understanding frequency ranges sets the stage for recognizing the impact of frequency masking in your mixes. Frequency masking occurs when louder frequencies obscure quieter ones, often diminishing clarity, especially in the low-frequency range. Here, elements like bass and kick drums can clash, making it challenging to achieve a balanced mix.

Advertisement

The frequency spectrum is divided into distinct bands, from sub-bass to highs, each with unique characteristics. In mixing, improper overlaps can lead to frequency masking, where important sonic details get lost.

To combat this, you can use EQ techniques to cut frequencies in overlapping instruments, thereby boosting clarity and separation.

Employing tools like frequency analyzers can help you visualize problematic frequency content, making it easier to identify and manage these masking issues.

Effective EQ Techniques

emotional intelligence skill development

Mastering effective EQ techniques can markedly enhance your mixes and elevate the overall sound quality. Start by utilizing the Sweep EQ Technique; boost a narrow band and sweep through frequencies to identify and cut problematic frequencies by 2-10 dB. This approach greatly improves clarity in your mix.

Also, apply high-pass filters to remove unnecessary low-end rumble, typically below ~140Hz, which helps prevent muddiness. Emphasizing subtractive EQ techniques minimizes frequency clashes and enhances overall mix clarity. Remember, cutting often leads to a more natural sound compared to boosting.

Here's a quick overview of effective EQ techniques:

Advertisement
Technique Purpose Key Settings
Sweep EQ Identify problematic frequencies Boost narrow, cut 2-10 dB
High-Pass Filter Remove low-end rumble Typically below ~140Hz
Subtractive EQ Minimize frequency clashes Focus on cutting
Narrow Q Settings Precise cuts in problematic frequencies Use for cutting
Wide Cuts Gentle boosts to enhance musicality Broader Q for smoother adjustments

Regularly compare processed and unprocessed sounds to verify your adjustments maintain the desired sonic qualities.

Common Mixing Mistakes
mixing errors to avoid

Even with effective EQ techniques, mixing can still go awry if certain common mistakes aren't addressed. One major pitfall is the overuse of EQ, which can lead to an unnatural sound and a loss of dynamics, leaving your mix feeling lifeless. To maintain a dynamic sound, prioritize subtractive EQ techniques instead of boosting frequencies, as boosting can introduce unwanted noise and clutter.

Another mistake is ignoring the context of the mix. Poor frequency balance can occur when certain elements mask others, resulting in confusion in your overall sound. Always consider how different elements interact within the mix to achieve clarity and balance.

Additionally, neglecting to use reference tracks during the mixing process can hinder your EQ decisions. Reference tracks serve as a benchmark, helping you gauge the quality and balance of your mix.

Finally, don't overlook automation; a static soundscape can make your track sound a little dull. Incorporating movement and evolution keeps listeners engaged and enhances the overall listening experience.

Essential EQ Tips for Success

emotional intelligence success strategies

Achieving clarity in your mixes requires a solid grasp of essential EQ tips. Start by prioritizing subtractive EQ over additive EQ. Cutting problematic frequencies often leads to a cleaner mix and minimizes phase issues, making your tracks more professional.

Use a high-pass filter to eliminate unnecessary low-end rumble, typically setting the cutoff around 140Hz for most instruments. This helps clear up space for other elements in your mix.

Advertisement

When adjusting frequencies, implement narrow Q settings for precise cuts in those troublesome areas. For boosts, employ broader Q settings to enhance the musicality of the sound without overwhelming it.

Regularly bypass your EQ adjustments to compare processed and unprocessed sounds; this guarantees the changes you make truly improve the overall mix. This practice ensures that you’re not over-processing or losing the natural tone of the audio, keeping the mix balanced and authentic. Coupled with proper monitoring and room acoustics, it’s a crucial step in maintaining a professional, polished sound. Additionally, optimizing hardware for music production, such as audio interfaces and studio monitors, can further enhance the accuracy of your mixing decisions by providing a clearer and more transparent listening environment.

Lastly, always reference tracks from similar genres. This practice provides valuable insight into effective EQ techniques, aiding you in achieving a balanced sound.

Frequently Asked Questions

What Is the Best EQ for Mastering?

The best EQ for mastering combines analog warmth with precision. Consider using linear phase EQs for phase integrity and dynamic EQs for responsive adjustments, ensuring you shape the sound while maintaining clarity and balance throughout your mix.

What Should Mastering EQ Look Like?

When refining your mix, envision your mastering EQ as a delicate sculptor's tool. It should reveal the beauty within, balancing subtle cuts and boosts across frequencies, ensuring a harmonious blend that enchants the listener's ears.

Advertisement

What Are the Best EQ Settings for an EQualizer?

For the best EQ settings, boost 3-6 kHz for vocals, 60-100 Hz for kick drums, 2-4 kHz for guitars, and 80-100 Hz for bass. Always cut muddiness around 100-500 Hz to enhance clarity in your mix.

What Does EQualization or EQ Do?

Equalization adjusts the balance of audio frequencies, letting you boost or cut specific ranges. By doing this, you'll enhance clarity, reduce muddiness, and guarantee each sound element stands out distinctly in your mix.

Conclusion

By mastering equalization, you're not just tweaking tones—you're transforming tracks! Embrace the essential EQ techniques and avoid common mixing mistakes to achieve a polished sound. With practice and patience, you'll elevate your mixes to new heights. Remember, a little EQ magic can make a massive difference in your music. So, get ready to groove and guide your audio to greatness, because with these skills, you're well on your way to mixing mastery!

Advertisement

Technical Skills

Compression Myths: Common Misconceptions Debunked

Discover the truth behind common compression myths that could transform your recovery and wellness journey—are you ready to debunk the misconceptions?

Published

on

debunking compression misconceptions explained

Compression therapy is often misunderstood, with myths claiming it's only for elite athletes, uncomfortable, or exclusive to older adults. In reality, it enhances blood flow and supports recovery for everyone, regardless of fitness level or age. Properly fitted garments are essential; they should feel snug but not painful. Compression wear is versatile, providing benefits for various body types and health issues, including injury recovery and venous disorders. It also helps reduce swelling and muscle fatigue. Curious about how these facts can improve your wellness journey? There's much more to discover about the true power of compression.

Key Takeaways

  • Compression therapy is beneficial for individuals of all fitness levels, not just elite athletes, enhancing recovery and preventing venous disorders.
  • Contrary to belief, compression wear enhances circulation, rather than restricting blood flow, promoting overall venous health.
  • Modern compression garments prioritize comfort and fit, ensuring they feel snug but not painful during use.
  • Compression therapy aids recovery for all body types and ages, making it accessible to anyone, including casual exercisers.
  • Compression wear is versatile, effective for various body parts and health conditions, not limited to post-surgery applications or intense workouts.

Understanding Compression Therapy

compression therapy explained clearly

Compression therapy plays an essential role in enhancing blood flow and supporting recovery, especially when you understand how it works. By applying graduated pressure using specially designed garments, compression therapy improves circulation and helps your body heal more efficiently.

It's particularly beneficial for athletes, as it reduces muscle fatigue and promotes faster recovery after workouts.

Despite its advantages, there are common myths surrounding compression wear. Many people wrongly believe that tighter garments always yield better results, but the right fit is vital. Properly fitted compression garments should feel supportive without causing pain; an incorrect fit can lead to discomfort and ineffective outcomes.

Moreover, modern compression wear is made from moisture-wicking and breathable fabrics, ensuring your comfort during use. You might think compression therapy is only for those with existing medical conditions, but it's also a preventive measure for venous disorders, benefiting anyone regardless of health status or activity level.

Understanding compression therapy can help you make informed choices about incorporating it into your fitness routine or daily life, dispelling the myths that often cloud its true benefits.

Advertisement

Common Misconceptions About Compression

understanding compression misconceptions clearly

Misconceptions about compression wear can lead to missed opportunities for improved performance and recovery. Many believe that compression wear is only for elite athletes, but research shows it benefits everyone—from casual gym-goers to those with medical conditions. Another common myth surrounding compression wear is that it restricts blood flow. In reality, when properly fitted, compression garments enhance circulation and may prevent blood clots.

You might also think compression wear is uncomfortable, but modern designs utilize breathable, moisture-wicking fabrics that allow for all-day comfort. Additionally, it's not just for older individuals; people of all ages can use compression for preventive venous health. Lastly, the idea that all compression garments are one-size-fits-all is simply false. Proper fit is crucial for effectiveness, and various sizes and graduated compression levels exist to meet your unique needs.

Misconception Reality Impact
Only for elite athletes Benefits all activity levels Missed performance gains
Restricts blood flow Improves circulation Potential health risks
Uncomfortable for long wear Breathable, moisture-wicking fabrics Discomfort in activity
Only for older adults Useful for all ages Preventive health opportunities

Pain and Discomfort Myths

misconceptions about pain relief

Many people worry that wearing compression garments will cause pain or discomfort, but this myth can lead to unnecessary hesitation in trying them. The common belief that compression wear is inherently painful is simply not true.

When properly fitted, these garments should feel snug but not painful. If you're experiencing discomfort, it usually indicates an issue with fit or sizing, and you might need to make adjustments.

Research shows that well-fitted compression wear can actually reduce muscle soreness and improve recovery without causing any discomfort. Many users report feeling increased support and comfort during physical activities when they wear high-quality compression garments made from breathable materials.

These garments are designed to enhance your experience, allowing for extended use without irritation.

If you do encounter pain while wearing compression garments, it's vital to consult a physician. They can help confirm that you're using the right size and type for your individual needs.

Advertisement

Age-Related Misconceptions

elderly stereotypes and misunderstandings

When it comes to compression therapy, age shouldn't be a barrier to reaping its benefits. Many people mistakenly believe that compression garments are only for older adults, but that's far from the truth.

In fact, compression therapy can greatly aid venous health for individuals of all ages. Early intervention is essential, especially for younger individuals, as it can prevent future complications related to venous disorders. Understanding the importance of senior safety and fraud prevention can also enhance awareness around health-related issues, including the need for proper vascular care.

No matter your age, awareness of venous health is critical. By using compression garments, you can proactively support your vascular system and address any potential issues before they escalate. Conditions requiring compression therapy are prevalent across various age groups, highlighting its importance for everyone.

Additionally, compression garments are designed to fit all body types and sizes, ensuring inclusivity in their use. This means you can find a solution tailored to your needs, regardless of whether you're young or old.

Embracing compression therapy now can pave the way for better venous health in the long run, so don't let age-related misconceptions hold you back. Start prioritizing your vascular wellness today!

Misunderstanding Medical Conditions

misinterpretation of health issues

You might think compression therapy is only for older folks or those with serious health issues, but that's a common misconception.

In reality, it's beneficial for people of all ages and can help prevent venous disorders even before they start.

Advertisement

Plus, compression garments are designed for a variety of body types, making them accessible to anyone looking to improve their vascular health.

Compression for All Ages

Compression therapy is often mistakenly thought to be solely for seniors, but it actually offers significant benefits for individuals of all ages. You mightn't realize that using compression products can effectively address various medical conditions, including venous insufficiency and deep vein thrombosis (DVT).

It's vital to understand that early intervention with compression therapy can prevent future complications. If you're younger, being aware of your venous health is just as important. Many people assume these issues only affect older adults, but that's not the case. Conditions like chronic venous insufficiency (CVI) can arise at any age, making it essential to take into account prevention strategies now.

Compression garments are designed to treat and prevent these conditions for everyone, regardless of age or body type. The inclusivity of compression therapy guarantees that people of all sizes can access its benefits, promoting overall wellness across different demographics.

Beyond Serious Conditions

Misconceptions about compression therapy often focus solely on its use for serious medical conditions, but it serves a broader purpose. Compression garments aren't just for chronic issues or recovery from surgery; they're effective in preventing venous disorders and promoting overall vascular health for everyone.

Advertisement

You might think compression wear is only for older adults, but early intervention can benefit younger individuals by enhancing circulation and reducing future complications.

Many people underestimate the versatility of compression therapy, believing it's only for severe cases. In reality, it can aid recovery from minor injuries and support general fitness, making it accessible for a wide range of activities.

Whether you're an athlete or someone who spends long hours on their feet, compression garments can provide the support you need.

Awareness of venous health is essential at any age. By using compression as a preventative measure, you can reduce the likelihood of developing more serious medical issues down the line.

Don't let misconceptions about compression keep you from experiencing the benefits; consider incorporating compression garments into your routine for better circulation and overall well-being.

Advertisement

Body Weight Misconceptions

understanding body weight myths

You might think compression therapy is just for those with higher body weights, but that's a common misconception.

Compression wear is designed for all body types and can benefit anyone looking to improve circulation or support recovery.

Embracing these inclusive designs means you can find the right fit and support tailored to your needs, regardless of size.

Compression for All Sizes

Across various body types and sizes, compression therapy proves effective, dispelling the notion that it's solely for those who are overweight. Compression garments are designed to cater to everyone, guaranteeing that individuals of all sizes can benefit from their unique properties.

By debunking myths surrounding compression therapy, we highlight its role in promoting venous health, regardless of body weight.

The Aero-Wrap™ product line exemplifies this inclusivity, offering a range of sizes from small to extra-large. This variety guarantees that anyone seeking relief from conditions like deep vein thrombosis or varicose veins can find the right fit.

Advertisement

Research supports the idea that people of all sizes can experience significant benefits from compression therapy, including improved circulation and reduced muscle fatigue.

Inclusive Design Features

Inclusive design features in compression wear are revolutionizing how we approach health and fitness for all body types. Many people mistakenly believe that compression garments are only for those who are overweight. In reality, they're crafted to promote inclusivity, providing benefits for everyone, regardless of body weight.

Here are three key points to evaluate:

  1. Size Variety: Compression wear is available in a range of sizes, from small to extra-large, ensuring that everyone can find the right fit.
  2. Health Benefits: Research demonstrates that compression garments improve circulation and muscle support, which is valuable for both casual athletes and those managing chronic conditions.
  3. Accessibility: With effective compression therapy, individuals seeking venous health can prevent and treat conditions, showing that these garments are essential tools for all, not just those focused on weight loss.

Body Types and Benefits

Compression therapy isn't just for those who are overweight; it offers significant benefits for individuals of all body types. Many people mistakenly believe that only those with excess weight need compression wear, but that's one of the common myths surrounding compression wear.

In reality, compression therapy is effective for a variety of conditions, such as improving venous health and enhancing athletic performance. Additionally, just like educational toys for skill development, compression garments can support recovery and improve overall well-being.

Whether you're a seasoned athlete or someone looking to support your recovery, wearing high-quality compression wear can provide the comfort and support you need. The Aero-Wrap™ product line, for example, offers sizes from small to extra-large, ensuring that everyone can find the right fit.

Advertisement

Research shows that compression garments can benefit anyone, regardless of body weight or fitness level.

Post-Surgery Beliefs

healing mindset after surgery

After surgery, many people believe that compression garments are only necessary for those who've undergone invasive procedures.

However, this misconception overlooks the broader benefits of wearing compression garments. They're not just for surgical recovery; they can also support individuals with various medical conditions.

Here are three key points to reflect on:

  1. Enhanced Blood Flow: Wearing compression garments helps improve circulation, which is essential for anyone recovering from surgery or dealing with chronic venous disorders.
  2. Reduced Muscle Fatigue: These garments provide support that can alleviate muscle fatigue, making them beneficial for both surgical and non-surgical patients.
  3. Faster Recovery: Research shows that using compression garments can greatly speed up recovery times, allowing you to return to your normal activities sooner.

Many healthcare professionals recommend incorporating compression therapy into your health strategy, whether you're recovering from a procedure or looking to prevent future issues.

Swelling and Compression Myths

misconceptions about swelling treatment

When it comes to swelling, many people underestimate the power of compression wear.

You might think it's only for those with visible issues, but compression can actually help prevent swelling and support your vascular health.

Let's clear up these misconceptions and explore how compression can be a game-changer for managing swelling effectively.

Advertisement

Swelling Reduction Benefits

While many people might underestimate the power of compression therapy, it's a proven method for reducing and preventing swelling.

Whether you're recovering from an injury, dealing with lymphedema, or just looking to enhance your comfort, wearing the right compression garments can make a significant difference.

Here are three key benefits of using compression wear:

  1. Improved Blood Flow: Graduated compression garments provide varying levels of pressure, which helps enhance circulation and reduce swelling in affected areas.
  2. Faster Recovery: Regular use of compression wear can lead to quicker recovery after physical activity, minimizing muscle soreness and swelling.
  3. Injury Support: Compression therapy isn't just for swollen limbs; it can help support recovery from injuries and provide comfort during long periods of inactivity.

Individuals at risk of developing venous disorders can find notable relief through properly fitted compression garments tailored to their needs.

By understanding how compression wear works, you're better equipped to harness its benefits and enjoy a more comfortable, active lifestyle.

Don't overlook the role of compression in managing swelling effectively!

Advertisement

Misconceptions About Compression

What misconceptions do people have about compression therapy? One common myth about compression is that it's solely for reducing swelling. In reality, high-quality compression wear enhances blood circulation and supports muscle recovery, benefiting everyone, not just athletes.

You might think that these garments restrict blood flow, but properly fitted compression actually improves venous return, helping prevent conditions like deep vein thrombosis (DVT).

Another myth suggests that compression wear is uncomfortable. However, modern designs use breathable, moisture-wicking materials, so you can wear them for extended periods without discomfort.

Additionally, many believe compression therapy is only for legs, but it's effective for arms and other body parts, addressing various conditions beyond just swelling.

Whether you spend long hours sitting or standing, compression wear can offer significant support. The key is to find appropriately fitted garments tailored to your needs.

Advertisement

Activity Level Misconceptions

common exercise myths explained

Many people mistakenly believe that compression wear is only for elite athletes, but that couldn't be further from the truth. Compression garments are beneficial for individuals at all activity levels, from casual joggers to weekend warriors. Research shows that these garments enhance blood flow and reduce muscle fatigue, making them suitable for everyone.

Just like how certain foods can be beneficial for our pets, such as safe fruits like apples and blueberries, compression wear can contribute positively to our health and wellness.

Here are three common myths surrounding compression wear:

  1. Only athletes benefit from compression: Compression helps anyone engaged in physical activities, including fitness beginners and those who enjoy leisurely walks.
  2. Compression wear is uncomfortable: Many specialized products, like Aero-Wrap™ Flex, are designed for comfort and flexibility, ensuring you feel great whether you're working out or resting.
  3. Compression is only for intense workouts: Even light activities can lead to discomfort and fatigue, so wearing compression during daily tasks can prevent venous disorders and provide relief.

Don't let misconceptions hold you back. Embracing compression wear can improve your performance and recovery, regardless of your fitness level.

Whether you're aiming for your next personal best or just staying active, compression can be your ally.

Limiting Compression to Legs

targeted leg compression therapy

It's a common misconception that compression wear is solely for the legs, but this belief limits its true potential. In reality, compression therapy is incredibly versatile and can be applied to various body parts, including the arms.

For instance, post-mastectomy lymphedema treatment often involves compression sleeves specifically designed for upper body support. These garments help enhance circulation and reduce swelling, proving that compression wear isn't just for lower extremities.

If you're into activities like weightlifting, swimming, or cycling, using compression tops can greatly boost your performance and recovery. Research backs this up, showing that compression benefits multiple body areas, contributing to overall venous health.

Advertisement

Many manufacturers now offer a range of specialized compression products tailored to different needs, ensuring inclusivity in design and addressing various health conditions.

Frequently Asked Questions

Can Compression Wear Be Used During Pregnancy?

Absolutely, you can use compression wear during pregnancy. It helps improve circulation, reduce swelling, and provide support. Just make sure to consult your healthcare provider to find the right fit and level of compression for you.

How Do I Choose the Right Compression Level?

To choose the right compression level, consider your specific needs and comfort. Consult with a healthcare professional if you're unsure. They'll help you determine the appropriate pressure based on your condition and activity level.

Are There Specific Brands Recommended for Beginners?

Yes, for beginners, brands like Skins, 2XU, and CEP offer great options. They provide varying compression levels, comfort, and durability. Start with these to help you find the right fit and support for your activities.

Can Compression Wear Help With Varicose Veins?

Yes, compression wear can help with varicose veins. It improves blood circulation, reduces swelling, and provides support. However, it's crucial to consult a healthcare professional to guarantee you choose the right type for your needs.

Advertisement

Is It Safe to Sleep in Compression Garments?

Like a gentle hug for your legs, sleeping in compression garments can be safe. They help improve circulation, but listen to your body. If you feel discomfort, it's best to remove them before bed.

Conclusion

In summary, it's essential to bust these compression myths to fully benefit from this therapy. Did you know that nearly 80% of people with chronic venous disease experience significant improvement when using compression correctly? Understanding the facts can enhance your comfort, recovery, and overall health. So, don't let misconceptions hold you back—embrace compression therapy as a valuable tool in your wellness journey!

Continue Reading

Technical Skills

Master Sidechain Compression! Create the Perfect Pulse in Your Tracks

Kickstart your music production skills by mastering sidechain compression; discover how to create an irresistible rhythmic pulse that transforms your tracks.

Published

on

master sidechain compression techniques

Mastering sidechain compression helps you create a vibrant pulse in your tracks. Start by inserting a compressor on your target track, usually a bass or pad, and set your kick drum as the sidechain input. Adjust the threshold, ratio, attack, and release to achieve that rhythmic "pumping" effect. Use high-pass filtering to maintain low-end clarity while enhancing vocal presence. Experiment with different source-target setups for unique interaction and consider ghost tracks for precision. With the right settings, you can elevate your mix's energy and clarity. There's much more to explore that'll elevate your sound even further.

Key Takeaways

  • Use sidechain compression to enhance clarity and reduce muddiness in dense arrangements by managing competing frequency ranges effectively.
  • Set up a compressor with moderate ratio and fast attack to achieve a rhythmic "pumping" effect, especially in EDM tracks.
  • Explore ghost track triggering for precise control over dynamics, allowing for complex sidechain effects without altering original audio elements.
  • Automate compressor settings to create evolving rhythmic textures, syncing attack and release times with the track's tempo for impactful dynamics.
  • Implement high-pass filtering on the sidechain input to preserve low-end integrity while allowing mid and high frequencies to drive compression.

Overview of Sidechain Compression

sidechain compression explained simply

Sidechain compression is an essential technique in modern music production that can transform your tracks. This audio processing method uses the signal from one track, often a kick drum, to control the compression on another track. By doing this, you create a dynamic relationship that enhances clarity in your mixes.

In dense arrangements, sidechain compression prevents muddiness and overlapping frequencies, allowing each element to shine.

To get the most out of a sidechain compressor, you need to adjust your compressor settings carefully. Key parameters like threshold, ratio, attack, and release play a significant role in shaping the sound. For instance, a fast attack and short release can create that signature rhythmic "pumping" effect, commonly found in electronic dance music (EDM).

This not only adds energy and movement to your tracks but also helps in creating space for other elements in the mix.

You can apply sidechain compression creatively across various instruments and vocals, making it a versatile tool in your music production arsenal. Mastering this technique will help you achieve polished and professional sound quality, elevating your productions to the next level.

Advertisement

Benefits of Sidechain Techniques

enhanced scalability and flexibility

One of the key advantages of using sidechain techniques in music production is the clarity it brings to your mixes. By employing sidechain compression, you can allow certain frequency ranges, such as kick drums, to duck competing elements. This prevents muddiness and guarantees that each sound occupies its own space in the mix.

Moreover, sidechain techniques add a pumping effect, which creates a rhythmic pulse that energizes your tracks, particularly in electronic dance music (EDM). This dynamic movement engages listeners and enhances the overall groove. Implementing sidechain compression on bass lines guarantees they're punchy without overpowering other elements, maintaining their presence effectively.

Additionally, the technique promotes better vocal clarity by ducking instrumentals during vocal phrases, letting the vocals shine without compromising the mix's quality. Sidechain filtering further refines this process, allowing you to control which frequencies trigger the compressor while preserving low-end integrity.

Benefit Description Importance
Clarity Reduces muddiness by managing frequency ranges Enhances mix quality
Dynamic Movement Creates a rhythmic pumping effect Engages listeners
Vocal Presence Allows vocals to stand out Maintains overall mix quality

Setting Up in Logic Pro X

logic pro x setup guide

To set up sidechain compression in Logic Pro X, start by inserting the Compressor plugin on the track you want to affect, like a bass or pad track.

Next, you'll need to select your source signal for the sidechain. This is typically a kick drum or another rhythmic element, which you can choose from the sidechain drop-down menu in the Compressor settings.

To keep your mix clean, create a ghost track by copying the kick drum onto a new track, muting it, and routing its output. This way, it won't be heard but will still trigger the compressor.

Now, adjust the compressor's threshold to determine when the compression activates, and set a moderate ratio to maintain some natural dynamics in the target track.

Advertisement

Choosing Your Source and Target

selecting source and target

When you're selecting your source track for sidechain compression, a kick drum's strong low-end presence is often your best bet.

The target track should share a similar frequency range, like bass lines or pads, to keep your mix clear.

Don't hesitate to experiment with different combinations, as unique sources and targets can lead to creative results that enhance your sound.

Source Track Selection

Selecting the right source and target tracks for sidechain compression is essential for achieving dynamic balance in your mix. Typically, you'll want to use a kick drum or another rhythmic element as your source track. This provides a clear and consistent trigger for the compressor, ensuring precise control over the dynamics.

When it comes to your target track, aim for elements that occupy a similar frequency range, such as bass lines, synths, or pads. Incorporating actionable tips and strategies can further refine your approach and enhance the overall sound.

One effective technique is creating a ghost track from your source signal. This allows you to maintain the original sound while utilizing its dynamics to control the compression on the target track. Just make sure to route your ghost track correctly as the sidechain input in the compressor settings to achieve the desired dynamic effects.

Advertisement

Don't hesitate to experiment with different source and target combinations. The unique rhythmic interactions you create can lead to creative results that enhance your mix.

Ultimately, effective source track selection is key to ensuring clarity and a punchy sound, especially in kick and bass interactions.

Target Track Considerations

Understanding how to choose your target track for sidechain compression is key to crafting a polished mix. Start by selecting elements that share a similar frequency range with your source track. For instance, pairing a bass line with a kick drum can effectively manage frequency clashes and maintain clarity in your mix.

Typically, your source track is a rhythmic element like a kick or snare, which should stand out in the mix to create a strong dynamic response on the target track. You might also consider using a ghost track—a muted copy of the source signal—to trigger the compressor on the target track. This way, you can control which elements are ducked without adding any unwanted noise.

Additionally, pay attention to the attack and release settings on your compressor. Tailoring these to your track's tempo and rhythmic structure will greatly impact how well the compressor reacts and integrates with the overall groove.

Advertisement

Don't hesitate to experiment with different instruments as target tracks, such as pads or synth leads, to uncover unique rhythmic interactions that enhance the overall movement of your composition through sidechain compression.

Compressor Configuration Essentials

compressor setup fundamental guidelines

Configuring a compressor for sidechain compression involves several key steps that can dramatically enhance your mix.

Start by selecting a suitable trigger source, typically your kick drum, to influence the dynamics of the target track effectively. Next, set the threshold level so the compressor activates only during the peaks of the kick signal. This approach guarantees minimal gain reduction during quieter passages, preserving the overall integrity of your mix.

Use a moderate ratio of around 4:1 to control the amount of compression without overly squashing the target track. This allows you to maintain its natural dynamics while achieving the desired ducking effect.

Adjust the attack time to be quick enough to respond to the kick drum, allowing for fast engagement and a more pronounced effect. Meanwhile, set the release time to complement your track's tempo, assuring smooth recovery.

Lastly, consider applying a sidechain filter, specifically a high-pass filter, to the sidechain input. This prevents low frequencies from triggering the compressor, keeping low-end elements like bass intact and clear in your mix.

Advertisement

Following these steps will set you up for successful sidechain compression.

Advanced Sidechain Techniques

innovative blockchain scalability solutions

In this section, you'll uncover advanced sidechain techniques that can elevate your mixes.

Experimenting with ghost track triggering can create unique rhythmic effects, while sidechain filtering methods help you maintain clarity in bass-heavy tracks.

Plus, using dynamic parameter automation allows you to tailor your compression for different sections, enhancing the overall musicality.

Ghost Track Triggering

Ghost track triggering offers an innovative approach to sidechain compression, allowing you to control dynamics without cluttering your mix. This technique involves creating an inaudible duplicate of a rhythmic element, like a kick drum, which acts as your sidechain input.

To set it up, simply create a new audio track, copy the desired trigger element, mute it, and route its output to the compressor's sidechain input on the target track.

Advertisement

Using ghost track triggering gives you precise control over the dynamics of your target track. You can tailor the compressor's threshold, ratio, attack, and release settings to achieve varied rhythmic responses.

This flexibility lets you craft complex and creative sidechain effects that enhance your track's groove.

Moreover, this technique opens up opportunities for experimenting with different timing and patterns, enhancing the dynamic interplay between instruments. By doing so, you create a more engaging listening experience.

Sidechain Filtering Methods

Taking your sidechain compression to the next level involves exploring sidechain filtering methods. By implementing sidechain filtering with techniques like a high-pass filter, you can precisely control which frequencies trigger your compressor on another track. This guarantees low frequencies don't overly compress, helping maintain clarity in your mix.

Here are four effective sidechain filtering methods to reflect on:

Advertisement
  1. Target Frequency Range: Set your sidechain filter to focus on frequencies between 100Hz and 16kHz, allowing mid and high frequencies to drive the compression, keeping bass intact.
  2. Use External EQ: Incorporate an external EQ in tandem with sidechain filtering. This helps tailor specific instruments, enhancing or reducing their influence on the compressor's response.
  3. Dynamic Automation: Experiment with automating the filter settings. By adjusting the frequency response throughout the track, you can create an evolving sound that captivates your listeners.
  4. Experiment with Filter Types: Try different filter types, like low-pass or band-pass filters. This can lead to unique ducking effects, enhancing the rhythmic and dynamic qualities of your mix.

Dive into these techniques and elevate your sidechain compression game!

Dynamic Parameter Automation

Dynamic parameter automation transforms sidechain compression into a highly responsive tool for your mixes. By allowing real-time adjustments to compressor settings—like threshold, ratio, attack, and release—you can enhance the effectiveness of sidechain compression throughout various sections of your track. This means you can create a more engaging listening experience that evolves with the music.

When you automate the attack and release times, you'll generate pronounced rhythmic effects that sync perfectly with your track's tempo and feel. This not only adds a dynamic pulse but also helps maintain clarity during dynamic changes by managing sidechain threshold levels. With careful automation, you can avoid over-compression and minimize pumping artifacts, ensuring that every element in your mix remains balanced.

Furthermore, integrating sidechain filtering with dynamic parameter automation gives you precise control over which frequencies are affected. This allows you to target specific instruments for ducking while preserving the integrity of your overall mix.

Experimenting with these techniques across multiple tracks can lead to intricate, evolving rhythmic textures, making your mix feel alive and responsive to the musical elements at play. Embrace dynamic parameter automation, and watch your mixes come to life!

Creative Applications in Mixing

innovative techniques for blending

In the world of mixing, sidechain compression offers exciting creative possibilities that can transform a track's energy. By strategically ducking elements such as synth pads or vocal effects during key rhythmic hits, you can enhance the overall groove and let prominent instruments shine through.

Here are some inventive ways to apply sidechain compression in your music production:

Advertisement
  1. Duck Non-Rhythmic Elements: Apply sidechain compression to strings or ambient sounds for a dynamic movement that makes your track feel alive.
  2. Use High-Pass Filtering: Prevent low frequencies from triggering the compressor by using a high-pass filter on the sidechain input, ensuring clearer mixes while keeping kick drums and bass lines punchy.
  3. Experiment with Settings: Tweak sidechain ratios and attack/release settings for varied effects, from subtle pulsing to more pronounced ducking, matching the vibe of your track.
  4. Utilize Ghost Tracks: Create unique rhythmic patterns by using a ghost track as a sidechain trigger for creative elements, adding unexpected musicality without altering the original audio source.

With these techniques, you can reveal the true potential of sidechain compression in your mixes.

Tips for Clarity and Impact

enhance communication for effectiveness

To achieve clarity and impact in your mix, you'll want to optimize your compressor settings for the best results.

Monitor gain reduction closely to guarantee your sidechain compression enhances rather than overwhelms your mix.

Tailoring your frequency selection can also make a significant difference, helping you maintain the integrity of your tracks while achieving that desired punch.

Optimize Compressor Settings

Achieving clarity and impact in your mix hinges on optimizing the compressor settings. When you fine-tune these parameters, you can create the perfect pulse that enhances your track without losing its essence.

Here are some key tips to help you get started:

  1. Adjust the Threshold: Set this level so that the compressor activates appropriately, allowing for noticeable gain reduction while keeping the target track's presence intact.
  2. Utilize a Moderate Ratio: Aim for around 4:1. This helps maintain natural dynamics while effectively controlling the dynamics of the track in relation to the sidechain input.
  3. Fine-Tune the Attack Time: Set it to a fast response (1-10ms) to guarantee the compressor reacts quickly to the kick drum or rhythmic element, achieving that snappy pumping effect.
  4. Set an Appropriate Release Time: Typically between 50-100ms, this allows the compressor to return smoothly without causing audible artifacts or excessive pumping.

Monitor Gain Reduction

Monitoring gain reduction is essential for maintaining clarity and impact in your mix. By visually observing the meter on your compressor plugin, you can guarantee that compression is applied effectively without squashing your track's dynamics. Aim for a gain reduction of 3-6 dB for subtle adjustments, while more aggressive settings can reach up to 10 dB for pronounced rhythmic effects.

Gain Reduction (dB) Effect
0-2 Minimal impact
3-6 Subtle adjustments
7-10 Pronounced rhythm
>10 Risk of squashing

Utilize the makeup gain feature after compression to restore your track's overall level, guaranteeing it sits well in the mix without losing presence. Regularly switch between bypassing the compressor and engaging it to critically listen for clarity. This helps you make informed decisions based on how your track interacts with other elements. Additionally, consider using visual aids, like your DAW's metering tools, to monitor gain reduction during specific sections, allowing for precise adjustments that enhance your mix.

Advertisement

Tailor Frequency Selection

Crafting a clear and impactful mix hinges on your ability to tailor frequency selection during sidechain compression. By focusing on the right frequencies, you can maintain the integrity of your bass line while achieving the desired punch in your mix. Here are some tips to help you refine your frequency selection:

  1. Use a High-Pass Filter: Set the cutoff between 150-200 Hz on the sidechain input to avoid low frequencies triggering excessive compression. This preserves clarity in your mix.
  2. Target Specific Frequency Ranges: Apply sidechain compression to frequencies between 100 Hz and 16 kHz to guarantee only competing elements are affected, leaving your low end intact.
  3. Experiment with Attack and Release: Adjust these settings to sync with your track's tempo. A musical response enhances your mix's rhythm and pulse.
  4. Utilize Visual Aids: Monitor compression effects using meters or waveform analysis. This helps you fine-tune settings for ideal clarity and impact.

Troubleshooting Common Issues

resolving frequent technical problems

Troubleshooting common issues with sidechain compression can make a considerable difference in your mix.

First, verify that the sidechain input is correctly routed to the compressor on the target track. Incorrect routing can prevent the desired ducking effect from occurring. If your kick drum or sidechain trigger isn't producing expected results, check the gain levels of both the source and target tracks to confirm they're balanced.

If the compressor isn't engaging as intended, revisit the threshold level. It should be set appropriately for the dynamics of the source signal to achieve the desired gain reduction.

To avoid excessive pumping or unnatural artifacts, adjust the attack and release settings on the compressor. These should match the tempo and rhythmic feel of your track.

When facing muddiness or lack of clarity, consider applying a high-pass filter on the sidechain input. This can help prevent low frequencies from overly influencing the compression response.

Advertisement

Resources for Further Learning

additional learning materials available

Improving your skills with sidechain compression doesn't stop with troubleshooting; there are plenty of resources available to deepen your understanding and application of this technique. From online tutorials and forums to in-depth masterclasses, you can explore a wealth of information tailored to different levels of expertise. Many of these resources break down compression techniques for all levels, making it easier to find guidance that suits your needs, whether you’re a beginner or a seasoned producer. Experimenting with these techniques in your own projects can also help you develop a more intuitive grasp of how to use sidechain compression effectively.

By exploring these options, you can enhance your production skills and take your music production to the next level.

Here are some valuable resources to take into account:

  1. YouTube Channels: Check out Reaper Mania and ADSR Music Production Tutorials for thorough video guides on sidechain compression techniques and their practical applications across various genres.
  2. Online Communities: Join forums like Gearspace and Facebook groups focused on music production. Engaging with experienced users can provide insights into effective sidechain practices.
  3. DAW Documentation: Utilize the official documentation for your Digital Audio Workstation (DAW) to understand the specific functionalities of sidechain compression tools and plugins available in your software.
  4. Online Courses: Think about enrolling in platforms like Mix Elite Academy, which offer extensive lessons on mixing, compression, and overall music production strategies.

Frequently Asked Questions

What Is the Best Sidechain Compression Setting?

To find the best sidechain compression settings, start with a 4:1 ratio, set the threshold around -10 dB to -20 dB, and adjust attack and release times between 10-30 ms and 50-150 ms, respectively.

What Is Sidechain Compression on Master?

Ever wondered how to create that dynamic pulse in your tracks? Sidechain compression on the master involves using a compressor triggered by a rhythmic element, enhancing your mix's cohesion without sacrificing its lively energy.

Should You Sidechain Compression?

You should definitely consider sidechain compression if you want a clearer mix. It helps prevent frequency clashes, enhances rhythm, and keeps your kick drum punchy while maintaining the bass line's presence without muddiness.

What Is the Best Ratio for Sidechain?

The best ratio for sidechain compression really depends on your track's needs. Start with 4:1 for balance, but don't hesitate to experiment with lower or higher ratios to find what fits your sound best.

Advertisement

Conclusion

Now that you've mastered sidechain compression, you're ready to create tracks that pulse with energy like a classic 80s synth. Remember to experiment with different sources and settings to find your unique sound. Keep refining your techniques, and don't hesitate to troubleshoot along the way. With practice, you'll transform your mixes into rhythmic masterpieces that captivate listeners. So plug in, turn up the volume, and let your creativity flow!

Continue Reading

Technical Skills

Double the Power! Parallel Processing Techniques for a Richer, Fuller Sound

Harness the secrets of parallel processing to elevate your audio quality—discover techniques that can transform your sound in ways you never imagined.

Published

on

enhanced sound through parallel processing

To double your audio processing power, embrace parallel processing techniques that create a richer, fuller sound. By layering multiple tracks and using effects like reverb and delay, you can enhance depth without overwhelming the original audio. Parallel compression adds punch and warmth by blending processed signals with untouched ones. Techniques like vocal layering and careful panning elevate your mix further, ensuring clarity and vibrancy. Experiment with plugin tools and set up auxiliary channels to manage your workflow efficiently. Keep exploring these strategies, and you'll reveal even more secrets to achieve a compelling audio experience.

Key Takeaways

  • Doubling enriches music by layering multiple recordings, creating a fuller and more vibrant sound experience.
  • Parallel compression enhances dynamic range without sacrificing punch, blending compressed and uncompressed signals for warmth.
  • Utilizing reverb and delay in auxiliary channels adds depth while preserving the original audio signal's clarity.
  • Vocal layering introduces natural variations in timing and pitch, enhancing richness and organic feel in vocal performances.
  • Strategic panning and effective effects selection maintain balance, ensuring clarity while achieving a polished and engaging mix.

Understanding Doubling in Music

doubling concepts in music

Doubling in music is like adding layers to a cake; it enriches the sound and enhances the overall experience. When you record the same musical part multiple times, you create a fuller, more vibrant mix. This technique, known as doubling, introduces natural variations in timing and pitch that breathe life into your tracks. It's a favorite among audio engineers, as it can be applied to a variety of instruments, from guitar to keyboard to bass.

By maintaining the natural dynamics of the original recording, doubling effectively thickens the sound while preserving its unique character. You'll find that this versatility allows you to explore different genres without compromising the integrity of your music.

Additionally, effective doubling often involves careful panning and mixing techniques, which help each layer coexist harmoniously in the final mix.

The beauty of doubling lies in its organic quality, celebrating human imperfections and resulting in a more engaging listening experience. So, as you immerse yourself in your next project, consider how you can use doubling to add depth and warmth, creating a rich tapestry of sound that captivates your audience.

Benefits of Doubling Techniques

enhancing growth through doubling

When you incorporate doubling techniques into your music production, you open up a range of benefits that can considerably enhance your tracks. Doubling layers multiple recordings of the same part, introducing natural variations in timing and pitch, resulting in a fuller, richer sound. This approach works across various instruments—like guitar, keyboard, and bass—allowing you to maintain the original character while achieving a thicker texture.

In genres such as rock and pop, where a fuller mix is essential, doubling adds depth and energy to your overall production. By embracing the imperfections in performance, it introduces an organic quality that makes your music more relatable and alive. Plus, utilizing doubling techniques can elevate your mix without sacrificing the natural dynamics of your original recordings.

Advertisement

Here's a quick overview of the benefits of doubling:

Benefit Description
Fuller Sound Layers create a richer audio experience.
Enhanced Depth Adds energy and dimension to the mix.
Organic Quality Celebrates human imperfections for relatability.

Essential Parallel Processing Methods

key techniques for parallelism

Essential parallel processing methods can considerably transform your audio productions, allowing you to enhance sound without sacrificing the original dynamics. By employing these techniques, you can achieve a fuller, more vibrant mix that maintains the integrity of your tracks.

Here are three essential methods to contemplate:

  1. Parallel Compression: This technique, often called New York compression, involves duplicating your audio track, applying heavy compression to the duplicate, and blending it back with the original. You'll retain those punchy transients while adding body and warmth.
  2. Reverb and Delay: By routing your audio to an auxiliary track, you can add depth with reverb or delay effects. This approach enhances spatial characteristics without overwhelming the original signal. You'll find the perfect balance of wet and dry sounds.
  3. Dynamics Processing: Experimenting with different dynamics processing techniques can give your mix a unique character. You can shape the sound to fit your creative vision while keeping the original essence intact.

Utilizing these essential parallel processing methods can lead to enhanced mix quality, flexibility in sound design, and endless possibilities for creativity in your audio projects.

Setting Up Parallel Chains

establishing concurrent processes

When setting up parallel chains in your DAW, you'll first want to familiarize yourself with the routing methods specific to your software.

This understanding will help you effectively blend wet effects with your dry signal, achieving the perfect balance for your mix.

Routing Methods Overview

Setting up parallel chains for sound processing can greatly enhance your mixing capabilities, and understanding the routing methods available is key.

Different Digital Audio Workstations (DAWs) offer various capabilities, so familiarize yourself with your specific DAW's features for efficient routing.

Advertisement

Here are three effective routing methods you can use:

  1. Track Duplication: Duplicate your original signal onto a new track for separate processing. This keeps the integrity of the original sound while allowing for creative effects.
  2. Analog Workflow: Use conventional parallel techniques that mimic analog console workflows. This approach provides intuitive control over your mix and effects application.
  3. Internal Plugin Routing: Some plugins manage parallel routing internally, streamlining your workflow and minimizing manual setups.

Blending Wet and Dry

To achieve a well-balanced mix, blending wet and dry signals is essential in setting up parallel chains. Start by duplicating your source audio track, creating a parallel version where you'll apply effects. This way, you maintain the integrity of the original dry signal while experimenting with different processing options on the new track.

Utilize aux return channels to control the wet signal level separately. This allows you to adjust how much of the processed sound you want to incorporate without overwhelming the dry signal. Many digital audio workstations (DAWs) offer intuitive routing options for parallel processing, making it easy to manage these signals effectively.

When mixing it back, adjust the channel faders to find the perfect balance. Don't hesitate to experiment with varying levels of wetness; this can lead to unique sonic characteristics that enrich your audio.

The key is to enhance the sound without losing the essence of the original track. By carefully blending the wet and dry signals, you can achieve a fuller, more dynamic mix that captivates your listeners.

Advanced Doubling Techniques

mastering doubling strategies effectively

Utilizing advanced doubling techniques can greatly enhance the depth and width of your mixes. By incorporating methods like mid-side processing, you can separate the center and stereo signals, giving you enhanced control over stereo width and spatial placement. This allows your mix to breathe and feel more alive.

Here are three ways to elevate your sound using advanced doubling techniques:

Advertisement
  1. Wider Soundstage: Blend processed side channels with untreated mid channels to create a richer stereo experience.
  2. Dynamic Textures: Use varying dynamics, articulation, or octaves while doubling to introduce unique textures that maintain the original character of your sound.
  3. Enhanced Clarity: Employ automation on doubled tracks, dynamically adjusting levels and effects to confirm clarity and prevent muddiness.

Choosing the Right Effects

selecting appropriate visual effects

When you're choosing effects, think about how each one can enhance your track's sound characteristics without overpowering the original elements.

Balancing depth and clarity is key, so consider how effects like reverb or delay interact with your mix.

Experimenting with different combinations will help you find the perfect blend for a polished, professional sound. Experimenting with different combinations will help you find the perfect blend for a polished, professional sound. Pay close attention to how each element interacts, adjusting EQ and compression settings to refine your mix further. For those looking to create bass without thirdparty tools, consider using built-in plugins or layering oscillator waveforms to craft a deep, clean low-end. This approach can yield powerful results while keeping your workflow efficient and streamlined.

Effect Selection Criteria

Choosing the right effects for your mix involves evaluating several key factors that influence the final sound. By applying effective selection criteria, you can enhance your tracks while maintaining clarity and definition. Here are three essential factors to assess:

  1. Sonic Qualities: Think about the desired characteristics. Do you need depth from reverb, rhythmic complexity from delay, or harmonic enhancement from saturation? Each choice should align with your track's essence.
  2. Clarity with Modulation Effects: Prioritize modulation effects like chorus that can widen the sound without overwhelming the mix. You want your original signal to shine through, so avoid muddiness.
  3. EQ Adjustments: Use parametric EQ to tailor effects to specific frequency ranges. This helps address issues like room tone and mic proximity buildup, ensuring your sound remains crisp and well-defined.

Experiment with blending different effect types in parallel processing to create unique textures.

Just remember, the selected effects should complement each other and the overall mix. With careful evaluation, you can achieve a rich, fuller sound that captivates your listeners.

Balancing Sound Characteristics

Balancing sound characteristics in your mix is essential for achieving a polished and professional result. When you choose the right effects, you can enhance your track without overpowering the original audio.

Advertisement

For instance, using reverb can add depth, while delay introduces rhythmic complexity, enriching your mix. Saturation is another powerful tool; it enhances harmonic content and adds warmth, helping you achieve that perfect balance.

Modulation effects like chorus can provide width and movement, but be cautious. Over-modulation can lead to muddiness, so aim for clarity. High-pass filters are your allies in this process, effectively eliminating unwanted low-end noise and keeping your mix clean and focused on the desired frequencies.

Parallel processing is where the magic happens. By blending processed signals with dry originals, you retain the dynamics of your original audio while enhancing the overall character of the track.

This technique allows for creative sound design, making your mix feel fuller and more engaging. Remember, it's all about balancing sound characteristics to create a rich listening experience that resonates with your audience.

Enhancing Vocals With Doubling

doubling technique for vocals

Doubling vocals is a powerful technique that can transform your recordings by layering multiple takes of the same performance. By doing this, you create a richer, fuller sound that captures the essence of your vocal delivery.

When you implement doubling vocals, consider these key emotional enhancements:

Advertisement
  1. Natural Variations: Layering takes introduces slight differences in timing and pitch, giving your vocals a more organic feel.
  2. Enhanced Stereo Image: Panning your doubled tracks strategically can make the lead vocal stand out while adding depth, creating a more immersive listening experience.
  3. Increased Emotional Impact: Layering different takes for harmonies or textures can greatly boost the song's emotional resonance.

Utilizing parallel processing is essential here. It allows you to blend compressed and uncompressed vocal tracks, preserving clarity while enhancing presence.

Plus, adding effects like reverb and delay to your doubled vocals creates a sense of space and dimension without overpowering the lead.

When you embrace these techniques, your vocals won't only shine but also evoke stronger feelings in your audience, making your music truly unforgettable.

Creative Applications of Doubling

innovative uses of doubling

When you layer multiple vocal takes, you not only enrich the sound but also create an enchanting choral effect that enhances your mix.

For instruments, experimenting with panning and timing variations can transform simple doubled tracks into a lush, immersive experience.

Let's explore these vocal and instrument doubling strategies to elevate your productions.

Vocal Layering Techniques

Vocal layering can transform a simple vocal track into a lush, immersive experience. By recording multiple takes of the same part, you can create a sound that's not just fuller but also richer.

Advertisement

To enhance your vocal production, consider exploring advanced mixing techniques that can further elevate your sound. Here are three techniques to elevate your vocal layering:

  1. Adding Harmonic Depth: Use different vocal takes to create harmonies. Each layer introduces unique qualities, making the overall sound larger and more engaging.
  2. Strategic Panning: Spread your layered vocals across the stereo field. This technique widens the mix while keeping the lead vocal clear and prominent, ensuring it stands out in the mix.
  3. Dynamic Effects Automation: Apply reverb and delay selectively on individual layers. This adds interest and depth throughout the track without overwhelming it, enhancing the overall richness of your vocal performance.

Balancing these layers is essential. Pay attention to avoid muddiness; each element should complement the others.

With thoughtful vocal layering, you'll create an emotive experience that captivates listeners, making your tracks unforgettable. Immerse yourself in the creative possibilities, and watch your sound transform!

Instrument Doubling Strategies

If you want to add depth and richness to your tracks, instrument doubling is a powerful technique worth exploring. This method involves recording the same part multiple times, layering each take to create natural variations in timing and pitch. By doing this, you'll achieve a thicker, more textured sound that enhances your mix.

To effectively implement instrument doubling, choose parts that could benefit from additional warmth and dimensionality. Capture those subtle differences during recording to enrich the overall tone and dynamics.

Once you have your doubled tracks, pan them strategically across the stereo field. This will create a sense of space and depth, allowing each layer to shine while contributing to the fuller mix.

Advertisement

Experiment with octave variations, different dynamics, or articulations between the doubled parts. This adds extra texture and makes your instrumentation feel more alive and organic.

Don't forget to leverage digital tools for artificial doubling, which can help you achieve that fuller sound without sacrificing the original character of your instruments. With these strategies, your tracks won't only sound richer but also resonate more deeply with your listeners.

Mixing Strategies for Depth

diverse approaches enhance understanding

Creating depth in a mix is essential for achieving a professional sound, and mixing strategies play a crucial role in this process. By utilizing parallel processing, you can blend a compressed signal with the dry original, enhancing richness without sacrificing integrity.

Here are three effective strategies to contemplate:

  1. Auxiliary Channels: Implement auxiliary return channels for applying effects like reverb and delay. This keeps your dry signal balanced while creating a spacious atmosphere in the mix.
  2. Panning Techniques: Experiment with panning multiple layers of vocals or instruments in parallel. This widens the stereo image, preventing a cluttered sound stage, and gives your mix room to breathe.
  3. Dynamic Range Management: Leverage parallel compression to maintain transient punch while adding sustain. This enriches the dynamic range, ensuring your mix feels alive and engaging.

Tools for Effective Processing

effective processing tools available

Utilizing the right tools is essential for effective parallel processing in sound production. Start by incorporating plugins like Vitamin Sonic Enhancer and Manny Distortion to add harmonic richness and excitement to your tracks. These tools can notably enhance your sound when used in parallel processing techniques.

Don't forget to conduct A/B testing with plugins like the CLA-2A Compressor and C6 Multiband Compressor. This helps you determine the best settings for achieving your desired vocal sound and dynamics, ensuring your processing is on point.

Implementing a color-coding system within your DAW can also streamline your workflow, allowing you to manage and differentiate various parallel processing paths easily.

Advertisement

To maintain clarity while enhancing depth, leverage aux return channels to blend processed signals with the dry originals, especially for effects like reverb and delay.

Frequently Asked Questions

What Is Parallel Processing in Sound?

Parallel processing in sound means you duplicate an audio signal, apply effects to the copy, and blend it back with the original. This technique enhances sound without losing the original dynamics, adding depth and richness.

What Is Parallel Processing Technique?

Did you know that 70% of professional mixers use parallel processing? This technique involves duplicating your audio signal, applying effects, and blending it back, enhancing your sound while preserving the original dynamics beautifully.

What Are Two Examples of Parallel Processing?

Two examples of parallel processing include applying reverb on a snare drum to enhance spaciousness, and using parallel compression to maintain punchy dynamics in vocals while blending a heavily compressed track with the original signal.

Is the Human Brain Capable of Parallel Processing?

Like a skilled conductor leading an orchestra, your brain can handle multiple tasks at once. Yes, it's capable of parallel processing, allowing you to juggle different sensory inputs and cognitive functions seamlessly.

Advertisement

Conclusion

So, you've learned all about doubling techniques, but here's the twist: you might just end up making your music sound too rich! Imagine creating a track that's so full, it practically spills out of your speakers, drowning your listeners in a sea of sound. But hey, who wouldn't want to swim in a wave of lush harmonies? Just remember, while you're doubling the power, don't forget to leave a little room for clarity—because even the richest cake needs some frosting!

Continue Reading

Affiliate disclaimer

As an affiliate, we may earn a commission from qualifying purchases. We get commissions for purchases made through links on this website from Amazon and other third parties.

Advertisement

Vetted

affordable home studios guide affordable home studios guide
Vetted3 weeks ago

15 Best Professional Home Studios Under $1000 for Aspiring Creators

Learn how to build your dream home studio for under $1000 with expert tips and gear recommendations that will elevate...

christmas gifts for musicians christmas gifts for musicians
Vetted3 weeks ago

The Ultimate Gift Guide: 14 Best Christmas Music Production Gifts for Every Aspiring Musician

With 14 unique gift ideas for aspiring music producers, discover the perfect present that will elevate their creative journey this...

affordable thunderbolt audio interfaces affordable thunderbolt audio interfaces
Vetted3 weeks ago

15 Best Thunderbolt Audio Interfaces Under $500: Affordable Options for Aspiring Musicians

The top 15 Thunderbolt audio interfaces under $500 offer exceptional quality and features—discover which one will elevate your music production...

affordable dynamic microphones guide affordable dynamic microphones guide
Vetted3 weeks ago

15 Best Dynamic Microphones Under $150 for Every Budget and Need

Hunt for the perfect dynamic microphone under $150? Discover the top 15 picks that cater to every budget and need,...

optimal studio monitor placement optimal studio monitor placement
Vetted3 weeks ago

15 Best Monitor Positioning Tips for Optimal Studio Acoustics

Get ready to transform your sound with these 15 essential monitor positioning tips that will elevate your studio acoustics to...

top wireless studio peripherals top wireless studio peripherals
Vetted3 weeks ago

13 Best Wireless Peripherals for Studio Use – Enhance Your Creative Workflow

Discover the 13 best wireless peripherals that can elevate your studio experience, but wait until you see how they can...

affordable guitar audio interfaces affordable guitar audio interfaces
Vetted3 weeks ago

15 Best Audio Interfaces for Guitar Under $250 – Affordable Picks for Every Musician

Navigate through our top 15 audio interfaces for guitar under $250, and discover which affordable pick could elevate your music...

top easter music sales top easter music sales
Vetted3 weeks ago

The 9 Best Easter Music Production Sales You Can’t Miss This Season

Unlock incredible deals on Easter music production sales, including must-have resources that promise to elevate your craft—discover what you can't...

optimal studio monitor stands optimal studio monitor stands
Vetted3 weeks ago

15 Best Monitor Stands for an Optimal Studio Setup – Enhance Your Workspace Today

Boost your studio setup with the 15 best monitor stands that enhance sound and organization—discover which options will transform your...

top drum pads for producers top drum pads for producers
Vetted4 weeks ago

15 Best Drum Pads for Beat Making: Elevate Your Music Production Game

Looking to enhance your music production? Discover the 15 best drum pads that will take your beat-making skills to the...

top spring sale gear top spring sale gear
Vetted4 weeks ago

The 2 Best Spring Sale Studio Gear Picks You Can’t Miss

Discover the top two must-have studio gear picks this spring that will elevate your workouts and photography skills—find out what...

affordable music production kits affordable music production kits
Vetted4 weeks ago

14 Best Complete Music Production Setups Under $1000 for Aspiring Producers

Explore the 14 best music production setups under $1000 that will elevate your creativity and gear up your journey—discover the...

Trending

Copyright © 2024 The Sound of Music Guide Affiliate disclaimer As an affiliate, we may earn a commission from qualifying purchases. We get commissions for purchases made through links on this website from Amazon and other third parties.