Connect with us

Technical Skills

Sidechain Techniques Beyond the Basics

With advanced sidechain techniques, you can transform your mixes dramatically—discover what unique dynamics await your sound production journey.

Published

on

advanced sidechain techniques explained

To enhance your audio production, exploring advanced sidechain techniques can be a game changer. Start with multiband sidechain compression to target specific frequency bands for a cleaner mix. You can also experiment with unconventional triggers, like percussive sounds or vocals, to create unique dynamics. Responsive techniques can energize your tracks, helping kick drums and basslines fit together tightly. Don't forget to adjust your compressor's parameters for ideal performance—fast attacks can give that iconic pumping sound. By venturing further into these techniques, you'll discover even more ways to elevate your mixes to professional levels.

Key Takeaways

  • Sidechain compression enhances mix clarity by allowing one track's dynamics to influence another, particularly useful for kick drums and basslines.
  • Advanced techniques like multiband sidechain compression enable targeted frequency control, preserving clarity while preventing frequency masking.
  • Creative sidechain triggering from unconventional sources can create unique rhythmic textures and dynamic control in mixes.
  • Responsive mixing techniques, such as ducking, ensure transient elements stand out and maintain a tight sound in electronic genres.
  • Proper signal routing and precise compressor parameter adjustments are essential for effective sidechain compression setup in modern DAWs.

Understanding Sidechain Compression

mastering sidechain compression techniques

Sidechain compression is a powerful technique that allows you to create dynamic mixing by using an external signal to control a compressor on a different track. This method excels at managing frequency ranges, particularly when you want to guarantee that your kick drum cuts through the bassline without muddiness. By routing the kick as the sidechain input to a compressor on the bass track, you can achieve a cleaner mix.

Modern DAWs make sidechain compression easy to set up, eliminating the complexities associated with vintage hardware. You can adjust parameters like threshold, ratio, attack, and release to tailor the compressor's response, creating effects that range from subtle to pronounced.

One of the most popular uses of sidechain compression is achieving the "pumping" effect, which enhances rhythmic energy in your tracks, especially in electronic music.

Beyond its basic uses, sidechain compression opens up numerous creative applications. You can experiment with different elements as the sidechain trigger, allowing for unique rhythmic textures and dynamic interactions within your mix.

Embrace this technique to elevate your productions and add depth to your sound.

Advertisement

Dynamic Sidechain Compression

dynamic audio processing technique

Dynamic sidechain compression enhances your mix naturally by allowing one track's volume to shape the dynamics of another.

This groove-driven ducking technique guarantees that your kick drum and bassline work together seamlessly, creating a tight and responsive sound.

With modern tools at your fingertips, you can easily implement this method for a more energetic and polished mix.

Natural Sound Enhancement

One of the most effective techniques for achieving a natural sound in music production is dynamic sidechain compression. This method uses the volume envelope of one track—often a kick drum—to control the compression of another track, like a bassline. By adjusting the ducking amount based on the kick's volume, you create a responsive and organic mix that enhances your music's groove.

With dynamic sidechain compression, you can achieve clarity in low-frequency content without sacrificing mix balance. This technique allows each element to shine while maintaining the overall cohesiveness of your track. The natural-sounding response of dynamic sidechain compression helps you avoid the harshness that often comes with static compression settings, leading to a more musical result.

When you utilize this technique effectively, you'll notice how individual elements stand out, making your mix feel more polished and professional. By focusing on the interplay between the kick and bass, you not only improve the rhythm but also enhance the emotional impact of your music.

Advertisement

Embrace dynamic sidechain compression, and you'll reveal a world of possibilities for achieving a more natural and engaging sound in your productions.

Groove-Driven Ducking

Creating a natural sound is just the beginning; groove-driven ducking takes your mix to the next level. By utilizing dynamic sidechain compression, you can use a kick drum trigger to control the compression of your bassline. This technique enhances the groove, resulting in a tighter and more responsive mix. The amount of ducking applied to the bass is directly proportional to the kick's volume, creating that characteristic "pumping" sound essential in dance music.

Here's a table summarizing the key components of groove-driven ducking:

Element Function Benefit
Kick Drum Trigger Controls compression on bass Enhances groove and rhythm
Sidechain Compression Reduces volume of bass during kick Allows transients to cut through
Ducking Amount Proportional to kick's volume Creates a balanced and clear mix
Dance Music Genres Utilizes dynamic sidechain Achieves the energetic "pumping" sound
Overall Clarity Maintains presence of elements Prevents muddiness in dense mixes

Responsive Mixing Techniques

Responsive mixing techniques, particularly dynamic sidechain compression, can transform your tracks by enhancing their interaction and flow. This method uses the volume envelope of one track to control the compression of another, creating a more natural mixing environment.

For instance, you can set a compressor on the bass to react to a kick drum, enabling ducking that's proportional to the kick's volume. This not only tightens your mix but also allows the transient elements, like the kick, to cut through sustained sounds without unwanted muddiness.

Advertisement

Additionally, mastering advanced mixing techniques can help you achieve more professional-sounding results.

To achieve the best results, employ fast attack and release settings on your compressor. This guarantees the compression reacts swiftly to the dynamics of the kick, preserving the rhythmic feel essential to genres like EDM.

The creative use of dynamic sidechain compression contributes to that signature "pumping" effect, energizing the music and driving the groove forward. By mastering these responsive techniques, you'll enhance the overall flow of your tracks, making them feel more cohesive and engaging.

Don't hesitate to experiment with different settings to find the perfect balance for your unique sound.

Multiband Sidechain Compression

dynamic frequency band control

Utilizing multiband sidechain compression can greatly enhance your mix by allowing for precise control over different frequency ranges. This technique enables you to split an audio signal into multiple frequency bands, applying targeted compression without affecting the entire signal.

Here are three key benefits you'll experience:

Advertisement
  1. Enhanced Clarity: By preserving the clarity of high frequencies, you guarantee that critical elements like vocals and lead instruments shine through, even in dense mixes.
  2. Effective Ducking: You can make low-end frequencies, such as basslines, duck when triggered by kick drum hits. This maintains the groove while preventing frequency masking.
  3. Customizable Settings: Advanced plugins offer adjustable crossover frequencies and individual band gain controls, allowing you to shape your sound creatively and precisely.

Creative Sidechain Triggering

innovative sidechain activation techniques

In the world of music production, embracing creative sidechain triggering can open up a domain of dynamic possibilities. By using unconventional sources like percussive elements or vocals as your sidechain triggers, you can control compression in exciting ways. This approach not only enhances the rhythmic feel of your track but also helps sculpt its sonic character.

Here's a quick look at some creative sidechain triggering options:

Trigger Source Effect on Dynamics Potential Outcome
Percussive Elements Creates unique rhythmic textures Unexpected groove variations
Vocal Dynamics Ducks background elements Enhanced space and depth
Master Bus Controls overall mix dynamics Cohesive emotional impact

Experimenting with different attack and release times allows you to create rhythmic effects beyond the typical kick drum triggers. Adjusting thresholds and compression ratios enhances your control over the sidechain effect, maintaining the musicality of your track. By tapping into these creative sidechain techniques, you can elevate your production and evoke deeper emotions in your listeners.

Practical Applications in Mixing
mixing techniques for applications

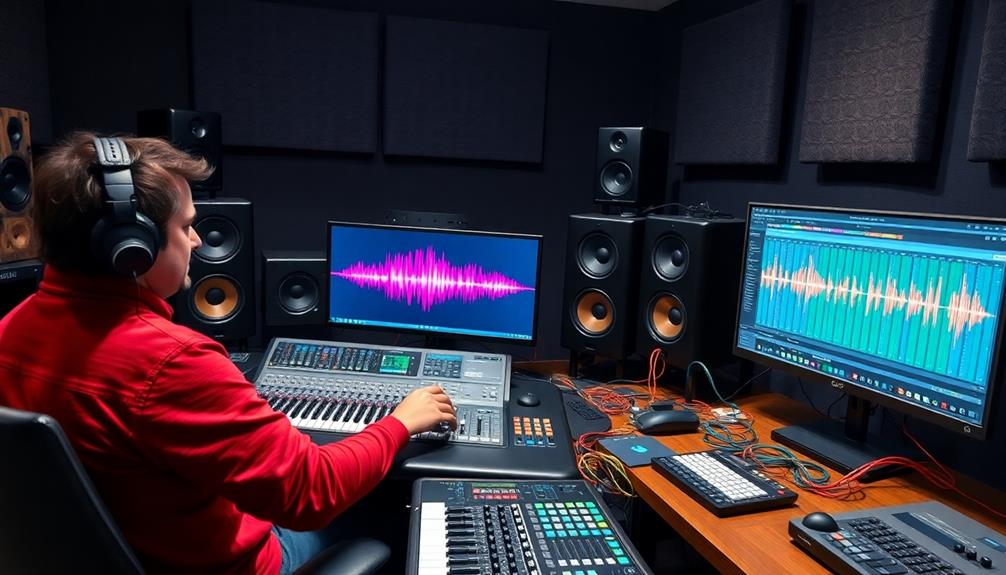
While mixing, applying sidechain compression can greatly enhance the clarity and balance of your tracks. It's a powerful tool for managing dynamics, especially when you're dealing with busy arrangements.

Additionally, utilizing techniques like the role of contrast ratio can help maintain the overall quality of your audio mix. Here are three practical applications to contemplate:

  1. Vocals and Instruments: Use sidechain compression to duck instruments when vocals are present. This guarantees your lead vocals shine through, maintaining clarity in dense mixes.
  2. Kick and Bass Interaction: To avoid frequency clashes, employ sidechain compression between your kick and bass. Adjust the attack and release settings to create a punchy low end that drives the track forward.
  3. Percussion Tightening: Apply sidechain techniques to percussion elements. This can tighten up bass sounds, creating a dynamic interplay between rhythm and melody, adding energy to your overall mix.

Additionally, using a multiband compressor allows you to target specific frequency ranges, giving you more control.

Fine-tuning the ratio and release time can lead to improved track dynamics and cohesion, guaranteeing your final mix sounds professional and engaging.

Embrace sidechain compression, and watch your mixes transform!

Advertisement

Enhancing Instrument Clarity

improving sound quality precision

Achieving instrument clarity in a mix is essential for creating a professional sound. One effective way to enhance clarity is by using sidechain compression, particularly with your kick drum. When you trigger sidechain compression on basslines with the kick, you allow the kick to punch through the mix, guaranteeing it maintains its transient impact without overwhelming the low-end frequencies.

Applying sidechain compression to other elements, like lush synth pads, can help duck the low-end frequencies when the kick hits. This technique keeps the high-end richness intact while creating space in the mix. Make certain to use a fast attack and release setting on the compressor; this allows for a quick response to transient signals, making the ducking effect more pronounced.

Additionally, incorporating a high-pass filter on the sidechain input can further clean up your compression effect. By filtering out unnecessary low frequencies, you guarantee that only the relevant signals influence the dynamics of your main track. This results in a clearer overall sound, allowing each instrument to shine while maintaining a cohesive mix.

Setting Up Sidechain Compression
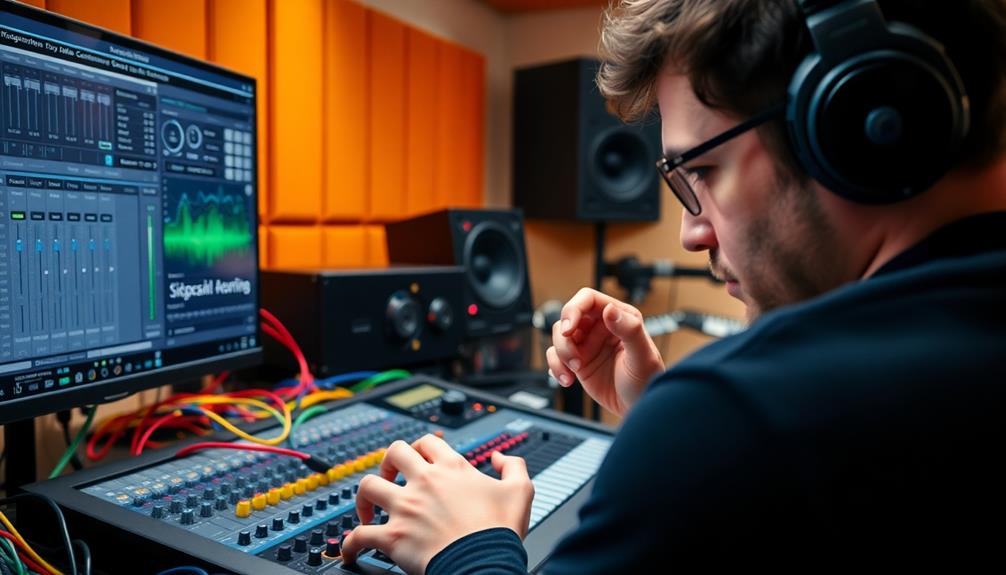
configuring sidechain compression techniques

Setting up sidechain compression involves a few key steps that vary depending on your DAW.

You'll need to route your trigger signal correctly and adjust the compressor parameters to get the sound just right.

Let's break down the specifics for different platforms to guarantee you're on the right track.

DAW-Specific Setup Steps

Many producers find that setting up sidechain compression in their Digital Audio Workstation (DAW) can appreciably enhance their mixes.

Advertisement

The process varies slightly depending on the DAW you're using, but the core principles remain the same. Here's how you can get started:

  1. Ableton Live: Load the Compressor, enable the Sidechain option, and select the track you want to trigger the sidechain from the dropdown menu.
  2. FL Studio: Route your sidechain trigger track to the Fruity Limiter, set it to Comp mode, and adjust the threshold to manage the ducking effect.
  3. Logic Pro X: Use the default Compressor, activate the Side Chain setting, and choose the triggering track from the menu.

For Pro Tools, assign a bus to the sidechain inputs of the compressor on the desired channel strip, ensuring the triggering signal is correctly routed.

Once you've set up the sidechain compression, don't forget to tweak key parameters like ratio, threshold, attack, and release to customize the ducking effect to fit your mix perfectly.

Happy mixing!

Signal Routing Essentials

When it comes to sidechain compression, proper signal routing is essential for achieving the desired effect in your mix. To set it up, you'll first need to determine your trigger track—most commonly a kick drum. Route the audio signal from this track to the sidechain input of the compressor on the track you want to compress, like a bass line.

If you're using Ableton Live, enable the Sidechain option in the Compressor device and select your trigger track from the dropdown menu. In Logic Pro X, simply activate the Side Chain feature in the default Compressor and choose your triggering channel from the settings.

Advertisement

For Pro Tools users, select a bus as the key input for your compressor, ensuring that the appropriate track sends are configured correctly. If you're working with hardware compressors, make sure to connect a 1/4 TRS cable to route the sidechain signal effectively, so the compressor responds accurately to the intended trigger input.

Once you've got your signal routing set up correctly, you're well on your way to creating that punchy, dynamic sound that sidechain compression is known for.

Adjusting Compressor Parameters

Now that you've established the proper signal routing for sidechain compression, it's time to fine-tune your compressor parameters to achieve the best results. Proper adjustments can make all the difference in your mix. Here's how to get started:

  1. Threshold: Set the threshold so the compressor only engages when the sidechain input exceeds a certain volume. This guarantees dynamic control without constant interference.
  2. Attack Times: Opt for fast attack times to allow the compressor to respond quickly to the sidechain signal. This is vital for creating that iconic pumping effect in genres like EDM.
  3. Release Time: Use a longer release time to maintain a natural sound. This allows the compressor to gradually return to its original state after the sidechain input decreases, preventing abrupt volume changes.

Don't forget about high-pass filtering on the sidechain input. This technique can help clean up the signal by reducing the influence of low frequencies, leading to a more responsive ducking effect on the target track.

With these adjustments in mind, you're well on your way to mastering sidechain compression!

Advanced Techniques for Sound Design
innovative sound design methods

Advanced sound design techniques often push the boundaries of creativity, and sidechain compression stands out as a powerful tool in this domain. By utilizing ghost sidechains, you can trigger a compressor with an inaudible kick drum, allowing for dynamic effects in genres like trap without cluttering the mix. This method keeps your sound clean while enhancing the rhythm, similar to how AI enhances immersive learning experiences through tailored content.

Multiband sidechain compression takes this a step further, letting you control specific frequency bands that duck based on the sidechain input. This targeted approach enhances clarity and maintains the overall tonal balance of your mix.

Advertisement

Don't shy away from using unconventional sidechain sources, such as reverb or delay effects. These can create intricate sound manipulations, leading to unique textures and rhythmic variations that enrich your composition.

You can also sidechain room mics to snare tracks, dynamically accentuating the groove and creating a saturated, engaging sound.

Plus, implementing these techniques in live performance settings can elevate the audience experience by adapting sound levels to various acoustics in real-time.

With these advanced techniques, your sound design possibilities are virtually limitless.

Historical Context and Evolution
evolution of historical context

To understand sidechain compression, you need to look at its origins in broadcast and vocal mixing, where it first helped manage levels.

As electronic music exploded in popularity, this technique transformed into an essential element of EDM, creating that iconic pumping effect.

Advertisement

Today, modern mixing practices continue to evolve, showcasing sidechain compression's versatility across various genres and sounds.

Origins of Sidechain Compression

Sidechain compression has its roots deeply embedded in the broadcast industry, emerging in the 1960s as a practical solution for managing audio levels. It primarily aimed to guarantee that the original vocal wouldn't be overpowered by background music.

Early compressors lacked the functionality for sidechain inputs, leading to complex setups that were cumbersome for engineers.

As technology advanced, this technique gained popularity, especially with the rise of electronic dance music in the early 2000s. Producers discovered that by routing a signal into the sidechain of a compressor, they could create that rhythmic pumping effect that became a hallmark of the genre.

Here are three key developments in the evolution of sidechain compression:

Advertisement
  1. Broadcast Origins: Initially designed to control audio levels in radio and television, assuring clarity in spoken content.
  2. Digital Revolution: The advent of modern digital audio workstations (DAWs) made compressors sidechain routing more accessible and user-friendly.
  3. Creative Tool: Today, it's a standard mixing technique, crucial for achieving dynamic control and clarity across various music genres.

This evolution showcases its transformation from a utility feature to a significant creative process.

Growth in Electronic Music

The rise of electronic music in the late 1990s and early 2000s marked a significant moment for sidechain compression, transforming it into a creative powerhouse. Artists like Daft Punk showcased this technique in their iconic track "One More Time," popularizing the pumping effect that captivated audiences.

As digital audio workstations (DAWs) evolved, sidechain compression became accessible to more producers, shifting from a utility feature to an essential tool in various genres of music such as EDM, house, and trap.

You'll find that these genres heavily rely on sidechain techniques to create rhythmic movement and clarity, effectively allowing kick drums to dominate low-frequency content while preserving melodic elements. This technique often employs ducking, which enhances the groove and energy of a track.

The introduction of ghost sidechain techniques, where inaudible triggers influence dynamics without cluttering the mix, has further expanded creative possibilities in modern electronic music production.

As electronic music has evolved, sidechain compression has been embraced not only for its practical applications but also for its ability to produce unique soundscapes, engaging listeners through rhythmic modulation that enhances the overall experience.

Advertisement

Modern Mixing Practices

Modern mixing practices have dramatically evolved, integrating sidechain compression as a fundamental technique that goes beyond its original utility.

Initially designed to manage vocal levels, this technique gained traction in the 2000s with the rise of electronic music. As digital audio workstations (DAWs) advanced, you found that setting up external sidechains became more intuitive, allowing for seamless integration into your workflow.

Today, sidechain compression isn't just a practical tool; it's a creative force in genres like EDM and pop.

Here are three ways it enhances modern mixing practices:

  1. Dynamic Control: By using multiband compression, you can target specific frequency ranges, giving you precise control over how elements interact in the mix.
  2. Rhythmic Effects: Sidechain compression can create that signature "pumping" effect, enhancing the groove of your track.
  3. Clarity and Balance: It helps maintain clarity in your mix by preventing frequency clashes, ensuring each element shines through.

As music production technologies continue to innovate, sidechain compression will remain a staple, constantly evolving to meet the demands of modern sound.

Resources for Further Learning

additional learning materials available

Numerous resources are available to deepen your understanding of sidechain techniques and enhance your music production skills. Video tutorials on platforms like YouTube showcase practical demonstrations of sidechain compression across various DAWs. These visual guides help learners quickly grasp the setup and application processes.

For a more structured approach, consider online courses like "Mixing Breakthroughs" or "Mastering Demystified." These classes offer in-depth instruction on sidechain compression, covering both its practical applications and creative uses in music production.

Advertisement

Additionally, articles and reviews from industry experts keep you updated on the latest trends, tools, and best practices, providing valuable insights for producers at any level.

Don't overlook community forums and feedback platforms, where you can share your experiences and techniques regarding sidechain compression. This collaborative environment can enhance your learning.

Frequently Asked Questions

What Is the Best Ratio for Sidechain?

The best ratio for sidechain compression usually falls between 4:1 and 10:1. Try a 4:1 for subtle effects or 10:1 for more pronounced pumping, adjusting based on your mix's needs and genre. Experimentation's key!

What Is the Best Sidechain Compression Setting?

For the best sidechain compression settings, use a fast attack, low threshold, high ratio, and longer release time. Experiment with high-pass filtering to clean up the effect while preserving low-end clarity in your mix.

How to Sidechain Properly?

To sidechain properly, you'll route your kick drum track to the compressor on your bassline. Set a low threshold, adjust attack and release times, and monitor the mix for clarity without squashing your sound.

Advertisement

How Do You Sidechain Everything to the Kick Logic?

To sidechain everything to the kick in Logic Pro X, load a Compressor, activate Side Chain, select the kick, adjust threshold and ratio, and tweak attack and release times for ideal ducking effects.

Conclusion

Incorporating sidechain techniques into your mixing arsenal can truly elevate your sound. By understanding the nuances of different compression methods and experimenting with creative triggering, you're bound to find a unique sonic signature. Remember, mastering these advanced techniques might seem like climbing a mountain, but with practice, you'll reach new heights in your music production. So plunge into, explore, and let your creativity flow—your tracks will thank you for it!


Advertisement

Technical Skills

Using Saturation to Add Warmth and Character to Tracks

Just how can saturation transform your music into a richer, warmer experience? Discover the secrets behind this essential mixing technique.

Published

on

saturation enhances track warmth

Using saturation can greatly enhance your tracks by adding warmth and character. When you apply it, you're introducing harmonic distortion, which enriches the sound. Choose from various types like tape for vintage warmth, tube for smooth vocals, or transistor for punchy drums. Start with subtle levels, gradually increasing intensity to prevent overwhelming your mix. Consider using parallel processing to blend saturated signals with clean ones while keeping clarity intact. Each technique helps you achieve that desired sound. If you want to explore advanced methods and specific applications, there's a wealth of insights waiting for you to discover.

Key Takeaways

  • Saturation enhances audio by introducing harmonic distortion, adding warmth and character to tracks through subtle applications on individual instruments.
  • Different types of saturation, like tape and tube, provide unique textures that enrich sound quality and evoke emotional depth.
  • Utilize parallel processing to blend saturated signals with clean tracks, preserving clarity while enhancing depth and character in the mix.
  • Gradually increase saturation intensity to achieve optimal warmth without overwhelming the overall mix, ensuring balanced clarity across all elements.
  • Target specific instruments, such as using tube saturation for vocals and tape saturation for drums, to achieve desired tonal qualities and enhance clarity.

Understanding Saturation

comprehending saturation concepts thoroughly

When you immerse yourself in music production, understanding saturation is vital for achieving that rich, full sound you're after. Saturation occurs when audio signals exceed maximum headroom, resulting in harmonic distortion that enhances warmth and character in your tracks. This process introduces compression and adds harmonic content, transforming cold, digital sounds into more organic audio.

You'll often encounter two main types of saturation: analog and digital. Analog saturation, often achieved through hardware like tape machines or tube preamps, imparts a unique warmth that some find irreplaceable. On the other hand, digital saturation using plugins offers greater control and flexibility within your DAW, allowing you to experiment with various settings without the constraints of physical equipment.

Understanding the nuances of saturation is essential. The role of even and odd harmonics can greatly affect your mixing. Even harmonics tend to add warmth, while odd harmonics introduce a bit of edge or distortion.

Whether you're applying tape saturation for a vintage vibe or tube saturation for smoothness, each type brings its own character to your audio, enhancing the overall texture of your music.

Types of Saturation

different saturation types explained

Saturation techniques can vary considerably, and each type offers unique qualities that can enhance your music.

Tape saturation mimics the warmth of magnetic tape recording, adding both even and odd harmonics to your audio signal. It creates a smooth character while subtly compressing the sound, making it a favorite for achieving a vintage feel.

Advertisement

Tube saturation, on the other hand, emulates the rich tones of vacuum tube amplifiers, producing warm distortion primarily made up of even-order harmonics. It's perfect for vocals and instruments when you want that lush sound.

In contrast, transistor saturation introduces odd-order harmonics, resulting in a punchy, aggressive tone often favored in rock and electronic music, enhancing clarity without harshness.

You might also consider overdrive, which offers a milder form of saturation. It adds warmth and grit, commonly used with electric guitars and vocals to create a pleasing harmonic distortion that enhances presence.

Finally, fuzz provides an extreme type of saturation, transforming audio signals into thick, heavily distorted sounds, perfect for rock and psychedelic genres.

Techniques for Application

application development techniques

When applying saturation, start with subtle amounts on individual tracks to enhance warmth without overpowering the original sound.

You can also target specific instruments by using techniques like parallel processing to maintain clarity while adding character.

Advertisement

Experimenting with these strategies will help you achieve a polished mix that retains its integrity.

Subtle Application Strategies

To achieve a warm and inviting sound in your mix, start with subtle saturation settings on individual tracks. Gradually increase the intensity to enhance warmth without overwhelming the original sound character.

For your drums sound, consider utilizing tape saturation. This technique smooths transients and adds punchiness while keeping the gain low to avoid undesirable distortion.

When working with vocals, apply tube saturation to enrich the mid frequencies, promoting a fuller and more natural presence in the mix. Experiment with parallel processing by blending a saturated duplicate track with the original. This allows you to add warmth while retaining clarity and dynamics, ensuring your mix remains vibrant.

Implementing multiband saturation techniques is another effective strategy. By targeting specific frequency ranges, you can enhance warmth in the low-end while maintaining clarity in higher frequencies.

Advertisement

This compressive enhancement allows for a balanced mix, ensuring that each element shines through without muddying the overall sound. With these subtle application strategies, you'll find the right balance of saturation that enriches your tracks, creating a warm and inviting listening experience.

Targeted Instrument Enhancement

Building on subtle application strategies, targeted instrument enhancement allows you to apply saturation techniques that cater to the unique characteristics of each track.

For vocals, using tube saturation adds warmth and richness, helping them sit nicely in the mix while introducing harmonic complexity without overwhelming their original tone.

On drums, especially the snare and kick, tape saturation delivers a punchy sound that glues elements together and smooths out transients.

When working with bass tracks, focus on upper harmonics by applying saturation to create definition and clarity, ensuring the low-end translates well on smaller speakers.

Advertisement

For guitars, analog-style saturation enhances natural overtones, adding depth and character that enriches the overall mix without sounding harsh.

These targeted enhancements not only elevate individual tracks but also contribute to the cohesiveness of your entire production.

Remember, the key to effective saturation is moderation; too much can muddy your mix.

Parallel Processing Techniques

Although parallel processing might seem complex at first, it offers a powerful way to enhance your tracks with saturation while preserving their clarity. By duplicating a track and applying saturation effects to the duplicate, you can blend the saturated and clean signals, adding depth, warmth, and character without overwhelming the mix.

Here are some key benefits to evaluate:

Advertisement
  • Enhanced punch on drum buses, giving your beats a compelling energy.
  • Diverse tonal qualities when experimenting with tape or tube saturation plugins.
  • Creative freedom to adjust the mix knob, balancing original and processed sounds.
  • Cohesion in tracks, ensuring all elements work together harmoniously.
  • Preservation of dynamics, allowing the original performance to shine through.

Using parallel processing for saturated elements empowers you to achieve a rich, polished sound while maintaining the integrity of your original audio.

Don't hesitate to experiment with different saturation types to discover what best complements your mix. With this technique, you'll find it easier to craft tracks that resonate with warmth and character, providing an engaging listening experience.

Real-World Applications

practical uses in reality

When you're working on a specific genre, knowing how to apply saturation can really make a difference in your mix.

For instance, using it on drum tracks can enhance punchiness in rock and hip-hop, while adding warmth to vocals guarantees they sit well in the overall sound.

You'll find that different instruments like bass and guitars also benefit from saturation, each adding unique texture and character to your production.

Genre-Specific Saturation Techniques

Saturation techniques vary widely across different music genres, each offering unique benefits that enhance the final mix. Understanding genre-specific saturation techniques can help you achieve the desired sound for your tracks.

  • Electronic music: Use aggressive saturation on synths and drums to boost energy levels and drive.
  • Rock music: Apply tube saturation to guitars and vocals, adding grit and character, enhancing overall presence.
  • Jazz recordings: Embrace subtle tape saturation to create warmth and smoothness, contributing to a more cohesive sound.
  • Pop music: Implement controlled saturation on vocals to enhance clarity and add richness, ensuring they stand out without overwhelming other elements.
  • Film scoring: Utilize saturation to evoke emotional depth, enhancing soundscapes for a more immersive experience.

Instrument-Specific Applications

In music production, applying saturation to specific instruments can greatly enhance their presence and character in a mix. Here's how you can use saturation effectively for various instruments:

Instrument Saturation Type Effect
Drums Tape Saturation Boosts punchiness and adds warmth
Vocals Tube Saturation Enhances warmth and emotional impact
Guitars Analog-style Saturation Enriches natural overtones, adds character
Bass Harmonic Saturation Increases clarity on small speakers
Synths Transistor Saturation Creates a punchy, aggressive tone

For drums, adding tape saturation to your snare and kick can make them pop without harshness. When it comes to vocals, tube saturation introduces rich harmonics that improve clarity and warmth. For bass, focusing on upper harmonics through saturation helps maintain definition, especially on smaller speakers. Electric guitars benefit from analog-style saturation, which brings warmth and character to both rhythm and lead parts. Ultimately, transistor saturation can give your synths an energetic drive, perfect for electronic and rock genres.

Advertisement

Common Pitfalls

avoiding frequent mistakes

Balancing clarity and warmth is an essential challenge in music production, especially when applying saturation. One common pitfall is over-saturation, which often leads to muddiness in your mixes. To keep your sound sharp, you need to apply saturation subtly. Here are some pitfalls to watch for:

  • Excessive distortion that overwhelms rather than enriches.
  • Digital artifacts creeping in from aggressive saturation settings.
  • Muddiness that clouds the mix, hiding important details.
  • Loss of integrity in the original sound as effects pile up.
  • Neglecting monitoring saturation, leading to unintended results.

Using high-quality plugins can help emulate that sought-after analog warmth while minimizing unwanted artifacts.

Always remember to check your saturation levels in real-time, ensuring they complement other effects like EQ and compression. This way, you maintain the clarity of your tracks while enhancing their richness.

Be mindful to preserve the clean sound quality, as excessive distortion can detract from the character you aim to create.

Advanced Techniques

cutting edge methodologies applied

Mastering the art of saturation can greatly elevate your music production, providing depth and character to your tracks. One advanced technique is multiband saturation, which allows you to apply saturation selectively across different frequency ranges. This way, you can add warmth and character to specific instruments without altering the entire mix.

For instance, incorporating techniques from songs like Blue Skies and Lemonade can inspire a joyful and nostalgic sound that enhances your overall production.

Another effective method is parallel processing. By blending saturated signals with clean tracks, you enhance warmth while preserving the original clarity and dynamic range of your sound.

Don't forget to experiment with different saturation types, such as tape for warmth, tube for richness, and transistor for punch. Each brings unique tonal colors to your music, enriching the overall texture.

Advertisement

Utilizing targeted application of saturation lets you focus on specific instruments. For example, applying tube saturation to vocals can enhance smoothness, while tape saturation on drums can deliver punch.

When you experiment with saturation levels, start with subtle amounts and gradually increase. This helps you find that sweet spot where warmth and character shine through without overwhelming the original sound.

Embrace these techniques to create engaging and polished tracks that resonate with listeners.

Frequently Asked Questions

What Does Saturation Do to a Track?

Saturation enriches your track by adding harmonic distortion, enhancing its tonal quality. It compresses audio, balances dynamics, and increases perceived loudness, resulting in a fuller sound that feels vibrant and engaging in your mix.

When to Use Saturation?

You should use saturation during tracking, mixing, and mastering. It enhances recordings, adds depth, and polishes the final mix. Just remember to apply it subtly to avoid muddiness and maintain clarity in your sound.

Advertisement

What Are the Different Types of Saturation in Mixing?

Think of saturation as seasoning for your mix. You've got tape for warmth, tube for smoothness, transistor for punch, overdrive for grit, and fuzz for that bold, edgy flavor. Each type enhances your sound uniquely.

What Is the Difference Between an Exciter and a Saturation?

An exciter enhances clarity and brightness in your audio, targeting high frequencies, while saturation enriches your sound with warmth and fullness across a broader spectrum. Each serves a unique purpose in your mixing process.

Conclusion

Incorporating saturation into your tracks can be like adding a splash of color to a black-and-white photo—it brings warmth and character that makes your music come alive. By understanding the types of saturation and mastering the techniques for application, you'll breathe new life into your sound. Just remember to avoid common pitfalls and explore advanced methods to truly elevate your mixes. Embrace saturation, and watch your tracks transform into something truly special.

Continue Reading

Technical Skills

Distortion Types Explained: Which One to Use When

The diverse world of distortion types awaits your exploration, revealing secrets that could transform your sound in ways you never imagined.

Published

on

understanding distortion usage guide

When choosing distortion, consider your desired sound. For a crunchy, aggressive tone, go for hard clipping. If you prefer a warmer and smoother effect, soft clipping is your friend. Use overdrive to emulate pushed tube amplifiers for rich, transparent distortion. Fuzz can give you a thicker, more chaotic sound, perfect for hard rock. For lo-fi textures, try bitcrushing or downsampling. Each type offers unique characteristics, allowing you to enhance warmth, thickness, or grit in your mix. There's so much more to explore with distortion techniques to elevate your sound further.

Key Takeaways

  • Hard Clipping is ideal for aggressive sounds, adding sharpness and edge, commonly used in rock and metal genres.
  • Soft Clipping provides a smoother breakup, perfect for warm, vintage tones, often emulating tube amplifiers in blues and jazz.
  • Overdrive is best for adding warmth and sustain, suitable for electric guitars and bass in various genres without overwhelming the original tone.
  • Fuzz delivers a thick, saturated sound that works well in hard rock and psychedelic music, creating a unique, gritty character.
  • Saturation is great for mixing, enhancing warmth and cohesiveness while softening transients, making it versatile across multiple music styles.

Understanding Distortion and Saturation

distortion and saturation explained

When you immerse yourself in the world of audio production, understanding distortion and saturation is essential for shaping your sound. Distortion alters the waveform of audio signals by increasing gain, resulting in loud, crunchy sounds that can add a powerful punch to your tracks. This effect originated in the 1950s with guitar pedals and has become a staple in modern music production, serving primarily as a tool for creative expression.

On the other hand, saturation enhances warmth and thickness without drastically changing the waveform. It typically occurs when you drive signals into tape, tubes, or circuits, creating a "smearing" effect across the frequency spectrum that softens transient peaks.

While both distortion and saturation can enrich sound texture, they serve different purposes in your mix. You'll find that distortion can give your music an edgy character, while saturation acts as a mixing tool to improve audio quality.

Types of Distortion

varieties of optical distortion

There are several types of distortion that can dramatically alter your audio, each with its own unique characteristics and applications.

Two primary distortion types are hard clipping and soft clipping. Hard clipping creates a sharp shift in sound, typical of transistor circuits, while soft clipping results in a smoother breakup, reminiscent of tube circuits.

Harmonic distortion enriches your sound by adding even and odd harmonics. Even harmonics enhance richness and are generally more pleasing, while odd harmonics can produce a harsher tone, often favored in rock and metal genres.

Advertisement

Saturation is another form of distortion that smoothens transients, adding warmth by driving signals into analog devices like tape machines.

Fuzz generates a highly distorted sound, characterized by strong clipping, perfect for hard rock and lo-fi indie music. It delivers a thick and noisy output, making it a staple in these genres.

On the other hand, overdrive offers a warm, transparent distortion, emulating the sound of pushed tube amplifiers. This makes it ideal for those who want to add character without losing the original dynamic range of their electric guitars and guitar amps.

Distortion Techniques and Effects

sound manipulation and alteration

Building on the various types of distortion, understanding specific distortion techniques and effects can enhance your audio production. One popular method is clipping, which comes in hard and soft varieties. Hard clipping sharply alters your audio signal into distortion, while soft clipping gradually adds harmonics, giving a smoother sound.

Waveshaping modifies the waveform based on input-output ratios, allowing you to create different types of distortion curves. While it can produce unique distortion effects, it might lack the warmth of analog processing.

Bitcrushing reduces the bit depth of your audio signal, resulting in a gritty, lo-fi texture that can add character to your tracks. Similarly, downsampling decreases the sample rate, creating a harsh digital effect often favored in electronic music for its vintage vibe.

Advertisement

Lastly, wavefolding adds harmonics by folding peaks back over themselves. Depending on the ratio you use, this technique can yield either warm musical results or harsh digital sounds.

Applications and Benefits

uses and advantages

Distortion finds its place in audio production through various applications, enhancing both the warmth and thickness of sound. Whether you're working on a rock anthem or an electronic track, different types of distortion—like saturation and overdrive—allow you to add just the right amount of grit or aggressive texture.

This versatility helps elements in your mix stand out, creating a more engaging listening experience. Clipping is particularly useful for managing signal levels, especially on transient-heavy sources, making it an essential tool for mastering engineers.

Meanwhile, saturation mimics analog warmth, smoothing out transients and generating cohesion in your mixes. This approach helps you achieve a polished sound without the harshness that can sometimes plague digital production.

If you're looking to introduce unique character, consider bitcrushing and downsampling. These techniques can infuse your audio with lo-fi qualities, appealing to genres that embrace vintage aesthetics.

Technical Considerations

technical aspects evaluation

When incorporating distortion effects into your mix, managing output gain becomes essential to avoid unintended clipping and guarantee a polished final product. Effective use of distortion tools requires attention to several technical considerations to maintain audio integrity.

Consideration Description
Output Gain Adjust levels to prevent clipping in the final mix.
Dynamic Range Monitor levels; bitcrushing can greatly reduce this.
Gain-Staging Critical in digital systems to prevent aliasing.
Fuzz Effects Careful EQ adjustments guarantee clarity without muddiness.
Downsampling Understand its lo-fi quality to achieve the desired aesthetic.

When using fuzz effects, you'll want to carefully tweak EQ settings to avoid muddiness while preserving that thick sound. Similarly, downsampling can provide a unique flavor but can impact your fundamental frequencies, so it's essential to be aware of its effects. Finally, maintain proper gain-staging in your digital signal chain to retain audio fidelity, especially when applying high-gain distortion techniques. By keeping these considerations in mind, you'll achieve a more polished and professional mix.

Advertisement

Frequently Asked Questions

What Are the Three 3 Classifications of Distortion?

You've got three main classifications of distortion: harmonic distortion, which enhances tonal richness; clipping distortion, resulting from signal overload; and saturation, adding warmth and thickness by driving signals into analog devices. Each serves unique purposes.

What Is Distortion and Types of Distortion?

Distortion alters audio waveforms, enhancing sound characteristics. You'll encounter types like tube, tape, clipping, fuzz, and overdrive. Each offers unique tonal qualities, shaping your music's emotional impact and creative expression in diverse genres.

When to Use Distortion?

You should use distortion when you want to enhance warmth and character in your tracks. Experiment with subtle saturation for cohesion or clipping to control peaks, depending on the instrument and genre you're working with.

What Are the Different Types of Waveform Distortions?

You might be surprised to discover the variety of waveform distortions. Clipping, harmonic distortion, saturation, fuzz, and bitcrushing each bring a unique flavor, transforming sound in ways you never imagined possible. Immerse yourself and explore!

Conclusion

So, you thought distortion was just about cranking up the gain, huh? Well, it's way more nuanced than that! Whether you're chasing that warm tube sound or the edgy bite of digital, knowing which type to use can make all the difference. Embrace the irony—what seems like chaos can create harmony. So, next time you plug in, remember: the right distortion can turn your musical mishaps into masterpieces. Happy experimenting!

Advertisement
Continue Reading

Technical Skills

Stereo Widening Tricks to Make Your Mix Pop

Keep your mix vibrant with essential stereo widening tricks that elevate your sound—discover the techniques that will transform your tracks.

Published

on

enhance stereo mix techniques

To make your mix pop, start by hard-panning instruments like guitars and background vocals. Double tracking adds another layer; record the same part multiple times and spread it across the stereo field. Use the Haas Effect by applying a slight delay to enrich width perception. Incorporate short decay reverb to simulate space without crowding the mix. Always keep essential elements centered to maintain balance, and be wary of over-widening to avoid phase issues. With the right techniques, you can achieve a dynamic, immersive sound. There's more to explore on enhancing your mixes effectively.

Key Takeaways

  • Hard-pan instruments like guitars and background vocals to create a wider stereo field and enhance mix separation.
  • Utilize double tracking by recording parts multiple times and panning them for a fuller sound.
  • Apply the Haas Effect with slight delays (20-30 ms) to create a perception of width without losing coherence.
  • Incorporate short decay reverb and specific delay settings to simulate depth and spatial distance in your mix.
  • Regularly check your mix in mono to ensure compatibility and prevent phase cancellation issues.

Understanding Stereo Imaging

stereo imaging techniques explained

In the world of music production, understanding stereo imaging is essential for creating an enchanting listening experience. Stereo imaging refers to the spatial perception of sound, allowing you to identify where each instrument and sound source sits within the stereo field. By mastering panning, you can effectively position your sound sources, enhancing stereo separation and ensuring that significant elements stand out.

Frequency distribution plays a significant role in this mixing process. When you distribute frequencies wisely across the stereo field, you avoid clashing sounds that can muddy your mix. Your ears naturally perceive sound directionality, which adds width and depth, making the overall listening experience richer.

Using time-based effects like reverb and delay can further enhance stereo imaging, creating a sense of space that draws listeners in. However, it's essential to maintain mono compatibility; your mix should sound good even when collapsed to mono.

Achieving a well-defined stereo image not only elevates your production quality but also helps listeners engage with your music more deeply. Focus on balancing the left and right channels to create that enchanting, professional sound you're after!

Techniques for Widening Mixes

expanding musical mix techniques

To widen your mixes effectively, you'll want to employ a variety of techniques that enhance spatial perception and clarity.

Start with panning; distribute sounds across the stereo field by hard-panning guitars and background vocals. This not only creates a wider mix but also guarantees that essential elements remain centered.

Advertisement

Another powerful method is double tracking—record the same instrument or vocal part multiple times and pan the tracks left and right to thicken the sound.

Don't overlook the Haas Effect. By applying a slight delay (20-30 ms) to one channel, you can create a perception of width without changing tonal characteristics.

Additionally, reverb and delay are your friends; use short decay reverb and specific delay settings to simulate distance, enhancing spatial qualities without overpowering the mix.

Common Mistakes in Stereo Imaging

stereo imaging mistakes overview

When mixing for stereo imaging, a few common mistakes can undermine your efforts and lead to disappointing results. One major pitfall is over-widening your mix, which can create phase issues that result in a thin, lifeless sound. Maintaining balance and subtlety is key to achieving the desired stereo width.

Additionally, neglecting mono compatibility can lead to phase cancellation when your mix is collapsed to mono, so it's essential to check your mix in mono for clarity.

Competing frequencies can muddy your mix, making careful EQ adjustments essential. This helps create sonic space and prevent frequency clashing between instruments.

Advertisement

Relying solely on visual cues, like waveforms, can mislead your mixing decisions. Trust your ears to assess the stereo signal and spatial placement accurately.

Best Practices for Effective Mixing

effective mixing best practices

Effective mixing hinges on a solid foundation built from quality recordings. Start by guaranteeing your tracks are clean and well-recorded, as this enhances the effectiveness of stereo widening techniques.

Use reference tracks to compare your mix sound against professional standards, helping you identify areas for improvement in stereo image and balance.

Regularly monitor your mix in mono to guarantee mono compatibility and clarity. This practice helps prevent phase cancellation and maintains a solid foundation before you expand to a wider stereo field.

Focus on balance across all elements in the mix by adjusting levels and frequencies, making sure no single instrument overwhelms the stereo image.

Experiment with panning decisions and dynamic automation throughout the mix. This approach creates interest and depth, leading to a more engaging listening experience.

Advertisement

By placing individual instruments strategically within the stereo field, you'll enhance the overall mix without sacrificing cohesion.

Recommended Tools and Plugins

essential tools and extensions

Releasing the potential of stereo widening requires the right tools and plugins that can elevate your mix.

Start with Waves S1, a powerful stereo imaging plugin that lets you precisely control stereo width. It allows you to widen the stereo field without losing mono compatibility, ensuring clarity in your mix.

iZotope Ozone also shines with its advanced stereo imaging module, using intelligent algorithms to enhance mix width while maintaining a balanced frequency spectrum.

For frequency-specific stereo imaging, FabFilter Pro-Q is an excellent choice. It helps you enhance spatial qualities without introducing muddiness, essential for achieving good stereo.

When you want to add some creative flair, consider Soundtoys Little AlterBoy. It can manipulate pitch and formant, producing spatial effects that complement your panned elements.

Advertisement

Lastly, explore Brauer Motion by Waves, which provides dynamic panning effects. This plugin creates an immersive listening experience, enhancing the emotional impact of your mix through movement.

Frequently Asked Questions

How Do I Make My Mixes Wider?

To make your mixes wider, you can pan instruments strategically, use the Haas effect for subtle depth, and double track parts. Also, consider stereo plugins and reverb to enhance the overall spatial quality.

How Do You Enhance Stereo Width?

You might think enhancing stereo width is complicated, but it isn't! Start by panning instruments creatively, using delay effects, and experimenting with double tracking. Your mix will feel more expansive and immersive with these techniques.

How to Make Your Mixes Sound Bigger?

To make your mixes sound bigger, you should hard-pan elements, double track parts, and use strategic reverb and delay. Regularly checking in mono guarantees everything remains clear and impactful, enhancing your overall sound quality.

What Is the Simple Stereo Widening Effect?

Did you know that 70% of listeners prefer music with a wider stereo image? The simple stereo widening effect enhances perceived space by adjusting panning, ultimately creating a richer and more immersive listening experience for you.

Advertisement

Conclusion

By applying these stereo widening tricks, you can truly make your mix pop like a firework in the night sky. Remember to strike a balance, avoid common pitfalls, and utilize the right tools to enhance your sound. With practice, you'll master the art of stereo imaging and create mixes that not only fill the room but also captivate your audience. So, grab your favorite plugins and start experimenting—your next hit is just a mix away!

Continue Reading

Affiliate disclaimer

As an affiliate, we may earn a commission from qualifying purchases. We get commissions for purchases made through links on this website from Amazon and other third parties.

Advertisement

Vetted

optimal studio monitor placement optimal studio monitor placement
Vetted1 month ago

15 Best Monitor Positioning Tips for Optimal Studio Acoustics

Get ready to transform your sound with these 15 essential monitor positioning tips that will elevate your studio acoustics to...

top wireless studio peripherals top wireless studio peripherals
Vetted1 month ago

13 Best Wireless Peripherals for Studio Use – Enhance Your Creative Workflow

Discover the 13 best wireless peripherals that can elevate your studio experience, but wait until you see how they can...

affordable guitar audio interfaces affordable guitar audio interfaces
Vetted1 month ago

15 Best Audio Interfaces for Guitar Under $250 – Affordable Picks for Every Musician

Navigate through our top 15 audio interfaces for guitar under $250, and discover which affordable pick could elevate your music...

top easter music sales top easter music sales
Vetted1 month ago

The 9 Best Easter Music Production Sales You Can’t Miss This Season

Unlock incredible deals on Easter music production sales, including must-have resources that promise to elevate your craft—discover what you can't...

affordable home studios guide affordable home studios guide
Vetted1 month ago

15 Best Professional Home Studios Under $1000 for Aspiring Creators

Learn how to build your dream home studio for under $1000 with expert tips and gear recommendations that will elevate...

christmas gifts for musicians christmas gifts for musicians
Vetted1 month ago

The Ultimate Gift Guide: 14 Best Christmas Music Production Gifts for Every Aspiring Musician

With 14 unique gift ideas for aspiring music producers, discover the perfect present that will elevate their creative journey this...

affordable thunderbolt audio interfaces affordable thunderbolt audio interfaces
Vetted1 month ago

15 Best Thunderbolt Audio Interfaces Under $500: Affordable Options for Aspiring Musicians

The top 15 Thunderbolt audio interfaces under $500 offer exceptional quality and features—discover which one will elevate your music production...

affordable dynamic microphones guide affordable dynamic microphones guide
Vetted1 month ago

15 Best Dynamic Microphones Under $150 for Every Budget and Need

Hunt for the perfect dynamic microphone under $150? Discover the top 15 picks that cater to every budget and need,...

optimal studio monitor stands optimal studio monitor stands
Vetted1 month ago

15 Best Monitor Stands for an Optimal Studio Setup – Enhance Your Workspace Today

Boost your studio setup with the 15 best monitor stands that enhance sound and organization—discover which options will transform your...

affordable beat making setups affordable beat making setups
Vetted1 month ago

10 Best Beat Making Setups Under $500 That Will Elevate Your Music Production Game

Looking for budget-friendly beat-making setups under $500? Discover the perfect tools to elevate your music production game and unleash your...

affordable mixing mastering equipment affordable mixing mastering equipment
Vetted1 month ago

15 Best Mixing & Mastering Setups Under $1000 for Aspiring Producers

Optimize your mixing and mastering with the 15 best setups under $1000 for aspiring producers; discover the essential gear that...

affordable audio interfaces guide affordable audio interfaces guide
Vetted1 month ago

15 Best Audio Interfaces Under $100 for Aspiring Musicians and Podcasters

Save money without sacrificing quality with the 15 best audio interfaces under $100—discover which one could elevate your sound today!

Trending

Copyright © 2024 The Sound of Music Guide Affiliate disclaimer As an affiliate, we may earn a commission from qualifying purchases. We get commissions for purchases made through links on this website from Amazon and other third parties.