To produce vocals that sit better from the start, focus on mastering your resonance by keeping your throat open and jaw relaxed. Maintain a consistent microphone distance and angle, about 6 to 12 inches off-axis, to capture a natural, balanced tone. Stand upright with relaxed shoulders and warm up your voice to enhance clarity and warmth. By paying attention to tuning your technique and setup early on, you’ll achieve clear, present vocals with less need for adjustments later. Keep exploring to refine these essential steps.

Get audio and creator gear delivered free with Prime
- Fast, free delivery on millions of items
- Prime Video, Amazon Music and more included
- Member-only deals all year
Key Takeaways
- Maintain proper microphone distance and angle to capture a balanced, natural vocal tone from the outset.
- Use open throat and relaxed jaw techniques to optimize resonance and clarity during recording.
- Ensure consistent posture and breathing to support steady, resonant vocals.
- Focus on vocal placement and resonant chamber awareness to shape a full, controlled sound.
- Warm up and practice resonance exercises to develop an intuitive sense for a well-sitting vocal tone.

Have you ever finished a vocal recording only to find it sitting awkwardly in the mix? It’s frustrating, especially after putting in so much effort. Often, the problem lies in capturing the vocal with the right resonance and ensuring proper microphone placement from the start. When you pay attention to vocal resonance, you help the voice develop a full, balanced tone that naturally blends with the track. This means understanding how different resonant chambers in your body influence your sound. For instance, engaging your chest and head voice at appropriate moments can add warmth and clarity to your vocals. You want to aim for a resonance that’s rich but controlled, avoiding overly nasal or muffled qualities. To do this, experiment with your vocal technique during recording, focusing on open throat and relaxed jaw positions, which enhance resonance naturally.
Focus on open throat and relaxed jaw to naturally enhance vocal resonance and achieve a balanced, full tone.
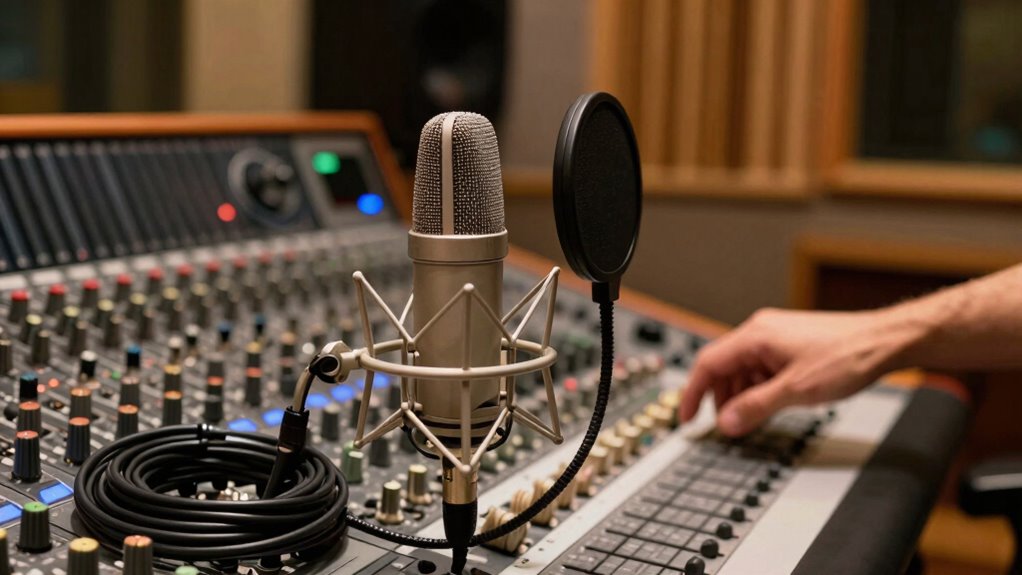
Microphone placement is just as critical. If you position the mic too far, you risk capturing more room noise and losing intimacy. Too close, and you might get unwanted plosives or exaggerated proximity effects. The goal is to find a sweet spot where your voice sounds full and natural without distortion. Generally, placing the microphone about 6 to 12 inches away, slightly off-axis from your mouth, helps balance proximity effect and clarity. Keep in mind that the type of microphone influences this as well; a large-diaphragm condenser mic captures more detail, so you may need to adjust your distance accordingly.
Beyond placement, consider your stance and breathing. Standing upright with relaxed shoulders allows for better airflow and resonant control. Before recording, do some warm-up exercises to open your vocal cords and set the resonance in a healthy, sustainable way. As you sing into the microphone, focus on maintaining consistent distance and angle to keep the tone even. Small adjustments during the session can make a big difference; if your voice sounds too dull or boxy, slightly moving the mic or adjusting your resonance can fix it. Additionally, understanding vocal resonance and how to control it can help you produce a more balanced and sit-ready vocal from the outset. Recognizing the importance of proper microphone technique can further enhance your recording quality and ensure your vocals sit well in the mix from the start. Developing awareness of your resonant chambers can also enable you to better shape your tone and improve your overall vocal sit from the beginning. Practicing mindful resonance control can help you achieve a more consistent and pleasing tone during recordings, reducing the need for extensive editing later. Incorporating techniques for resonance adjustment into your practice routine can further refine your ability to produce a polished vocal sound from the outset.
In the end, producing vocals that sit well from the start involves paying close attention to how your voice naturally resonates and how you position your microphone. When these elements work together, you’ll find your vocals are clearer, more present, and easier to mix. It’s about setting the foundation right, so your vocals don’t need extensive corrective processing later. With practice, you’ll develop an intuitive sense for capturing a balanced, resonant sound that sits perfectly in the mix from the moment you press record.
large diaphragm condenser microphone for vocal recording
As an affiliate, we earn on qualifying purchases.
As an affiliate, we earn on qualifying purchases.
Frequently Asked Questions
What Are the Best Microphones for Capturing Vocals?
For capturing vocals, choose microphones with cardioid polar patterns because they focus on sound directly in front, reducing background noise. A large-diaphragm condenser mic is ideal for clarity and warmth. Proper vocal microphone placement—about 6-12 inches from your mouth—ensures best sound. This setup helps your vocals sit better in the mix from the start, making your recordings clearer and more professional.
How Do I Choose the Right Vocal Tuning Software?
You need to choose vocal tuning software that excels in vocal harmonization and pitch correction techniques, ensuring your vocals sit perfectly. Look for programs with intuitive interfaces, real-time processing, and advanced features like auto-tune and formant control. Consider your skill level and budget, then test demos to see which one feels right. The right software will elevate your vocals, making them seamless and professional from the very first note.
Should I Record Vocals in a Treated or Untreated Room?
You should record vocals in a treated room or a dedicated vocal booth to guarantee better room acoustics. Treated spaces minimize reflections and unwanted noise, helping your vocals sit better in the mix. Untreated rooms often have echo and background noise, which can make your recordings sound muddy or distant. Investing in proper acoustic treatment or a vocal booth enhances clarity, making your vocals sit more naturally from the start and reducing the need for extensive editing later.
How Do I Prevent Vocal Clipping During Recording?
To prevent vocal clipping during recording, start by setting your input levels carefully, ensuring they don’t peak too high. Use vocal compression lightly to control dynamic range, keeping loud parts in check without squashing the natural tone. Regularly monitor your levels, and encourage the vocalist to sing at a consistent volume. This approach helps maintain clarity and prevents distortion, resulting in a cleaner, more professional vocal track from the start.
What Are Common Mixing Mistakes That Affect Vocal Sit?
Your mixing can go awry if you overlook common mistakes. For instance, relying too heavily on vocal compression can squash dynamics, making vocals sound unnatural. Ignoring room acoustics leads to muddiness or harshness, disrupting vocal sit. Always balance compression carefully and treat your space to improve clarity. These slip-ups can turn a good vocal into a muddled mess, so stay attentive to these details to keep vocals sitting perfectly in the mix.
Conclusion
By applying these techniques from the start, you’ll notice your vocals naturally sit better in the mix, almost as if they were meant to be there all along. It’s funny—sometimes, a simple tweak can make your vocals feel like they were recorded just for that song, perfectly aligned. Keep experimenting, and you’ll find those small adjustments turn into big improvements, revealing how much your initial setup influences the final sound. Trust the process, and let your ears be your guide.
Halloween Picks
halloween
As an affiliate, we earn on qualifying purchases.