Connect with us

Music Production

Charmian Carr: Beloved Liesl from Sound of Music

Explore the life and legacy of Charmian Carr, the iconic Liesl from The Sound of Music, and her enduring impact on film and fans.

Published

on

Charmian Carr

Charmian Carr was just 21 when she became Liesl von Trapp in “The Sound of Music”1. Her youth and talent made her unforgettable in the film world.

As Liesl von Trapp, Carr won hearts globally and helped make the film a classic2. Thanks to her, “The Sound of Music” bagged five Oscars, including Best Picture1.

Carr left us at 73, after battling a rare dementia1. Her death was a big blow to her many fans.

Though best known for Liesl, Carr had another role in 1966’s “Evening Primrose” with Anthony Perkins1. Her acting journey was brief but impactful.

After acting, Carr wrote two books about her “Sound of Music” experience1. Her works, “Forever Liesl” and “Letters to Liesl,” let fans see behind the scenes.

Advertisement

Later, Carr became a successful interior designer1. She even worked for Michael Jackson, showing her wide range of skills.

Carr is remembered by her daughters, siblings, and grandchildren1. Her legacy in entertainment and her personal life remains powerful.

We will now look at Carr’s journey from Chicago to being Hollywood’s Liesl von Trapp2.

Key Takeaways:

  • Charmian Carr was only 21 years old when she was cast as Liesl von Trapp in “The Sound of Music”1.
  • “The Sound of Music” won five Oscars, including Best Picture1.
  • Carr passed away at the age of 73 due to complications from dementia1.
  • She authored two books, “Forever Liesl” and “Letters to Liesl,” about her experience in the movie1.
  • Carr had a successful career as an interior designer, with clients including Michael Jackson1.

The Life and Career of Charmian Carr

Charmian Carr was born on December 27, 1942, in Chicago, Illinois. She was famed for her role as Liesl in “The Sound of Music.” Carr grew up in a family of performers in California, with a vaudeville actress mother and a musician father3.

At 21, Carr made her big break as Liesl in “The Sound of Music.”4 This role became the highlight of her career. Her performance won hearts globally and the film made $200 million worldwide4.

Following the movie’s success, Carr kept pursuing her love for acting. She starred in “Evening Primrose” in 1966 and appeared in a pilot with Van Johnson3.

Advertisement

In 1967, Carr chose to focus on her family life. She married Jay Brent, a dentist, and they had two daughters53. Around this time, she also founded her interior design firm, Charmian Carr Designs, in Encino, California3.

Carr always cherished her “The Sound of Music” days. She authored “Forever Liesl” and “Letters to Liesl” with Jean Strauss4. These books share her experiences and the movie’s impact on her life.

In 2010, Carr and her co-stars celebrated the film’s 45th anniversary on The Oprah Winfrey Show3. In 2014, she recorded “Edelweiss” with the von Trapps’ great-grandchildren, proving her lasting bond with the film’s music3.

Charmian Carr passed away on September 17, 2016, from frontotemporal dementia at age 7353. Her role as Liesl and her work in entertainment live on in the hearts of fans everywhere.

The Legacy of Liesl

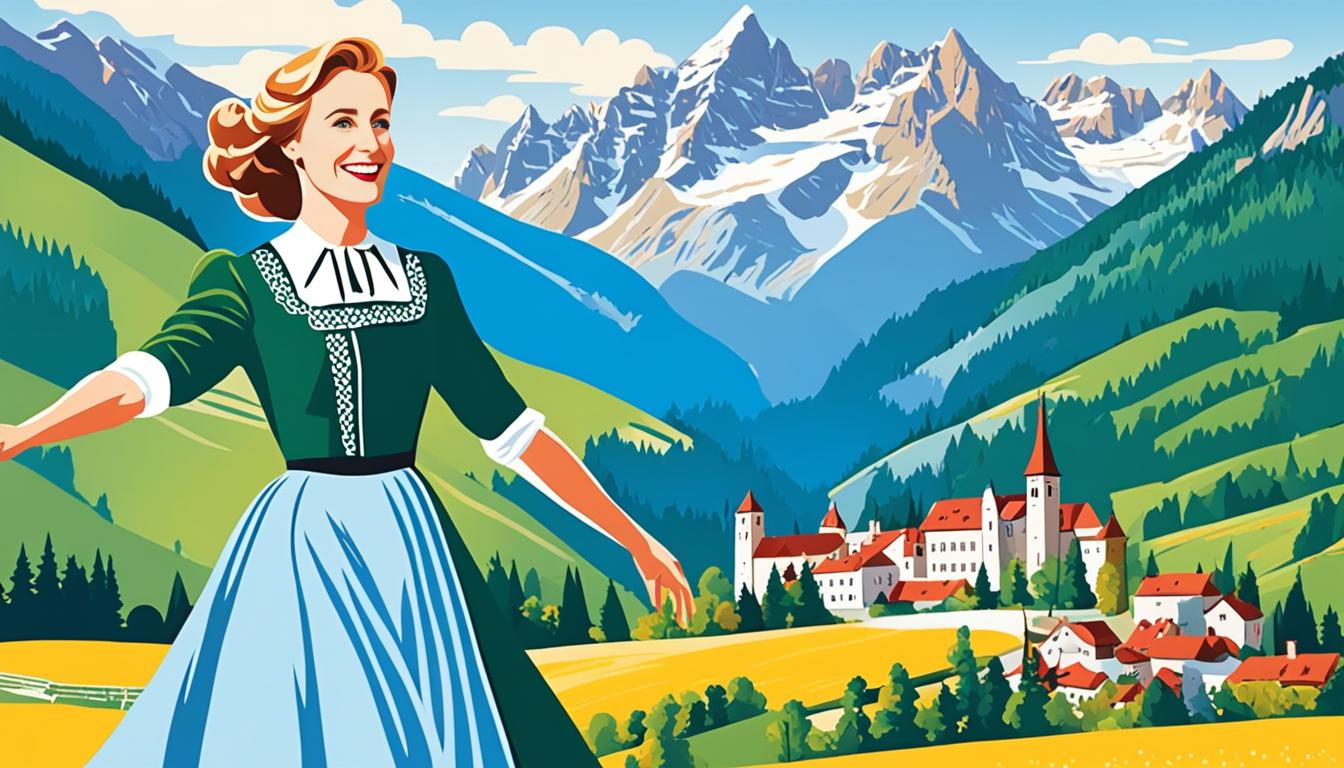
Charmian Carr’s role as Liesl von Trapp in the 1965 film “The Sound of Music” made a lasting impression. Her performance captivated fans all over, making her a beloved actress6.

Advertisement

The gazebo scene where Liesl sings “Sixteen Going On Seventeen” is unforgettable. Carr and Daniel Truhitte’s chemistry made it a highlight of the film.

Carr loved “The Sound of Music” deeply. She connected with fans at sing-alongs and through her autobiography, “Forever Liesl.” Published in 2000, her book became a bestseller in the U.S., sharing insights and experiences7.

After leaving acting, Carr focused on interior design and wrote “Letters to Liesl.” This book includes fan memories and shows her bond with her audience. Her work keeps her connected to the movie’s lasting impact.

“The Sound of Music” remains popular, ensuring Carr’s legacy lives on. It’s available on DVD, TV, and online, reaching new fans. Memorabilia collectors add to its cultural importance6.

Charmian Carr’s portrayal of Liesl left a mark on film history and hearts worldwide. Her role brings joy and inspiration to many, remembered across generations.

Advertisement

Charmian Carr’s Personal Life and Family

Charmian Carr was best known as Liesl von Trapp in “The Sound of Music.” She was born in Chicago, Illinois, in 19428. Later, her family moved to the San Fernando Valley during her childhood9.

Though famous as Liesl, Carr lived a life away from the public eye. She leaves behind four siblings: Sharon, Darleen, Michael, and Brian9. She was also a mother to Jennifer and Emily, and a grandmother to four: Emma, Derek, William, and Tucker9.

Carr turned her passion for home into a new career in interior design. She started Charmian Carr Designs in Southern California9. She worked with stars like Michael Jackson and Ernest Lehman, writer of “The Sound of Music.”9

Siblings Children Grandchildren
Sharon Jennifer Emma
Darleen Emily Derek
Michael William
Brian Tucker

For Carr, her family and personal life were everything. She was a successful actress, yet she cherished time with her loved ones more. Her legacy is marked by her iconic role and her deep bonds with family and the von Trapp children actors from “The Sound of Music.”9

Advertisement

Remembering Charmian Carr’s Impact

Charmian Carr’s passing deeply touched fans and those in the industry10. She shone as Liesl von Trapp in “The Sound of Music,” winning over audiences with her charm. Her influence went beyond the film, guiding co-stars on and off the set11.

After her death, many paid tribute to Carr. Ted Chapin from the Rodgers and Hammerstein organization praised her role in “The Sound of Music”10. He noted how Carr’s Liesl connected with people, making the film even more beloved10.

Celebrities and groups like 20th Century Fox and Seth MacFarlane honored Carr’s talent and her effect on them10. Her dedication to acting left a lasting mark on viewers10.

The “Sound of Music” community felt Carr’s loss profoundly. Fans worldwide shared how Liesl inspired them10. Carr’s role brought joy and hope, creating a legacy that continues to inspire10.

Carr was more than a talented actress. Her kindness and warmth touched many beyond her roles10. Known for her connection with fans, Carr’s spirit made a lasting impression10.

Advertisement

Though we’ve lost Charmian Carr, her impact endures in our hearts and memories. She remains the beloved Liesl von Trapp, leaving a lasting imprint on cinema10.Charmian Carr

References:

  1. Reference 1
  2. Reference 2
  3. Reference 3

Carr’s Battle with Dementia

Charmian Carr faced dementia in her later years. This condition contributed to her death at 7312. The type of dementia she fought was not made public. This painful truth reminds us of the disease’s harsh effects12. Carr’s family chose to keep her struggle private. They honor her memory and her role in the entertainment world12.

Dementia leads to a drop in mental skills. It affects memory, thought, and how one acts. It greatly impacts the person and their family. Carr’s fight with this illness underscores the need to spread awareness and support research12.

Charmian Carr, as Liesl Von Trapp in The Sound of Music12, brought happiness to many. Her talent and vibrant spirit won over fans everywhere. Her contribution will influence many future generations12.dementia

The above image shows dementia’s effects on people and their families12. It reminds us to support efforts in research for better treatments. Helping those hit by this condition is crucial12.

Carr’s Battle with Dementia
Age at the time of passing 73
Cause of death Complications from a rare form of dementia

Despite her fight with dementia, Carr’s role as Liesl Von Trapp remains unforgettable12. Her spirit and legendary act still charm watchers worldwide12.

Charmian Carr’s Contributions Beyond Acting

After she stopped acting, Charmian Carr tried new and creative things. She succeeded in various areas.

Advertisement

Carr started a design business that did really well. She had a natural skill for design and paid great attention to details. These qualities made her well-known in her field.

Besides designing, Charmian Carr wrote two books. They give a close-up view of her time in “The Sound of Music.” Her book, “Forever Liesl,” talks about her role as Liesl von Trapp. It shows how the film left a big mark on her life. She shared stories and secrets from behind the scenes, drawing readers in. Nearly all of her autobiography focuses on “The Sound of Music.”13 Also, in “Letters to Liesl,” Carr wrote letters to her character. She explored how the role of Liesl changed her life.

Moreover, Carr’s design business linked her with music star Michael Jackson. He admired her creative talent. Their work together showed the respect she earned in the industry13.

Carr did more than act. Her design and writing helped her touch many lives. She left a mark that goes beyond movies.

The Sound of Music Fan Community

The Sound of Music has won hearts for years with its unforgettable songs, touching story, and memorable characters. It draws fans from every age, creating a strong, loving fanbase. Many adore Charmian Carr, known as Liesl von Trapp, for her wonderful acting and kind nature.

Advertisement

Charmian Carr’s role as Liesl made a big impact on fans. She often met them at events. These include The Sound of Music sing-alongs where fans dress up and enjoy the movie together5.

As Liesl, Carr was a standout, capturing hearts worldwide. The film is a favorite for many, winning a People’s Choice Award for most popular movie. Its success shows how much it means to people14.

The Sound of Music hit theaters for nearly five years and is a top-selling video. Carr was 21 when she played Liesl, contributing to the film’s triumph141. She also showed dedication by sticking to a strict school schedule during filming14.

Although Carr stopped acting to raise her family, she stayed close to the fan community. She touched lives with her role and received touching fan mail. Carr became more than an actress to her fans14.

Charmian Carr’s warm connections with fans and her memoir, “Forever Liesl,” keep her memory alive. She also ran a successful interior design business. Her creativity and business sense impressed many, including Michael Jackson514.

Advertisement

Charmian Carr will always be remembered by The Sound of Music community. Her portrayal of Liesl and her bond with fans have made a lasting impression514.Sound of Music Fan Community

Carr’s Singing and Dancing in The Sound of Music

Charmian Carr, known for her role as Liesl von Trapp, charmed everyone in “The Sound of Music” in 1965. Her incredible singing and dancing left a mark on all who watched. She brought something special to the screen.

Her performance of “Sixteen Going On Seventeen” was unforgettable. Singing with Daniel Truhitte, who played Rolfe, they created a magical moment. It was a scene that won over hearts around the world.

Carr faced a big hurdle during casting because of her stunning blue eyes. At that time, they couldn’t change her eye color with contact lenses. But, they used lighting tricks to let her beauty shine, helping her embody Liesl wonderfully.

Her dancing in the film showed her range as an actress. She did everything from running and jumping to complex dances. Carr’s hard work made Liesl’s character come alive, winning the audience’s hearts with her grace.

Carr’s role as the eldest Von Trapp daughter was powerful. She became a key part of “The Sound of Music” and its lasting legacy. Her impact on fans was immense, making her role unforgettable.

Advertisement
Charmian Carr as Liesl von Trapp

Carr’s Post-Acting Career and Retirement

Charmian Carr said goodbye to acting and started a new part of her life. She focused on her family and followed her love for interior design. She opened Charmian Carr Design , her very own interior design business.

She didn’t stop there. Carr also began writing, sharing her stories in two books. Her first book, “Forever Liesl,” came out in 2000. It’s a touching look at her experiences filming “The Sound of Music” . Encouraged by her readers, she wrote “Letters to Liesl” in 2001. This second book allowed her to go deeper into her journey and connect with her fans .

After acting, Carr took the chance to be creative in new ways. She made a mark in the design world and in the hearts of those who loved her as Liesl in “The Sound of Music.”

Carr relished in her accomplishments with her beloved family by her side. She leaves behind four siblings, two kids, and four grandkids .

The Sound of Music’s Enduring Popularity

Since its release in 1965, The Sound of Music has won hearts globally. Its timeless music, touching story, and unforgettable performances make it a cinematic treasure.

Charmian Carr’s performance as Liesl is a big reason for the film’s magic. She brings charm and depth, making her character stick with audiences long after.

Advertisement

The movie wasn’t just loved; it was a box office hit, earning $163 million in the US alone15. Its soundtrack ruled the UK charts for 70 weeks, standing with iconic bands16.Sound of Music

Events and tributes show how much we adore The Sound of Music. In 2006, a contest sought a new star for its West End show16. London’s Prince Charles Cinema’s sing-along events prove its charm hasn’t faded16.

Even stars like Lady Gaga honor it. She performed a medley at the Oscars to mark its 50th year16. Christopher Plummer praised its timeless appeal, despite his funny nickname for it16.

Its magic comes from amazing music, touching stories, and standout moments like Carr’s Liesl. Its massive earnings, hit soundtrack, and cultural footprint show why it remains dearly loved.

Conclusion

Charmian Carr is remembered lovingly for her role as Liesl in The Sound of Music. Her performance won the hearts of fans globally. She played the eldest von Trapp daughter and made a lasting impression.

Charmian earned a spot in movie history with her talent and hard work. Although she was in just one film, The Sound of Music, that movie earned five Oscars and made $200 million worldwide4. At 21, she perfectly portrayed Liesl von Trapp with her beautiful voice and acting skills.

Advertisement

After her acting career, Charmian had a rich life. She was a loving mother to her daughters, Jenifer and Emily. She then became a successful interior designer with her own firm, Charmian Carr Designs17. She worked with many clients, including Michael Jackson.

Charmian Carr’s impact goes beyond her acting. She connected with fans through her books, Forever Liesl and Letters to Liesl, with Jean Strauss4. Her stories included her crush on Christopher Plummer. Fans have shared memories and appreciation for years18. Charmian’s legacy lives on in her portrayal of Liesl and the happiness she brought to many.

FAQ

Who was Charmian Carr?

Charmian Carr was an American actress. She was best known for playing Liesl, the oldest von Trapp child, in The Sound of Music.

What was Charmian Carr’s role in The Sound of Music?

In The Sound of Music, Charmian Carr played Liesl von Trapp. Liesl is the romantic and adventurous oldest daughter of the von Trapp family.

What is The Sound of Music?

Released in 1965, The Sound of Music is a beloved movie musical. It’s known for its beautiful music and the heartwarming story of the von Trapp family.Advertisement

When did Charmian Carr pass away?

Charmian Carr died at the age of 73. She passed away due to dementia complications.

What books did Charmian Carr write?

Charmian Carr authored two books. These books, Forever Liesl and Letters to Liesl, share her experiences from The Sound of Music.

Who did Charmian Carr leave behind?

Charmian Carr was survived by her siblings: Sharon, Darleen, Michael, and Brian. She also left behind two children, Jennifer and Emily.She had four grandchildren named: Emma, Derek, William, and Tucker.

What was Charmian Carr’s battle with dementia like?

The details of Charmian Carr’s fight with dementia have not been shared by her family.Advertisement

What was Charmian Carr’s post-acting career?

After acting, Charmian Carr ran a successful design business. Michael Jackson was among her clients.

Did Charmian Carr interact with fans?

Charmian Carr loved meeting fans. She attended events like The Sound of Music sing-alongs. Fans could dress as favorite characters and enjoy the film together.

What is Charmian Carr’s legacy?

Charmian Carr’s legacy includes her memorable role as Liesl. She greatly influenced The Sound of Music’s fan community and the musical film world.

How did Charmian Carr contribute to The Sound of Music?

As Liesl von Trapp, Carr showed off her talents in singing and dancing. She contributed to some of the film’s most unforgettable scenes.

Why is The Sound of Music still popular today?

Its timeless music and touching story keep The Sound of Music loved by new generations. This helps its popularity last over the years.Advertisement

What Impact did Charmian Carr’s Role in Sound of Music Have on Choosing a Music School?

Charmian Carr’s iconic role as Liesl Von Trapp in the Sound of Music influenced many to pursue music education. Her portrayal of a talented, passionate young woman highlighted essential music school factors like performance skills, musicality, and dedication, inspiring aspiring musicians to seek these qualities in their own education.

Source Links

  1. https://www.latimes.com/local/obituaries/la-me-charmian-carr-20160918-snap-story.html – ‘Sound of Music’ actress Charmian Carr, who played Liesl von Trapp, dies at 73
  2. https://www.cbsnews.com/baltimore/news/sound-of-music-actress-liesl-charmian-carr-dies-at-73/ – ‘Sound of Music’ Actress ‘Liesl’ Charmian Carr Dies at 73
  3. https://en.wikipedia.org/wiki/Charmian_Carr – Charmian Carr
  4. https://www.theguardian.com/film/2016/sep/20/charmian-carr-obituary – Charmian Carr obituary
  5. https://www.imdb.com/name/nm0139642/ – Charmian Carr | Actress, Soundtrack
  6. https://dollsmagazine.com/so-long-farewell-to-charmian-carr-forever-known-as-liesl-von-trapp/ – “So Long, Farewell” to Charmian Carr, forever known as Liesl von Trapp | DOLLS magazine
  7. https://www.independent.ie/entertainment/movies/movie-news/sound-of-music-star-charmian-carr-suffered-a-bout-of-depression-and-developed-two-phobias/35062406.html – Sound of Music star Charmian Carr suffered a bout of depression and developed two phobias
  8. https://www.abc.net.au/news/2016-09-19/the-sound-of-music-charmian-carr-liesl-von-trapp-dies/7856706 – Charmian Carr, actress best known as The Sound of Music’s Liesl, dies
  9. https://chicago.suntimes.com/2016/9/19/18364974/charmian-carr-eldest-daughter-in-sound-of-music-dies-at-73 – Charmian Carr, eldest daughter in ‘Sound of Music,’ dies at 73
  10. https://pagesix.com/2016/09/19/sound-of-music-actress-charmian-carr-dies-at-73/ – ‘Sound of Music’ actress Charmian Carr dies at 73
  11. https://www.goodreads.com/book/show/105609.Forever_Liesl – Forever Liesl
  12. https://www.straitstimes.com/lifestyle/entertainment/fans-mourn-death-of-charmian-carr-who-played-liesl-in-sound-of-music – Fans mourn death of Charmian Carr, who played Liesl in Sound Of Music
  13. https://www.theguardian.com/film/2000/nov/12/film – Charmian ‘Liesl’ Carr has written a book on The Sound of Music
  14. http://www.cnn.com/COMMUNITY/transcripts/2000/2/carr/ – CNN – Chatpage – Books
  15. https://www.britannica.com/topic/The-Sound-of-Music-film-by-Wise – The Sound of Music | Plot, Cast, Awards, & Facts
  16. https://www.bbc.com/news/uk-37405216 – Why fans are still singing along to the Sound of Music
  17. https://fox59.com/news/entertainment/charmian-carr-the-actress-who-played-liesl-in-the-sound-of-music-dies/ – Charmian Carr, the actress who played Liesl in ‘The Sound of Music,’ dies
  18. https://obits.oregonlive.com/us/obituaries/oregon/name/charmian-carr-obituary?pid=181453141 – Charmian Carr Obituary (1942 – 2016) – Connellsville, PA – The Oregonian

Music Production

How to Build a PC for Music Production: Everything You Need!

Craft the perfect music production PC with powerful components and expert tips – elevate your studio setup with ease!

Published

on

pc for music production

When building a PC for music production, focus on a powerful CPU with at least 6 cores, 16GB of RAM, SSD storage, a dedicated sound card, and a motherboard with upgrade options. Choose components based on your performance needs and guarantee compatibility. Optimize with sufficient RAM for smoother multitasking. Balance speed and capacity with storage options like SSD and HDD. Consider the sound card's connectivity and DSP capabilities. Assembly tip: select a spacious case with good airflow for setup. Regular maintenance and upgrades are key. Make sure to update for best performance and back up your data consistently for a smooth music production experience.

Key Takeaways

  • Prioritize a CPU with 6+ cores for music production.
  • Opt for 16GB+ RAM to enhance multitasking.
  • Choose SSD storage for quick data access.
  • Invest in a dedicated sound card for high-quality audio.
  • Select a motherboard with ample upgrade options.

Hardware Considerations for Music Production PC

When building a PC for music production, prioritize a powerful CPU with at least 6 cores to efficiently handle audio production tasks. The CPU is the heart of your music production setup, responsible for processing the complex audio tasks required in music production.

Alongside a robust CPU, you should also consider investing in sufficient RAM, starting with a minimum of 16GB. This will guarantee smooth multitasking capabilities, allowing you to run multiple audio software and plugins simultaneously without any lag.

In addition to a powerful CPU and ample RAM, opt for SSD storage to enhance data access speed, essential for seamless workflow in music production. The faster read and write speeds of an SSD will greatly reduce loading times for your audio projects and software applications.

Moreover, consider incorporating a dedicated sound card into your setup to achieve high-quality audio inputs and outputs, vital for producing professional-grade music.

Lastly, when selecting a motherboard for your music production PC, prioritize one with ample upgrade options to future-proof your setup. This will allow you to easily expand your system in the future as your music production needs evolve.

Advertisement

Choosing the Right CPU for Music Production

optimal cpu for music

When selecting a CPU for music production, focus on your performance needs.

Consider whether you require a multicore processor for handling multiple tasks simultaneously or a strong single-core performance for CPU-intensive software.

Keep an eye out for budget-friendly options that offer the right balance of power and affordability.

CPU Performance Needs

Selecting the ideal CPU is crucial for optimizing performance in music production setups. When choosing a CPU for music production, consider your performance needs. For tasks like running CPU-intensive plugins such as Izotope Iris 2, CPUs with high single-core performance are recommended. If you engage in heavy multitasking and use numerous plugins simultaneously, AMD processors are known for their competitive multi-core performance.

To guarantee you select the right CPU, benchmarking tools like Passmark.com can help you compare relative performance levels. Popular choices among music producers include the Intel i9 13900K and AMD Ryzen 9 3900X due to their robust performance capabilities.

Take a look at the table below for a quick comparison of CPU options based on key factors like core count, clock speed, and price:

Advertisement

CPU Model Cores Clock Speed Price Performance Level
Intel i9 13900K 8-16 3.5-5.0 GHz High High
AMD Ryzen 9 3900X 12 3.8-4.6 GHz Moderate High

Make sure your selected CPU not only meets your performance needs but also fits within your budget and is compatible with the rest of your system components.

Multicore Vs Single-Core

For peak performance in music production setups, understanding the difference between multicore and single-core CPUs is crucial.

Multicore CPUs like the AMD Ryzen 9 3900X are proficient at handling multiple tasks simultaneously, making them well-suited for music production software that requires heavy multitasking.

On the other hand, single-core performance plays an important role in running CPU-intensive plugins like Izotope Iris 2 efficiently. Intel's i9-9900KF, known for its high single-core performance, is a good choice for tasks that heavily depend on quick single-core speed.

When deciding between multicore and single-core CPUs for music production, it's important to strike a balance between managing numerous tracks and running demanding plugins smoothly.

Advertisement

Utilizing benchmarking tools such as Passmark.com can aid in comparing CPUs based on their single-core and multicore performance, helping you select the most suitable processor for your music production needs.

Budget-Friendly Options

Considering budget-friendly options, opt for CPUs like the AMD Ryzen 5 3600 or Intel Core i5-9600K to enhance performance in music production tasks. These CPUs strike a balance between cost and performance, providing ample processing power for audio editing and production.

The AMD Ryzen 5 3600 boasts 6 cores and 12 threads, while the Intel Core i5-9600K offers 6 cores and 6 threads, both suitable for music production tasks.

Don't overlook the importance of single-core performance, essential for running plugins and software smoothly during music production. Choosing the right CPU within your budget can significantly impact the overall efficiency of your music production PC.

  • Opt for CPUs like AMD Ryzen 5 3600 or Intel Core i5-9600K for budget-friendly options.
  • Consider the balance between cost and performance offered by these CPUs.
  • Look at the core and thread specifications of AMD Ryzen 5 3600 and Intel Core i5-9600K.
  • Remember the significance of single-core performance in running music production software seamlessly.

Importance of RAM in Music Production PC

ram crucial for music

RAM plays an important role in optimizing the performance of a music production PC, enabling seamless handling of audio samples, virtual instruments, and effects in real-time. In music production, where large files and multiple processes run simultaneously, sufficient RAM is vital for smooth operation.

With more RAM, you can experience smoother multitasking, faster loading times, and improved performance, especially when working on complex music projects. Music production software such as Digital Audio Workstations (DAWs), plugins, and virtual instruments rely heavily on RAM for efficient operation without lags or latency issues.

Advertisement

While a minimum of 16GB RAM is recommended for music production, professionals working on larger projects may benefit from 32GB or more. Upgrading your RAM can greatly enhance the overall performance and responsiveness of your music production PC, allowing you to work with multiple tracks and effects seamlessly.

Prioritizing adequate RAM capacity is essential for a productive music production setup.

Selecting the Best Storage Solutions

optimal storage solutions selection

When evaluating the best storage solutions for your music production PC, it's crucial to assess the types of storage available, striking a balance between speed and capacity, and ensuring you have backup solutions in place.

SSDs offer fast data access for quicker loading times, while NVMe SSDs can provide even higher speeds for handling audio files and plugins efficiently.

Additionally, don't forget to plan for large storage capacities to accommodate extensive sample libraries and multiple projects.

Storage Types Overview

For peak performance in music production, choosing the best storage solution is essential to guarantee efficient data access and processing. When considering storage types, here are some key options to keep in mind:

Advertisement

  • SSD (Solid State Drive): Offers faster data access speeds, enhancing performance for music production tasks.
  • HDD (Hard Disk Drive): Provides larger storage capacities at a lower cost, although it's slower compared to SSDs.
  • RAID (Redundant Array of Independent Disks): Configurations that can boost storage performance and provide data redundancy, important for critical music projects.
  • NVMe SSD (Non-Volatile Memory Express SSD): Even faster than traditional SSDs, making them ideal for high-speed data transfer demands in music production.

These storage solutions each have their strengths, so selecting the right combination based on your needs is key to optimizing your music production workflow.

Speed Vs Capacity

Balancing speed and capacity when selecting storage solutions is essential for optimizing your music production workflow. In this regard, Solid State Drives (SSDs) stand out for their superior speed and performance compared to traditional Hard Disk Drives (HDDs).

SSDs offer quick access to audio files and plugins, notably reducing loading times and enhancing overall system performance. For even faster data transfer rates, Non-Volatile Memory Express (NVMe) SSDs are the way to go. These high-speed storage solutions are paramount for handling large audio projects and samples efficiently.

While SSDs may not match the capacity of HDDs, they strike a good balance between speed and storage space, making them ideal for music production tasks. Opting for SSDs, especially NVMe SSDs, can greatly improve your workflow by minimizing loading times and ensuring smooth operation when working on complex music projects.

Backup Solutions Needed

Consider incorporating a variety of storage solutions, such as external hard drives and cloud services, to guarantee robust backup options for your music production projects.

When it comes to backup solutions, external hard drives and NAS systems are essential for storing your music files and project data securely. Additionally, utilizing cloud storage services like Dropbox, Google Drive, or OneDrive can provide off-site backups for an added layer of protection.

Advertisement

Investing in redundant storage systems, such as RAID configurations, can help with data mirroring and protection against hardware failures. To streamline the backup process, use specialized backup software to automate backups and ensure the integrity of your music production files.

Remember to implement a thorough backup strategy that includes regular backups of both your music files and system settings to safeguard your work.

Sound Card Essentials for Music Production

key components for music

When setting up your music production system, selecting the right sound card is essential for peak performance and sound quality. Sound cards play a critical role in the audio production process, providing the necessary inputs and outputs for recording and playback. Whether you opt for USB audio devices, Thunderbolt, or PCI-E sound cards, each offers unique features to enhance your music production experience.

Considerations such as ASIO driver quality and latency are paramount for ensuring a smooth workflow during recording and editing sessions. Some sound cards come equipped with additional connectivity options like ADAT or DANTE connections, expanding your setup possibilities. Additionally, onboard DSP capabilities found in certain sound cards allow for running plugins directly on the hardware, reducing the strain on your computer's CPU.

Below is a table highlighting some key features to look out for when selecting a sound card for your music production needs:

Feature Description
Connectivity Options USB, Thunderbolt, PCI-E, ADAT, DANTE
ASIO Driver Quality Essential for low latency and stable performance
DSP Capabilities Ability to run plugins directly on the sound card hardware
Budget-Friendly Options Affordable choices for enhancing audio production setups

Graphics Card Selection Tips

graphics card buying guide

When selecting a graphics card for your music production PC, it's crucial to take into account compatibility with your audio software and budget-friendly options.

Make sure the GPU has sufficient VRAM and good driver support for your tasks, bearing in mind that performance is secondary to CPU and RAM for audio production.

Advertisement

Seek out a reputable brand known for stability and performance to manage any visual effects or GUI demands of your software.

GPU Compatibility Considerations

To guarantee peak performance in your music production tasks, prioritize selecting a GPU that aligns with the requirements of your software and digital audio workstation (DAW).

When considering GPU compatibility for music production, keep the following tips in mind:

  • Check Software Compatibility: Confirm your GPU is compatible with your music production software to avoid any potential performance issues.
  • Meet System Requirements: Make sure the GPU meets the minimum system requirements specified by your DAW for the best functionality.
  • VRAM Capacity: Opt for a GPU with ample VRAM to handle large audio files and multiple plugins simultaneously without lag.
  • Acceleration Support: Look for a GPU that supports OpenCL or CUDA acceleration to enhance the performance of audio processing tasks.

Budget-Friendly Options

Consider opting for budget-friendly graphics cards like the AMD Radeon RX 6600 when selecting a GPU for your music production PC build, focusing on cost-effectiveness without compromising performance. The AMD Radeon RX 6600 offers a good balance between price and capabilities, making it a suitable choice for handling visual elements in music production software efficiently.

When choosing a graphics card, prioritize ones with excellent driver support to avoid compatibility issues with your audio software. Ensuring stable performance is vital, so selecting a graphics card with dedicated VRAM can help meet the demands of your music production projects without lag or bottlenecks.

Remember to assess your specific needs, such as multiple monitor support or GPU-accelerated plugins, to tailor your graphics card choice accordingly. By balancing cost and performance, you can create a reliable music production setup that enhances your workflow without breaking the bank.

Advertisement

Assembling Your Music Production PC

building a music production

For peak performance, carefully assemble your music production PC by following these steps.

  • Choose a spacious case with good airflow to accommodate components comfortably.
  • Confirm compatibility between your chosen CPU, motherboard, RAM, and storage options.
  • Install the CPU, RAM, and storage devices onto the motherboard carefully.
  • Connect the power supply, GPU, and any additional components following the motherboard manual.

When assembling your PC build for music production, the motherboard serves as the foundation where all components are connected.

Begin by securing the motherboard in the case, ensuring it aligns with the standoffs.

Install the CPU, being cautious with the delicate pins, and then insert the RAM sticks into the designated slots.

Next, connect your storage devices, such as SSDs or HDDs, to the appropriate ports on the motherboard.

Refer to the motherboard manual to correctly attach the power supply, GPU, and any other components.

Double-check all connections before powering on your music production PC to prevent any potential issues.

Advertisement

Setting Up Audio Production Software

software for audio setup

When setting up audio production software for your music production PC, choose a Digital Audio Workstation (DAW) like Pro Tools, Ableton Live, or FL Studio. These DAWs offer a wide range of features to help you create, record, and mix your music efficiently.

Install plugins and virtual instruments within your chosen DAW to enhance creativity and access a broader sound palette.

Next, configure your audio settings both in your operating system and DAW to guarantee peak performance and compatibility with your hardware. Adjust buffer sizes, sample rates, and audio input/output settings to minimize latency and achieve high-quality audio production.

Additionally, connect and set up your audio interface properly to enable professional-grade audio inputs and outputs for recording and playback.

Remember to regularly update your software, including the operating system, DAW, plugins, and drivers. Staying up to date ensures that you have access to the latest features and improvements, enhancing your overall music production experience.

Maintaining Your Music Production PC

optimizing music production computer

To keep your music production PC running smoothly, regularly clean and dust your components to prevent overheating and maintain peak performance.

Here are some essential tips for maintaining your music production PC:

Advertisement

  • PC maintenance: Regularly clean and dust your PC components to prevent overheating and maintain top performance.
  • Software updates: Keep your software, drivers, and plugins up to date to maintain compatibility and access the latest features for your music production tasks.
  • Hardware upgrades: Consider upgrading components like RAM, storage, or GPU to improve performance and handle more complex music production tasks effectively.
  • Data backup: Back up your important music projects and files regularly to prevent data loss in case of hardware failure or software issues.

Upgrading Components for Improved Performance

enhancing performance with upgraded components

Consider enhancing your music production PC's performance by upgrading key components such as RAM, SSD, CPU, sound card, and graphics card.

Upgrading the RAM can boost multitasking abilities, allowing you to run more plugins and software simultaneously, leading to improved overall system performance.

Adding a faster SSD or increasing storage capacity can decrease load times, enhancing your workflow efficiency by allowing for quicker access to project files and samples.

When upgrading the CPU, you'll experience a significant increase in processing power, enabling smoother operation of resource-intensive music production tools.

A dedicated sound card or audio interface upgrade can enhance audio quality and decrease latency during recording and playback sessions.

While upgrading the graphics card may not directly impact music production performance, it can improve visual editing and provide a smoother software interface experience.

Advertisement

Frequently Asked Questions

What Kind of PC Is Needed for Music Production?

For music production, you need a PC with a powerful CPU (at least 6 cores), 16GB+ RAM for multitasking, and NVMe/SATA SSDs for fast access. A dedicated sound card with ASIO drivers guarantees high-quality audio. Consider a GPU for visual tasks.

Do You Need a High End PC for Music Production?

You don't have to, but a high-end PC is essential for music production. It guarantees smooth operation with complex software and large files, boosting efficiency and audio quality. Invest wisely for a seamless music-making experience.

Would a Gaming PC Be Good for Music Production?

A gaming PC can work well for music production with its robust processing power and multitasking abilities. Prioritize strong CPUs and ample RAM. Check compatibility with music production gear like audio interfaces.

What Is the Best Computer for a Music Producer?

For a music producer, the best computer blends power and precision. Think Intel i9 or AMD Ryzen CPUs for seamless audio work. RAM matters too; aim for 32GB+. Speedy NVMe SSDs and premium sound cards seal the deal.

Conclusion

So there you have it – you're all set to rock and roll with your brand new music production PC!

Advertisement

Remember, with the right hardware and software, you'll be churning out hits in no time.

And hey, if you ever feel like your setup needs a little boost, don't be afraid to upgrade those components.

The sky's the limit when it comes to creating your next chart-topping track!

Continue Reading

Music Production

How to Build a Music Production Desk: DIY Guide!

Leverage this DIY guide to craft your personalized music production desk, ensuring a stylish and functional workspace that suits your needs perfectly.

Published

on

diy music production desk

Craft your personalized music production desk by following a detailed DIY guide. Gather materials like MDF, supports, and a bamboo countertop. Consider dimensions carefully for stability and comfort. Prepare your workspace with ample lighting and organization. Cut and sand the wood precisely for a flawless finish. Assemble the frame securely and install the countertop accurately. Finish off with sanding, priming, and painting for durability. Gain insights into cost breakdown and final touches. Explore the steps further to build a functional and stylish desk just for you.

Key Takeaways

  • Use 3/4 inch MDF & bamboo countertop for stability and sleek finish.
  • Customize desk height for ergonomic comfort.
  • Optimize workflow with spacious design for gear organization.
  • Secure frame with proper spacing and supports for stability.
  • Sand, prime, paint, and seal for a durable, professional finish.

Materials Needed

To construct a music production desk, gather 3/4 inch MDF, 2×3 supports, a 1×8 back support, and a bamboo countertop. These materials form the foundation for your DIY project.

The use of 3/4 inch MDF guarantees a robust structure, while the 2×3 supports provide stability to the desk. Additionally, incorporating a 1×8 back support adds further reinforcement to the design, ensuring durability over time.

When working on your music production desk, remember to cut specific measurements such as 35.5-inch squares for the desk itself. For accommodating rack mount gear, the inner spacing should be set at 19 1/16 inches.

Lastly, the choice of a bamboo countertop not only adds a sleek finish to the desk but also provides a smooth surface for your equipment.

Desk Design Considerations

desk ergonomic design tips

Considering the width of your desk is important to guarantee all your gear remains within easy reach during your music production sessions. When designing your studio desk, make sure that it accommodates the width of your equipment, such as your computer, MIDI controllers, and audio interfaces. This setup will optimize your workflow by keeping everything you need nearby.

Another significant aspect to take into account is easy access to rack space from your sweet spot. This allows you to adjust your gear and settings conveniently without disrupting your creative process.

Advertisement

Additionally, opt for a design that provides stability, especially if you have heavy equipment like studio monitors or multiple screens.

Customizing the desk height is crucial for your comfort and working preferences. Ensure the desk is ergonomically suitable to prevent strain during long hours of music production.

Preparing the Workspace

setting up your space

Clear out a spacious area in your workspace to accommodate the size of the desk you plan to build before starting the construction process. Guarantee that your workspace has proper lighting and ventilation for a comfortable working environment during the construction phase.

Have all necessary tools and materials organized and easily accessible within your workspace to facilitate efficient assembly. Consider using a drop cloth or protective covering to prevent any damage to the floor or surrounding surfaces while you work on building the desk. Double-check measurements and plans in your workspace to avoid mistakes and ensure a smooth construction process.

Cutting and Sanding the Wood

crafting wooden pieces carefully

Measure and mark the birch butcher block with precision before making the necessary cuts to create your studio desk's main desktop.

Use a circular saw with a fine-tooth blade for accurate dimensions and then sand the edges and surfaces with fine-grit sandpaper for a smooth finish.

Don't forget to round off the corners for a polished look and wipe down the wood to remove any debris before moving on to staining.

Advertisement

Wood Measurements and Cuts

To guarantee a sturdy and professional-looking music production desk, accurately cut 35.5-inch squares of 3/4 inch MDF for the main desktop using precise measurements. The table below outlines the measurements needed for key components of the desk:

Component Material Measurement
Main Desktop 3/4 inch MDF 35.5-inch squares
Inner Spacing for Gear 3/4 inch MDF 19 1/16 inches
Cross Supports 2×3 Custom lengths
Back Support 1×8 Custom lengths

Ensure that the inner spacing for rack mount gear is accurately cut to 19 1/16 inches to accommodate your equipment. Use 2×3 for the cross supports to provide stability and 1×8 for the back support to reinforce the structure. Remember, precise measurements and clean cuts are essential for both the structural integrity and the visual appeal of your music production desk.

Sanding for Smoothness

Smooth out any rough surfaces and imperfections by sanding the wood before staining your music production desk.

Begin with coarser sandpaper, around 80 to 120 grit, for initial sanding to remove any prominent flaws. Make sure to follow the wood grain's direction to avoid creating scratches and maintain a uniform surface.

As you progress, switch to finer sandpaper, such as 220 to 400 grit, for a smoother finish. Thoroughly clean the wood after sanding to eliminate all dust and debris, ensuring a pristine base for staining.

Advertisement

Finishing Touches

When cutting and sanding the wood for your music production desk, prioritize precision and attention to detail to guarantee a professional and polished finish.

Start by measuring twice and cutting once to make sure accurate dimensions for each wood piece. Use a high-quality saw with a fine-tooth blade to make clean and precise cuts, reducing the risk of errors during assembly.

After cutting, sand the edges of the wood pieces to eliminate splinters and rough spots, creating a smooth surface for a refined look. Focus on the corners and edges while sanding to maintain a uniform appearance across the entire desk.

Smooth and properly finished wood not only enhances the aesthetics of your desk but also improves its durability and longevity. Remember, the effort put into cutting and sanding the wood will greatly impact the overall quality and appearance of your music production desk.

Assembling the Desk Frame

furniture assembly step by step

Begin by spacing out the side racks evenly to guarantee structural integrity and proper alignment when assembling the desk frame. This step is essential in ensuring that the desk frame is stable and can support the weight of your music production equipment.

Once the side racks are in position, secure them using half-inch screws and additional brackets for added stability during use.

Advertisement

Next, carefully place the desktop on the assembled side racks, making sure it fits snugly to create a solid foundation for your music gear. Use support pieces to attach the desktop to the side racks securely. This will provide a sturdy work surface for your equipment.

Before proceeding with the final touches, double-check the desk frame to ensure it's level. Make any necessary adjustments to guarantee a stable and balanced desk for your music production needs.

Following these steps will help you assemble a reliable and durable music production desk.

Adding Rack Mount Gear Spacing

rack mount equipment organization

To optimize your music production desk for rack mount gear spacing, determine the inner spacing needed for your equipment, typically around 19 1/16 inches.

When adding rack mount gear spacing to your desk, consider the following:

  • Use 2×3 Cross Supports: Incorporate 2×3 pieces for cross supports to guarantee stability for your rack mount gear.
  • Sturdy Back Support: Utilize a 1×8 back support to hold the sides together securely, especially when heavier gear is placed on the rack.
  • Wider Surface: Create a wider desk surface to accommodate all your gear on the same table, allowing for easy access and better organization of your equipment.
  • Accessibility Optimization: Optimize the design to make sure that the rack space is easily accessible from the sweet spot of your music production setup, enhancing workflow efficiency and convenience.

Installing the Countertop

setting up a countertop

Consider securing the countertop onto the assembled desk frame using screws or a suitable adhesive for a stable work surface.

Before attaching the countertop, make sure you have accurately measured its dimensions to guarantee a perfect fit. Once positioned, use screws or adhesive to firmly attach the countertop, ensuring it's level and flush with the edges of the desk for a polished look.

Advertisement

To enhance the durability of your countertop, seal its edges to safeguard against moisture damage and wear over time.

After installation, test the stability by applying pressure and making any necessary adjustments for a sturdy work surface. Maintaining a secure attachment won't only provide a reliable workspace for your music production needs but also add a professional touch to your DIY desk project.

Follow these steps diligently to create a functional and aesthetically pleasing music production desk.

Sanding, Priming, and Painting

prepping surfaces for painting

You're about to tackle the essential steps of sanding, priming, and painting your music production desk.

Sanding will guarantee a smooth surface, while using an acrylic-based primer is key for proper paint adhesion.

Sanding Techniques

Smooth out imperfections in the wood surface by starting with an initial sanding using fine grit sandpaper before applying primer and paint for your music production desk. Essential sanding techniques are vital for achieving a professional finish.

Advertisement

Here are some tips to help you sand effectively:

  • Begin with a fine grit sandpaper (around 120-220) for the initial sanding process.
  • Use a super fine grit sandpaper (around 320-400) for a smoother finish before applying primer and paint.
  • Guarantee even sanding to help the primer adhere better to the wood surface.
  • Remember to sand between paint layers to remove imperfections and achieve a polished, smooth final look for your music production desk.

Priming Importance

Before painting your music production desk, make sure you understand the critical significance of priming the surface to achieve a flawless finish. Priming plays a key role in preparing the desk for painting by sealing the surface and enhancing paint adhesion.

By sanding the desk beforehand, you create a smooth canvas for the primer to adhere to, ensuring a uniform base for the paint application. This step is especially vital for MDF surfaces, as it prevents the material from absorbing paint unevenly, leading to a blotchy finish.

Opt for an acrylic-based primer and apply it in thin coats to effectively seal the surface and improve the overall durability of the paint job. Proper priming not only enhances the aesthetic appeal of your desk but also reduces the number of paint coats needed to achieve a professional look.

Painting Tips

Prepare your music production desk for a flawless finish by following these essential painting tips, including sanding, priming, and painting techniques.

Before painting, establish a smooth surface by sanding thoroughly to improve paint adhesion. Use an acrylic-based primer on MDF surfaces to help the paint adhere evenly and prevent blotching.

Advertisement

When painting, apply multiple thin coats of paint for a professional and durable finish. To achieve a polished look, remember to sand between paint layers using fine-grit sandpaper.

Attention to detail during the painting process is vital to guarantee a professional appearance for your finished music production desk.

  • Sanding before painting is essential for a smooth surface.
  • Use an acrylic-based primer on MDF surfaces for even paint adhesion.
  • Apply multiple thin coats of paint for a professional finish.
  • Sand between paint layers with fine-grit sandpaper for a polished look.

Staining and Finishing Touches

applying final finishes carefully

Consider pouring gel stain onto the surface of your music production desk and spreading it evenly with a dry cloth to achieve a consistent finish. When staining, keep in mind that applying multiple layers of gel stain can result in a darker color, but be cautious to prevent excess buildup.

After achieving the desired hue, a clear protective coat can be added to provide durability and a refined appearance. To guarantee a professional look, sanding between each layer of stain is recommended for a smooth texture.

Detail-oriented work during the staining process is vital for obtaining the desired aesthetic for your music production desk. Taking the time to apply the stain evenly and paying attention to any imperfections will contribute to a polished final result.

Cost Breakdown and Final Thoughts

analyzing expenses and conclusions

You're probably curious about how the costs break down for your DIY music production desk.

Let's discuss the budget breakdown analysis, tips for saving money, and the key takeaway points to think about as you undertake this project.

Advertisement

Budget Breakdown Analysis

For a thorough understanding of the cost breakdown and final reflections on constructing a music production desk, let's explore the budget breakdown analysis.

The total cost for a DIY music production desk amounts to approximately $544.32, with the primary expenses being:

  • Wood at $344.78
  • Hardware at $52.11
  • Tools at $49.97
  • Stain at $19.98
  • Miscellaneous items at $77.48

By choosing to build your own desk, you can save substantially compared to buying a pre-built one, which can cost between $1,000 to $2,500. Constructing a music production desk from wood allows for customization, cost-effectiveness, and a sense of accomplishment in creating a workspace tailored to your needs.

The DIY approach not only saves money but also offers a rewarding experience, providing a unique and personalized solution that meets your specific requirements.

  • Wood: The most significant cost, allowing for customization and durability.
  • Hardware: Essential for assembling the desk securely.
  • Tools: Necessary for the construction process.
  • Miscellaneous items: Additional components that enhance functionality.

Tips for Saving

To save on costs while building your music production desk, prioritize sourcing materials from budget-friendly suppliers. Seek out deals at local hardware stores, online marketplaces, or salvage yards to score discounts on wood, stain, hardware, tools, and miscellaneous items.

By being strategic in your material sourcing, you can greatly reduce the overall expenses associated with constructing your DIY music production desk. Additionally, consider repurposing materials from old furniture or items you already have to further cut down on costs.

Remember, the total estimated cost for building a DIY music production desk is approximately $544.32, which is a substantial saving compared to purchasing a pre-made studio desk. Embracing the DIY approach not only allows for customization but also frees up budget for investing in other studio equipment or upgrades.

Advertisement

Key Takeaway Points

When starting a DIY music production desk, being mindful of the cost breakdown and final thoughts is essential for a successful project. Here are some key points to keep in mind:

  • Cost Breakdown: Understanding the breakdown of costs, including materials like wood, stain, hardware, tools, and miscellaneous items, is vital for budgeting your DIY music production desk project effectively.
  • Cost-Effectiveness: Opting for a DIY music production desk can be a cost-effective choice compared to purchasing one, with the total materials cost ranging from $500 to $650 CAD.
  • Attention to Detail: Ensuring precise measurements, cuts, and attention to detail will result in a professional-looking DIY music production desk that meets your needs.
  • Customization: Take advantage of customization options to incorporate your personal preferences and design ideas into the DIY music production desk, making it uniquely yours.

Keep these key points in mind as you start on your DIY music production desk project, and enjoy the process of creating a workspace tailored to your music production needs.

Frequently Asked Questions

How Do You Set up a Room for Music Production?

To set up a room for music production, position your desk in the center for balanced acoustics. Add sound-absorbing panels, a monitor isolation pad, adjustable lighting, and a rug for improved audio quality, vibration prevention, comfort, and acoustics.

How Much Does It Cost to Build a Music Production Studio?

To build a music production studio, it can cost around $500-$650 CAD. This includes materials like MDF, hardware, paint, and a bamboo countertop. Opting for DIY can save you a lot compared to buying a ready-made desk.

How to Build a Music Studio Pc?

To construct a music studio PC, choose a powerful processor, ample RAM, fast SSD, and dedicated graphics card. Research best configurations balancing performance and budget. Select a reliable motherboard with adequate connectivity. Guarantee proper cooling and install a high-quality sound card for professional-grade output.

How Can I Build a Music Studio?

To build a music studio, start by determining your needs and gathering materials. Follow step-by-step instructions to assemble the setup, ensuring stability and functionality. Customize with rack plates and cable management for a professional finish.

Advertisement

Conclusion

Now that you've built your own music production desk, you've got a creative space that's truly music to your ears.

With the right materials and a little elbow grease, you've crafted a masterpiece that will inspire your next hit.

So go ahead, sit down at your new desk and let the music flow like a river through your fingertips.

Let your creativity soar on the wings of your homemade creation.

Advertisement

Continue Reading

Music Production

How to Build a Music Production Computer: Essential Tips!

Jumpstart your music production computer journey with essential tips on choosing components and optimizing performance for a seamless workflow!

Published

on

building music production computer

To build a music production computer, start by choosing a platform that suits your needs, like PC for flexibility or Mac for stability. Pick a powerful CPU with enough cores and speed for smooth performance. Keep your system cool with efficient cooling solutions to prevent overheating issues. Guarantee your motherboard and RAM are compatible for peak functioning. Opt for NVMe SSDs over HDDs for faster data access. Choose components that support multitasking and a dedicated GPU for visual effects. Consider peripherals like external DACs for excellent audio output. More tips await to enhance your music production setup.

Key Takeaways

  • Choose a CPU with high core count and clock speed for efficient multitasking and processing.
  • Ensure motherboard and RAM compatibility for optimized performance.
  • Opt for NVMe SSDs for faster read/write speeds and quick project loading.
  • Select components supporting multiple CPU cores and high-speed RAM for smooth editing.
  • Invest in external DACs, USB audio interfaces, quality microphones, and studio monitors for optimal setup.

Choosing the Right Platform

When selecting the ideal platform for your music production computer, prioritize compatibility with your audio interface and plugins.

Whether you opt for a PC or a Mac system, make sure that your digital audio workstation (DAW), hardware components, and operating system align seamlessly.

PCs, especially Windows systems, offer a vast array of options for audio production software and hardware. They're highly customizable, allowing for easy upgrades to keep up with the demands of music production.

On the other hand, Mac systems are renowned for their stability and smooth integration with popular music production software like Logic Pro X. While Macs are favored for their reliability and performance by many music producers, Windows PCs provide flexibility and a broader range of choices when it comes to DAWs, hardware configurations, CPUs, and GPUs.

Ultimately, the decision between a PC and a Mac system should be based on your specific needs and preferences in the domain of music production.

Advertisement

Selecting a Powerful CPU

choosing the best processor

When selecting a powerful CPU for your music production computer, prioritize factors like core count and clock speeds.

Seek out CPUs such as the Intel i7-14700 or AMD Ryzen 7 7800X3D for peak performance in audio processing tasks.

Confirm compatibility with your preferred digital audio workstation software to maximize efficiency.

CPU Performance Factors

For peak performance in music production, selecting a powerful CPU with at least 6 cores and high clock speeds is crucial.

When choosing a CPU for your music production setup, consider models like the Intel Core i7-14700 or AMD Ryzen 7 7800X3D for their multitasking capabilities and audio processing efficiency.

Mac users can look into Apple's M series processors, known for their prowess in handling music production tasks.

Advertisement

Remember, higher core counts and faster clock speeds play a significant role in the seamless execution of multiple tracks and plugins.

If you're aiming for maximum processing power, CPUs like the Intel Core i9 or AMD Ryzen 9 series are excellent choices.

Prioritize a CPU that can effectively handle the demands of audio editing and production to guarantee a smooth workflow in your music projects.

Compatibility With Software

To guarantee smooth operation of popular music production software, it's crucial to select a powerful CPU with multiple cores and high clock speeds. When handling complex audio processing tasks, a CPU with sufficient cores can divide the workload efficiently, while high clock speeds ensure swift execution of operations.

For real-time audio processing and low latency during recording and playback, look for CPUs with strong single-core performance. CPUs from Intel's Core i7/i9 or AMD's Ryzen 7/9 series are well-suited for music production applications, offering the necessary power to run demanding software like Ableton Live, Pro Tools, FL Studio, and Logic Pro X seamlessly.

Advertisement

Make sure your chosen CPU meets the minimum system requirements of your preferred Digital Audio Workstation (DAW) to avoid compatibility issues.

Ensuring Adequate Cooling Solutions

efficient cooling system maintenance

Consider incorporating fan coolers or water coolers into your music production computer setup to ensure adequate cooling for peak performance.

Fan coolers are a budget-friendly option that provides sufficient cooling for your custom PC.

On the other hand, water coolers offer efficient cooling for high-performance CPUs, ensuring stable performance during intensive music production tasks.

Overheating prevention is essential to maintaining the best performance of your components and extending their lifespan.

When choosing cooling solutions, consider factors such as your budget, cooling requirements, and personal preferences to create an effective cooling system for your music production computer.

Advertisement

Adequate cooling not only prevents overheating but also plays a significant role in the overall performance and longevity of your custom PC.

Identifying Compatible Motherboards and RAM

matching motherboards with ram

When selecting components for your music production computer, prioritize ensuring compatibility between the motherboard and RAM modules to optimize performance. Here are some essential factors to keep in mind:

  • Choose a motherboard with the correct socket type to match your CPU, like AM4 for AMD or LGA1200 for Intel.
  • Confirm the motherboard has sufficient RAM slots and supports the speed and capacity of your selected RAM modules.
  • Opt for a motherboard with an adequate number of USB ports, PCIe slots, and M.2 slots to meet your connectivity and storage requirements.
  • Check the motherboard's compatibility with your CPU and other components to prevent any compatibility issues during assembly.
  • Select RAM that aligns with the motherboard's supported memory type (DDR4, DDR5) and speed (e.g., 3200MHz, 4800MHz) for best system performance.

Ensuring harmony between your motherboard and RAM is vital for a stable and efficient music production setup.

Opting for Fast Storage Options

choosing efficient data storage

When selecting storage options for your music production computer, consider the benefits of NVMe SSDs over traditional HDDs. NVMe SSDs provide faster read and write speeds, enhancing the efficiency of your workflow.

Additionally, investing in NVMe SSDs can reduce latency and improve overall performance.

SSD Vs HDD

Opt for faster storage options by choosing between SSDs and HDDs when building your music production computer.

SSDs offer quicker data access and file transfer speeds due to their flash memory technology. They excel in faster boot times and rapid application loading compared to HDDs, which have mechanical components leading to slower performance.

While SSDs are pricier per GB, their prices are decreasing over time, making them more affordable. For music production, SSDs are ideal for swift project loading and quick sample access, enhancing overall system performance.

Advertisement

When deciding between SSDs and HDDs for your music production setup, consider the importance of speed and efficiency in handling large audio files and complex projects. Opting for SSDs can greatly improve your workflow and productivity in music production.

External Drive Options

Consider utilizing NVMe SSDs for rapid data transfer speeds, essential for storing and accessing large audio files in music production.

External SSDs provide portability and high-speed data transfer rates, making them ideal for transferring projects between different systems efficiently.

Thunderbolt 3 external drives offer lightning-fast data transfer speeds, perfect for handling and manipulating large audio projects in music production setups.

If you require a balance between storage space and performance, hybrid external drives, which combine the speed of SSDs with the capacity of HDDs, could be a suitable option.

Advertisement

Opting for external drives with USB 3.1 Gen 2 connectivity guarantees faster data transfers and compatibility with modern music production setups.

Whether you need portable storage for on-the-go work or high-speed data transfer for handling large audio files seamlessly, these external drive options address different needs within the domain of music production.

Considering Additional Enhancements

innovative technological solutions proposed

Enhance your music production setup by incorporating PCIe sound cards for optimized audio processing and superior sound quality.

When considering additional enhancements for your music production computer, there are several key factors to keep in mind:

  • Invest in a power supply unit (PSU) with safety features to guarantee stability during intense production tasks.
  • Plan for future upgrades by choosing hardware that allows for easy expansion and enhancements.
  • Opt for components that support multiple CPU cores to maximize efficiency in modern editing software.
  • Essential peripherals such as external DACs, USB audio interfaces, and high-quality microphones are vital for high-quality audio production.

Frequently Asked Questions

What Makes a Good Computer for Music Production?

For music production, a good computer must have a powerful CPU with multiple cores, sufficient RAM of at least 16GB, fast NVMe SSD storage, high-quality audio interfaces, and optional dedicated graphics card for improved performance.

What PC Specs Do You Need for Music Production?

Looking to craft music like a pro? You'll need a robust CPU with 6+ cores, 16GB RAM for smooth multitasking, and SSD storage for quick access. Consider a dedicated GPU for graphics. Keep cool under pressure for top performance.

How to Configure PC for Music Production?

To configure your PC for music production, optimize audio settings in the OS and DAW. Adjust low latency in your audio interface and use ASIO drivers. Set up MIDI controllers and gear in your DAW for seamless control.

Advertisement

Do You Need a High End PC for Music Production?

When creating music, think of a high-end PC as your orchestra conductor, coordinating all the intricate parts seamlessly. With its powerful CPU, ample RAM, and fast storage, a high-end PC is essential for efficient music production.

Conclusion

Now that you have the essential tips for building a music production computer, you're well on your way to creating your own powerhouse of creativity.

With the right platform, CPU, cooling solutions, motherboards, RAM, storage options, and additional enhancements, you'll be ready to take your music production to the next level.

Just like a well-tuned instrument, your computer will be the perfect tool to bring your musical vision to life.

So, let the music-making begin!

Advertisement

Continue Reading

Trending

Copyright © 2024 The Sound of Music Guide Affiliate disclaimer As an affiliate, we may earn a commission from qualifying purchases. We get commissions for purchases made through links on this website from Amazon and other third parties.