Performance Optimization
The Best Mac & PC Settings for High-Performance Music Production
Streamline your Mac or PC settings for optimal music production performance, but discover the crucial adjustments that could elevate your workflow even further.
To optimize your Mac or PC for high-performance music production, start by keeping your OS and drivers updated. Adjust your power settings to prioritize performance, making sure your CPU stays at full capacity. Connect your audio interface directly to your computer to avoid latency. Use CPU-efficient plugins and manage your resources by bouncing MIDI tracks to audio. Also, consider adjusting buffer settings during recording and playback for the best latency management. These strategies can considerably enhance your workflow and productivity. There's more to uncover about optimizing your setup effectively, so keep exploring these techniques!
Key Takeaways
- Adjust energy settings on both Mac and PC to maximize CPU performance and prevent throttling by keeping laptops plugged in during sessions.
- Use ASIO on Windows or CoreAudio on Mac for optimal audio interface performance and ensure that sampling frequency matches system settings.
- Regularly monitor and manage CPU usage by rendering MIDI tracks to audio and utilizing freeze or consolidate features for efficiency.
- Increase playback buffer lengths during mixing sessions to improve CPU performance while reducing latency during recording.
- Stay updated with software and driver updates to ensure compatibility and performance for high-demand music production tasks.
Operating System Optimization
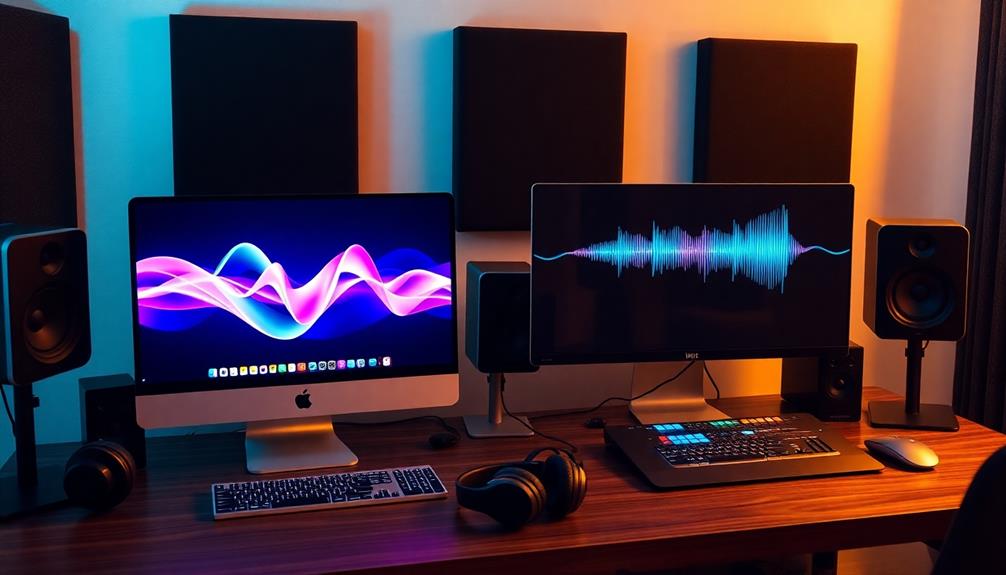
Operating system optimization is essential for a smooth music production experience. If you're using a Mac, start by creating a full backup of your operating system with Time Machine. This safeguards your music projects and settings.
Next, check your internal storage; maintaining at least 20% free space is imperative. It helps optimize your computer's performance and prevents slowdowns during intense audio sessions.
You should also disable unnecessary background applications and services. This frees up CPU and memory resources, ensuring your Digital Audio Workstation (DAW) runs without interruptions.
Regularly updating your operating system and device drivers is another key step. This enhances compatibility and stability, which are essential for seamless music production.
On Mac, adjust the Energy Saver settings to maximize your CPU's processing capabilities.
By taking these steps, you can greatly enhance your music production setup. Remember, a well-optimized operating system translates to better performance, allowing you to focus more on creativity and less on technical issues.
Optimizing your computer isn't just about speed; it's about creating an environment where your music can thrive.
Power and Performance Settings
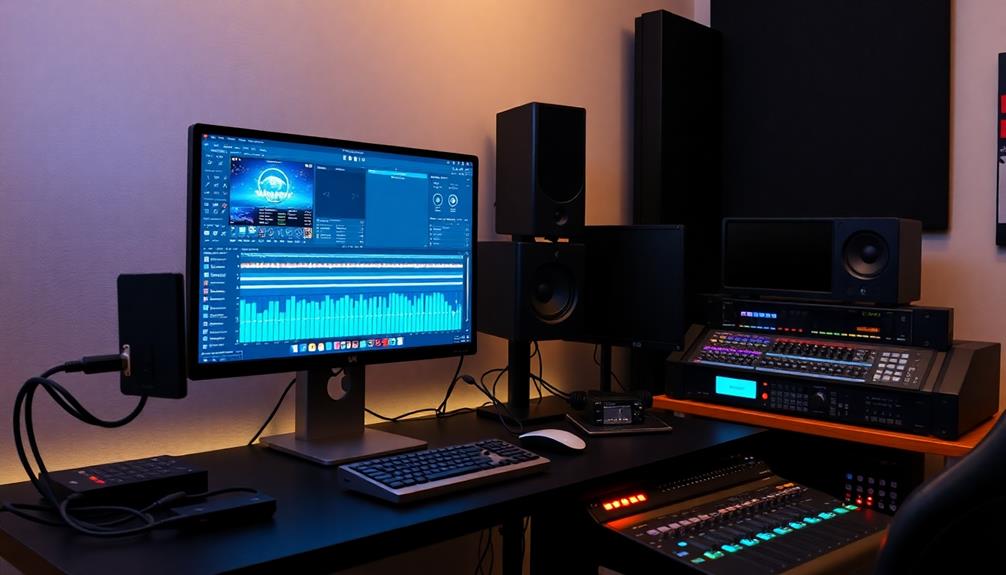
When you're ready to optimize your music production setup, adjusting your power settings is essential.
On Windows, switching to the High Performance power plan guarantees your CPU runs at its peak, while Mac users can tweak Energy Saver settings to keep your system awake during those long sessions.
High Performance Power Plan
To secure your music production sessions run smoothly, enabling the High Performance power plan on Windows is essential, as it prevents CPU throttling and maximizes processing power. This power plan guarantees your CPU resources are fully utilized, particularly during demanding tasks like music production.
To access this, go to your power settings and select the High Performance option.
On Mac computers, you can achieve similar benefits by adjusting your Energy Saver settings. Preventing hard disk sleep and display turn-off allows your system to maintain consistent performance when running audio applications.
In Windows, explore the advanced settings and set your minimum processor state to 100%. This adjustment guarantees your CPU operates at full capacity, optimizing its performance for your music production needs.
If you're using a laptop, keep it plugged in to avoid energy-saving measures that can throttle CPU performance.
Additionally, consider utilizing specific laptop software that enables turbo boost or gaming modes. These features can provide extra performance enhancements, further optimizing your machine for the demanding workloads of music production.
Energy Saver Adjustments
Adjusting your Energy Saver settings can greatly enhance your music production experience on Mac. First, prevent your hard disk from sleeping and disable display sleep. This keeps your system running consistently, guaranteeing that your DAW performs at its best.
Additionally, with recent advancements in technology like AI privacy revolution, you can be confident that your personal data remains protected while focusing on your creative tasks. If you're using a PC, make sure the High Performance power plan is enabled to avoid CPU throttling and maximize processing power.
It's crucial to keep your laptop plugged in during sessions. This prevents interruptions from power-saving features that could compromise your performance.
Additionally, consider disabling Bluetooth and other unnecessary background services. By doing this, you can reduce processor overhead and allocate more resources to your music production tasks. This will not only help improve overall system performance but also ensure that your digital audio workstation (DAW) runs more smoothly. Taking steps to optimize system for music production can significantly enhance workflow efficiency and reduce the likelihood of crashes or latency issues. By fine-tuning your setup, you create an environment that allows you to focus purely on creativity without technical distractions.
Regularly monitor and adjust your minimum processor state settings. Keeping these at ideal levels will guarantee your system operates at peak capability, especially during intensive music production activities.
Implementing these Energy Saver adjustments will greatly enhance your overall performance, allowing you to focus on creating great music without technical distractions.
Whether you're on a Mac or PC, these tweaks will help you achieve a high-performance environment for your next masterpiece.
DAW Setup and Management

To get the best performance from your DAW, start by optimizing your audio interface connection directly to your computer's USB port.
Next, configure your DAW's audio settings to use the appropriate sound driver and guarantee your sampling frequency aligns with your system.
Optimize Audio Interface Connection
Optimizing your audio interface connection is vital for achieving the best performance in music production. Start by connecting your audio interface directly to a USB port on your computer. Avoid using a USB hub, as this can hinder bandwidth and increase latency during your sessions.
If you're using a Windows system, make certain to select the ASIO sound driver in your DAW's audio settings. This will help you achieve lower latency and enhance performance with your audio interface. On a Mac, utilize the CoreAudio driver for better compatibility and stability while recording and mixing.
It's also important to verify that the sampling frequency set in your DAW matches that of your operating system. This step minimizes CPU load and helps prevent audio dropouts, keeping your workflow smooth.
Don't forget to regularly check for updates for your audio interface's drivers. Keeping these drivers up-to-date guarantees compatibility and can greatly improve your overall performance in music production.
Configure DAW Audio Settings
Once your audio interface connection is set up, configuring your DAW's audio settings becomes the next step to enhance your music production experience.
Start by selecting the ASIO sound driver if you're on Windows or CoreAudio for Mac. This choice guarantees peak audio performance and reduced latency during audio production.
Next, match the sampling frequency in your DAW to your operating system's settings. This simple adjustment minimizes CPU load and prevents playback issues.
To further boost performance, increase the playback buffer length in your DAW, especially during mixing sessions. Just remember to balance this with your latency requirements.
Utilizing CPU-efficient plugins and managing your channels effectively within the DAW can also conserve valuable resources. This is vital for maintaining performance, especially if you're working with multiple tracks or complex arrangements.
Lastly, schedule regular reminders for audio driver updates. Staying current with updates is necessary for compatibility and stability, which play a significant role in achieving high-performance music production.
With these steps, you'll set yourself up for success in your creative endeavors.
Manage Plugins Efficiently
Managing plugins efficiently is essential for maintaining a smooth workflow in your DAW. Start by connecting your audio interface directly to your computer's USB port instead of using a USB hub. This setup guarantees peak data transfer and reduces latency during audio recording.
Next, select the appropriate sound driver in your DAW's audio settings—ASIO for Windows and CoreAudio for Mac—to enhance performance and minimize dropouts.
To further improve your system's efficiency, match the sampling frequency of your DAW with that of your operating system. This helps decrease CPU load while maintaining audio fidelity.
Utilize CPU-efficient plugins and regularly monitor your channel usage in the DAW to maximize processing power and prevent system overload.
If you find your CPU resources running low, consider rendering MIDI tracks to audio or using features like Freeze, Consolidate, or Bounce In Place. These techniques free up CPU resources, allowing for a more efficient workflow.
Latency Management Techniques
When you're deep into a recording session, latency can be a frustrating obstacle that disrupts your creative flow. To minimize this issue, effective latency management is vital. Start by reducing your latency settings while recording; this guarantees accurate audio capture without delays, which is essential for achieving high-quality takes.
Consider using direct monitoring options within your DAWs. This allows you to hear your performance in real time, greatly minimizing perceived latency during those critical moments.
However, if you find the performance lagging, you may need to increase the playback buffer length. This can improve CPU performance but be careful; it's all about striking the right balance between low latency and sufficient processing power.
Watch out for CPU-hungry synths, as they can strain your system and increase latency. Identifying and managing these plugins will help keep your recording studio running smoothly.
If the load becomes too much, commit those CPU-intensive synths to audio. This frees up resources and enhances your creative process, all while maintaining an efficient latency management strategy.
Workflow Optimization Strategies
Effective workflow optimization is essential for any music producer looking to enhance their creative output. Start by increasing the playback buffer length in your DAW during mixing sessions. This adjustment allows for better CPU performance without compromising audio quality, letting you focus on your craft rather than technical glitches.
When recording, utilize direct monitoring options to capture takes accurately and minimize latency, improving your overall recording experience.
Regularly bouncing MIDI tracks to audio can also lighten your system's load. This practice reduces real-time processing demands and frees up CPU resources for other tasks, streamlining your workflow.
Additionally, keep your plugins organized by bookmarking and categorizing them. This systematic approach helps you access them quickly during production sessions, minimizing distractions and maintaining focus.
Lastly, make it a habit to monitor your CPU usage throughout your music production sessions. Identifying and addressing any bottlenecks will guarantee a smoother workflow and prevent system overload, allowing you to stay in the creative zone.
Mac Hardware Compatibility
Maneuvering the landscape of Mac hardware compatibility is vital for music producers aiming to leverage the latest technology. Since Apple shifted to Apple Silicon, including the M1, M2, and M3 chips, you'll notice significant improvements in performance for handling audio files and music production tasks.
However, compatibility issues can arise, especially when using Intel-based apps in Rosetta emulation.
To guarantee a smooth experience, consider the following:
- Check for software compatibility: Confirm your music production software supports Apple Silicon natively.
- Stay updated on iLok-protected AU plug-ins: Be cautious, as these may crash on macOS Sonoma 14.4.
- Understand kernel extensions: You'll need to enable these on Apple Silicon Macs for certain functionalities.
- Follow setup procedures for Universal Audio devices: Proper installation is essential for peak performance.
- Utilize resources like Sweetwater: They provide compatibility information from over 180 manufacturers, helping you avoid potential pitfalls.
Software Management Best Practices
Managing your software effectively is essential for a smooth music production experience. Regularly check for software updates to guarantee compatibility and performance, but be cautious with automatic updates that might introduce issues with your DAW or other applications.
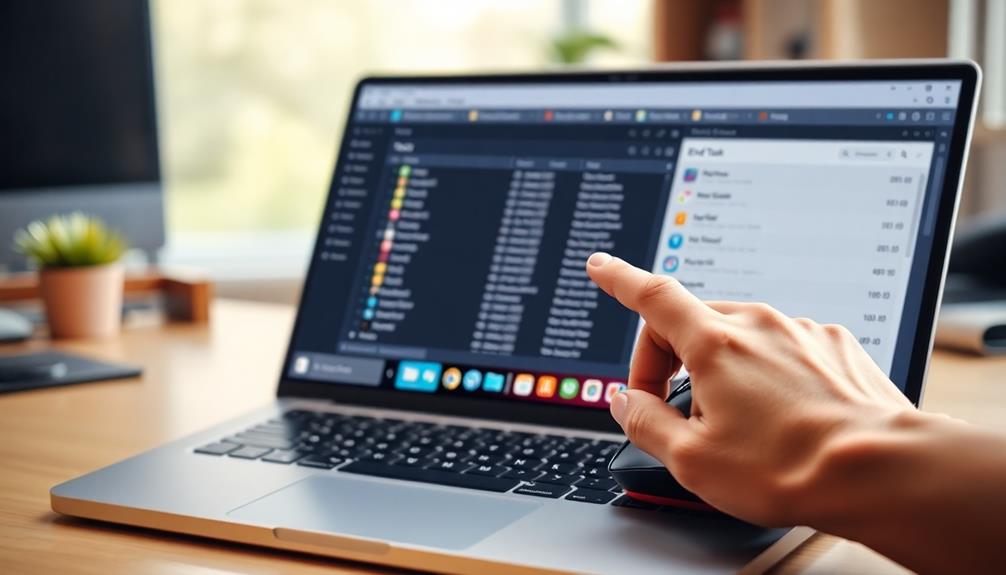
Utilize Activity Monitor on Mac or Task Manager on PC to monitor resource usage, identifying rogue applications that consume excessive CPU and memory resources.
During production sessions, disconnect from the Internet or pause syncing with cloud services. This helps reduce network traffic and minimizes distractions, allowing you to focus on your music.
Keep backup applications disabled while recording to avoid glitches, and set Time Machine to manual backup to prevent interruptions.
To optimize your DAW's CPU performance, regularly clear out unused effects, audio files, loops, and tracks. An organized workspace not only enhances your workflow but also guarantees your software runs smoothly.
Community Engagement and Resources
Engaging with the music production community can open up a treasure trove of insights and optimization strategies that enhance your workflow.
By participating in discussions and sharing experiences, you can discover advanced optimization techniques that remarkably improve your music production outcomes, such as using music production software effectively to maximize your creative potential.
Here are some valuable resources for music production you should check out:
- Sweetwater: Access over 28,000 tech articles and daily updates from industry professionals.
- Benchmarking Results: Share your performance specs to help others gauge different setups.
- Feedback Mechanisms: Contribute your experiences and suggestions to refine tools and resources.
- Software Compatibility Discussions: Engage with others to learn about the best software pairings for your needs.
- Online Forums: Join platforms where producers exchange tips on optimizing their setups.
Frequently Asked Questions
What Specs Should a Mac Have for Music Production?
For music production, you'll need at least 16GB RAM, a powerful multi-core CPU, and 500GB SSD storage. Make certain your Mac runs your preferred DAW and check for compatibility with any essential plugins.
How Do I Make My Mac High Performance?
To make your Mac high performance, adjust power settings to "High Performance," connect your audio interface directly, clear unused files, disable background apps, and monitor resource usage with Activity Monitor to optimize efficiency.
How Do I Maximize My Mac Performance?
To maximize your Mac's performance, check if it's running unnecessary background processes. You should regularly clear unused files, guarantee ample RAM, and disable services like Time Machine during intensive tasks for peak efficiency.
How Can I Improve My Mac CPU Performance?
To improve your Mac's CPU performance, clear unused files, set energy preferences to "Higher Performance," and monitor background applications. Upgrading to an SSD can also boost speed and efficiency for your tasks.
Conclusion
By fine-tuning your Mac or PC, you're not just optimizing settings; you're crafting a symphony of efficiency that resonates with creativity. Picture your DAW humming smoothly, every note effortlessly flowing from your fingertips. With the right tweaks, you'll transform your workspace into a vibrant studio where ideas burst into life. Embrace these strategies, and watch as your music production takes flight, soaring above the clouds of lag and frustration, landing you right in the heart of inspiration.
Performance Optimization
Optimizing Laptop Settings for Efficient Mobile Production
Harness the power of your laptop by optimizing settings for mobile production; discover essential tips that will transform your workflow and boost efficiency.
To optimize your laptop settings for efficient mobile production, start by freeing up at least 15% of your disk space and running Disk Cleanup regularly. Uninstall unnecessary applications to enhance performance and manage startup programs through Task Manager to reduce boot time. Adjust your visual effects by selecting options for best performance and consider hardware upgrades like an SSD or additional RAM for speed boosts. Regular maintenance and performance monitoring will keep your system responsive. To solidify your setup, implement a backup routine to protect your data. Discover more tips for even greater efficiency!
Key Takeaways
- Regularly uninstall unused applications to free up storage space and enhance system performance for mobile production tasks.
- Adjust visual effects to "best performance" settings to improve responsiveness during high-demand applications like video editing.
- Use Disk Cleanup to remove temporary files and system caches, boosting performance and speeding up your laptop.
- Manage startup programs via Task Manager to reduce boot time and ensure essential applications run efficiently.
- Upgrade to an SSD for faster boot times and improved data access, significantly enhancing mobile production efficiency.
Free Up Disk Space
To keep your laptop running smoothly, you should regularly free up disk space. Maintaining at least 15% free disk space on your Local Disk C is essential for ideal system performance, as it allows your laptop to manage virtual memory efficiently.
One effective way to achieve this is by running Disk Cleanup, which removes temporary files and system caches. This action can free up valuable storage space and improve system responsiveness by up to 30%.
Additionally, if you frequently work on graphics or media editing tasks, make it a habit to delete accumulated temporary files at least twice a week. This simple step can greatly enhance your laptop's speed and overall performance.
To get a clearer picture of your storage space usage, consider utilizing tools like WinDirStat. It helps you visualize disk space usage, allowing you to identify large files or applications that you no longer need.
Uninstall Unnecessary Applications
To boost your laptop's performance, start by identifying unused applications that you no longer need.
Uninstalling these programs simplifies software management and frees up valuable resources.
Identify Unused Applications
When it comes to optimizing your laptop for mobile production, identifying and uninstalling unused applications is crucial. Unnecessary applications can take up valuable storage space and contribute to background resource consumption, ultimately hindering your system performance.
Additionally, managing your budget for tech upgrades can guarantee you're investing wisely in the tools that enhance your productivity. By accessing the Control Panel on Windows or System Preferences on macOS, you can easily spot and remove pre-installed or rarely used applications that may be slowing down your laptop.
Regularly uninstalling these unused applications can boost performance considerably, potentially improving system performance by up to 15%. Plus, it minimizes potential software conflicts that arise from having too many applications installed.
Tools like Revo Uninstaller can aid you in this process, helping to identify and remove stubborn applications that standard uninstallation methods might miss, guaranteeing a cleaner system.
Keeping your laptop free of unnecessary applications not only enhances the overall user experience but also leads to faster boot times and improved responsiveness during tasks.
Simplify Software Management
Simplifying software management on your laptop is essential for maximizing mobile production efficiency. One effective way to do this is by uninstalling unnecessary applications. By removing unused software, you can free up valuable storage space and potentially boost your system performance by up to 15%.
This reduction in software clutter also lessens the strain on system resources, leading to improved boot times and overall responsiveness.
To get started, access the Control Panel in Windows and review your installed programs. Look for any pre-installed bloatware or applications you haven't used in a while. Regularly reviewing and uninstalling these programs not only clears up storage but also helps prevent potential software conflicts, ensuring a smoother operating environment.
For a more thorough approach, consider using tools like Revo Uninstaller, which can help you completely remove applications along with their residual files.
Keeping your laptop lean by optimizing software management will enhance its performance, particularly during mobile production tasks. So take the time to streamline your applications, and you'll notice a significant impact on your productivity.
Perform Regular Maintenance
Performing regular maintenance on your laptop is crucial for maintaining peak performance during mobile production tasks. Start by regularly cleaning out temporary files using Disk Cleanup; this simple step frees up valuable storage space, which is essential for efficient production.
You should also run malware scans at least once a month to protect your system from harmful software that might compromise your productivity and data integrity.
Don't overlook the importance of hardware maintenance, either. Performing monthly hardware cleaning helps prevent overheating and performance degradation, allowing your laptop to run smoothly, especially during intensive tasks like video editing.
Additionally, if you're using a traditional HDD, scheduling regular defragmentation can improve data access speeds by up to 30%, enhancing your application performance.
Lastly, monitoring system performance with built-in tools helps you identify CPU and memory usage trends, enabling you to optimize resources effectively.
If you find your laptop still struggling, consider hardware upgrades to guarantee you're equipped for demanding mobile production tasks.
Optimize Startup Programs
Your laptop's startup programs can greatly impact its overall performance, especially during mobile production tasks. By optimizing these settings, you can markedly reduce boot time and enhance system responsiveness.
To get started, access the Task Manager by pressing Ctrl + Shift + Esc. Navigate to the "Startup" tab, where you'll see a list of applications that launch at startup.
Identify and disable any unnecessary startup programs—these are often the culprits that slow down your boot time by up to 30%. Uninstalling or disabling apps you rarely use not only frees up system resources but also improves your laptop's overall performance during vital production moments.
Remember, some applications may continue to run in the background even after you close them, consuming valuable resources.
Regularly reviewing and updating your startup preferences guarantees that only essential applications are running when you boot your laptop. This simple step, combined with proper power settings, can optimize your laptop's performance, making it more efficient for your mobile production tasks.
Adjust Visual Effects
To enhance your laptop's performance, consider disabling unnecessary animations and adjusting transparency effects.
These changes can greatly improve responsiveness, especially if your device has limited hardware capabilities.
Disable Unnecessary Animations
Disabling unnecessary animations can be a game-changer for optimizing your laptop's performance during mobile production. By freeing up CPU and GPU resources, you can enhance system responsiveness, especially on older devices.
You can easily access the System Properties in Windows and select "Adjust for best performance," which automatically turns off all visual effects. This simple adjustment can greatly improve your laptop's performance, making application launches faster and changes smoother.
Here are some additional steps you can take to customize visual effects:
- Selectively disable options like "Animate windows when minimizing and maximizing."
- Regularly manage these settings during high-demand tasks, such as video editing or 3D rendering.
- Monitor your hardware components to make sure they're not overloaded with unnecessary visual tasks.
Adjust Transparency Effects
Many users overlook the impact of transparency effects on their laptop's performance, but adjusting these settings can considerably enhance system responsiveness. By disabling transparency effects, you can optimize your laptop's performance, especially during mobile production tasks. It reduces the graphical load on your CPU and GPU, which is particularly beneficial for older devices.
To adjust transparency effects, navigate to Settings > Personalization > Colors, and toggle off the "Transparency effects" option. This simple action can lead to better battery life by minimizing resource usage for rendering visual effects. Users have reported up to a 10% increase in performance in everyday tasks after turning off these effects, making it an effective optimization strategy.
Here's a quick overview of the benefits:
Adjusting Transparency Effects | Benefits |
---|---|
Optimize Your Laptop | Enhance performance |
Improve Battery Life | Extend performance and battery |
Increase Speed and Responsiveness | Allocate resources effectively |
Disabling these effects frees up system resources for essential applications running in the background, ensuring a smoother and faster experience. Don't underestimate the power of a few adjustments!
Upgrade Hardware Components
Upgrading hardware components in your laptop can dramatically enhance its performance, especially for mobile production tasks.
One of the most impactful upgrades is replacing your traditional hard drive with a solid-state drive (SSD). This switch can reduce boot times by up to 70% and increase application launch speed by 50%, leading to a more responsive operating system.
Additionally, increasing your RAM capacity, such as upgrading from 4GB to 8GB, can improve multitasking performance by up to 40%, allowing you to run multiple applications without lag. Additionally, increasing your RAM capacity, such as upgrading from 4GB to 8GB, can improve multitasking performance by up to 40%, allowing you to run multiple applications without lag. This extra memory gives your system more room to temporarily store data, enabling smoother transitions between tasks and reducing the chances of system slowdowns. For users who work with demanding software, like music producers running digital audio workstations (DAWs), increased RAM helps free up the system to allocate CPU resources for DAW operations more efficiently, ensuring optimal performance during complex audio processing tasks.
Consider these key upgrades:
- Solid-State Drive (SSD): Opt for NVMe SSDs for up to six times faster data transfer speeds, ideal for intensive tasks like video editing.
- RAM: Choose high-quality, compatible RAM like DDR4 or DDR5 to maximize performance.
- Driver Updates: Regularly update your drivers to guarantee peak performance and compatibility with your new hardware.
Monitor System Performance
To guarantee your laptop performs at its best during mobile production, it's crucial to monitor system performance regularly. Start by utilizing built-in tools like Task Manager in Windows or Activity Monitor in macOS to track CPU and memory usage. This will help you identify resource-heavy applications that could be slowing you down.
Consider employing performance monitoring software for deeper insights into your system's metrics, such as temperatures and fan speeds. This proactive approach allows you to optimize resources effectively, making certain your laptop runs smoothly.
Regularly checking these metrics can help detect issues before they escalate, enabling timely optimizations or even necessary upgrades.
Don't overlook disk space management; tools like WinDirStat can reveal large files or applications consuming significant space. Keeping tabs on your disk usage guarantees you have enough room for your projects.
Additionally, monitor background processes to enhance system responsiveness and speed, limiting unnecessary resource consumption during your mobile production tasks. By consistently monitoring system performance, you'll maximize your laptop's efficiency and productivity on the go.
Reset Your Laptop
Ever wondered how a simple reset could breathe new life into your laptop? Resetting your laptop can greatly enhance its performance by clearing out unwanted temporary files and resolving software conflicts.
It's an effective way to restore your system's responsiveness, especially if you notice it lagging or struggling with bloatware.
To get started, access the recovery options through the Control Panel. You can choose to keep your files or opt for a complete reset for maximum efficiency.
Just remember to backup important files before initiating the reset, as a complete wipe will permanently erase all applications and data on your device.
Consider these key benefits of resetting your laptop:
- Eliminates unwanted temporary files: Frees up space and enhances speed.
- Resolves software conflicts: Fixes issues that may slow down your system.
- Maintains ideal performance: Regular resets can keep aging devices running smoothly.
Implement Regular Backups
In the digital age, losing important files can feel like a nightmare. To avoid this, implementing regular backups is crucial. Regular backups protect your data from loss due to hardware failures, accidental deletions, or malware attacks, guaranteeing that your important files are always recoverable.
You can use external storage devices like SSDs or HDDs for quicker access and recovery options compared to cloud solutions, which can be hampered by internet speed. If you're looking for convenience, consider automated backup solutions. These can save you time by letting you schedule backups daily, weekly, or monthly based on your needs.
Cloud storage services, such as Google Drive or Dropbox, also provide secure options for remote backups, allowing you to access files from any device while offering redundancy against local data loss.
Establishing a backup routine, like every Sunday evening, can help maintain peace of mind and guarantee you always have the latest version of your files available.
Frequently Asked Questions
How Do I Optimize My Laptop Performance?
To optimize your laptop performance, regularly clear temporary files, uninstall bloatware, upgrade to an SSD, adjust power settings for high performance, and monitor resource usage. These steps will greatly enhance your system's efficiency and responsiveness.
How Do I Put My Laptop in Best Performance Mode?
To put your laptop in Best Performance Mode, access Power Options in the Control Panel, select "High Performance," and adjust advanced settings. Don't forget to disable unnecessary visual effects for smoother operation.
How Do I Clean My Laptop to Make It Faster?
To clean your laptop and boost speed, regularly remove temporary files, uninstall unnecessary software, clear browser cache, and physically dust off vents. These steps help prevent overheating and improve overall performance during your tasks.
How to Optimize a PC for Best Performance?
Did you know disabling unnecessary startup programs can cut boot time by up to 30%? To optimize your PC's performance, regularly uninstall bloatware, use Disk Cleanup, and adjust power settings for demanding tasks efficiently.
Conclusion
By freeing up disk space and uninstalling unnecessary applications, you can create a leaner, faster laptop. On the flip side, neglecting regular maintenance can lead to sluggish performance that hampers your mobile production. While optimizing startup programs boosts efficiency, adjusting visual effects can enhance your visual experience. Upgrading hardware components may seem challenging but can yield significant gains. Remember, monitoring system performance and implementing regular backups can be the difference between seamless creativity and frustrating setbacks.
Performance Optimization
Power User Tips for Faster Plugin Load Times
Discover essential strategies to boost plugin load times, ensuring your website runs smoothly and efficiently—find out how to implement these tips today!
To speed up plugin load times, start by auditing your current plugins with tools like GTmetrix. Identify and remove underperforming or redundant ones, and prioritize lightweight alternatives. Use caching techniques like browser and server-side caching to serve content faster. Minify and consolidate your CSS and JavaScript files to cut down on HTTP requests. Regularly monitor and maintain your site's performance to catch issues early, especially after updates. Keep an eye on usage trends so you can streamline effectively. Stick around to uncover more techniques that can enhance your site's efficiency and user experience.
Key Takeaways
- Conduct regular audits using GTmetrix and Google PageSpeed Insights to identify and address slow-loading plugins effectively.
- Prioritize lightweight and multifunctional plugins to reduce HTTP requests and improve overall site speed.
- Implement caching techniques, such as browser and server-side caching, to enhance loading times for returning visitors.
- Minify and consolidate CSS and JavaScript files to decrease file sizes and minimize the number of server requests.
- Regularly monitor plugin performance and remove any unused or redundant plugins to maintain optimal site efficiency.
Assessing Current Performance
Evaluating your website's current performance is essential for enhancing plugin load times. Start by conducting a thorough audit using tools like GTmetrix or Google PageSpeed Insights. These tools help you identify slow-loading plugins and their impact on overall load times.
Pay close attention to the number of HTTP requests each plugin generates, as high-traffic pages can experience a significant drop in website speed if even one plugin lags behind.
Utilize browser developer tools to track network requests and pinpoint which plugins contribute to excessive load times. Regularly review plugin performance after updates; new versions may introduce inefficiencies that can slow things down.
Keep an eye on Core Web Vitals metrics, as they directly impact user experience and overall website performance.
Additionally, analyze user feedback and conduct A/B testing to see how plugin load times influence engagement and retention rates on your site.
Optimizing Plugin Usage
Once you've assessed your website's performance, it's time to focus on optimizing plugin usage to enhance load times.
Start by prioritizing lightweight plugins; resource-intensive ones can slow down loading times, leading to increased bounce rates and reduced user engagement. Start by prioritizing lightweight plugins; resource-intensive ones can slow down loading times, leading to increased bounce rates and reduced user engagement. Evaluate the functionality of each plugin and remove any that are redundant or no longer necessary. Optimizing your setup to reduce plugin CPU usage is crucial for maintaining website speed and ensuring smooth performance under varying traffic loads. Regularly updating plugins and monitoring their resource demands can also help prevent inefficiencies that compromise the user experience.
Regularly auditing your plugins to identify and remove unnecessary ones that are redundant or underperforming is essential, as each active plugin contributes to your overall load time.
Additionally, addressing technical SEO issues can further help your site run more efficiently.
Implement performance monitoring tools like LoadForge to assess the impact of individual plugins on loading times. This will help you make targeted optimizations.
Consider combining multiple plugins into a single, multifunctional one to minimize HTTP requests and streamline code execution.
This approach not only boosts website speed but also simplifies maintenance.
Leveraging Caching Techniques
To enhance your website's load times, leveraging caching techniques is vital. By implementing browser caching, you can store static resources, enabling quicker access for users on subsequent visits. Popular caching plugins like W3 Total Cache or WP Super Cache can efficiently manage dynamic content, reducing server load and improving site performance.
Additionally, consider server-side caching solutions such as Varnish or Redis. These greatly improve loading speed by serving cached pages directly from memory. Object caching for frequently accessed database queries can also minimize repeated database calls, further boosting plugin performance.
Here's a quick reference table to summarize caching techniques:
Caching Technique | Benefits | Recommended Tools |
---|---|---|
Browser Caching | Reduces load times for static resources | Browser settings |
Server-Side Caching | Serves cached pages from memory | Varnish, Redis |
Object Caching | Decreases database load | Memcached, Redis |
Regularly clearing your cache guarantees users receive the latest content without sacrificing speed. By leveraging these caching techniques, you can improve your site's loading speed and enhance your conversion rates considerably!
Streamlining Code Efficiency
Streamlining code efficiency is crucial for optimizing plugin performance and enhancing load times. By focusing on your code, you can greatly improve your site's overall loading speed, creating a better user experience.
Here are three key strategies to reflect on:
- Minify CSS and JavaScript: Reducing file sizes by up to 50% through minification leads to faster load times. This means removing unnecessary characters and whitespace to streamline your code.
- Consolidate Files: Instead of having multiple CSS and JavaScript files, combine them into a single file. This not only reduces HTTP requests but also minimizes the loading time, making your plugins more responsive.
- Optimize Coding Practices: Avoid using page builders that can introduce bloated code. Instead, focus on writing cleaner, more efficient code. This practice will help you maintain lightweight plugins that load faster.
Monitoring and Maintenance Strategies
Effective monitoring and maintenance strategies are essential for keeping your plugins running smoothly and efficiently. Start by regularly monitoring the performance of your most utilized plugins. Tools like LoadForge can help you identify any plugins causing slowdowns.
After any updates, schedule routine assessments of plugin load times to catch performance issues early, guaranteeing your plugins stay efficient over time.
Keep a close eye on plugin usage trends. As your website grows in complexity or traffic, consistent monitoring can reveal hidden performance issues. Periodically review your plugins and remove any that are unused or redundant.
Maintaining a lean plugin roster can notably enhance overall site speed and reduce load times.
Don't underestimate the value of community engagement. Participating in forums allows you to share insights and gather recommendations on the best-performing plugins, fostering an environment of collective optimization strategies.
By implementing these monitoring and maintenance strategies, you'll not only improve your website's performance but also guarantee that your plugins are optimized for the best possible user experience.
Regularly attending to these aspects will keep your site running at peak performance, avoiding unnecessary slowdowns.
Frequently Asked Questions
How Do I Optimize My Loading Time?
To optimize your loading time, regularly audit plugins, minimize HTTP requests by combining files, use caching plugins, choose lightweight options, and implement lazy loading for content. These steps can greatly enhance your site's performance.
What Are the Three Ways to Reduce Page Load Time?
Isn't it frustrating when pages take forever to load? To reduce load time, you can optimize images, minimize HTTP requests, and implement browser caching. These steps will make your site faster and more user-friendly.
How to Improve Website Performance and Speed Using Plugins?
To improve website performance, regularly assess your plugins, optimize their settings, and use caching solutions. Choose lightweight plugins designed for speed, and monitor their impact to guarantee your site runs smoothly and quickly.
How Do I Speed up WordPress Loading Time?
Imagine your website as a race car; to speed it up, use caching plugins, optimize images, minimize active plugins, and regularly check performance. Each tweak brings you closer to the finish line of fast loading times.
Conclusion
So, after all these tips on speeding up your plugin load times, you might be tempted to think you can just sit back and relax, right? Well, that's the irony! The real work begins now. By regularly evaluating performance, optimizing usage, and monitoring your progress, you'll keep those pesky slowdowns at bay. Remember, a faster site doesn't just happen; it's a continuous effort. Embrace the grind, and enjoy the fruits of your labor!
Performance Optimization
Managing and Upgrading RAM for a Smoother Workflow
Streamline your computer’s performance with effective RAM management and upgrades—discover essential tips to enhance your workflow and unleash your device’s potential.
Upgrading your RAM can greatly improve your computer's performance and guarantee a smoother workflow. Start by evaluating your current RAM needs based on your usage—8GB is often enough for basic tasks, while gaming or professional work may require 16GB or more. Before you buy, check your motherboard's compatibility with RAM types like DDR4. When selecting new modules, aim for matching speed and specifications for peak performance. Installation is straightforward—just make sure you follow safety precautions. After upgrading, test your RAM's performance using benchmarking software to confirm everything's running smoothly. There's more to explore if you seek deeper insights into RAM management!
Key Takeaways
- Assess current RAM specifications and usage to determine if an upgrade is necessary for optimal performance during demanding tasks.
- Ensure compatibility with the motherboard's RAM type, speed, and maximum capacity before purchasing new modules.
- Opt for matched RAM specifications in speed and size to enhance performance and avoid stability issues when mixing modules.
- Follow proper installation procedures, including safety precautions, to prevent static damage and ensure successful memory upgrades.
- Test RAM performance using diagnostic tools and benchmarking software to verify improvements post-upgrade and identify any issues.
Assessing RAM Needs
When you start evaluating your RAM needs, it's essential to first check your current specifications, including type, size, speed, and usage. You can do this easily through Task Manager on Windows or Activity Monitor on Mac.
Start by examining your current RAM and how it aligns with your typical memory usage. If you're only handling basic tasks, 8GB might suffice, but for gaming or professional applications, you'll likely need 16GB or more for peak performance.
Next, consider your multitasking habits. High memory usage during demanding tasks can signal the need to upgrade RAM, especially if you're experiencing slowdowns or crashes.
Documenting your current RAM specifications and usage patterns will help you evaluate future needs, particularly as software demands evolve.
Lastly, keep motherboard compatibility in mind; verify the RAM types—DDR3, DDR4, or DDR5—are supported by your system. This step is vital to guarantee any upgrades function correctly.
Types and Compatibility
When it comes to upgrading your RAM, understanding the different types is essential, especially with options like DDR3, DDR4, and the newer DDR5.
You'll need to verify compatibility with your motherboard to confirm it supports the RAM type and speed you want.
Additionally, while mixing RAM modules is possible, sticking to matched specifications will help you achieve peak performance.
RAM Types Overview
Understanding RAM types and their compatibility is vital for any system upgrade. When considering a RAM types overview, you'll encounter DDR3, DDR4, and the newest DDR5. DDR4 is the most common in modern systems, offering higher speeds and efficiency compared to DDR3, which is usually found in older systems with lower bandwidth.
DDR5 is designed for next-generation computing, boasting faster speeds and improved power efficiency.
Compatibility is essential when upgrading RAM; each motherboard supports specific types, speeds, and capacities. Before purchasing new modules, check your motherboard specifications to confirm compatibility with DDR3, DDR4, or DDR5.
Most motherboards have a maximum RAM capacity limit that can vary widely, so refer to the motherboard's manual or the manufacturer's website for this information.
When upgrading RAM, it's vital that the new modules match existing ones in speed (MHz) and latency (CAS Latency). Mixing different specifications can lead to performance issues, resulting in suboptimal system performance.
Compatibility Verification Steps
To confirm a successful RAM upgrade, it's crucial to verify compatibility with your system. Start by identifying your motherboard model and checking its specifications for supported RAM types, such as DDR3, DDR4, or DDR5. Using system information tools like CPU-Z or the built-in Windows feature, you can determine your current RAM type, size, and speed.
Next, consult your motherboard's manual or the manufacturer's website to find the maximum RAM capacity and the number of slots available for upgrades. This step assures that you'll be able to install the new RAM without exceeding your system's limits.
If you plan on mixing RAM modules, make certain they've matching specifications regarding speed, voltage, and latency to avoid potential performance issues and instability.
Remember, if you're upgrading to a higher speed RAM, confirm that your motherboard supports it. You may need to adjust your BIOS settings to enable peak performance for your new RAM.
Mixing RAM Modules Considerations
Upgrading your RAM can considerably boost your system's performance, but mixing RAM modules requires careful consideration to confirm compatibility.
First, check your motherboard manual to verify that the RAM types, such as DDR3, DDR4, or DDR5, are supported. Compatibility issues often arise when using different brands or specifications, so it's best to stick to modules with similar characteristics.
When mixing RAM, pay close attention to RAM speed and latency. If you use modules with different speeds, your system may default to the lowest speed, which can hinder performance.
Aim for dual-channel configurations by pairing RAM sticks of the same size and speed in matching slots for peak performance.
While it's possible to mix old and new RAM, be cautious. Differences in speed and timing can lead to decreased RAM performance, which could affect system stability.
Ideally, upgrade all your modules simultaneously to avoid these potential pitfalls. By following these guidelines, you'll confirm that mixing RAM modules enhances your system rather than causing frustration.
Selecting RAM Modules
When you're selecting RAM modules, start by checking their compatibility with your motherboard's supported types and maximum capacity.
It's important to choose the right amount of RAM based on your needs, whether it's for basic tasks or high-performance applications.
Don't forget to take into account the speed and configuration, as these factors can greatly impact your system's performance.
RAM Type Compatibility
Understanding RAM type compatibility is essential for selecting the right modules for your system. Your motherboard specifications dictate which RAM types you can use, such as DDR3, DDR4, or DDR5. Each type has different pin configurations and voltage requirements.
For example, DDR4 features 288 pins and operates at 1.2V, while DDR3 has 240 pins and works at 1.5V.
Here are a few key points to keep in mind:
- Mixing RAM types isn't possible: You can't combine DDR3 with DDR4 due to physical and electrical incompatibilities.
- Check maximum RAM capacity: Verify your modules don't exceed your motherboard's defined RAM threshold.
- Match RAM speed and CAS latency: For peak performance, new modules should align with the speed (in MHz) and CAS latency of your existing RAM.
Capacity and Speed Considerations
Choosing the appropriate RAM modules can greatly affect your system's performance, so it's essential to evaluate both capacity and speed. For most users, a minimum RAM capacity of 8GB is suitable for basic tasks, while 16GB is ideal for intermediate use. If you're into gaming or video editing, consider going for 32GB or more to handle those memory-intensive tasks seamlessly.
RAM speed, measured in MHz, plays an important role in system responsiveness. Higher speeds, like 3200MHz or 3600MHz, can lead to noticeable performance upgrades, especially during demanding applications. Make sure that the RAM type—whether DDR4 or another version—matches your motherboard's specifications for compatibility and top-tier performance.
Additionally, consider dual-channel configurations. By installing two identical RAM modules, you can greatly increase bandwidth compared to single-channel setups.
Don't overlook CAS latency (CL) either; lower latency values enhance data retrieval speeds, boosting overall system efficiency. By paying attention to these capacity and speed considerations, you can make informed decisions that lead to a smoother, more responsive computing experience.
Installation Preparations
Preparing for a RAM installation requires careful attention to detail to guarantee a smooth upgrade process. Before diving into the installation, make sure you've gathered all necessary tools and created a conducive workspace.
Here's what you need to focus on:
- Gather tools: Include screwdrivers and an anti-static wrist strap to protect your computer memory during the installation.
- Prepare your workspace: Verify it's clean and well-lit to prevent losing small components.
- Document current RAM: Use system information tools to check and document your current RAM specifications, aiding in selecting compatible upgrades.
Next, confirm your computer is completely powered down. Unplug it and press the power button for five seconds to discharge any residual electricity. This step is crucial for your safety.
Finally, familiarize yourself with the internal layout of your computer by consulting the owner's manual. This guide will help you safely access the RAM slots, making the installation process smoother.
Upgrading Process
With your workspace set and the computer powered down, you're ready to tackle the RAM upgrade process. Start by gathering your tools: screwdrivers, anti-static wrist straps, and the compatible RAM modules that match your system specifications. Make sure you know if your motherboard supports DDR3, DDR4, or DDR5.
Next, disconnect all peripherals and discharge any residual electricity by holding the power button for five seconds. For desktops, remove the side panel to access the memory slots. If you're working on a laptop, locate the designated panel on the bottom.
Carefully remove the existing RAM modules by pressing down on the clips. When inserting the new modules, do so at a 45-degree angle, ensuring the notches align properly. Press down until they click securely into place.
After the installation, close the computer case, reconnect all peripherals, and power on your system. To verify that the new RAM is recognized, check your system properties or BIOS settings.
This upgrade will enhance your computer's performance, allowing for smoother multitasking and better overall functionality.
Testing RAM Performance
After upgrading your RAM, it's crucial to test its performance to confirm everything is functioning correctly. You want to verify that your new RAM modules are running smoothly and efficiently. Here are some effective ways to test RAM performance:
- Use Windows Memory Diagnostic: This built-in tool checks for memory problems by running tests on the next system boot.
- Check with CPU-Z: This software provides detailed information about your RAM's speed, timings, and modules, helping you assess if your RAM is performing as expected.
- Run Benchmarking Software: Tools like AIDA64 or PassMark can measure your RAM's speed and bandwidth, offering comparative data against other systems.
While you're testing, keep an eye on memory usage in Task Manager during demanding tasks. Ideally, you should maintain at least 15-20% available memory for peak system performance.
Look out for memory errors or RAM bottlenecks, as these can hinder your workflow. By diligently testing RAM performance, you affirm that your upgrade contributes positively to your system's efficiency.
Selling Old RAM
Upgrading your RAM is an excellent way to boost your system's performance, but what do you do with the old modules? Selling old RAM is a smart move that not only helps recoup some costs associated with your memory upgrades but also showcases your financial savvy.
Platforms like BuySellRam.com and eBay make it easy to list your old RAM, connecting you with a wide audience keen for affordable memory.
If you prefer a hassle-free process, consider trade-in programs from retailers such as Amazon and BestBuy. These options allow you to exchange your old memory for store credit, making it simple to upgrade without worrying about the selling process.
Local marketplaces like Facebook Marketplace and Craigslist are also great for peer-to-peer selling, letting you connect directly with buyers in your area.
By selling your old RAM, you're not just saving money; you're also contributing to sustainable computing practices by reducing electronic waste and extending the lifecycle of hardware components.
Frequently Asked Questions
How Do I Make My RAM Run Smoother?
To make your RAM run smoother, match its type and speed to your system's specs, monitor usage regularly, close unnecessary applications, and keep slots clean. Consider upgrading if you often multitask or run demanding programs.
How Does Upgrading RAM Improve Performance?
Did you know that upgrading from 4GB to 16GB of RAM can boost performance by up to 70%? It reduces system slowdowns, enhances multitasking, and allows your applications to run faster and more efficiently.
What Is the Best Way to Upgrade RAM?
To upgrade RAM effectively, assess your current specifications and usage, choose compatible modules, guarantee a clean workspace, and install them carefully. Finally, verify recognition and run diagnostics to confirm peak performance.
How Do I Optimize My RAM Usage?
Your RAM's practically screaming for help! To optimize it, regularly check usage, close unnecessary apps, and use tools to clean memory. Set virtual memory right, and release your system's full potential for seamless multitasking!
Conclusion
In summary, managing and upgrading your RAM can transform your workflow. By evaluating your needs, selecting compatible modules, and installing them with care, you'll access smoother performance, faster loading times, and enhanced multitasking capabilities. Testing your new RAM will confirm your upgrade's success, while selling your old modules can even offset costs. Embrace the journey of improvement, and watch as your productivity soars, your tasks become seamless, and your computing experience reaches new heights. With this upgrade, you’ll also future-proof your system, ensuring it can handle more demanding applications and tasks with ease. Whether you’re a creative professional or a casual user, achieving memory mastery in Pro Tools or any other resource-intensive software will significantly elevate your efficiency. Take control of your system’s potential and enjoy a more powerful, personalized computing experience.
-
Vetted6 months ago
10 Best Laptops for Music Production in FL Studio: Top Picks for Beat Makers
-
Music Production6 months ago
Maria Von Trapp’s Legacy & The Sound of Music
-
Music Production6 months ago
Christopher Plummer: Legendary Actor’s Legacy
-
Vetted6 months ago
15 Best Music Production Blogs Every Music Producer Should Follow
-
Vetted6 months ago
15 Best Laptops for Music Production Under $300: Top Budget-Friendly Options
-
Music Production6 months ago
Find Do-Re-Mi Picnic Meadow Directions Here!
-
Music Production5 months ago
How to Work in Music Production: Start Your Career Today!
-
Vetted6 months ago
12 Best Music Production Laptops for FL Studio – Create Beats Anywhere