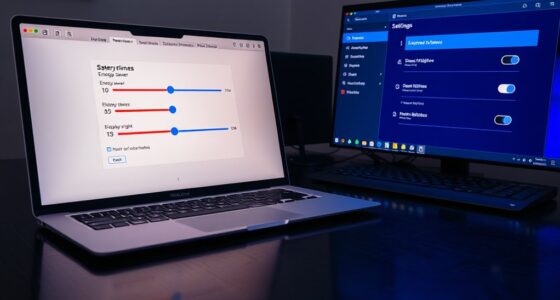
In your DAW, using clip gain and channel fader together is key to proper gain staging. Start by adjusting clip gain to set a clean, balanced source level without clipping early in the chain. Use the channel fader to balance tracks within the mix afterward, ensuring each element sits well without distortion. Mastering how these tools work side by side helps you achieve a professional sound—if you continue, you’ll discover the best techniques for seamless gain staging.
Key Takeaways
- Clip gain adjusts individual clip volume before the channel fader, providing precise source-level control.
- Channel fader manages overall track volume after clip gain, balancing the entire mix.
- Using clip gain first prevents clipping and maintains signal integrity early in the signal chain.
- Combining both tools ensures levels stay within healthy ranges, reducing distortion risks.
- Layered gain staging with clip gain and fader results in a cleaner, more professional-sounding mix.

Gain staging in a DAW is a essential step for achieving a clean, balanced mix. When you set your levels properly, you prevent audio clipping and preserve signal integrity throughout your project. Clipping occurs when your signal exceeds the maximum level your system can handle, causing distortion that can be difficult to fix later. To avoid this, you need to manage your gain carefully from the start. Whether you’re adjusting your channel fader or using clip gain, understanding their roles helps you maintain ideal levels and keep your audio clear.
Gain staging ensures a clean, balanced mix by preventing clipping and preserving signal quality throughout your session.
Using clip gain gives you precise control over the volume of individual audio clips before they hit the channel fader. Think of clip gain as a way to shape your sound at the source, allowing you to set the exact level for each clip. This is especially useful when you want to make subtle adjustments without affecting the entire track. By adjusting clip gain early in the signal chain, you reduce the likelihood of clipping later on, which helps maintain your signal’s integrity. It also makes your mix more manageable because you can see and control the levels of each clip independently.
On the other hand, the channel fader adjusts the overall volume of the entire track after the clip gain has been set. This fader controls how loud the track is in the context of the whole mix. If you rely solely on the channel fader, you might risk pushing it too high, causing clipping and distortion. That’s why it’s wise to set your clip gain first, establishing a solid baseline, and then use the channel fader for balancing your mix. This layered approach ensures your levels stay within a healthy range, preventing audio clipping and preserving signal integrity across your session.
Both clip gain and channel faders are essential tools for proper gain staging, but they serve different purposes. Clip gain allows for detailed level adjustments at the clip level, which is crucial for detailed editing and avoiding clipping early on. Meanwhile, the channel fader helps you balance the overall mix without risking distortion. Using them in tandem, you can fine-tune your levels with precision, ensuring that your audio remains clean and clear. Proper gain staging with these tools helps you avoid unnecessary noise, distortion, and phase issues, making your final mix sound professional and polished. Mastering these techniques is key to producing high-quality recordings that stand out. Additionally, understanding gain structure within your DAW can further optimize your mixing process.
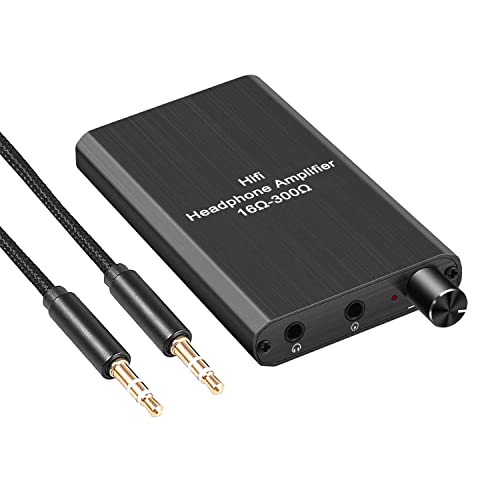
RuiPuo Portable Headphone Amplifier Support Volume Control with GAIN Switch for Switch/PS4/PS5/Mobile Phone/PC/MP3/MP4 /HD 650 Headphones ect
- Portable headphone amplifier: Supports 3.5mm audio input/output
- Long-lasting battery: 1000mAh capacity for 15 hours use
- Micro USB charging: Convenient charging with long battery life
As an affiliate, we earn on qualifying purchases.
As an affiliate, we earn on qualifying purchases.
Frequently Asked Questions
How Do I Choose Between Clip Gain and Channel Fader?
You should choose clip gain when you want precise control over the dynamic range of individual parts, ensuring signal integrity before mixing. Use channel faders for overall level adjustments during the mix, maintaining a natural sound. Clip gain helps with detailed editing, while faders streamline balancing multiple tracks. Combining both techniques lets you optimize dynamic range and keep your signal clear throughout the project.
Can Clip Gain and Channel Fader Be Used Together?
Yes, you can definitely use clip gain and channel fader together. Doing so helps you control your audio’s dynamic range more precisely and enhances clarity. You might set clip gain early to shape the initial level, then fine-tune with the channel fader during mixing. This combined approach ensures your mix stays balanced, clear, and maintains ideal audio quality throughout the production process.
What’s the Impact of Improper Gain Staging on Mix Quality?
Think of gain staging like tuning a guitar before a concert. If you don’t, your sound suffers—clipping distorts your tone, and weak signals get lost. Improper gain staging reduces your dynamic range and muddles signal clarity, making your mix sound flat or harsh. You risk losing detail and punch. To keep your mix vibrant and clear, always set proper levels early, ensuring each element shines without distortion or noise.
Are There Specific Plugins Recommended for Gain Staging?
You should use plugins like the Waves VU Meter or FabFilter Pro-Q to assist with gain staging. These plugins let you monitor your volume levels accurately and make precise adjustments with plugin gain. To avoid clipping, use volume automation to control dynamic changes, ensuring your mix stays balanced. Proper gain staging with these tools helps you maintain clarity and headroom, ultimately improving your overall mix quality.
How Do I Maintain Consistent Levels Across Different Tracks?
To maintain consistent levels across tracks, start by setting your clip gain or channel fader roughly in the right range. Use track automation to fine-tune volume changes, ensuring smooth progression. Keep an eye on gain reduction meters, especially when applying compression, to avoid distortion. Regularly compare tracks with a reference, and adjust accordingly, balancing all elements for a cohesive mix.
Conclusion
Think of gain staging like tending a garden—you want each plant to get just the right amount of sunlight and water. When you master clip gain and channel fader balance, your mix becomes a lush, vibrant landscape, free of weeds and noise. It’s the secret sauce that keeps your tracks shining without distortion. So, get your tools ready, fine-tune your levels, and watch your song bloom into a professional masterpiece.