Production Tips
How to Use White Noise in Your Productions
Mastering the art of white noise in your productions can transform your sound, but how do you unlock its full potential?
To use white noise in your productions, start by selecting a white noise generator in your DAW and create a dedicated track for it. Keep the volume low to fill empty spaces without overwhelming other elements. Experiment with equalization to emphasize specific frequencies and add effects like reverb for depth. Use automation to dynamically adjust volume and panning, creating movement and tension, especially during buildups. Layer white noise under melodic components for unique textures, or incorporate it as a percussive element. Your exploration of these techniques can yield even richer soundscapes and textures that elevate your music.
Key Takeaways
- Use a dedicated track for white noise at low volume to fill empty spaces and enhance overall sound design in your productions.
- Experiment with equalizers to shape white noise, emphasizing or cutting specific frequencies to complement other instruments effectively.
- Automate volume and panning of white noise to create dynamic shifts and movement throughout the track, enhancing engagement.
- Layer white noise with melodic elements for unique textures and richer sound, ensuring it doesn't overpower the main instruments.
- Utilize white noise in buildups by applying frequency automation and effects adjustments for impactful transitions leading to drops.
Understanding White Noise
When it comes to sound design, white noise is an invaluable resource. This random signal includes all frequencies at equal intensity, giving it a sharp quality that can enhance your music production. Think of it like white light, which contains all wavelengths; white noise brings a similar completeness to your mixes.
In music production, you can effectively use white noise to fill empty spaces, making your tracks sound fuller and richer. It's particularly useful for creating smoother shifts between sections, allowing your compositions to flow seamlessly. You'll often find white noise in ambient layering or as a build-up, adding a sense of anticipation in your tracks.
Moreover, white noise can serve as a unique percussive element when combined with effects like reverb or delay. Understanding how to manipulate it through automation and equalization can greatly elevate your sound design.
Benefits of White Noise
Five key benefits make white noise a must-have in your production toolkit.
First, white noise helps add ambience and a sense of space to your tracks, which creates a fuller sound that enhances the overall listening experience. This richness is essential for engaging your audience.
Second, it effectively fills empty spaces in a mix, allowing for smoother shifts between different sections of a song. This fluidity keeps listeners engaged and makes your productions feel cohesive.
Third, white noise acts as a mixing tool by masking imperfections, like pops and clicks in recordings, giving your final product a more polished sound. You'll appreciate how it elevates your work.
Fourth, by using equalizers, you can shape white noise to emphasize specific frequencies, tailoring its impact to fit the needs of any track. This versatility lets you customize your sound.
Lastly, continuous experimentation with white noise can lead to innovative sound design outcomes. You'll discover how it enriches the texture and complexity of your musical compositions, making your noise in music production stand out.
Embrace these benefits, and watch your productions flourish!
Implementing White Noise
Implementing white noise in your productions can enhance the overall sound and texture of your tracks. Start by selecting a suitable white noise generator from your Digital Audio Workstation (DAW) to create a dedicated track for managing your white noise sample. Keep the volume low to guarantee it blends seamlessly with other elements, enhancing the mix without overpowering it.
Next, use equalizers to shape and emphasize specific frequencies in the white noise. This allows it to fill empty spaces in your mix and adds a rich texture.
Don't hesitate to experiment with effects like reverb, delay, or phaser; these can create unique sonic characteristics and help you build a more immersive soundscape.
To create dynamic shifts throughout your track, utilize automation tools in your DAW. By dynamically adjusting the volume and panning of the white noise, you'll keep listeners engaged and add depth to your production.
Automation Techniques
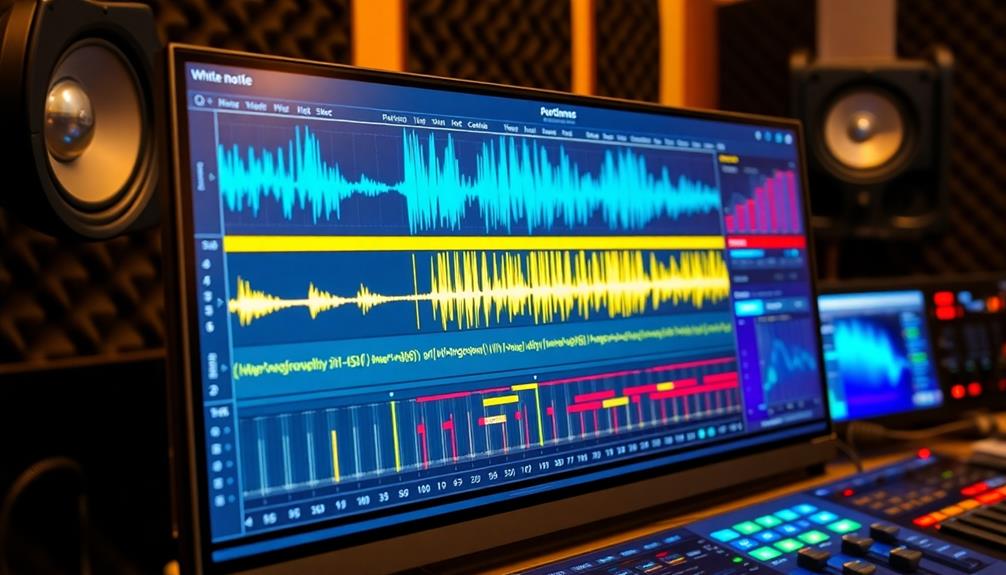
When you're working with white noise, automation can really bring your track to life.
Adjusting the volume and panning dynamically creates depth and movement, while tweaking effects parameters adds texture and interest.
Volume Automation Strategies
Often, using volume automation effectively can transform how white noise interacts with your track. By creating dynamic changes in white noise levels, you can make it swell or recede during different sections, adding drama and interest. For instance, implementing gradual volume increases leading up to a drop can build tension, making white noise serve as a precursor to significant musical events.
Here are some volume automation strategies to take into account:
Strategy | Description |
---|---|
Gradual Swells | Increase white noise volume gradually for impact. |
Sync with Elements | Automate white noise in sync with drums or vocals. |
Rapid Automation | Use quick changes for stutter effects or glitches. |
Visual Manipulation | Utilize automation lanes in your DAW for precision. |
Layering with Drum Sounds | Enhance drum sounds by automating white noise levels. |
Dynamic Effect Adjustments
Building on the volume automation strategies discussed earlier, dynamic effect adjustments can further enhance the role of white noise in your productions. By utilizing your DAW's automation tools, you can dynamically adjust the volume of white noise throughout your track. This creates a more engaging listening experience that evolves over time.
Additionally, understanding the importance of a well-structured music production workflow can help you implement these dynamic adjustments more effectively music production workflow.
Consider automating filter cutoff frequencies on white noise to generate sweeping effects, adding tension and excitement during buildups or shifts. You can also incorporate automation on effects parameters, like reverb and delay, to give white noise a more dynamic character. This allows its intensity and texture to shift as your song progresses, keeping listeners captivated.
Experiment with automating panning for white noise, allowing it to move across the stereo field. This enhances the spatial qualities of your mix and adds depth.
Additionally, using LFO modulation in conjunction with automation introduces subtle variations in the white noise sound, preventing it from becoming repetitive. By combining these techniques, you can fully exploit the frequency spectrum of white noise, transforming it into a powerful tool that elevates your productions.
Panning for Depth
Panning white noise effectively can greatly enhance the depth and spatial quality of your mix. By utilizing automation tools in your DAW, you can gradually pan white noise from left to right, creating a sense of movement that captivates listeners.
Experiment with different panning speeds and patterns—try slow, sweeping motions or rapid shifts to evoke varying emotional responses.
Layer multiple instances of white noise, each with distinct panning automation, to enhance stereo imaging. This technique makes your sound environment more immersive.
Additionally, consider incorporating sidechain panning automation to introduce a rhythmic feel, allowing the white noise to bounce in and out of the mix alongside other elements.
Don't forget about volume automation; it's essential for dynamically adjusting the presence of white noise throughout the track. This guarantees that the white noise complements rather than overwhelms your other instruments.
By mastering these panning techniques, you can achieve a rich, inviting depth in your productions, transforming your tracks into a more engaging listening experience.
Creative Experimentation
When you start experimenting with white noise, think beyond traditional uses to discover unconventional sound design techniques that can elevate your tracks.
Layering white noise under your melodic elements can create unique textures that fill out your sound.
Don't hesitate to tweak and manipulate these layers; innovation often happens when you push the boundaries of what you know.
Unconventional Sound Design Techniques
In the world of sound design, countless opportunities arise when you embrace unconventional techniques using white noise. Start by layering white noise with various instruments to craft new textures that enhance the depth and richness of your mix. This simple addition can transform a flat sound into something dynamic and engaging.
Utilize automation to adjust the volume and frequency of white noise throughout your track. This keeps the sound evolving, adding an element of surprise. You can also shape white noise with filters and modulation techniques to create special effects like thunder or wind, making your sound design more immersive.
Consider using white noise as a modulation source for unconventional vibrato effects or to influence synth patch parameters. This approach can lead to unexpected sonic results that capture listeners' attention.
Don't forget to explore white noise in rhythmic contexts, such as triggering short samples. Incorporating it into your drum patterns can add complexity and texture, pushing your sound design further.
Layering for Unique Textures
Layering white noise with your musical elements can reveal a world of unique textures that enrich your sound design, much like how personalized learning in classrooms caters to individual styles. By filling in frequency gaps, it enhances the overall texture of your track.
To effectively harness this technique, consider the following steps:
- Experiment with Volume: Adjust the levels of your white noise to guarantee it complements your instruments without overpowering them.
- Use EQ Wisely: Shape the white noise to fit different contexts, emphasizing or cutting frequencies as needed.
- Add Effects: Combine white noise with effects like reverb and delay to add depth and spatial characteristics, making the layers feel immersive.
- Automate Changes: Introduce dynamic shifts by automating volume and panning throughout your track, keeping the listener engaged with evolving soundscapes.
Additionally, don't shy away from mixing various types of noise, like crackle or hiss. This creative experimentation can lead to unique sonic textures that enhance your overall production.
Buildups With White Noise

Buildups with white noise can effectively heighten tension and anticipation in your track. To create impactful buildups, start by using a synthesizer like Operator in Ableton. This allows you to generate the white noise, seamlessly integrating it into your music. Loop a single note while applying frequency automation to create a rising effect that builds excitement leading into a drop or new section.
Adjust the effects parameters, such as increasing the resonance on the filter applied to the white noise. This gives the buildup a fuller body and a sweeping sound that grabs listeners' attention.
Don't hesitate to experiment with LFO modulation for dynamic panning and volume variations, which can add depth and interest to your buildup.
Layer white noise with additional elements like rhythmic percussion or synth stabs to enhance your track further. This combination will create a richer and more engaging buildup experience, ensuring your audience feels the anticipation before the big moment arrives.
Ambient Layering Techniques

Using white noise in ambient layering can transform your soundscapes dramatically. This versatile tool in music fills the frequency spectrum and enhances the overall sense of space in your mix.
Here are some effective ambient layering techniques you can apply with white noise:
- Layer with Instruments: Use tools like Ableton's Operator or Simpler to blend white noise with other instruments at a low volume, ensuring it complements rather than overwhelms your mix.
- Add Reverb: Incorporating light reverb on your white noise smooths its texture, creating a more cohesive ambient sound layer that feels enveloping.
- Automate Dynamics: Experiment with automating the volume or panning of the white noise. This introduces dynamic changes, keeping the ambient layer engaging and alive throughout your track.
- Use Arpeggiators: Pairing white noise with arpeggiators can add movement and complexity to your sound, enriching the atmosphere of your ambient layer.
Percussive Sound Design

Incorporating white noise into your percussive sound design can elevate your tracks by adding unique textures and depth. By using short white noise samples triggered by MIDI sequences, you can create percussive elements that intrigue your listeners. Don't forget to experiment with ADSR (Attack, Decay, Sustain, Release) controls to sculpt the amplitude envelope of the noise, resulting in crisp snare-like sounds or softer, airy percussions.
Here's a quick overview of techniques to enhance your white noise percussive design:
Technique | Description |
---|---|
Layering | Combine white noise with existing drum sounds to enhance fullness. |
Distortion/Bitcrushing | Use tools like Trash 2 to introduce grit and character. |
Modulation Techniques | Implement LFO or filter sweeps for evolving percussive sounds. |
ADSR Shaping | Adjust the envelope to create varied snare-like or soft sounds. |
Unique Sound Applications
While many producers might focus solely on melodic elements, white noise offers a versatile palette for creating unique sound applications that can elevate your tracks.
You can use white noise to create exciting shifts, enrich your mix, and enhance sound design in various ways:
- Dynamic Noise Sweeps: Modulate filter cutoffs to create impactful whooshes that build anticipation and excitement in your electronic dance music.
- Noise as a Background: Layer white noise textures to fill the stereo field, allowing primary melodies or vocals to shine while providing an immersive listening experience.
- Vibrato Effects: Use white noise as a modulation source, filtering it to creatively modulate pitch and filter cutoff, adding high resonance to your sound design.
- Realistic Drum Sounds: Synthesize drums with white noise to craft authentic hi-hats and snares, employing tight volume envelopes for a polished finish.
Frequently Asked Questions
How Do You Use White Noise Effectively?
You can use white noise effectively by blending it into your mix at a low volume, shaping its frequencies with EQ, and adding effects like reverb for texture. Experiment to find what enhances your sound best.
Does White Noise Make You Productive?
Yes, white noise can boost your productivity. It masks distractions and creates a calming environment, helping you focus better. Many find that it enhances concentration, making tasks easier and reducing mental fatigue during work sessions.
How to Use White Noise in Music?
Ever wondered how to elevate your music? You can use white noise to fill gaps, enhance depth, and layer sounds. Experiment with volume, panning, and effects to create a unique auditory experience in your tracks.
What Is White Noise in Audio Production?
White noise in audio production is a sound that contains all frequencies at equal intensity. You can use it to enhance your mixes, fill gaps, and mask imperfections, creating a fuller, more textured sound experience.
Conclusion
Incorporating white noise into your productions can be a game changer, adding texture and depth that transforms your sound landscape. Like a painter who adds a splash of color to a canvas, you can use white noise to enhance your tracks, from buildups to ambient layers. So don't hesitate—experiment boldly and let your creativity flow. With each twist and turn, you'll discover new dimensions in your music that elevate your productions to a whole new level.
Production Tips
Drum Programming Tips for Natural Sounding Beats
Perfect your drum programming skills with essential tips for creating natural-sounding beats that will transform your music—discover the secrets inside!
To create natural sounding beats in drum programming, master techniques that mimic a live drummer's nuances. Start by layering different drum samples for richness and texture. Adjust hit velocities, especially on hi-hats, to add dynamic interest. Incorporate ghost notes at lower velocities to enhance groove without overpowering main beats. Timing adjustments can also help with a more organic feel; try moving notes slightly off the grid. Employ swing settings to create a relaxed vibe. These methods will elevate the authenticity of your rhythms, setting the stage for even greater musical expression as you explore further techniques.
Key Takeaways
- Adjust timing by slightly moving notes off the grid to create a more organic feel in your drum patterns.
- Vary hit velocities, especially on hi-hats, to add dynamic interest and authenticity to your beats.
- Incorporate ghost notes to add texture and depth without overpowering the main rhythm.
- Utilize swing templates in your DAW to enhance groove and create a relaxed feel in your drum patterns.
- Experiment with layering different drum samples to enrich the overall texture and sound of your beats.
Understanding Drum Patterns
When immersing yourself in drum programming, understanding drum patterns is fundamental for creating compelling rhythms. Different genres feature characteristic patterns that define their sound. For instance, rock typically highlights a strong snare backbeat, while hip-hop focuses on syncopation with kick and snare. Recognizing these distinctions will help you craft authentic beats that resonate with listeners.
The interplay between the kick, snare, and hi-hat is vital, as these elements shape the overall feel and drive of your drum track. Experiment with various drum patterns to find what fits best for your genre. Utilizing swing templates can also emulate a live performance feel, particularly enhancing the rhythmic quality in funk and jazz.
Incorporating ghost notes at lower velocities adds texture and depth to your patterns without overpowering the primary beats. These subtle percussion sounds can greatly enrich your drum programming, giving it a more dynamic presence.
Humanizing Your Beats
To create beats that feel alive, you need to humanize your programming. Start by making slight timing adjustments; moving some notes off the grid mimics the natural fluctuations of a human drummer. This helps your beats feel more organic and less mechanical.
Next, focus on the velocity of hits. Varying the intensity, especially on hi-hats, adds dynamic interest and keeps your track engaging. Most DAWs come with manual velocity adjustment tools, so take advantage of these to fine-tune each hit for a more authentic feel.
Incorporating ghost notes is another effective technique. These subtle, softer hits can enrich the groove while adding depth without overshadowing the main rhythm. They create a more complex texture, enhancing the overall vibe of your track.
Implementing Swing and Groove
When you want to bring life to your drum patterns, using swing templates in your DAW can make a huge difference.
By making subtle timing adjustments and experimenting with built-in groove templates, you'll find the right feel that resonates with your track.
Don't forget to tweak hi-hat velocities alongside these settings for an even more dynamic rhythm!
Swing Template Utilization
Incorporating swing templates into your drum programming can instantly breathe life into your tracks. By delaying specific beats, swing templates create a relaxed, organic feel that mimics live drumming.
Here are some tips to make the most of swing in your drum patterns:
- Start Small: Apply a swing percentage between 8-16% to enhance rhythmic quality without overwhelming the track.
- Experiment: Test different swing settings to see how they transform your straightforward drum patterns into engaging grooves.
- Balance Timing: Verify that your timing adjustments maintain the overall integrity and tempo of the track, avoiding a disjointed feel.
- Use Built-in Tools: Take advantage of groove templates available in DAWs like Ableton Live 12 to easily apply swing to your beats.
Groove Templates in DAWs
Groove templates in digital audio workstations (DAWs) can transform your drum programming by adding a layer of depth and expressiveness to your rhythms. Many DAWs, like Ableton Live 12, come with built-in groove templates that you can apply directly to your MIDI tracks. This feature helps create more humanized and organic-feeling drum patterns.
Utilizing swing settings is essential for achieving that live performance vibe. A slight swing adjustment (typically between 5-15%) can greatly enhance the rhythmic quality of your drum patterns. This small tweak can make your beats feel more dynamic without compromising the integrity of the overall track.
Here's a quick overview of how different settings affect your rhythms:
Groove Template | Swing Setting | Effect on Drum Pattern |
---|---|---|
Default | 0% | Straight, rigid rhythms |
Funk | 10% | Adds a laid-back feel |
Jazz | 15% | Creates a syncopated vibe |
Latin | 7% | Enhances rhythmic variations |
Experimenting with various groove percentages and note lengths can lead to unique rhythmic variations, encouraging your creativity while producing engaging sounds.
Subtle Timing Adjustments
Subtle timing adjustments can dramatically enhance your drum programming, giving it a more lifelike quality. By implementing swing and groove, you can create a more relaxed and human feel in your rhythms.
Here are some key techniques to take into account:
- Apply Swing: Delay certain off-beats slightly, typically in the range of 50-70% of the quantized value. This creates a laid-back vibe, perfect for funk and jazz.
- Vary Hi-Hat Sound: Shift hi-hat notes slightly ahead or behind the grid to mimic natural drumming variations, adding a dynamic quality to your beat.
- Experiment with Note Lengths: Adjusting the lengths of your notes can create unique rhythmic patterns that evoke an organic sound.
- Use DAW Groove Templates: Many DAWs, like Ableton Live, have built-in groove templates that make it easy to apply swing to your MIDI patterns.
Using Layering Techniques
Layering techniques can take your drum programming to the next level, creating a fuller and more engaging sound in your tracks. One effective method is layering different drum samples, like combining multiple snare sounds. This approach enhances the richness and dynamic texture of your beats.
However, it's essential to adjust the volume levels of each sample to guarantee they blend cohesively without overpowering one another in the mix.
Don't shy away from utilizing unique layered sounds, such as adding subtle percussion or electronic elements. This can set your tracks apart, introducing fresh sonic characteristics that capture listeners' attention.
Experimenting with various drum kits allows you to find the perfect combination that fits your genre and style.
Additionally, consider employing subtle layering techniques. While ghost notes can add depth, focusing on the nuances of how each layer interacts can enhance the groove and complexity of your drum patterns.
Incorporating Ghost Notes
Incorporating ghost notes can really enhance the dynamics of your groove.
By adding subtle rhythm textures between your main beats, you create a more intricate and engaging feel.
Experimenting with their placement and velocity will help you find the perfect balance for your track.
Enhancing Groove Dynamics
While you might think that a strong drum pattern relies solely on the main beats, adding ghost notes can transform your groove dynamics dramatically.
Ghost notes are subtle, low-velocity hits that add texture and depth to your drum track, enhancing the overall groove without overpowering the primary rhythm.
Here are some tips to effectively incorporate ghost notes into your programmed drums:
- Placement: Focus on snare and hi-hat for ghost notes, as they can enrich the dynamic complexity of your patterns.
- Velocity Variation: Program ghost notes with varying velocities to mimic the nuanced dynamics of live drumming, creating a more organic feel.
- Experiment with Toms: Move ghost notes around different drum elements, like toms or rimshots, to introduce variation and keep listeners engaged.
- Layering: Use ghost notes to layer textures, adding more depth and intricacy to your rhythmic structure.
Subtle Rhythm Textures
Revealing the potential of subtle rhythm textures can elevate your drum programming to new heights. One key technique to achieve this is incorporating ghost notes—those low-velocity hits that enhance your drum sounds without overpowering the main beats. This approach is especially effective in genres like funk and jazz, where groove is essential.
To maximize the impact of ghost notes, consider their placement and velocity. Programming them at around 30-50% of your main hit velocity guarantees they add texture while remaining discreet. Varying their location across different drum elements, such as snares and toms, introduces unexpected rhythmic variations that keep listeners engaged.
Here's a quick reference table to guide you in using ghost notes effectively:
Element | Suggested Velocity % |
---|---|
Snare | 30-40% |
Tom | 40-50% |
Hi-Hat | 20-30% |
Kick Drum | 30-50% |
Rim Shot | 25-35% |
Incorporating these subtle rhythm textures not only adds depth but also mimics the expressiveness of a live drummer's performance.
Building Energy for Drops
To effectively build energy for drops, you need to create anticipation in the two bars leading up to the moment. This is where you can really engage your listeners and elevate the tension in your track.
Here are some strategies you can use:
- Rising Effects: Incorporate white noise sweeps or rising synths to create a sense of urgency.
- Strategic Silence: Reduce or even silence drum hits before the drop to amplify the impact of the beat when it returns.
- Layering Different Sounds: Instead of just doubling your kick or snare frequency, build upon various musical elements and layers to create a more dynamic build-up.
- Anti-Drop Techniques: Implement unexpected rhythmic changes or pauses to enhance listener engagement and create memorable moments.
Tools for Effective Programming
After building energy for drops, it's time to focus on the tools that can help you program your drums effectively. One essential tool is your DAW, where you can utilize MIDI libraries like those in Superior Drummer 3. These libraries offer genre-specific drum loops that elevate the authenticity of your beats.
Don't overlook velocity adjustments; experimenting with these within your DAW can create dynamic interest, making your programming feel more natural. Incorporating ghost notes at lower velocities adds subtle complexity without overshadowing the primary beat, enriching your rhythm considerably.
You can also enhance the groove by leveraging swing settings in your DAW. This humanizes your beats, especially in genres like funk and jazz, giving them that live performance feel.
Frequently Asked Questions
How Do You Make Drums Sound Natural?
To make drums sound natural, you'll want to vary hit velocities, add ghost notes for texture, slightly adjust timing, use swing settings, and layer diverse samples. These techniques create a more organic and engaging rhythm.
How to Program Drums That Sound Real?
Programming drums that sound real is like crafting a masterpiece. You'll want to vary timing, incorporate ghost notes, and layer samples. Embrace subtle imperfections to capture the essence of a live performance, making your beats truly dynamic.
How to Program a Drum Beat?
To program a drum beat, start with a solid pattern. Layer sounds, adjust velocities, and add ghost notes for depth. Experiment with swing to create groove. Balance your mix for clarity, and have fun exploring!
How Can I Make My Sampled Drums Sound Better?
Imagine a canvas where your sampled drums dance. Layer them like colors, adjusting velocities to create rhythm's heartbeat. Add ghost notes and microtiming, letting spontaneity breathe life, while swing settings bring vibrant energy to your creation.
Conclusion
By applying these tips, you'll find your drum programming takes on a whole new life. Remember, the magic often happens in the small details—like a ghost note sneaking in just when you least expect it. As you layer sounds and play with swing, you'll notice your beats not only feel more natural but also resonate with your listeners. So grab your kit, trust your instincts, and watch how your creativity unfolds in ways you never imagined!
Production Tips
Building Energy in Your Songs Without Overcrowding
Get ready to elevate your music’s energy with strategic techniques that keep it clear and engaging—discover how to master this essential skill!
You can build energy in your songs without overcrowding by using strategic techniques. Start by varying your dynamics, mixing soft verses with powerful choruses to engage listeners. Increase the tempo for an energetic vibe, and incorporate syncopation to add rhythmic interest. It's essential to maintain your vocal range during key modulations to keep the performance comfortable. Layer instruments thoughtfully, limiting guitar tracks and employing unique arrangements to preserve clarity. Focus on targeted EQ boosts and dynamic contrasts to enhance your mix. Use these tips to elevate your song's energy and discover more effective methods along the way!
Key Takeaways
- Utilize dynamic contrasts by alternating between softer verses and powerful choruses to maintain listener engagement without overcrowding the mix.
- Implement targeted EQ boosts to brighten the mix and filter low frequencies, ensuring clarity while enhancing overall energy.
- Layer instruments thoughtfully, limiting guitar tracks to two, to maintain distinct sounds and prevent sonic clutter.
- Experiment with tempo changes during climactic sections to heighten emotional impact without overwhelming the listener.
- Introduce backing vocal harmonies strategically in energy-demanding sections, enhancing richness without sacrificing clarity.
Importance of Energy in Music
Energy plays an essential role in music, impacting how listeners connect with a song. When you create music, think about how energy levels fluctuate to engage your audience emotionally. Techniques like tension and release are crucial in crafting these dynamics, allowing listeners to ride the emotional waves of your piece.
While loudness can convey energy, it shouldn't be your only tool. If you rely solely on volume, you risk dulling your audience's senses. Instead, mix it up! Use dynamic contrasts by alternating between soft and loud sections to keep energy levels high and maintain engagement.
Consider how tempo, rhythmic complexity, and instrumental adjustments influence the perception of energy. A faster tempo might inject excitement, while a slower rhythm can create anticipation.
You can also layer instruments or vary their intensity to enhance the overall vibrancy of your song.
Key Techniques for Modulation
When you raise the key of your song, you can instantly boost its energy and excitement.
This technique can create a more uplifting atmosphere, much like how certain scents in aromatherapy can stimulate emotions.
Don't forget to keep your performers' vocal ranges in mind, as it's essential for maintaining the song's integrity.
Even a small half-step adjustment can refresh the entire feel, making your piece more engaging for listeners.
Key Raise Benefits
Elevation in music often sparks a renewed sense of excitement, and one of the most effective techniques to achieve this is through key modulation. When you raise the key of your song, you can provide a noticeable energy boost, enhancing its emotional impact and driving deeper engagement with your audience.
For instance, shifting from G major to A major can refresh the song's feel and greatly elevate perceived energy levels. This technique mirrors how AI systems utilize algorithms to process data and enhance decision-making, showcasing the power of strategic adjustments.
Even small adjustments in key can create a remarkable sense of energy, making strategic modulation a powerful tool in your music production arsenal. Not only does effective key modulation rejuvenate a song, but it also contributes to the tension and release dynamics that captivate listeners, enhancing their emotional journey.
Keep in mind that while exploring key raise benefits, you should consider the vocal range of the performers. This guarantees comfort and maintains the integrity of the song, allowing you to fully leverage the energy and excitement that come from a well-executed key change.
Embrace modulation as a means to elevate your music, and watch as it resonates more profoundly with your audience.
Vocal Range Considerations
Understanding vocal range is fundamental for effective key modulation in your songs. When you consider key changes, confirm the new key allows the vocalist to maintain comfort. Straining their voice can lead to a diminished performance quality, so it's essential to stay within their comfortable range.
For instance, raising a song from G major to A major can enhance perceived energy without pushing the singer too far. Additionally, incorporating uplifting elements, like those found in Blue Skies and Lemonade, can inspire positive vocal delivery and enhance the overall feel of your music.
Effective key modulation can refresh a song's feel, making it more engaging for listeners, especially during shifts between verses and choruses. Knowing the lead singer's vocal range helps you select appropriate keys. If the key is too high or too low, it can greatly impact the emotional delivery of the performance.
Before finalizing any key changes, test the new key against the original vocal performance. This step is important to assess how well it suits the singer's range and the overall energy of the song.
Impact of Small Adjustments
Small adjustments in key can transform a song's energy in remarkable ways. For instance, raising a song's key from G major to A major can greatly enhance its perceived energy, invigorating the overall feel of your track.
The impact of small adjustments isn't just about pitch; it's also about maintaining the vocal range and comfort of your performers. You want to guarantee they can deliver the song effectively without strain.
Even minor shifts in pitch can create a revitalizing impact, keeping your listeners engaged without overwhelming the mix. Effective key modulation can strategically contribute to emotional dynamics, generating tension and release that makes for a more compelling listening experience.
When you experiment with strategic modulation techniques, you can rejuvenate your song's energy, making it feel fresh. This approach helps avoid overcrowding due to excessive instrumentation or layers.
Instrumental Adjustments for Impact
To boost the energy in your songs, consider using higher voicings on your guitars and keyboards.
This simple adjustment can make your mix feel more vibrant and engaging.
Additionally, layering instruments thoughtfully can enhance the overall impact without cluttering the sound, allowing each element to shine.
Higher Voicings for Energy
Higher voicings on instruments like guitars and keyboards can instantly elevate the energy in your songs. By utilizing higher registers, you create a brighter sound that enhances the overall energy perception in your mix. The human ear is naturally more attuned to higher frequencies, so incorporating these voicings leads to a more vibrant and engaging listening experience.
When you actively include higher voicings in your instrumentation, it contributes to a dynamic soundscape that excites your audience. This intensity can be further amplified by strategically layering higher voicings with contrasting lower elements. This technique guarantees a fuller sound while maintaining clarity, preventing your mix from becoming overcrowded.
Moreover, higher voicings can emphasize key melodic lines or hooks, drawing listener attention and elevating the emotional impact of your song. Focus on placing these bright elements in essential moments to maximize their effect.
Layering for Impact
When you layer instruments thoughtfully, you can amplify the impact and energy of your song considerably. To achieve this, focus on effective layering instruments that create a fuller, vibrant sound while avoiding muddiness. Limiting the number of layers is essential for maintaining clarity, so choose your elements wisely.
Incorporating higher voicings on guitars and keyboards can boost the energy perception, making your arrangement feel more lively and engaging. Active instrumentation, where each layer plays a distinct role and maintains rhythmic involvement, enhances the listening experience without overcrowding the mix.
Dynamic contrasts between layered instruments are also key. Alternating between soft and loud passages can generate excitement and keep listeners engaged.
Additionally, carefully arranged backing vocal harmonies can elevate sections demanding extra energy, ensuring the title hook stands out while preserving mix clarity.
Mastering Tempo and Rhythm
Mastering tempo and rhythm is essential for infusing energy into your songs. Increasing the tempo can greatly enhance perceived energy, making your music feel more exciting. Studies show that faster rhythms evoke stronger emotional reactions from listeners. You can also add rhythmic complexity by incorporating syncopation or unexpected accents, which keeps your audience engaged.
To give you a clearer idea, here's a quick table outlining some effective strategies:
Strategy | Description | Impact on Energy |
---|---|---|
Increase Tempo | Speeding up the overall pace of the song | Boosts excitement |
Incorporate Syncopation | Adding off-beat rhythms for surprise | Captivates listener focus |
Maintain Steady Beat | Keeping a consistent rhythm while varying tempo | Creates dynamic interest |
Use Tempo Changes | Altering tempo during climactic sections | Heightens emotional impact |
Analyze Song Versions | Observing subtle tempo adjustments in different versions | Reveals energy differences |
Dynamics of Tension and Release
Often, the dynamics of tension and release play a significant role in keeping your listeners engaged. By incorporating contrasting sections—like a calmer verse followed by a powerful chorus—you create an impactful musical experience. This interplay heightens emotional responses, drawing your audience deeper into the song.
You can effectively use dynamics through techniques like crescendos and sudden volume changes, which build anticipation. Strategic placement of tension elements, such as risers and drum fills, helps to guide the track's flow and maintain excitement. Think of these elements as tools to craft a compelling journey that feels alive.
Balancing macro-tension, which involves the overall song structure, with micro-tension, focusing on specific moments, is essential. This balance sustains interest and energy throughout your piece without overwhelming your listeners.
When you master tension and release dynamics, you enhance the overall energy of your songs. Your goal is to create a dynamic listening experience that captivates your audience without overcrowding the mix. By carefully steering the tension and release in your music, you'll keep listeners hooked from start to finish.
Enhancing Mix Energy and Clarity
Focusing on mix energy and clarity can transform your tracks from flat to vibrant. Start by applying targeted EQ boosts to brighten your mix while filtering out unnecessary low frequencies that contribute to muddiness. This approach keeps your low end punchy and well-defined, preventing overcrowding in the mix.
When working with low-end frequencies, selectively filter them from multiple tracks. This guarantees your mix retains its punch without overwhelming the listener.
Compression should be used judiciously on ensemble signals rather than individual tracks, preserving musicality and enhancing the overall liveliness of your mix.
Utilize fader automation to maintain vocal clarity and add dynamic interest. This technique simulates organic communication among performers, keeping your audience engaged.
A well-balanced mix incorporates dynamic contrasts, which elevates both energy levels and listener engagement, making your track feel alive.
Layering Strategies for Clarity
Effective layering is essential for achieving clarity in your mixes. One effective layering strategy is limiting your guitar layers to just two tracks. This keeps each sound distinct and prevents a bland mix that can arise from over-layering.
When it comes to choruses, using unique arrangements for each iteration can maintain listener interest while staying true to your song's theme. Consider introducing new backing vocal harmonies in sections that need an extra energy boost. This approach elevates the mix without overcrowding it, allowing the title hook to shine.
Additionally, a gradual build-up in arrangement toward climactic moments helps you harness energy effectively, avoiding sonic clutter that could distract from the overall impact.
Lastly, carefully selecting vocal layers enhances your mix's richness while ensuring clarity. By highlighting the most impactful sounds and not overwhelming other elements, you create a more engaging listening experience.
Frequently Asked Questions
How Do I Add More Energy to a Song?
To add more energy to your song, consider raising the key, increasing the tempo, or using higher voicings. Also, play with tension and release dynamics to keep listeners engaged and emotionally connected.
What Is the Energy of a Song?
You might think energy's just about loudness, but it's more nuanced. The energy of a song reflects its emotional intensity, driven by tempo, dynamics, and instrumentation, creating engagement that captivates listeners and evokes powerful feelings.
Can Songs Give You Energy?
Absolutely, songs can give you energy! When you listen to upbeat rhythms or powerful lyrics, you often feel invigorated. The right melodies and tempos can lift your spirits and motivate you to take action.
Does Listening to Music Increase Energy?
Listening to lively, lyrical tunes can lift your spirits and spark your stamina. With each beat, you'll feel a surge of energy, transforming tasks into thrilling adventures, and making movement more manageable and enjoyable.
Conclusion
Incorporating energy into your songs is essential for engaging listeners and keeping them hooked. Remember, a well-structured track can elevate emotional impact—studies show that songs with dynamic shifts can increase listener retention by up to 60%. By mastering modulation, adjusting instrumentation, and fine-tuning your mix, you create a vibrant soundscape that resonates. Don't shy away from layering; it adds depth without overcrowding. Keep experimenting, and you'll find the perfect balance that brings your music to life.
Production Tips
Making Transitions Smooth With Automation
Mastering automation can transform transitions, but are you ready to discover the secrets that ensure a seamless shift?
To make shifts smooth with automation, you need to prioritize planning and employee engagement. Start by mapping out your processes and timelines. Engage your team early, providing tailored training to build confidence. Communicate openly and regularly to keep everyone informed and involved. Test automated processes with pilot programs to identify issues before a full rollout. Monitor key performance indicators to track success, and stay flexible to adapt to changes. Ongoing support will help alleviate concerns and empower your team. Keep this momentum going, and you'll uncover even more strategies for a seamless shift ahead.
Key Takeaways
- Develop a detailed roadmap that outlines processes, timelines, and integration steps for seamless automation transitions.
- Engage employees early and provide tailored training to foster ownership and boost confidence in new automated systems.
- Implement pilot programs to test automation processes on a smaller scale and identify issues before full rollout.
- Establish effective communication strategies, including regular updates and two-way channels, to build trust and keep employees informed.
- Monitor KPIs and gather continuous feedback to make informed adjustments, ensuring ongoing success and adaptability during transitions.
Importance of Planning
Planning's role in automation can't be overstated. When you begin an automation journey, effective planning guarantees a smooth shift from manual to automated processes.
Start by developing a detailed roadmap that outlines the processes, timelines, and steps for integration. Conducting thorough process assessments helps you identify which tasks are best suited for automation, allowing you to prioritize actions that yield the highest efficiency gains. By focusing on content relevance and authority, you can enhance the effectiveness of your automation efforts.
A thorough change management plan is essential for risk mitigation. You'll want to include strategies for reverting to manual processes if automation doesn't go as planned. This backup approach protects your operations from potential failures.
Aligning your IT strategies with business goals enhances operational efficiency and guarantees that your automation initiatives positively impact your organization.
Don't forget to regularly review and adjust your automation plan based on real-time feedback and challenges. This adaptability will facilitate a more resilient shift process, making sure that your automation efforts lead to the desired outcomes.
Engaging and Training Staff
When engaging staff early in the automation process, you greatly reduce resistance and foster a sense of ownership among employees. By getting them involved from the start, you can achieve up to a 70% reduction in pushback against changes.
Implementing tailored training sessions that address the specific needs of different roles boosts employee confidence and guarantees effective adoption of new systems. Incorporating principles from the Law of Attraction can further enhance this process by encouraging positive thinking and emotional alignment with the shift.
Creating a change committee with representatives from various departments enhances engagement by incorporating diverse perspectives into your automation strategy. This collaborative nature of automation cultivates a culture of continuous improvement, where technologies are seen as tools for enhancement rather than replacements.
Regularly soliciting feedback from staff during the shift process is essential; this feedback helps us improve training effectiveness and can lead to a 50% increase in process efficiency.
Effective Communication Strategies
Effective communication is key to a smooth automation change, especially since 70% of employees report feeling more trust when they're kept informed about changes and expected outcomes. To foster this trust during changes, you should prioritize open communication and regular updates. Engaging in two-way communication allows employees to voice their feedback and concerns, greatly boosting employee buy-in and satisfaction.
Establishing a change committee with representatives from various departments can enhance collaboration and alignment across your organization. This approach promotes stakeholder engagement and guarantees everyone is on the same page.
Here's a quick overview of effective communication strategies:
Strategy | Benefits | Implementation Tips |
---|---|---|
Open Communication | Builds trust | Hold regular meetings |
Regular Updates | Fosters transparency | Use newsletters or bulletins |
Two-Way Communication | Increases employee buy-in | Create feedback channels |
Testing Automation Processes
When you implement pilot programs, you can effectively test automated processes on a smaller scale before rolling them out completely.
While running these automated systems alongside your current workflows, pay close attention to performance metrics to spot any issues early.
This approach not only validates effectiveness but also helps you make informed adjustments for smoother changes.
Pilot Program Implementation
Testing automated processes through a pilot program provides organizations with a strategic opportunity to identify potential issues before a full-scale rollout. By implementing a pilot program, you can test automated processes on a smaller scale, allowing you to validate their effectiveness while running them in parallel workflows with existing manual systems.
This approach helps you make necessary adjustments based on real-time performance metrics, such as transaction processing times and error rates. Moreover, as organizations navigate complexities in areas such as end-of-life planning, understanding how automation can streamline these processes is fundamental for enhancing service delivery.
Engaging employees in the pilot program is essential. Their collaboration fosters a sense of ownership and leads to valuable feedback, which enhances the overall effectiveness of your automation initiative. As employees see the benefits firsthand, their enthusiasm can drive broader acceptance within the organization.
Additionally, a successful pilot can build stakeholder confidence. By demonstrating improvements in efficiency and reduced error rates, you can increase buy-in for the full implementation of automated processes.
This confidence can ultimately pave the way for a smoother shift, ensuring that all parties are on board and supportive of the changes ahead. In conclusion, pilot program implementation is a significant step in making your automation efforts successful and sustainable.
Performance Metrics Monitoring
Monitoring performance metrics during the pilot phase is essential for guaranteeing your automated processes function as intended. By focusing on key indicators like transaction processing speed, error rates, and system uptime, you can gain valuable insights into how well your automation is performing.
Regular monitoring allows you to identify issues early, making it easier to implement adjustments before rolling out the system on a larger scale. This proactive approach helps reduce operational downtime and enhances overall efficiency.
Establishing KPIs specific to your automation initiatives, such as employee adoption rates and performance improvements, provides quantitative evidence of success. These metrics not only track the performance of automated processes but also serve as benchmarks for future assessments.
Continuous data analysis after implementation can reveal trends that inform enhancements and guarantee sustained operational efficiency.
Utilizing real-time monitoring tools enhances visibility into your automated processes. This level of oversight enables you to promptly manage any anomalies or dips in performance, maintaining a smooth operation.
Monitoring and Measuring Success
Successful automation changes hinge on effectively monitoring and measuring key performance indicators (KPIs). To guarantee you're on the right track, establish KPIs such as employee adoption rates and reductions in operational downtime. Regular check-ins and surveys can help you gather valuable feedback from employees and managers regarding automated processes, driving continuous improvements.
Here's a quick overview of essential metrics to take into account:
KPI | Measurement Method | Purpose |
---|---|---|
Employee Adoption Rate | Surveys and Analytics | Evaluating user engagement |
Operational Downtime | Time Tracking | Evaluating system reliability |
Error Rate Reduction | Performance Logs | Identifying workflow issues |
Flexibility During Transitions
Flexibility during shifts is key to successfully implementing automation in your organization.
By adopting adaptive strategies and providing continuous support, you can navigate the unexpected challenges that arise.
Engaging your team in the process won't only foster acceptance but also enhance overall efficiency.
Adaptive Strategies for Change
Embracing adaptability during changes can make a significant difference in how organizations implement automation. When you foster flexibility during shifts, you'll find that the ability to adjust strategies in real-time leads to enhanced productivity. In fact, 70% of businesses that embrace adaptability report improved performance.
Establishing a dedicated support team is vital for resolving challenges quickly, maintaining employee confidence, and minimizing downtime. Implementing pilot programs before full-scale automation allows you to identify potential issues early, paving the way for smoother shifts.
Regular check-ins and feedback loops with employees promote a culture of adaptability, enhancing employee engagement and satisfaction post-shift.
An agile approach to change management is essential. It gives you the ability to pivot strategies when unexpected challenges arise, ensuring that your automation initiatives align with your evolving business goals.
Continuous Support and Guidance
Continuous support during automation shifts is essential for keeping employees engaged and productive. By addressing employee challenges with flexibility, you create an environment where adaptability thrives. This ongoing assistance can greatly enhance the effectiveness of automation changes, leading to smoother adoption of new systems.
Here are some key components of effective continuous support:
- Regular check-ins: Maintain open lines of communication to identify concerns and adjust strategies.
- Ongoing training: Equip your team with the resources they need to navigate new technologies confidently.
- Feedback mechanisms: Encourage employees to share their experiences, fostering a culture of improvement.
- Dedicated helpdesks: Provide quick resolutions to issues, ensuring minimal disruption.
- A culture of adaptability: Make your staff feel valued and involved in the change process.
Ongoing Support and Resources
Moving to automated systems can feel overwhelming, but having reliable ongoing support and resources makes all the difference. Establishing a dedicated helpdesk or support team can greatly boost your confidence as you adapt to new automated systems. They'll provide quick resolutions to challenges you might face during the changeover.
To enhance employee experiences, implement continuous feedback mechanisms like surveys and regular check-ins. These tools are fundamental for gauging how well the automation process is working and pinpointing areas for improvement. Ongoing training sessions and resources will keep you updated on new features and best practices, ensuring you feel supported every step of the way.
Fostering a culture of adaptability is essential. When you embrace changes, it facilitates a smoother changeover and minimizes resistance to new technologies.
Additionally, utilizing performance metrics will allow your organization to monitor the effectiveness of automation. This data is critical for making informed adjustments and optimizing workflows continuously.
Future Trends in Automation
As you look to the future, automation is poised to evolve dramatically, driven by advancements in AI and machine learning. These technologies will enable smarter, adaptive systems that learn from data and improve over time.
You'll notice the rise of remote and hybrid work environments, which necessitate automation tools that enhance collaboration and productivity among distributed teams.
Key trends shaping the future of automation include:
- Enhanced data analytics for real-time insights.
- Agile methodologies that allow quick adaptations and iterative improvements.
- Increased focus on employee well-being, guaranteeing a smooth shift to new workflows.
- Tools that foster collaboration across diverse teams.
- Advances in operational efficiency, allowing you to do more with less.
These trends not only transform how organizations operate but also create a more supportive environment for you and your colleagues.
Emphasizing employee well-being during automation shifts guarantees that you feel valued and supported.
As automation continues to evolve, the integration of these elements will ultimately lead to a more productive workplace where you can thrive and contribute effectively.
Embracing these changes will prepare you for a more dynamic and fulfilling future in the workplace.
Frequently Asked Questions
How Do I Make My Transitions Smoother?
To make your changes smoother, focus on clear objectives and timelines. Engage your team early, communicate openly, and consider pilot programs. Continuous monitoring and support can help you address issues promptly and enhance overall efficiency.
How Do You Use Transitions to Make Your Work Flow Smoother?
To make your workflow smoother, focus on establishing clear protocols and communication. Regularly assess your processes and encourage team feedback. This engagement fosters collaboration and helps you adapt to changes effectively, enhancing overall efficiency.
Conclusion
As you navigate the complexities of changes, remember that automation isn't just a tool—it's your ally. By planning meticulously and engaging your team, you're setting the stage for success. But what happens if you encounter unexpected challenges? The key lies in your ability to adapt and monitor your processes. Stay vigilant, for the future of automation holds surprises that could redefine your strategies. Embrace the journey, and watch as smooth changes transform into remarkable opportunities.
-
Vetted6 months ago
10 Best Laptops for Music Production in FL Studio: Top Picks for Beat Makers
-
Music Production6 months ago
Maria Von Trapp’s Legacy & The Sound of Music
-
Music Production6 months ago
Christopher Plummer: Legendary Actor’s Legacy
-
Vetted6 months ago
15 Best Music Production Blogs Every Music Producer Should Follow
-
Vetted6 months ago
15 Best Laptops for Music Production Under $300: Top Budget-Friendly Options
-
Music Production6 months ago
Find Do-Re-Mi Picnic Meadow Directions Here!
-
Music Production5 months ago
How to Work in Music Production: Start Your Career Today!
-
Music Production6 months ago
Exploring Heather Menzies: Career & Legacy