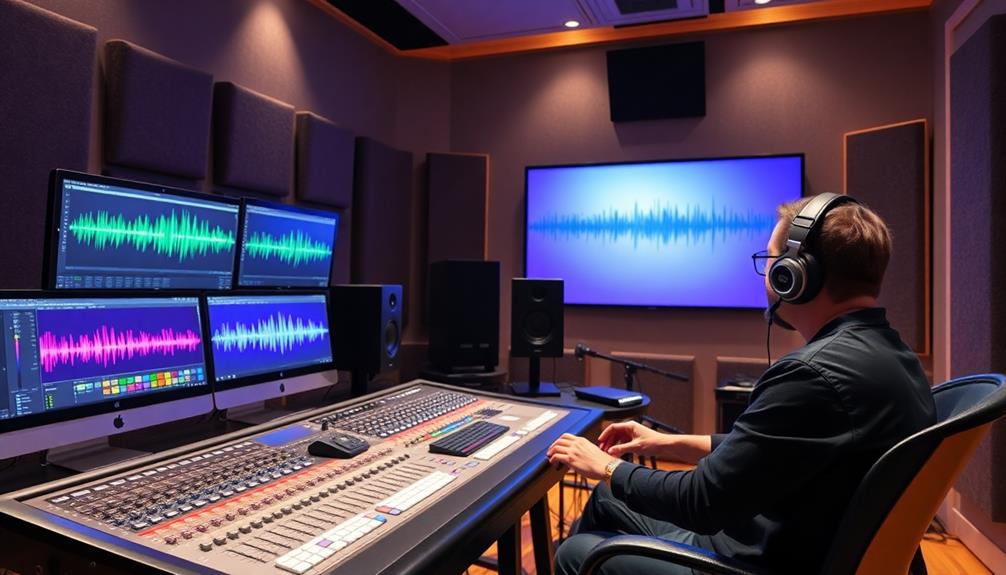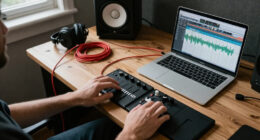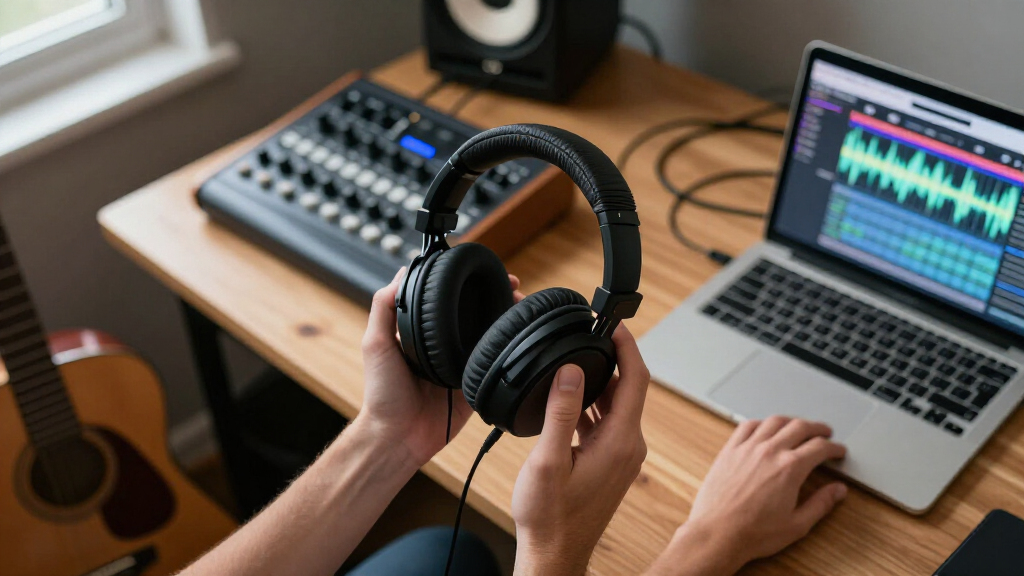

Set up your wireless studio headphones to play audio from a computer or compatible audio interface, then check the connection and monitoring delay. This guide is for beginners who want to listen while recording, editing, or mixing. Allow about 15-30 minutes; the exact setup depends on whether your headphones use Bluetooth or a dedicated wireless transmitter.

Get audio and creator gear delivered free with Prime
- Fast, free delivery on millions of items
- Prime Video, Amazon Music and more included
- Member-only deals all year

OneOdio Studio Max 2 Wireless DJ Headphones
- ✔ Latency: 9 ms
- ✔ Wireless modes: 2.4 GHz and Bluetooth 6.0
- ✔ Audio codec: LDAC

Audio-Technica ATH-M50xBT2 Wireless Headphones, Black
- ✔ Drivers: 45 mm
- ✔ Amplifier: Dedicated amplifier
- ✔ Battery life: Up to 50 hours
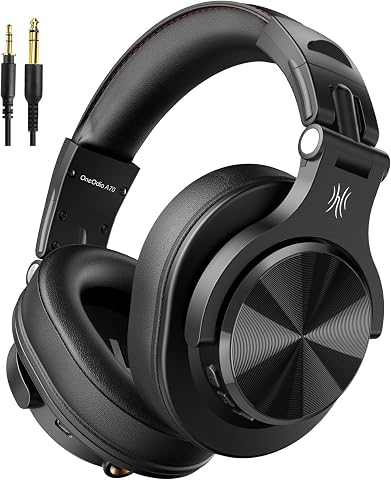
OneOdio A70 Bluetooth Over-Ear Headphones
- ✔ Wireless playtime: Up to 72 hours
- ✔ Drivers: 40 mm neodymium
- ✔ Connectivity: Bluetooth and wired
Difficulty: Beginner | Time: 15-30 minutes
What You’ll Need
Tools & Materials:
- Wireless studio headphones and their charging cable
- Computer, phone, or audio interface with a compatible output
- Bluetooth connection or the headphones’ wireless transmitter and required cable
- Headphone or audio software settings access
Knowledge:
- Basic ability to select an audio device in your computer’s sound settings
- Ability to identify the headphone model’s pairing or transmitter controls
Check the headphone manual for supported connection types and any model-specific pairing steps. Charge the headphones before setup. Bluetooth can introduce noticeable delay, especially during recording or playing instruments; a manufacturer’s dedicated transmitter may provide lower latency, but only if it is compatible with your headphones and source.
OneOdio Studio Max 2 Wireless DJ Headphones
The Studio Max 2 is the most purpose-built choice here for someone who wants wireless freedom during editing or monitoring without ignoring delay. Its stated 9 ms latency and 2.4 GHz mode give it a clear role that the A70 and ATH-M50xBT2 do not claim in the supplied specifications. Bluetooth 6.0 and LDAC add another listening route, while the 45 mm drivers and listed 20 Hz–40 kHz response cover the product’s broad audio-use pitch. Those figures alone do not establish neutral tuning, so we would still check important mix decisions on a trusted wired reference.Connection flexibility strengthens the case: the Studio Max 2 includes both 3.5 mm and 6.35 mm jacks, making it less dependent on wireless playback and easier to accommodate studio gear. The A70 also includes useful wired cables, but it does not list a low-latency wireless mode; the ATH-M50xBT2 brings a dedicated amplifier and two-device pairing, but is positioned more naturally for listening and calls. The Studio Max 2’s stated up to 120 hours is the longest runtime in this group, with a claimed five-minute charge providing up to nine hours. Those are maximum claims, so real use may differ. Pick it for flexible monitoring and long sessions; skip it if you want independently verified sound neutrality or a smaller everyday headset.
Pros:
- Stated 9 ms latency supports responsive monitoring and editing workflows.
- 2.4 GHz and Bluetooth 6.0 provide distinct wireless connection options.
- Both 3.5 mm and 6.35 mm jacks support a range of wired studio setups.
- Up to 120 hours of claimed playback and rapid-charge support reduce charging interruptions.
Cons:
- Battery and fast-charge figures are maximum claims, not guaranteed session lengths.
- The provided details do not establish neutral tuning or include customer review information.
- Its studio and DJ focus may be more than needed for casual portable listening.
Best for: Home-studio users, editors, and DJ-oriented listeners who want a stated low-latency wireless mode plus common wired connections.
Not ideal for: Buyers who need confirmed neutral reference tuning, independently documented battery performance, or a compact foldable design.
Bottom line: For wireless studio work in this group, the Studio Max 2 makes the strongest case through its stated low latency and broad wired and wireless connections.
“For wireless studio work in this group, the Studio Max 2 makes the strongest case through its stated low latency and broad wired and wireless connections.”
Audio-Technica ATH-M50xBT2 Wireless Headphones, Black
The ATH-M50xBT2 is the more balanced pick for people whose studio headphones also need to handle calls and daily device switching. Its 45 mm drivers and dedicated amplifier are described as delivering clear sound with deep, accurate bass, while dual beamforming microphones target clearer voice pickup. Multipoint Bluetooth pairing is particularly useful if we move between a computer and phone without wanting to disconnect and reconnect each time. The A70 has a built-in microphone, but the ATH-M50xBT2 offers more explicit call-focused microphone details.Against the Studio Max 2, this Audio-Technica option gives up the stated 9 ms latency and the listed dual-size wired jacks, so it is less compelling when wireless monitoring response and studio connector flexibility are the deciding factors. It also has the shortest stated battery maximum here at up to 50 hours, though a 10-minute charge is claimed to provide up to three hours of use. That remains ample for many routines, but the A70’s 72-hour claim and Studio Max 2’s 120-hour claim are longer. The supplied details do not specify the wired connection options or latency, so buyers who depend on those should verify them before choosing. This model makes the most sense when Bluetooth convenience, listening, and calls matter as much as studio use.
Pros:
- 45 mm drivers and a dedicated amplifier are specified for clear sound with deep bass.
- Multipoint Bluetooth pairing connects to two devices at once.
- Dual beamforming microphones are designed to support clearer calls.
- A 10-minute charge is claimed to provide up to three hours of use.
Cons:
- Its stated battery maximum is shorter than those of both OneOdio models.
- The supplied details do not state wireless latency or wired connector options.
- Its call and multipoint strengths do not address every studio-monitoring requirement.
Best for: Listeners who want studio-oriented headphones for Bluetooth playback, calls, and switching between two devices.
Not ideal for: Users who specifically need a stated low-latency wireless mode, listed 6.35 mm studio connectivity, or the longest runtime.
Bottom line: Choose the ATH-M50xBT2 when calls and multipoint Bluetooth matter more than the Studio Max 2’s stated low latency or the A70’s longer runtime.
“Choose the ATH-M50xBT2 when calls and multipoint Bluetooth matter more than the Studio Max 2’s stated low latency or the A70’s longer runtime.”
OneOdio A70 Bluetooth Over-Ear Headphones
The OneOdio A70 is the straightforward choice for listeners who want one foldable pair for wireless playback and wired use. Its up to 72 hours of stated playtime falls between the Studio Max 2 and ATH-M50xBT2, and the option to listen over a cable without battery power is a useful fallback for long editing sessions or an empty battery. It comes with both a 3.5 mm-to-6.35 mm cable and a 3.5 mm-to-3.5 mm cable, which gives it a practical connection advantage over the ATH-M50xBT2 details provided here. The 40 mm neodymium drivers are smaller than the two 45 mm designs, but driver size by itself does not determine sound quality.Compared with the Studio Max 2, the A70 does not list a dedicated low-latency wireless mode, LDAC, or 2.4 GHz connection, so we would rank it lower for live monitoring where delay matters. It is also less specialized than the ATH-M50xBT2 for calls: the A70 has a built-in HD microphone with noise reduction, but only the Audio-Technica’s details identify dual beamforming microphones and multipoint pairing. Its foldable, rotatable design suits travel and storage, while soft memory-cotton padding is intended for extended wear. There is no active noise cancellation listed, and sharing audio with additional headphones requires a wired connection. Choose the A70 for flexible everyday use and cable-based studio connection; skip it if wireless monitoring performance is your main criterion.
Pros:
- Up to 72 hours of stated wireless playtime.
- Wired listening works without battery power.
- Includes both 3.5 mm-to-6.35 mm and 3.5 mm-to-3.5 mm cables.
- Foldable earcups and soft padding support storage and everyday wear.
Cons:
- No active noise cancellation is specified.
- Audio sharing with additional headphones requires a wired connection.
- No dedicated low-latency wireless mode is listed, unlike the Studio Max 2.
Best for: Beginners and mobile listeners who want foldable headphones with long claimed battery life and included wired connections.
Not ideal for: Producers who need a stated low-latency wireless mode, or commuters specifically seeking active noise cancellation.
Bottom line: The A70 is the practical foldable pick when wired fallback and everyday flexibility matter more than specialized low-latency wireless monitoring.
“The A70 is the practical foldable pick when wired fallback and everyday flexibility matter more than specialized low-latency wireless monitoring.”
As an Amazon Associate we earn from qualifying purchases.
Before You Start
Turn down the computer, interface, and headphone volume before connecting. If you plan to record or play in real time, check whether your headphones support a low-latency wireless mode. Do not assume that a Bluetooth connection will be suitable for live monitoring: audio and video may be delayed, and some systems switch to a lower-quality microphone mode during calls. Keep wired headphones available as a backup if timing matters.
Use only a transmitter designed for your headphone model or explicitly listed as compatible. A USB Bluetooth adapter may not support the codecs or features your headphones need. If you are using an audio interface, confirm that its software or operating system can send playback to the wireless device; some recording applications work best with the interface as the sole audio device.
Step-by-Step Instructions
Step 1: Charge and inspect the headphones
Charge the headphones according to the manual, then check the ear pads, controls, and charging port. Remove any shipping film from the charging contacts or transmitter. Locate the power, pairing, volume, and connection-mode controls before you begin.
Tip: If the headphones have both Bluetooth and a dedicated wireless mode, identify the control or menu setting for each. The connection modes may not be interchangeable.
Check: The headphones power on without a low-battery warning, and you can identify how to start pairing or connect the transmitter.
Step 2: Choose a connection method
Choose Bluetooth for general listening or when your source and headphones support a compatible Bluetooth connection. For recording, playing an instrument, or monitoring timing-sensitive audio, choose the manufacturer’s compatible low-latency transmitter if available. Check the manual to confirm that your source has the required port, such as USB or a headphone output.
Tip: A dedicated transmitter may need to be paired with the headphones separately. Follow the model’s instructions rather than treating it as a standard Bluetooth adapter.
Check: You have a connection method supported by both the source and the headphones, with the cables or transmitter ready.
Step 3: Connect the headphones
For Bluetooth, open the source device’s Bluetooth settings, put the headphones into pairing mode, and select the headphone name when it appears. For a dedicated transmitter, connect it to the source using the specified port, power it if required, and pair it with the headphones using the instructions for both devices. Wait for the connection indicator or voice prompt before playing audio.
Tip: If the headphone name appears more than once, select the entry identified for audio playback, not one marked only for calls or a companion app.
Check: The source shows the headphones or transmitter as connected, and the headphones give the expected connection indication.
Step 4: Select the headphones as the playback device
Open the computer’s sound settings and select the connected headphones or transmitter as the output device. If you are using a digital audio workstation, open its audio or device settings and select the same output there. Choose the correct sample rate and device options offered by the software, and apply the changes.
Tip: Some recording programs need to be restarted after you change the system audio device. If the headphones connect but the program stays silent, check the program’s output selection too.
Check: The operating system and the audio application both show the intended output device, and their meters respond when audio plays.
Step 5: Set a safe listening level
Start playback with the source and headphone volume low. Raise the source level gradually, then adjust the headphone controls until the sound is clear and comfortable. If your interface has a separate monitor level, increase it in small increments.
Tip: Avoid raising volume to compensate for a weak or distorted signal. Check the selected output and source level first; extended loud listening can harm hearing.
Check: Audio is clear at a comfortable level, with no crackling, clipping, or sudden volume jumps.
Step 6: Check delay and audio quality
Play a familiar song or a short test clip. For live monitoring, tap along with the playback or record a short test and compare the sound with the action. If the audio noticeably lags, switch to the compatible low-latency transmitter or use a wired connection. For editing or mixing, compare the headphones with another reliable playback source before making critical decisions.
Tip: Bluetooth delay varies by device, software, and codec. A low-latency setting can help when supported at both ends, but it may not remove all delay.
Check: Playback is stable and clear. For timing-sensitive work, the delay is low enough for your task; if it is not, use a wired monitoring path.
Step 7: Save the setup and test a real session
Save any audio-device settings or presets in your recording software. Play a short section of the project or make a brief test recording, then listen for dropouts, delay, and unwanted microphone or call-mode changes. Confirm that the headphones reconnect after a brief pause or power cycle if you expect to use them regularly.
Tip: Keep the transmitter within its recommended range and away from obstructions. Battery level, radio interference, and distance can affect stability.
Check: Your intended application sends audio to the headphones consistently, and the test sounds and timing meet the needs of your session.
Common Mistakes to Avoid
- Using Bluetooth for live recording or instrument monitoring without checking delay. — Test timing before the session. Use a compatible low-latency transmitter or wired headphones if you hear an echo or lag.
- Pairing the headphones but leaving the computer or audio application on another output. — Select the headphones or transmitter in both system sound settings and the recording software.
- Turning the volume up quickly when playback is quiet. — Check the selected output and software level first, then raise volume gradually from a low starting point.
- Assuming any wireless transmitter will work with the headphones. — Confirm model compatibility and connection requirements in the headphone and transmitter manuals before buying or connecting an adapter.
Troubleshooting
Problem: The headphones do not appear in Bluetooth settings.
Solution:
Charge and power on the headphones, then put them into pairing mode using the model’s instructions. Disconnect them from another device if they connect automatically. Keep them close to the source and refresh the device list. If they still do not appear, restart Bluetooth on the source and consult the manual for a reset procedure.
Problem: The headphones connect, but no sound plays.
Solution:
Select the headphones as the system output and check the audio application’s separate output setting. Confirm that playback is not muted, raise the source level slightly, and reconnect the headphones. If you use a transmitter, check its power, cable, input selection, and pairing indicator.
Problem: The audio cuts out or crackles.
Solution:
Move closer to the source or transmitter, reduce obstructions, and move away from busy wireless equipment if possible. Charge the headphones and transmitter, then reconnect. Try another supported output or a wired connection to determine whether the issue comes from the wireless link or the source.
Problem: Audio arrives late during recording or playback.
Solution:
Check for a low-latency mode supported by both the headphones and transmitter. Close call or conferencing apps that may change the Bluetooth profile, and test again. If delay remains, monitor through the audio interface’s wired headphone output or use wired headphones for the session.
What Success Looks Like
The headphones connect to the intended source, the operating system and audio application send playback to them, and sound remains clear and stable at a comfortable level. For recording or instrument practice, a short test confirms that timing is acceptable; if wireless delay remains audible, use a wired monitoring connection.
Next Steps
Save the working audio-device settings and note which connection mode you used. Recharge the headphones and transmitter after long sessions, and check their connection before each recording. For mixing decisions, compare important details on another trusted playback system because wireless headphones, like all headphones, can color what you hear.
Frequently Asked Questions
Can I use Bluetooth studio headphones for recording?
You can use them to listen to playback, but Bluetooth delay may make live performance or monitoring uncomfortable. Test the timing first and use a compatible low-latency transmitter or wired headphones if the lag affects your work.
Do wireless studio headphones work with an audio interface?
They can work if the interface, computer, or transmitter supports the required connection. Many interfaces provide a wired headphone output but do not send audio directly to Bluetooth headphones. Check your interface software and headphone instructions for the supported route.
Why does sound quality change when I use the headphone microphone?
Some Bluetooth systems switch to a call-focused mode when the microphone is active. Close conferencing applications or choose a separate microphone and headphone output if your computer allows it. A dedicated transmitter may also avoid this behavior.
Should I mix music on wireless headphones?
You can edit or make an initial mix on them, but wireless processing and headphone frequency response can affect what you hear. Check the mix on another trusted playback system before final decisions.
Halloween Picks
halloween
As an affiliate, we earn on qualifying purchases.