
To find the perfect low-cut point, start by listening carefully to each instrument and identify where muddiness or masking occurs. Use a high-pass filter gradually, typically between 80-120 Hz for vocals and guitars, and lower for bass or kick drums. Avoid cutting too aggressively to keep warmth and body in the sound. If you’re interested in detailed tips to fine-tune your cuts and achieve clarity, explore further insights here.
Key Takeaways
- Start with gentle high-pass filters around 80–120 Hz for vocals and guitars to remove rumble without thinning sound.
- Use narrower bandwidths and listen critically to avoid removing essential low-end warmth.
- For bass instruments, set cutoff around 30–80 Hz to preserve fundamental frequencies.
- Gradually adjust the cutoff to reduce muddiness, ensuring clarity without sacrificing natural instrument tone.
- Avoid steep slopes or excessive resonance that can cause phase issues and unnatural thinning.
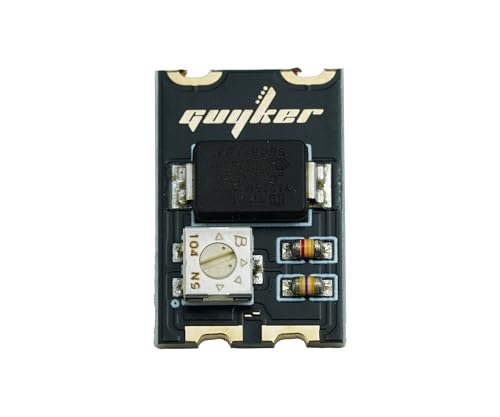
Guyker Integrated Chip High-Pass Filter (High-Frequency Compensation) Module (HPF-G3K)
- High-Frequency Compensation Module: Integrated high-pass filter for guitars
- Compact Design: Minimal space for circuit integration
- Reliable Performance: Self-resetting, high voltage resistance, low noise
As an affiliate, we earn on qualifying purchases.
As an affiliate, we earn on qualifying purchases.
Understanding the Purpose of High-Pass Filters in Mixing

Have you ever wondered why high-pass filters are a staple in mixing? They help reduce unwanted low-frequency sounds that can muddy your mix. By cutting out these frequencies, you prevent frequency masking, where bass or kick drums overpower other elements. This cleaning-up allows each instrument’s harmonic content to shine clearly without competing for space. High-pass filters also improve clarity by removing rumble and sub-bass that aren’t essential to the instrument’s character. Using these filters strategically guarantees your mix sounds balanced and focused. They’re especially useful on vocals, guitars, and overheads, where excessive low-end can clutter the overall sound. Understanding their purpose helps you create a cleaner, more professional mix by controlling low-frequency overlap. Additionally, being aware of credit card insights can inform how you manage your financial resources to maintain your studio equipment.
Factors Influencing High-Pass Filter Settings for Different Instruments

Choosing the right high-pass filter settings depends on the specific instrument and its role in the mix. Factors like frequency masking and phase shift influence your decisions. For example, instruments with overlapping frequency ranges can cause masking, so filtering helps clarify each element. Phase shift can alter how sounds interact, especially when filters are applied at different points. To guide you, consider this table:
| Instrument | Typical Cutoff Range | Key Considerations |
|---|---|---|
| Vocals | 80–120 Hz | Avoid phase issues, preserve warmth |
| Bass | 30–80 Hz | Prevent frequency masking with kick |
| Guitars | 100–150 Hz | Keep clarity without thinness |
| Cymbals | 300–500 Hz | Remove muddiness, avoid phase shifts |
Adjust filters carefully to balance clarity without introducing unwanted phase issues or masking. Additionally, understanding frequency masking helps in setting filters precisely to enhance each instrument’s presence without interference.
Techniques for Identifying the Right Low-Cut Point

To identify the right low-cut point, start by listening carefully to how each instrument interacts within the mix. Focus on frequency masking, where overlapping sounds create muddiness, indicating where cutting low frequencies can clarify the mix. Use narrow filter resonance to probe different cutoff points; increasing resonance slightly helps reveal problematic low-end buildup. When resonance causes a ringing or exaggerated sound, it signals that you’re nearing the ideal cutoff. Avoid cutting too aggressively, as it can thin out the instrument, but also prevent letting low-end mud dominate. Trust your ears, and adjust gradually, seeking a balance where the instrument retains fullness without masking others. This approach ensures your low-cut filter enhances clarity without sacrificing natural tone. Additionally, understanding the importance of frequency balancing can help you achieve a more polished and professional sound.
Common Mistakes to Avoid When Setting High-Pass Filters

One common mistake when setting high-pass filters is cutting too much of the low end, which can thin out the instrument and make the mix sound unnatural. Overly aggressive cuts may introduce phase cancellation, causing certain frequencies to cancel each other out and reducing overall clarity. Additionally, high filter resonance can lead to unwanted peaks near the cutoff point, creating a harsh or ringing sound. To avoid these issues, you should listen carefully after setting the filter and adjust gradually, ensuring the low end remains full without muddying the mix. Be cautious of overly steep slopes, which increase the risk of phase issues and resonance problems. Striking a balance helps maintain a natural sound while removing unnecessary low-frequency rumble. Considering insights from private placement equity markets, it’s important to avoid overly aggressive filtering that could disrupt the natural balance of your mix.
Practical Tips for Achieving a Balanced and Clear Mix

Achieving a balanced and clear mix starts with careful frequency management and thoughtful use of filtering. To prevent frequency masking, prioritize removing unnecessary low-end content from non-bass instruments, freeing up space for the core elements. Use high-pass filters strategically to clean up muddiness without sacrificing warmth or harmonic balance. Listen critically to how each track interacts with others; if sounds clash or a mix feels congested, adjust the filters accordingly. Trust your ears over presets—sometimes subtle changes make a significant difference. Regularly solo and compare tracks to ensure clarity. Remember, the goal is to achieve clarity without stripping essential harmonics. Proper filtering helps maintain harmonic balance across your mix, making each element sit well together and enhancing overall clarity. Additionally, understanding the role of room acoustics and how it influences your monitoring environment can greatly improve your filtering decisions and overall mix clarity.
Frequently Asked Questions
How Do High-Pass Filters Affect the Overall Mix Clarity?
High-pass filters improve your mix clarity by removing unnecessary low-end rumble, which helps enhance EQ balance. They reduce frequency masking, allowing other instruments to stand out more clearly. When you cut unwanted bass, your mix sounds cleaner and more focused. Be careful not to cut too much, or you risk losing warmth. Properly setting high-pass filters guarantees each element has its space, creating a transparent, well-defined mix.
What Are the Signs of Over-Cutting With High-Pass Filters?
Imagine you’re in the age of vinyl, and over-cutting high-pass filters is like scratching your record. You might notice signs of over-cutting, such as a hollow or thin sound, which reduces fullness. It can cause frequency masking, where important elements get buried, and phase issues that make your mix sound hollow or disconnected. Keep an ear out for these signs to avoid sacrificing clarity and warmth in your mix.
How Do Room Acoustics Influence Low-Cut Decisions?
Room acoustics, like resonance and sound absorption, heavily influence your low-cut decisions. If your space has strong resonance, you might need to cut more low frequencies to prevent muddiness. Conversely, in a sound-absorbing room, less cutting is necessary to retain warmth and fullness. Always listen carefully, adjusting your high-pass filters to balance clarity and natural sound, considering how room acoustics affect your mix or playback.
Can High-Pass Filters Be Automated During a Track?
You can automate high-pass filters during a track using automation techniques in your DAW. This allows you to dynamically adjust filter implementation, opening or closing the filter at precise moments. Automation helps you create more interesting and evolving soundscapes, ensuring the filter responds to the track’s energy and arrangement. With this approach, you maintain control over the filter’s effect while seamlessly integrating it into your mix.
What’s the Difference Between High-Pass and Low-Pass Filters?
Think of a high-pass filter as a gate that lets the treble through like sunlight shining through a window, while a low-pass filter keeps out the bass, like a wall blocking noise. The key difference lies in their cutoff points; high-pass filters remove low frequencies, and low-pass filters cut high ones. Adjusting filter slope and resonance shapes how sharply these filters affect your sound, giving you more control over your mix.
Conclusion
By carefully setting your high-pass filters, you create space and clarity in your mix. For instance, in a rock track, cutting unnecessary low frequencies from guitars and vocals prevents muddiness, allowing drums and bass to shine. Remember, the key is to listen critically and avoid over-cutting, which can thin out your sound. With practice, you’ll develop an ear for the perfect low-cut point, ensuring a balanced, professional mix every time.