Connect with us

Production Tips

Essential Mixing Tips for Trap Beats

Navigate the world of trap mixing with essential tips that will elevate your beats; discover the secrets behind that iconic sound.

Published

on

trap beats mixing essentials

To mix trap beats effectively, start by blending your kick and 808 for a punchy, deep sound. Use saturation for warmth and side-chain compression to allow the kick to cut through. Enhance snares with compression and a little reverb for thickness. Manage your frequency by cutting below 30Hz on the 808 and using high-pass filters on other tracks. Set levels to maintain headroom, ideally around -10dB. Experiment with panning and stereo widening to create depth. Stick with these strategies, and you'll lock in that signature trap sound; there's so much more to explore on this journey.

Key Takeaways

  • Blend kick and 808 using side-chain compression to maintain clarity and punch in the low end.
  • Apply aggressive EQ to enhance trap snares, boosting high frequencies for brightness without overcrowding.
  • Utilize a drum bus for cohesive processing, applying compression and clipping for added energy and impact.
  • Monitor frequency management by cutting low frequencies on non-bass instruments to prevent muddiness in the mix.
  • Experiment with panning and stereo imaging to enhance clarity and spatial quality while avoiding phase cancellation issues.

Mixing Kick and 808
kick drum and 808

Mixing kick and 808 is crucial for achieving that signature trap sound. To create a balanced sound, you need to blend the kick drum's punch with the 808's deep bass.

Start by using a saturation plugin to enhance the 808's harmonics, adding warmth without overpowering the kick. This way, the low-end presence of the kick is emphasized while the 808 fills in the bass frequencies.

Next, apply side-chain compression. This technique allows the kick to control the dynamics of the 808, guaranteeing that the kick hits punchily while the 808 supports the low-end.

When adjusting EQ, cut the low frequencies of the 808 below 30Hz to avoid muddiness, creating space for the kick around 60Hz.

For width, use a single mono 808 track with a duplicated stereo version, slightly detuning the duplicates for added spatial effects. Always monitor in mono to prevent phase issues.

Advertisement

Enhancing Trap Snares

improving trap music production

Crafting the perfect trap snare is all about achieving a punchy and impactful sound that cuts through the mix. To enhance your trap snares, start by applying an 1176 compressor. This will help distort transients and boost output harmonics, resulting in a punchier sound that commands attention.

Next, incorporate a short reverb effect to thicken the snare's presence. This adds space and depth without overwhelming your mix sound. You can also experiment with sample delay techniques to position snares in the stereo field. This technique creates a wider and more engaging soundstage, making your snares feel more dynamic.

Don't forget about EQ! Aggressively boost high frequencies around 5-10kHz to add brightness and clarity, allowing your snares to stand out prominently.

Layering multiple snare samples is another effective strategy; make sure that each layer complements the others regarding frequency and dynamics.

Drum Bus Techniques
percussion transport methodology insights

When you want to achieve a cohesive sound for your trap beats, utilizing a drum bus is essential. A drum bus allows you to process all your drum elements together, enhancing the overall punch and clarity of your mix.

Start by applying compression to the drum bus, which helps to tighten the sound and gives it more impact. Consider using M/S (Mid/Side) compression; this technique compresses the mid frequencies more than the sides, resulting in stereo expansion and a wider soundstage.

You can also employ a clipper on the drum bus to add some brightness and white noise, contributing to a punchier, more energetic sound. To add depth, applying a short reverb can thicken your snare and hi-hat sounds, creating a more dynamic rhythm that engages listeners.

Advertisement

Regularly reference your mix before and after processing on the drum bus to highlight the significant improvements in clarity and impact. This practice guarantees you're making intentional choices that elevate your trap beats, keeping everything tight and polished.

With these techniques, you'll have a powerful foundation for your tracks.

Instrument Bus Processing

data transfer and management

When you're mixing trap beats, instrument bus processing is essential for achieving a polished sound.

You can enhance clarity and presence by using upward compression techniques like MV2, while harmonic saturation tools like PSP Saturator can enrich your mix.

Don't forget to add character with modulation effects from plugins like Vinyl Strip to keep your sound engaging.

Upward Compression Techniques

In the domain of mixing trap beats, upward compression techniques can notably elevate your instrument bus processing. By utilizing upward compression, you can enhance the presence of quieter instrument details without squashing the dynamics too much.

Advertisement

Here are three essential skills to keep in mind when applying this technique:

  1. Choose Your Ratio Wisely: Aim for a subtle ratio between 2:1 to 4:1 to maintain the natural dynamics while enhancing clarity.
  2. Monitor Your Mix: Regularly check your mix after applying upward compression to make sure it contributes positively and doesn't lead to muddiness.
  3. Reduce Masking Issues: Use upward compression to lift lower-level signals, helping each element occupy its own sonic space more effectively.

Incorporating upward compression on your instrument bus can create a fuller and more cohesive sound. By focusing on these elements, you can greatly improve your mix's overall quality and clarity.

Harmonic Saturation Use

Upward compression can set the stage for adding harmonic saturation, which enriches the sound of your instrument bus. This technique helps bring warmth and richness, enhancing the presence of quieter details in your mix. By utilizing plugins like PSP Saturator, you can introduce cohesive harmonics while avoiding aliasing, ensuring a smooth blend of sounds.

Here's a quick overview of the harmonic saturation process:

Step Description
1. Upward Compression Use plugins like MV2 to reveal subtle nuances.
2. Choose Plugins Select harmonic saturation plugins for warmth.
3. Adjust Drive Monitor and tweak drive levels for balance.
4. Maintain Headroom Apply saturation judiciously to prevent distortion.

Clarity and Modulation

Achieving clarity in your instrument bus processing is essential for a polished trap beat. You want each element to shine without getting lost in the mix. Here are three key techniques to enhance clarity and modulation:

  1. Upward Compression: Use the MV2 upward compressor on your instrument bus. This brings quieter details forward, enhancing the overall clarity of your mix.
  2. Harmonic Enrichment: Implement the PSP Saturator to add cohesive harmonics. This technique avoids aliasing while enriching your sound design, giving your trap beats a fuller texture.
  3. Unique Character: Introduce a Vinyl strip plugin to add LoFi qualities and modulation. This can contribute a distinct character that sets your beats apart.

Always assess your processing choices to maintain balance. Utilize tools like Fresh Air and Gullfoss EQ to reduce masking between elements, ensuring each instrument remains distinguishable.

Regularly check your instrument bus, especially as you add new elements. By focusing on clarity and effective modulation, you'll achieve a more engaging and polished sound in your trap beats.

Advertisement

Don't forget to explore free plugins to expand your options!

Frequency Management

optimizing signal distribution efficiency

Effective frequency management is vital for creating clean and impactful trap beats. Start by cutting frequencies below 250Hz for non-bass instruments; this helps prevent muddiness and creates space for your kick and 808 bassline. Using high-pass filters on duplicate 808 tracks around 160Hz can further reduce low-end overlap, enhancing clarity in your mix.

Regularly check your mix in mono to guarantee the low frequencies, typically below 300Hz, are balanced and free from phase issues. This step is significant, as phase problems can lead to a weak and unfocused sound.

Additionally, applying a low-pass filter to instrument groups can create much-needed space, especially for elements competing with the kick and bass.

Balancing low-end energy with overall mix clarity is critical. Avoid excessively boosting low-end frequencies, as this can clutter your mix and make it sound unprofessional.

Level Setting Strategies

aligning expectations for success

Once you've got your frequency management under control, the next step is to focus on level setting strategies that bring your trap beats to life. Proper level setting guarantees your mix is dynamic while preventing distortion when the track's mastered.

Here are three key strategies to contemplate:

Advertisement
  1. Maintain Headroom: Keep individual track levels below -10dB. This allows for adequate dynamic range and keeps your mix clean.
  2. Target Levels: Use a consistent target level of around -12dB for your samples. This guarantees a balanced mix before adding any processing or effects.
  3. Gain Staging: Regularly assess levels during mixing. Adjust each track properly so that you can add more elements seamlessly without disrupting the existing balance.

Make sure to utilize plugins like Voxengo SPAN to monitor levels and frequency distribution accurately. This will help you maintain a cohesive sound throughout the mix.

Stereo Imaging Techniques
3d audio visualization methods

To create a rich and immersive trap beat, you'll want to focus on enhancing instrument width through effective stereo imaging techniques.

Start by experimenting with panning and carefully placing elements across the stereo field, which helps maintain clarity and avoids any one sound overpowering the mix.

Don't forget to regularly check for phase cancellation issues, especially when you're applying stereo effects, to guarantee your mix translates well across various playback systems.

Enhancing Instrument Width

While creating trap beats, enhancing instrument width can greatly elevate your mix, making it feel more expansive and immersive.

Here are three techniques to help you make the most of stereo widening:

  1. Use Stereo Widening Plugins: These tools can enhance the perceived width of individual instruments, adding depth and richness to your mix. They'll help you make your sounds feel more dynamic.
  2. Experiment with Subtle Delays: Applying slight delay effects on certain instruments creates a sense of space, pushing them further back in the mix and adding dimension.
  3. Implement Mid/Side Processing: This technique lets you control the stereo width of mid and side elements independently, allowing for greater soundstage manipulation.

Remember to regularly check your mix in mono to avoid phase cancellation, ensuring clarity and punch in your final track.

Panning Techniques Overview

With a solid understanding of enhancing instrument width, it's time to explore panning techniques that can further refine your trap beats. Effective panning enhances the stereo image by distributing sounds across the left and right channels. For instance, panning instruments like hi-hats and percussion slightly to one side (10-30% left or right) can add width without introducing phase issues.

Advertisement

When you're working on your mix, regularly check it in mono to verify that all elements remain coherent and don't interfere with each other. This helps you maintain a solid low-end foundation by keeping bass elements, like 808s, centrally panned. Higher frequency instruments can then occupy the stereo field more freely.

Using automation for panning adds dynamic movement to your mix, keeping listener interest alive throughout the track. Here's a quick reference table for panning techniques:

Panning Technique Description
Hi-Hats and Percussion Pan 10-30% left or right
Bass Elements Keep centrally panned
Automation Introduce dynamic movement in panning

Avoiding Phase Cancellation

Phase cancellation can greatly affect your mix, especially in the low frequencies where it often becomes most noticeable.

To guarantee your trap beats have that punchy, spacious mix you're after, here are three tips to keep phase issues at bay:

  1. Monitor in Mono: Regularly check your tracks in mono. This helps you identify any problematic frequencies that may interfere with each other, allowing you to make necessary adjustments.
  2. Layer with Variations: When layering sounds, avoid using identical signals. Slight variations in timing or pitch can considerably reduce phase cancellation effects, keeping your drum busses powerful and clear.
  3. Use Phase EQ: Implement phase EQ techniques to correct any phase issues. This can enhance the clarity of your mix and guarantee that all elements work harmoniously together.

Bass Enhancement Methods

improving low frequency sound

To enhance the impact of your trap beats, focusing on bass enhancement methods is important. Start by employing EQ to cut unnecessary low frequencies below 30Hz from your 808s. This guarantees they add depth without muddiness, allowing the kick and snare to shine through.

Next, consider introducing saturation to your 808s using saturation plugins. This adds warmth and upper harmonics, enhancing their presence in the mix without overpowering other elements.

Advertisement

An essential technique is sidechain compression. By allowing the kick to momentarily reduce the volume of the 808, you create space and emphasize the punch of the kick in your mix. It's critical to monitor headroom levels carefully; make sure that your bass elements, especially the 808s, remain 3-4dB quieter than the kick when soloed. This helps maintain clarity and prevents distortion.

You can also experiment with layering bass sounds to create a fuller and richer texture. Just be sure that these bass elements are cohesive and complement the rhythmic foundation of your track.

Implementing these bass enhancement methods will elevate your trap beats to new heights.

Overall Mixing Workflow
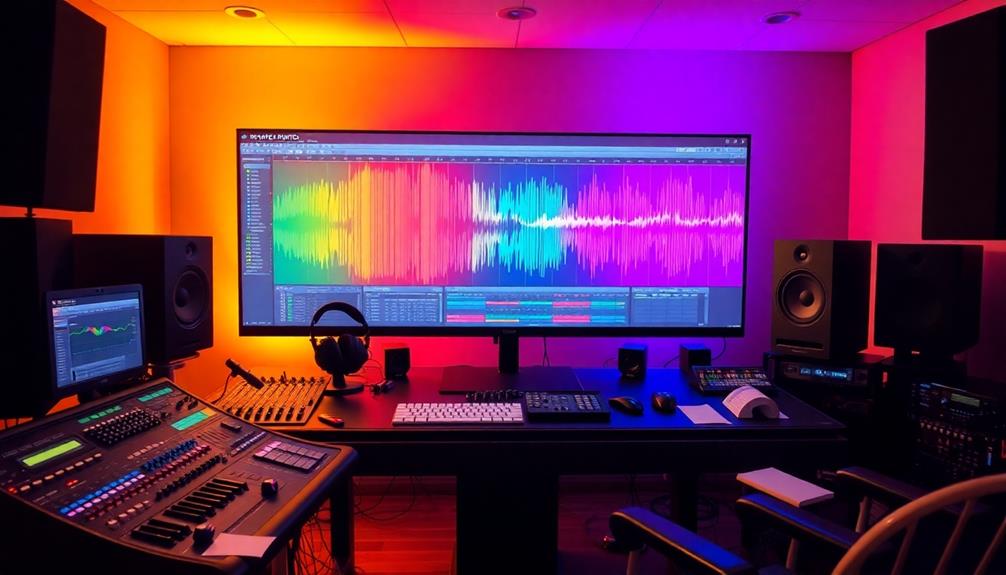
comprehensive audio mixing process

After enhancing the bass in your trap beats, it's time to focus on the overall mixing workflow. This step is essential for creating a polished sound that stands out. Here's a streamlined approach to get you started:

  1. Set Your Levels: Begin by adjusting the levels for each track, keeping them around -10dB. This helps maintain headroom and prevents clipping, allowing for effective dynamic processing later on.
  2. Utilize EQ: Carve out space for each element in your mix. Focus on cutting problematic frequencies and boosting where necessary to enhance clarity and punch in your drums and other instruments.
  3. Apply Compression: Use compression to control the dynamics of individual tracks. This guarantees your overall mix stays consistent and cohesive throughout the arrangement, making every element sit well together.

Don't forget to incorporate stereo imaging techniques as well. Panning and widening effects can enhance the spatial quality of your mix.

Frequently Asked Questions

How Do I Make My Trap Beats Better?

To make your trap beats better, focus on balancing your mix, layering sounds effectively, and using sidechain compression. Don't forget to reference professional tracks and experiment with EQ to enhance clarity and impact.

What Does Every Trap Beat Need?

Every trap beat needs a thunderous heartbeat, echoing with power. You'll want a punchy kick, a distorted 808, crisp snares, and bright hi-hats, all woven together to create a vibrant, engaging sonic tapestry.

Advertisement

What Is the Best BPM for Trap Beats?

The best BPM for trap beats usually falls between 130 and 170. If you settle around 140 BPM, you'll achieve that perfect balance, allowing for energetic hi-hat patterns and heavy basslines that define the genre.

How to Structure a Trap Beat?

To structure a trap beat effectively, you'll want to create distinct sections like intro, verse, and drop. Use dynamic changes and memorable hooks to keep listeners engaged while maintaining energy throughout the track.

Conclusion

As you wrap up your mixing journey, picture your track like a vibrant city at night—each element shining in its own spotlight. By blending your kick and 808, enhancing snares, and mastering frequency management, you've crafted a soundscape that pulses with energy. Trust your ears, keeping levels balanced while letting bass resonate like a heartbeat. With your workflow streamlined, your trap beats will reverberate through the speakers, igniting the dance floor and capturing listeners' hearts.

Advertisement

Production Tips

Layering Instruments for a Fuller Sound

Start mastering the art of layering instruments to create a rich, captivating sound—discover the techniques that can elevate your music to new heights.

Published

on

enhanced sound through layering

Layering instruments effectively transforms your music, creating a fuller sound that captivates listeners. Start by selecting contrasting elements, like bass and synths, to enhance depth and texture. Use EQ and panning to carve out space for each layer, preventing frequency clashes. Techniques like multi-octave layering and dynamic variations bring richness to your sound. Prioritize a strong primary layer while carefully arranging complementary sounds. Don't overlook the use of modulation for added movement and unique textures. Exploring these techniques can elevate your compositions greatly—there's so much more you can achieve with simple tweaks to your approach!

Key Takeaways

  • Layering different sound elements enhances depth and richness, creating a more engaging audio experience.
  • Utilize EQ and panning to avoid frequency clashes, ensuring clarity in the mix.
  • Employ multi-octave layering and detuning to widen the sonic spectrum and add richness.
  • Layering vocals and percussion with dynamic variation enhances emotional depth and impact.
  • Regularly assess frequency content and prioritize a primary layer for cohesive sound.

Understanding Layering Techniques

mastering layering strategies effectively

When it comes to creating a fuller sound in your music, understanding layering techniques is key. Layering sounds involves combining different elements like synths, vocals, and percussion to enrich your audio experience. To achieve effective layering, you'll want to focus on contrasting sound characteristics. For example, blending a detuned synth with a clean lead can enhance the mix's width and depth, making your track more engaging.

Consider using multi-octave layering, where you stack sounds across various octaves. This approach adds a massive sound experience and introduces richness and dimension to your composition.

Additionally, employing EQ and panning strategies is crucial. This helps avoid frequency clashes and guarantees each layer occupies its own space in the stereo field, leading to a clearer mix.

Don't overlook techniques like attack layering and sustained layering. Short, punchy layers contribute impact, while slower, evolving layers can add depth, enhancing the dynamic quality of your sounds.

Benefits of Layering Instruments

enhanced sound texture layering

When you layer instruments, you instantly enhance the sound depth of your track, making it feel richer and more engaging.

This technique not only fills out frequency gaps but also adds a unique sonic character that sets your music apart.

Advertisement

Enhanced Sound Depth

Layering instruments can transform your music by adding depth and richness that single sounds simply can't achieve on their own. When you layer sounds, you combine various textures and timbres, resulting in an audio experience that's fuller and more immersive.

By employing contrasting characteristics—like blending acoustic and synthetic instruments—you create a dynamic and engaging sonic landscape. Techniques such as detuning and multi-octave layering help you widen the sonic spectrum, contributing to the enhanced sound depth of your mix.

This approach fills frequency gaps that individual instruments might leave, ensuring a cohesive and balanced overall sound.

Moreover, incorporating ambient sounds and unique recordings alongside your primary instruments adds another layer of interest and complexity, enriching the listening experience.

You'll find that the depth you achieve not only makes your music more enchanting but also invites listeners to explore every nuance of your composition.

Advertisement

Unique Sonic Character

Creating a unique sonic character is one of the standout benefits of layering instruments in your music. When you layer different sounds, you introduce distinct characteristics that enrich your overall sonic palette, making your tracks more engaging and dynamic. By combining contrasting timbres—like blending acoustic guitars with electronic synths—you create a unique texture that stands out in today's crowded musical landscape.

To achieve unique sonic identities, focus on the careful selection of layers. Each sound should contribute its qualities, ensuring your mix doesn't conform to common trends. This approach allows you to integrate various frequency ranges, filling gaps and achieving a more balanced and fuller sound.

Don't forget these layering tips: experiment with different instruments and effects to enhance emotional depth. This layering process can help you convey various feelings and atmospheres, resonating with listeners on multiple levels.

Ultimately, crafting a unique sonic character through layering not only differentiates your music but also invites your audience to connect more deeply with your creative vision. So, immerse yourself in the world of layering and discover the rich textures waiting to be revealed in your sound!

Selecting Sounds to Layer

layering selected sound elements

To achieve a rich and dynamic sound, selecting the right layers is essential. When you layer multiple sounds, make sure each serves a distinct purpose and contributes unique characteristics. This approach prevents muddiness in your mix. Aim to incorporate contrasting sound qualities; for example, pairing bright synths with warm acoustic instruments can greatly enhance depth and richness.

Prioritize a primary layer that dominates the mix while ensuring that additional layers complement and enhance its tonal qualities without overpowering it. This balance is critical for maintaining clarity in your sound.

Advertisement

Also, consider utilizing different sound sources, like combining analog synths with sampled acoustic instruments, to create a more organic and textured sound.

Regularly assess the frequency content of your layered sounds using EQ. This step is essential for carving out space and preventing frequency clashes, which can muddy your overall mix.

Effective Layering Methods

optimized layering techniques explained

Achieving a fuller sound involves employing several effective layering methods. First, focus on frequency separation by using EQ to carve out distinct ranges for each layer. This guarantees they complement each other in the mix, filling the frequency spectrum without clashing.

Furthermore, just as AI customizes learning experiences in e-learning, you can customize your sound layers to fit the unique needs of your track. Next, consider detuning your oscillators slightly, around ±10 cents. This technique widens the sound and adds richness when layering synths.

Octave layering is another powerful method. Pair low bass layers with higher melodic elements to enhance fullness and create a dynamic sound landscape.

Don't forget about panning and spatial distribution; pan your layered instruments away from the center to craft a more expansive stereo image. This helps each sound be distinctly heard without cluttering the mix.

Advertisement

Lastly, introduce dynamic variation in velocity and articulation across your layers. This is particularly effective in percussive elements, adding depth and an organic feel to your music.

Layering for Vocal Richness

enhancing vocal texture layers

Layering vocals transforms your mix into a rich tapestry of sound that captivates listeners. By recording multiple takes of the same line and panning them across the stereo field, you create a "wall of sound" effect that adds depth and richness to your mix.

Here are some techniques to enhance your vocal recordings:

  • Utilize natural doubling techniques to capture harmonies and ad-libs.
  • Experiment with varying dynamics and textures, like breathy whispers alongside powerful belting.
  • Incorporate vocal effects such as reverb and delay for seamless blending.
  • Use harmonized vowel sounds like "Ooo" or "Ahh" for warmth and fullness.
  • Pay attention to the arrangement, ensuring layers complement each other.

These strategies not only enhance the emotional impact of choruses but also create a more engaging auditory experience.

With careful attention to detail, you'll find that layering vocals elevates your music, making it feel more organic and inviting.

Enhancing Percussion With Layers

layering for percussion enhancement

After enriching your vocal layers, it's time to turn your attention to percussion. Start by layering different snare samples; using a top snare for that crisp crack and a bottom snare for added body creates a punchier sound. This combination enhances the overall impact of your percussion section, making it feel fuller.

Next, consider your kick drum. Pairing it with a sub-bass layer considerably deepens the low-end frequencies, establishing a more powerful rhythm foundation. This combo gives your track the weight it needs to drive the energy forward.

To keep things interesting, vary the velocity and dynamics of your layered percussion elements like hi-hats or shakers. This approach introduces an organic feel, adding depth to your rhythm.

Advertisement

Additionally, don't shy away from incorporating ambient sounds, such as field recordings or subtle sound effects. These elements enrich your percussion layers, offering unique character to your mix.

Using Modulation for Depth

modulation enhances depth perception

While you're refining your layered sounds, adding modulation can greatly enhance their depth and presence. By introducing subtle changes in pitch, amplitude, or filter settings over time, modulation creates a dynamic listening experience that keeps your audience engaged.

Here are some key benefits to reflect on:

  • Introduces movement and life to static layers
  • Prevents phase cancellation, maintaining clarity
  • Allows for unique textures with varying modulation rates and depths
  • Enhances cohesion among multiple layers
  • Adds an element of surprise to your mix

Utilizing modulation plugins, like LFOs (Low-Frequency Oscillators), lets you automate adjustments to parameters such as volume or pan. This adds movement and depth, making your layered sounds feel more expansive.

Experimenting with different modulation settings can yield engaging textures, turning your mix into a complex tapestry of sound.

Incorporating modulation into your mixing process not only enriches the individual layers but also enhances the overall cohesiveness of your track.

Group Processing Strategies

collaborative teamwork techniques

Group processing strategies play an essential role in enhancing the cohesion and clarity of your mix. By routing multiple layers of instruments to a single bus, you can apply effects like compression, which unifies the sounds. For ideal results, use slow to medium attack and release settings during group compression; this typically yields a natural, cohesive sound across your layered instruments.

Here's a quick reference table for effective group processing strategies:

Advertisement
Strategy Description Benefits
Group Compression Send layers to a bus with careful gain reduction Enhances clarity and cohesion
Multiband Compression Control specific frequency ranges Fine-tunes without losing integrity
Group Saturation Introduces harmonics and warmth Enriches sound and adds character

Aim for a gain reduction of 1-3 dB to maintain subtlety while polishing your mix. Finally, don't underestimate the power of group saturation techniques; they can greatly enhance the overall warmth and richness of your layered instruments, making your sounds more engaging.

Common Layering Mistakes

layering fashion mistakes identified

When layering instruments, many musicians fall into common traps that can compromise their mix. Recognizing these pitfalls can help you create a more engaging sound.

Here are some mistakes to watch out for:

  • Overloading your mix with too many layers
  • Layering identical tonal qualities without variation
  • Failing to utilize proper EQ techniques
  • Neglecting to arrange layers according to song structure
  • Ignoring dynamic variation in your layers

Real-World Layering Examples

practical applications of layering

Layering instruments effectively can greatly enhance your sound, bringing depth and richness to your music. For instance, try combining a bass guitar with a synth bass. The bass guitar adds warmth and presence, while the synth delivers punch and clarity, creating a robust low-end foundation. Additionally, utilizing loop integration techniques can further enhance your layering process, allowing for enchanting compositions.

You can also layer strings with a synth pad. The strings provide organic warmth, and the pad enhances depth and texture, resulting in a rich, atmospheric sound.

In the domain of percussion, consider layering a kick drum with a sub-bass. This combination enhances low-end impact, where the kick gives rhythmic attack, and the sub-bass adds depth and fullness.

When it comes to guitars, layer a clean guitar with a distorted one. This setup creates a fuller, more dynamic sound, with clarity from the clean guitar and grit from the distorted track.

Advertisement

Finally, layering woodwinds, like flutes and clarinets, produces a lush harmonic texture. The flute brings brightness, while the clarinet adds warmth, enhancing the overall orchestral sound.

Frequently Asked Questions

How Do You Make an Instrument Sound Fuller?

To make an instrument sound fuller, you can use techniques like layering sounds, adding effects, and experimenting with different octaves. These methods enhance richness and depth, creating a more engaging auditory experience for your listeners.

What 4 Instruments Sound Good Together?

You'll find that a grand piano, acoustic guitar, strings, and synth pad blend beautifully, creating a rich sound. Alternatively, a bass guitar, electric guitar, flute, and clarinet also complement each other well, adding depth.

How to Layer Sounds Properly?

To weave a beautiful tapestry of sound, you'll want to start with a strong foundation, choose contrasting textures, carve out space with EQ, and pan creatively to create an inviting, immersive listening experience.

What Is the Layering of Musical Sounds Called?

The layering of musical sounds is commonly known as sound layering. You combine different audio sources, enhancing depth and richness in your mix. This technique helps create a more engaging and textured listening experience.

Advertisement

Conclusion

Layering instruments can seem complex, but it's really about creativity and exploration. Don't worry if you think you lack the skills; even simple layers can transform your sound dramatically. By experimenting with different combinations, you'll discover a richer, fuller texture that enhances your music. So, immerse yourself and start layering—your tracks will thank you! Remember, every great musician started somewhere, and your unique sound is just waiting to be uncovered.

Continue Reading

Production Tips

Creating Movement in Tracks With Automation

Discover how automation can transform your tracks into dynamic masterpieces, but there’s so much more to learn about its advanced techniques.

Published

on

automated movement in tracks

Creating movement in your tracks with automation is essential for enthralling your audience. Start by automating volume to enhance dynamics, keeping your mix engaging. Use EQ automation to carve out space and improve clarity among elements. Incorporate reverb and delay automations to craft a sense of depth and perspective. For synths, adjust filter cutoff settings and MIDI velocities to add rich, organic expressions. Don't overlook the importance of LFOs for rhythmic movement. With practical implementation, you can overcome common challenges in automation to maintain an organized workflow and elevate your sound. If you're curious about advanced techniques, there's more to explore.

Key Takeaways

  • Use volume automation to create dynamic shifts that enhance the emotional impact of your track.
  • Implement EQ automation to carve out space for elements, improving mix clarity and preventing frequency clashes.
  • Automate reverb and delay levels to adjust spatial characteristics, adding depth and richness to your sound.
  • Adjust MIDI velocity and filter cutoff settings to introduce variations and warmth, enhancing emotional expression in your music.
  • Regularly evaluate and refine automation settings to ensure a cohesive and engaging listening experience throughout your track.

Importance of Movement in Music

movement s role in music

Why is movement so fundamental in music? It's the heartbeat that keeps your listeners engaged and emotionally connected. When you incorporate harmonic movement—like chord changes and key shifts—you create an emotional journey that resonates deeply.

Similarly, dynamic changes in volume and EQ are vital. They add layers to your sound design that prevent it from feeling flat or static.

You should also consider how automation plays a significant role in enhancing movement. By implementing real-time adjustments, you mimic the nuances of human performance, making your tracks come alive. For instance, using automation for effects like reverb and delay can dramatically alter the spatial characteristics of your mix, transforming the listener's experience.

As you craft your music, remember that it's the ebb and flow of these elements—harmonic shifts, dynamic changes, and automated effects—that create an engaging narrative.

Essential Automation Techniques

key automation strategies overview

Automation techniques are essential for creating dynamic and engaging tracks. One of the most effective methods is volume automation. By adjusting levels throughout different sections, you can enhance song dynamics and create movement that keeps listeners invested.

Likewise, EQ automation allows you to make frequency-specific adjustments, preventing muddiness and enhancing clarity in your mix. This helps you create space for each element, ensuring everything shines through.

Advertisement

Don't overlook automating reverb send levels. This dynamic adjustment alters the listener's perspective, contributing considerably to the depth and immersion of your mix.

Additionally, applying subtle automation to filter cutoff can transform synth sounds. Warm tones at low settings can shift to brighter sounds as you increase the cutoff, adding richness to your tracks.

Enhancing MIDI and Synth Expressions

midi synth expression enhancement

Often, enhancing MIDI and synth expressions can make a significant difference in your tracks. Start by editing MIDI velocity; slight adjustments can create dynamic variations that deeply impact the emotional expression of your performance. Using automation to modify velocity within your MIDI tracks will help you avoid the mechanical feel of static values, allowing for a more natural and engaging sound.

Next, focus on the filter cutoff in your synth programming. Low cutoff settings yield warmer tones, while higher settings create brighter sounds. This dynamic control plays a fundamental role in shaping your electronic music.

Additionally, incorporating LFOs (Low-Frequency Oscillators) can introduce rhythmic movement and sweeping effects, enhancing expressiveness and adding warmth reminiscent of classic analog synthesizers.

Mastering ADSR (Attack, Decay, Sustain, Release) envelopes is essential for crafting sounds with the character and dynamics you desire. By adjusting these parameters, you can create more organic and enthralling musical expressions.

Advertisement

Practical Automation Implementation

effective automation deployment strategies

Incorporating practical automation techniques can further enhance the movement and dynamics of your tracks. Start by utilizing volume automation to boost the clarity and presence of your main vocal lines, guaranteeing they cut through the mix. Next, consider EQ automation to make frequency-specific adjustments. This helps carve out space for various elements, allowing them to shine without clashing.

Here's a quick reference table to streamline your automation moves:

Automation Type Purpose Best Practice
Volume Automation Enhance dynamics and vocal presence Use gain/utility plugins for precision
EQ Automation Create clarity in the mix Adjust frequencies dynamically
Effects Automation Manage reverb/delay levels for clarity Regularly evaluate for emotional impact

Don't forget to automate effects like reverb and delay to enrich the spatial feel of your mix without causing muddiness. By regularly evaluating your automation settings, you can guarantee they enhance the track's emotional depth rather than distract. Experiment, make subtle adjustments, and watch your tracks come alive with movement!

Addressing Automation Movement Challenges

navigating automation implementation obstacles

Managing automation in your digital audio workstation (DAW) can feel like maneuvering through a maze, especially when movement challenges arise. One common issue is that volume automation often doesn't move with regions when you drag them, requiring you to adjust automation markers manually afterward. This can be frustrating, but it's something you need to know to stay organized.

In Logic, the lack of a straightforward mass selection method for global tracks can make managing automation lanes cumbersome. You might find yourself using the marquee tool as a workaround to select multiple automation markers.

Additionally, tempo changes can create gaps between audio regions if Flex and follow settings aren't turned off, complicating your arrangement.

When dealing with sum track automation, you may notice it doesn't follow individual region movements, leading to further complications. To streamline the process of moving automation, utilize shortcuts like control+command drag to select multiple automation markers efficiently.

Advertisement

Creating empty regions on sum tracks can also help keep everything aligned and organized, ensuring your automation maintains its original position throughout your project.

Frequently Asked Questions

How Do I Add Movement to a Track?

To add movement to your track, try varying the dynamics, experimenting with panning, and adjusting frequency balances. Incorporate effects like reverb or filters to create depth and enhance the emotional journey of your music.

How to Move Automation With Tracks in Logic?

"Where there's a will, there's a way." To move automation with tracks in Logic, guarantee "Automation follows events" is checked, use Ctrl+U to group, or select markers with the marquee tool for easy adjustments.

How to Move Automation With Tracks in Garageband?

To move automation with tracks in GarageBand, you'll need to manually adjust the automation points. Use the "Copy" and "Paste" functions or "Select All" to guarantee everything stays synchronized when shifting your audio regions.

How Can Automation Be Employed to Add Movement and Dynamics to Drum Tracks?

You can use automation to adjust volume, reverb, and compression on your drum tracks. By dynamically changing these elements, you'll create energy, enhance depth, and make your beats feel more alive and engaging for listeners.

Advertisement

Conclusion

Just like a painter brings a canvas to life with every brushstroke, your music thrives on movement. By harnessing automation, you're not just adding layers; you're crafting a dynamic landscape that captivates listeners. Embrace the tools at your fingertips, and let your creativity flow like a river, winding through peaks and valleys. Remember, every note can dance, and every silence can breathe—make your track a vivid journey that keeps your audience coming back for more.

Continue Reading

Production Tips

Develop a Unique Sound as a Producer

Learn how to cultivate a distinctive sound as a producer and uncover the essential steps that will set your music apart from the rest.

Published

on

cultivate distinctive musical identity

To develop a unique sound as a producer, start by mastering the basics of music production. Familiarize yourself with essential software and tools, then experiment with unconventional instruments and layers. Find your voice by expressing your emotions and drawing inspiration from your favorite artists. Consistency is key; set regular production goals and seek feedback to refine your craft. Embrace collaboration and continuously learn from others in the community. Remember, patience and practice will help shape your distinct style over time. Stick around to discover more tips for enhancing your production journey and making your sound truly stand out.

Key Takeaways

  • Experiment with unconventional sounds and instruments to create unique textures that set your music apart from others.
  • Regularly practice producing new tracks to refine your skills and discover your distinctive musical voice.
  • Collaborate with other artists to gain new perspectives and influence your sound development through shared creativity.
  • Draw inspiration from various genres and cultures to infuse your music with unique elements and broaden its appeal.
  • Establish a consistent brand identity through cohesive visuals and regular engagement on social media to enhance recognition.

Learn the Basics

fundamental knowledge acquisition

Mastering the fundamentals of music production is essential for developing your unique sound. Start by familiarizing yourself with essential software like Ableton Live or FL Studio. These tools are vital for creating and manipulating audio. You should also invest time in learning about hardware tools, such as MIDI controllers and audio interfaces, which enhance your production capabilities.

Additionally, understanding how to use music production software effectively can greatly influence your creative process.

Next, gain a solid understanding of recording techniques. Practice capturing vocals and instruments properly, as this will greatly impact the quality of your tracks.

Don't overlook the editing process; mastering it will help you refine your sound and find your voice as a producer.

Incorporate music theory into your work. Understanding chord progressions and song structure can elevate your compositions and make them more engaging.

Advertisement

Explore various genres and styles, from electronic to acoustic, to broaden your production techniques. This exploration can inspire creativity in your work and help you carve out your unique sound.

Experiment With Sounds

explore auditory sensations creatively

To develop your unique sound, start by utilizing unconventional sound sources, like everyday objects or field recordings.

Layer those sounds in unexpected ways to create original textures that captivate your audience.

Utilize Unique Sound Sources

Experimenting with unique sound sources can greatly elevate your productions and set you apart as a producer. By stepping outside the typical samples and synths, you can create a signature sound that truly resonates.

Here are some effective strategies to help you sound different:

  1. Utilize field recording techniques: Capture unique sounds from everyday environments, like bustling streets or serene nature, to add authenticity to your tracks. Incorporating diverse soundscapes can enhance the emotional depth of your music, creating an immersive experience similar to the role of contrast ratio in projector image quality.
  2. Incorporate unconventional instruments: Use objects around you—kitchen utensils, stones, or even your voice—to create interesting textures that enhance your music.
  3. Manipulate ordinary sounds: Experiment with audio manipulation tools like granular synthesis or pitch shifting. Transform simple recordings into innovative musical elements that surprise your listeners.
  4. Explore diverse tempos and scales: Don't hesitate to play with different rhythmic patterns and harmonic progressions. This keeps your sound fresh and enthralling.

Layering Techniques for Originality

There's something enchanting about the art of layering sounds that can transform an ordinary track into an extraordinary one. By combining multiple audio tracks with varying frequencies, timbres, and dynamics, you can create a richer sonic texture that enhances your composition's impact.

To develop your unique voice, immerse yourself in experimenting with sounds from different genres. Use organic recordings, synthesized sounds, and unique samples to form layers that contribute to your original sound signature. Understanding production quantity variance can also help you manage the resources effectively while experimenting.

Advertisement

Don't shy away from using effects like reverb, delay, and modulation on individual layers; these can add depth and movement, helping each element shine while maintaining cohesion. Adjusting the volume, panning, and EQ of each layer allows you precise control over the mix, ensuring clarity for every component in your production.

Regularly experiment with unconventional layering techniques—like inverse filtering or creative automation—to achieve unexpected results. This approach can lead to distinctive soundscapes that set you apart from other producers.

Find Your Voice

discover your unique expression

Finding your voice as a producer is like uncovering a hidden gem; it requires introspection and creativity. Your unique sound emerges from a blend of personal experiences, influences, and experimentation.

To help you on this journey, consider the following steps:

  1. Express Yourself: Channel your emotions and life experiences into your music. This authenticity resonates deeply, creating a strong connection with your audience.
  2. Draw Inspiration: Incorporate elements from artists you admire. This can help shape your artistic vision while ensuring your compositions maintain originality.
  3. Utilize Personal Instruments: Use instruments or sounds that hold personal significance. This enhances the emotional depth of your music, making it distinctly yours.
  4. Embrace Cultural References: Infuse your work with cultural elements that reflect your identity and heritage. This enriches your musical expression and broadens your appeal.

Regularly experimenting with different styles and techniques will reveal what truly resonates with you.

Develop Your Skills

enhance your abilities today

To develop your skills as a producer, make regular practice a priority by creating beats or remixes consistently.

Collaborating with other artists can also open up new perspectives and techniques that enhance your craft.

Set clear goals for your projects to keep pushing your creative boundaries and refining your unique sound.

Advertisement

Regular Practice Techniques

Consistent practice is essential for honing your skills as a music producer. By setting aside dedicated time for regular practice, you'll foster creativity and develop a unique sound.

Here are four techniques to help you maximize your practice sessions:

  1. Create Regularly: Challenge yourself to produce at least one new beat, remix, or original song each week. This keeps your creativity flowing and helps you explore different musical ideas.
  2. Seek Feedback: Utilize online platforms and communities to share your work and receive constructive feedback. This insight is invaluable for your growth as a producer.
  3. Invest in Learning: Consider enrolling in music production courses or tutorials that focus on specific techniques or software. Expanding your knowledge will refine your skill set and enhance your productions.
  4. Analyze Favorites: Regularly analyze and recreate tracks from your favorite producers. Understanding their techniques will help you incorporate diverse styles and find your sound.

Collaborative Learning Opportunities

Collaborative learning opportunities can greatly enhance your skills as a music producer. By collaborating with other producers, you expose yourself to different techniques and perspectives, which can inspire innovation in your work.

Join online communities or forums dedicated to music production where you can share feedback, resources, and experiences. This fosters a collaborative learning environment that's vital for your growth.

Participating in local or virtual workshops gives you hands-on experience and direct mentorship from industry professionals. This can accelerate your development considerably.

You might also consider engaging in co-writing sessions with artists. This collaboration can lead to unique sound explorations and help you refine your compositional techniques through shared creativity.

Advertisement

Utilizing platforms like Splice or Kompoz allows you to collaborate with musicians worldwide. These connections can introduce diverse influences, helping you create a sound that stands out.

You'll also get the chance to learn how to use various sample packs, enhancing your production toolkit. Ultimately, these collaborative efforts can provide you with fresh insights and skills, paving the way for your unique sound as a producer.

Embrace these opportunities; they're essential for your growth.

Be Consistent

maintain consistent efforts

Establishing a reliable routine can be a game-changer for music producers. When you prioritize consistency in output, you're laying down the essential building blocks for your unique sound and style of music.

Here's how you can enhance your creative process:

  1. Set a Monthly Goal: Aim to produce a specific number of tracks each month. This creates a rhythm and pushes you to refine your sound.
  2. Develop Your Brand: Create a memorable name, logo, and visual style. This cohesive image resonates with audiences and fosters recognition.
  3. Engage on Social Media: Regularly share your music and personal stories. This helps in building a loyal supporter base who'll follow your journey.
  4. Collaborate and Connect: Engage with the music community through collaborations and feedback. This not only enhances your skills but also maintains your presence in the industry.

Importance of Unique Sound

significance of distinctive audio

Creating a unique sound is essential for standing out in today's crowded music landscape. In a saturated market, your distinctive style sets you apart and enhances your brand identity.

When fans recognize your unique sound, they're more likely to develop loyalty and stick around as part of your dedicated audience base.

Advertisement

Just look at artists like Skrillex and Deadmau5; their signature sounds haven't only made them household names but have also demonstrated the marketability of a distinctive style across various genres.

Remix Opportunities

creative content reimagining possibilities

While you may think of remixing as simply reworking someone else's track, it can actually be a powerful avenue for showcasing your unique sound.

By honing your distinctiveness, you open doors to numerous remix opportunities that can elevate your career. Here's how to leverage remixes effectively:

  1. Attract Contracts: A unique sound can attract remix contracts from labels and artists enthusiastic to incorporate your distinct style into their projects.
  2. Gain Recognition: Producers known for their distinctive sound often receive more recognition, leading to increased remix offers from established artists.
  3. Expand Audience: High-profile remixes can greatly expand your audience reach, helping you connect with new listeners who appreciate your unique take on popular tracks.
  4. Build a Fanbase: Cultivating a unique sound not only increases your chances of remix offers but also fosters a loyal fanbase excited to hear your interpretations.

Patience and Growth

cultivating resilience through patience

In the journey of developing your unique sound as a producer, patience is key. It's vital to understand that creating something truly original takes time. You'll often need years of dedicated practice and experimentation with various techniques and genres before you find your niche.

Focus on mastering the basics of music production first—recording, mixing, and editing. This solid foundation is critical for producing high-quality work that resonates with listeners.

As you grow, allow yourself the freedom to explore new sounds. Embrace the creative process without the pressure of immediate success. When you're patient, you give yourself the opportunity for organic growth, which can lead to a more authentic musical identity.

Don't rush; instead, enjoy the journey. As you experiment and refine your skills, your sound preferences will evolve naturally.

Advertisement

Continuous Learning and Networking

lifelong growth through connections

To develop your unique sound as a producer, continuously learning and networking are vital. Embrace new things that can elevate your skills and expand your connections. Here are four effective strategies to enhance your growth:

  1. Take Online Courses: Platforms like Coursera and Skillshare offer specialized classes from industry professionals. Immerse yourself in these resources to sharpen your production techniques.
  2. Attend Local Events: Networking with fellow producers and artists can lead to valuable feedback and collaboration opportunities. These interactions can foster innovation in your voice as a producer.
  3. Follow Influential Blogs and Channels: Stay updated on the latest tools and trends by engaging with music production blogs like Produce Like A Pro and ADSR. Their insights can inspire you to explore new methods.
  4. Join Social Media Groups: Being a part of dedicated music production communities allows you to share experiences and gather advice. This supportive environment is essential for continuous learning.

Incorporating these strategies won't only enhance your skills but also create pathways for new opportunities.

Frequently Asked Questions

How to Create Your Own Sound as a Music Producer?

To create your own sound as a music producer, experiment with unique samples, craft custom synth patches, analyze your favorite tracks, produce consistently, and collaborate with others for fresh perspectives. Embrace the journey of discovery!

What Makes a Sound Unique?

A sound's uniqueness springs from its quirky melodies, unexpected rhythms, and wild production techniques. When you blend genres, experiment with rare instruments, and craft original samples, your sonic identity becomes an unforgettable masterpiece that truly stands out!

What Is a Unique Sound Called?

A unique sound is often called a "signature sound." It reflects your distinct style, combining specific elements that resonate with listeners, making your music instantly recognizable and setting you apart from others in the industry.

How Do You Find Unique Sounds?

You wander through familiar spaces, recording everyday sounds, feeling excitement build. You immerse yourself in synth design, analyze tracks that inspire you, and collaborate with others. Each step reveals unique textures, waiting to be discovered.

Conclusion

In your journey to develop a distinctive sound, don't rush the process. Patience pays off as you polish your productions. Keep experimenting, exploring, and expanding your expertise. By fostering friendships within the music community, you'll find fresh inspiration and opportunities. Remember, a unique sound isn't just a goal; it's a gift you give to the world. Stay dedicated, stay curious, and let your creativity shine through every track you create. Your sonic signature is waiting to emerge!

Advertisement
Continue Reading

Affiliate disclaimer

As an affiliate, we may earn a commission from qualifying purchases. We get commissions for purchases made through links on this website from Amazon and other third parties.

Advertisement

Vetted

affordable home studios guide affordable home studios guide
Vetted2 months ago

15 Best Professional Home Studios Under $1000 for Aspiring Creators

Learn how to build your dream home studio for under $1000 with expert tips and gear recommendations that will elevate...

christmas gifts for musicians christmas gifts for musicians
Vetted2 months ago

The Ultimate Gift Guide: 14 Best Christmas Music Production Gifts for Every Aspiring Musician

With 14 unique gift ideas for aspiring music producers, discover the perfect present that will elevate their creative journey this...

affordable thunderbolt audio interfaces affordable thunderbolt audio interfaces
Vetted2 months ago

15 Best Thunderbolt Audio Interfaces Under $500: Affordable Options for Aspiring Musicians

The top 15 Thunderbolt audio interfaces under $500 offer exceptional quality and features—discover which one will elevate your music production...

affordable dynamic microphones guide affordable dynamic microphones guide
Vetted2 months ago

15 Best Dynamic Microphones Under $150 for Every Budget and Need

Hunt for the perfect dynamic microphone under $150? Discover the top 15 picks that cater to every budget and need,...

optimal studio monitor placement optimal studio monitor placement
Vetted2 months ago

15 Best Monitor Positioning Tips for Optimal Studio Acoustics

Get ready to transform your sound with these 15 essential monitor positioning tips that will elevate your studio acoustics to...

top wireless studio peripherals top wireless studio peripherals
Vetted2 months ago

13 Best Wireless Peripherals for Studio Use – Enhance Your Creative Workflow

Discover the 13 best wireless peripherals that can elevate your studio experience, but wait until you see how they can...

affordable guitar audio interfaces affordable guitar audio interfaces
Vetted2 months ago

15 Best Audio Interfaces for Guitar Under $250 – Affordable Picks for Every Musician

Navigate through our top 15 audio interfaces for guitar under $250, and discover which affordable pick could elevate your music...

top easter music sales top easter music sales
Vetted2 months ago

The 9 Best Easter Music Production Sales You Can’t Miss This Season

Unlock incredible deals on Easter music production sales, including must-have resources that promise to elevate your craft—discover what you can't...

optimal studio monitor stands optimal studio monitor stands
Vetted2 months ago

15 Best Monitor Stands for an Optimal Studio Setup – Enhance Your Workspace Today

Boost your studio setup with the 15 best monitor stands that enhance sound and organization—discover which options will transform your...

top drum pads for producers top drum pads for producers
Vetted2 months ago

15 Best Drum Pads for Beat Making: Elevate Your Music Production Game

Looking to enhance your music production? Discover the 15 best drum pads that will take your beat-making skills to the...

top spring sale gear top spring sale gear
Vetted2 months ago

The 2 Best Spring Sale Studio Gear Picks You Can’t Miss

Discover the top two must-have studio gear picks this spring that will elevate your workouts and photography skills—find out what...

affordable music production kits affordable music production kits
Vetted2 months ago

14 Best Complete Music Production Setups Under $1000 for Aspiring Producers

Explore the 14 best music production setups under $1000 that will elevate your creativity and gear up your journey—discover the...

Trending

Copyright © 2024 The Sound of Music Guide Affiliate disclaimer As an affiliate, we may earn a commission from qualifying purchases. We get commissions for purchases made through links on this website from Amazon and other third parties.