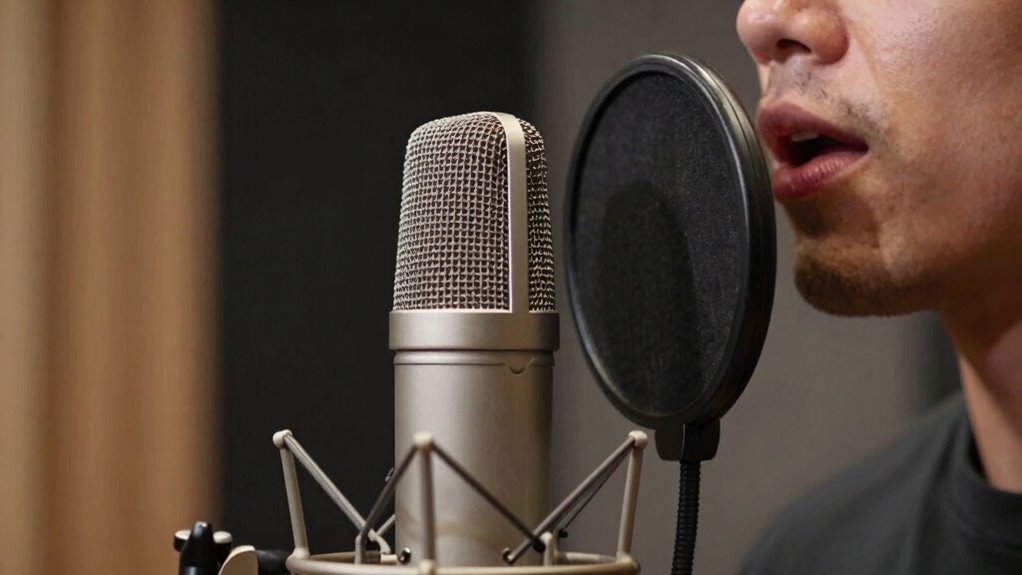

To fix your sound before touching EQ, focus on proper mic placement. Position your mic about 1 to 3 inches from your mouth, slightly off-axis to reduce harsh sibilance and pops. Adjust the angle to suit your vocal style, aiming for a natural tone. Experiment with small movements to find the sweet spot that captures your voice clearly without unwanted noise. Keep practicing these tips, and you’ll achieve a polished sound effortlessly. If you want to learn more, there’s plenty to explore.
Key Takeaways
- Position the microphone 1 to 3 inches from your mouth to balance proximity and prevent plosives.
- Slightly angle the mic off-axis to reduce sibilance and harsh sounds.
- Adjust the mic distance based on your vocal tone—closer for bass-heavy vocals, farther for bright sounds.
- Experiment with mic placement to capture a full, natural sound before using EQ.
- Consider room acoustics and ambient noise to optimize placement and minimize unwanted sounds.
Proper vocal mic placement is essential for capturing clear, balanced sound and avoiding unwanted noise or feedback. When you focus on microphone positioning, you control how your voice interacts with the microphone, which directly impacts your vocal tone. The way you position the mic can make a significant difference in the overall quality of your recording or live performance, often eliminating the need for excessive EQ adjustments later.
Proper mic placement ensures clear, balanced sound and enhances your vocal tone.
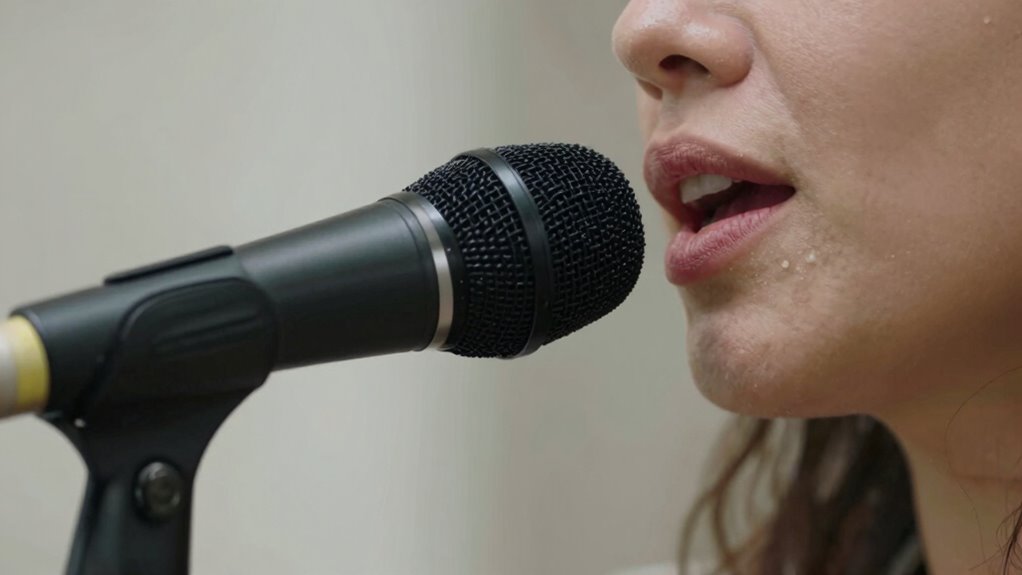
Start by holding the microphone at an appropriate distance from your mouth—generally about 1 to 3 inches away. Too close, and you risk capturing plosive sounds like “p” and “b,” which can cause distortion or unwanted pops. Too far, and your vocal tone may sound thin or distant. Experiment with slight adjustments to find that sweet spot where your voice sounds full and natural without capturing excessive breath noise. This ideal distance allows the microphone to pick up your voice accurately, preserving your vocal tone while minimizing ambient noise.
Angle the microphone slightly off-axis from your mouth, aiming it directly at your lips or just slightly above or below. This helps reduce harsh sibilance and plosive sounds, which can distort your vocal tone. If you’re using a dynamic microphone, keep in mind that it’s more forgiving to proximity effects—so you can get closer without as much worry about distortion. Conversely, with condenser mics, you might need to be a little more precise, since they tend to pick up more of your vocal nuances and room sound.
Another key aspect of microphone positioning involves considering your vocal style and tone. If you have a bright vocal tone, you might want to angle the mic slightly downward or keep it a tad further away to tone down harsh frequencies. For a warmer, bass-heavy vocal tone, getting closer can enhance low-end richness. Remember, small adjustments in microphone placement can dramatically influence your vocal tone, so listen carefully as you tweak your position. Additionally, understanding frequency response and how it interacts with your placement can help optimize your vocal sound even further.
Frequently Asked Questions
How Do Room Acoustics Affect Mic Placement Choices?
Room acoustics greatly influence your mic placement choices because reflections can cause comb filtering and muddiness. You should position the mic to minimize room reflection, such as avoiding reflective surfaces and using acoustic treatment like panels or diffusers. Moving closer to the source reduces room sound, while angling the mic can help reduce unwanted reflections. Proper placement ensures clearer vocals before you even start adjusting EQ, giving you a cleaner, more professional sound.
What Are Common Mistakes When Positioning a Vocal Mic?
You often make the mistake of placing the microphone too close or too far, ignoring vocal proximity and causing unwanted noise or distortion. You might overlook microphone polarization, which affects how the mic rejects background noise, or misjudge the angle, resulting in uneven sound. Always check your vocal proximity, guarantee proper microphone polarization, and adjust your positioning for clear, balanced vocals. Avoid these mistakes to improve your overall sound quality.
How Does Mic Type Influence Placement Technique?
You choose your mic type based on your desired sound. For example, a cardioid microphone reduces ambient noise but is sensitive to proximity effect, so keep it close for warmth. A condenser mic, often with different polarization, captures more detail but requires careful placement to avoid sibilance. Understanding these factors helps you position your mic correctly, ensuring peak sound without unwanted coloration or phase issues.
Can Mic Placement Impact Vocal Performance Dynamics?
Think of mic placement as the conductor guiding your vocal performance. When you position the mic correctly, it captures the full spectrum of your voice, enhancing your dynamic range and allowing your vocal projection to shine. Poor placement can dull your sound and mute your expressiveness, while precise positioning amplifies your nuances. Ultimately, good mic placement is the key to revealing your vocal potential and delivering a compelling, well-rounded performance.
What’s the Best Way to Test Mic Placement Quickly?
To test mic placement quickly, start by using your microphone’s polar pattern—cardioid for focused sound or omnidirectional for more room. Have the vocalist perform vocal projection techniques, like singing loudly and softly. Move the mic gradually while listening through headphones, noting where the sound is clear and balanced. Adjust until you find the spot that captures the vocals naturally, ensuring the best sound before tweaking EQ.
Conclusion
So, next time you’re tempted to tweak the EQ first, remember that perfect mic placement is the real magic trick. It’s funny how a simple move can save you hours of frustration, yet so many skip it. Don’t fall into the trap of thinking fancy effects will fix a poor setup. Trust me, fixing your mic placement first might just save you from endless EQ battles—who knew the secret to great vocals was right under your nose?