Connect with us

Music Production

How to Build a Music Production Desk: DIY Guide!

Leverage this DIY guide to craft your personalized music production desk, ensuring a stylish and functional workspace that suits your needs perfectly.

Published

on

diy music production desk

Craft your personalized music production desk by following a detailed DIY guide. Gather materials like MDF, supports, and a bamboo countertop. Consider dimensions carefully for stability and comfort. Prepare your workspace with ample lighting and organization. Cut and sand the wood precisely for a flawless finish. Assemble the frame securely and install the countertop accurately. Finish off with sanding, priming, and painting for durability. Gain insights into cost breakdown and final touches. Explore the steps further to build a functional and stylish desk just for you.

Key Takeaways

  • Use 3/4 inch MDF & bamboo countertop for stability and sleek finish.
  • Customize desk height for ergonomic comfort.
  • Optimize workflow with spacious design for gear organization.
  • Secure frame with proper spacing and supports for stability.
  • Sand, prime, paint, and seal for a durable, professional finish.

Materials Needed

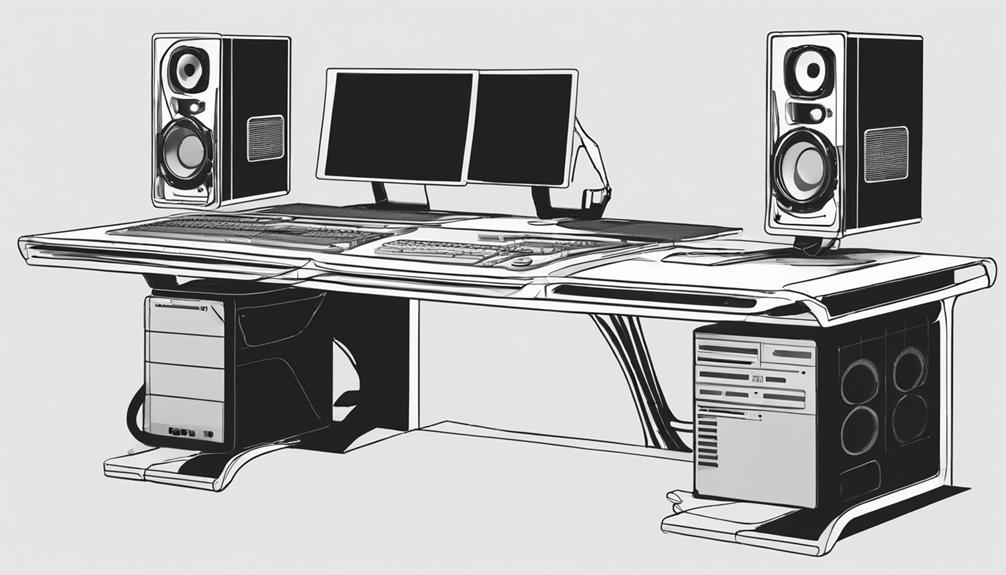
To construct a music production desk, gather 3/4 inch MDF, 2×3 supports, a 1×8 back support, and a bamboo countertop. These materials form the foundation for your DIY project.

The use of 3/4 inch MDF guarantees a robust structure, while the 2×3 supports provide stability to the desk. Additionally, incorporating a 1×8 back support adds further reinforcement to the design, ensuring durability over time.

When working on your music production desk, remember to cut specific measurements such as 35.5-inch squares for the desk itself. For accommodating rack mount gear, the inner spacing should be set at 19 1/16 inches.

Lastly, the choice of a bamboo countertop not only adds a sleek finish to the desk but also provides a smooth surface for your equipment.

Desk Design Considerations

desk ergonomic design tips

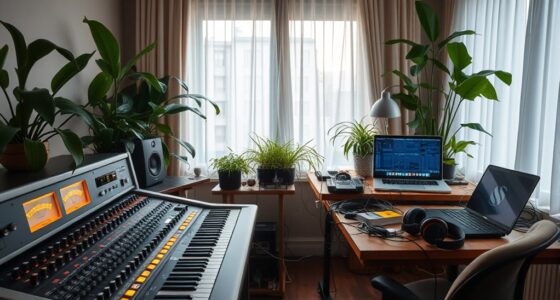
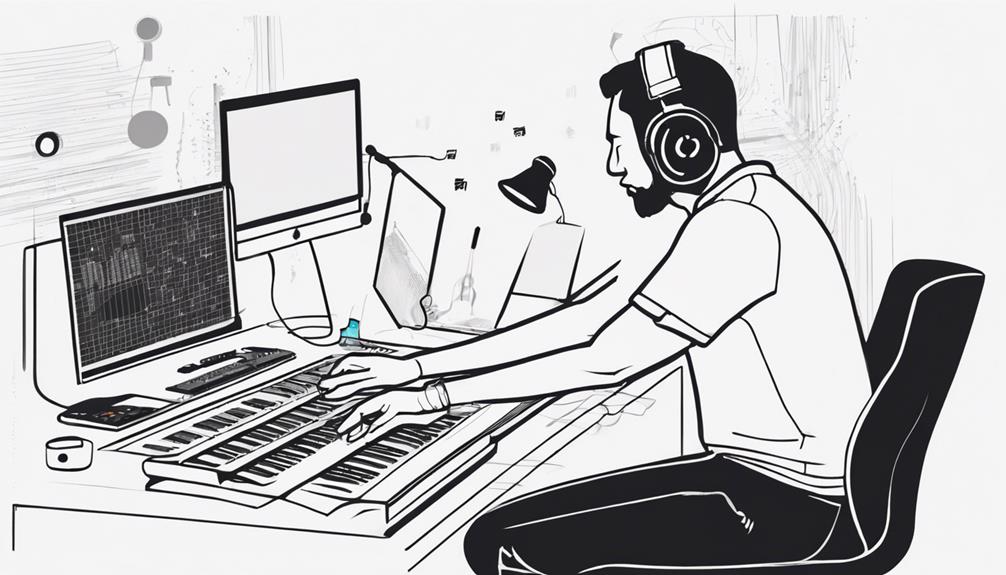
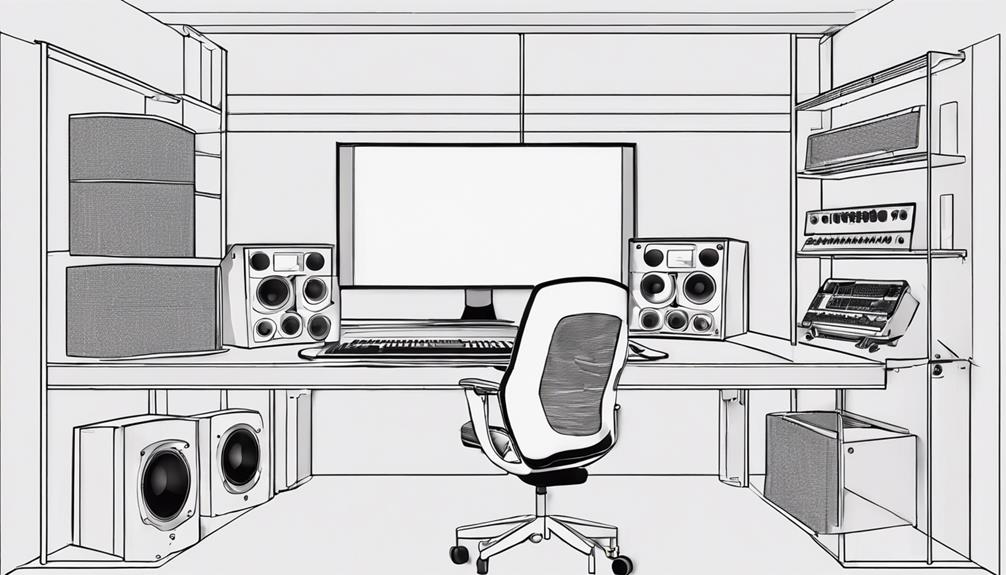
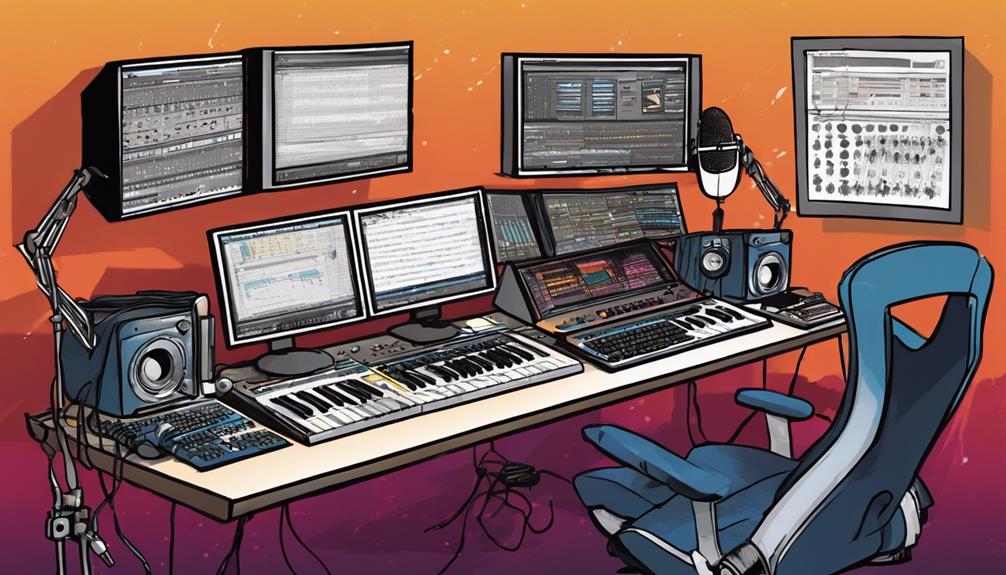
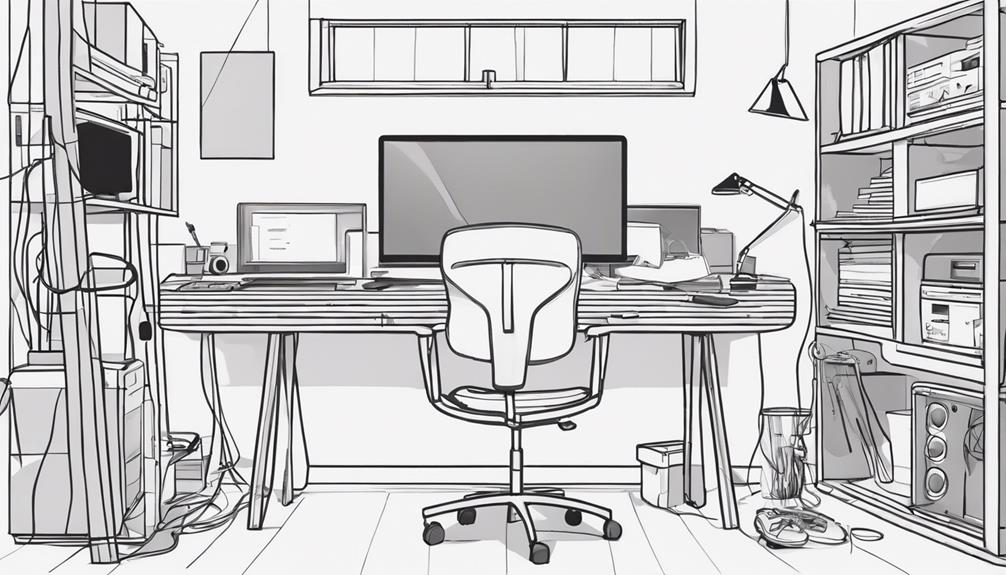
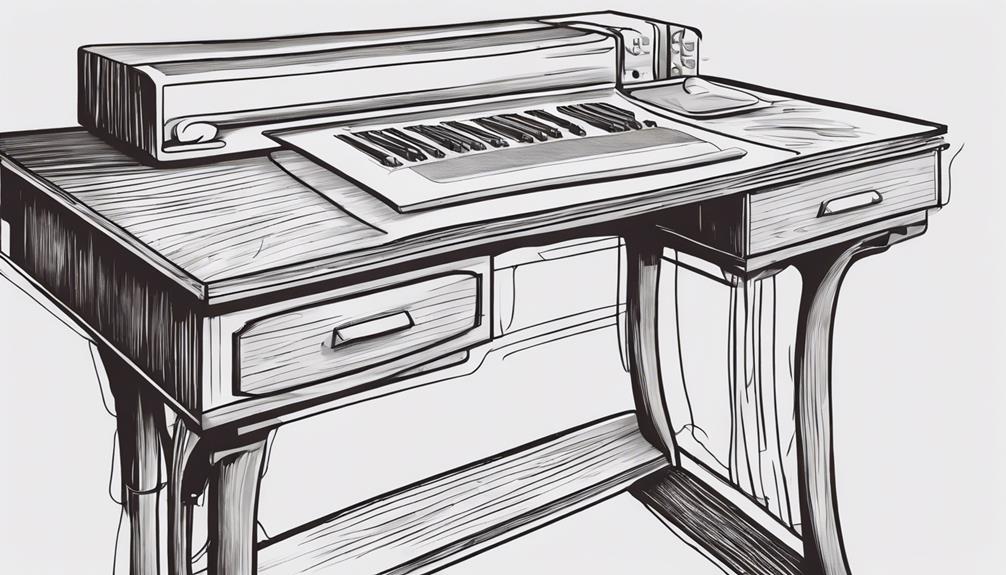
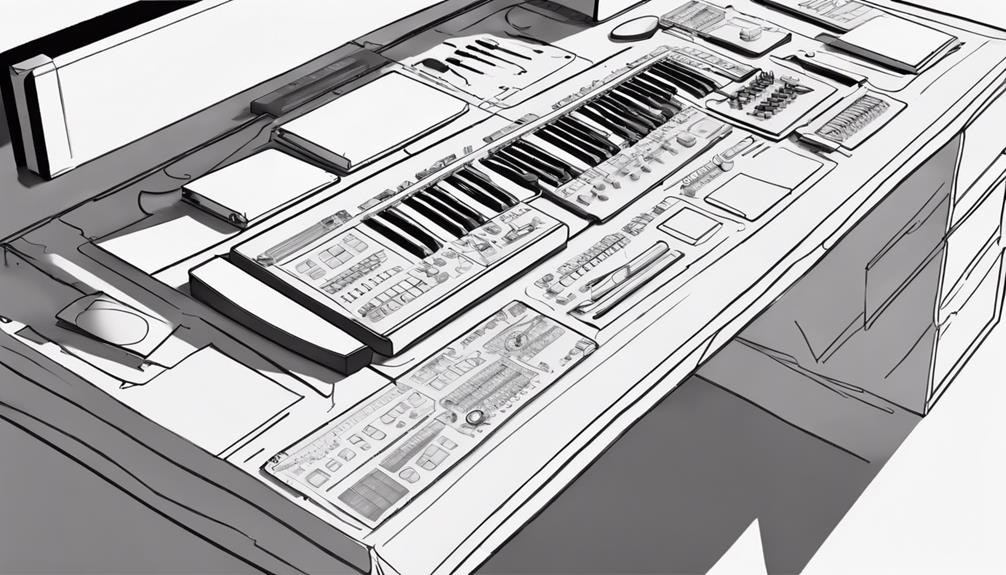
Considering the width of your desk is important to guarantee all your gear remains within easy reach during your music production sessions. When designing your studio desk, make sure that it accommodates the width of your equipment, such as your computer, MIDI controllers, and audio interfaces. This setup will optimize your workflow by keeping everything you need nearby.

Another significant aspect to take into account is easy access to rack space from your sweet spot. This allows you to adjust your gear and settings conveniently without disrupting your creative process.

Advertisement

Additionally, opt for a design that provides stability, especially if you have heavy equipment like studio monitors or multiple screens.

Customizing the desk height is crucial for your comfort and working preferences. Ensure the desk is ergonomically suitable to prevent strain during long hours of music production.

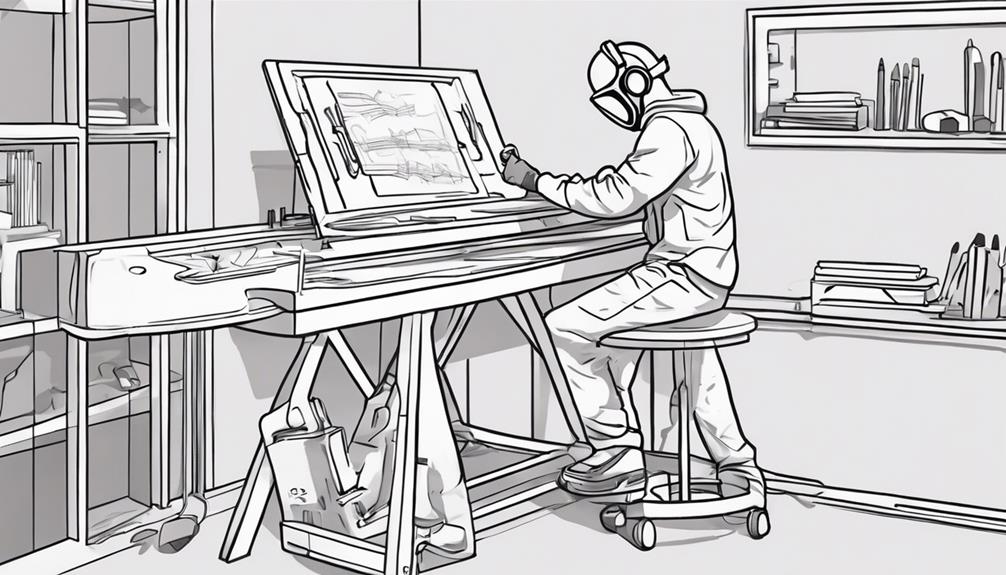
Preparing the Workspace

setting up your space

Clear out a spacious area in your workspace to accommodate the size of the desk you plan to build before starting the construction process. Guarantee that your workspace has proper lighting and ventilation for a comfortable working environment during the construction phase.

Have all necessary tools and materials organized and easily accessible within your workspace to facilitate efficient assembly. Consider using a drop cloth or protective covering to prevent any damage to the floor or surrounding surfaces while you work on building the desk. Double-check measurements and plans in your workspace to avoid mistakes and ensure a smooth construction process.

Cutting and Sanding the Wood

crafting wooden pieces carefully

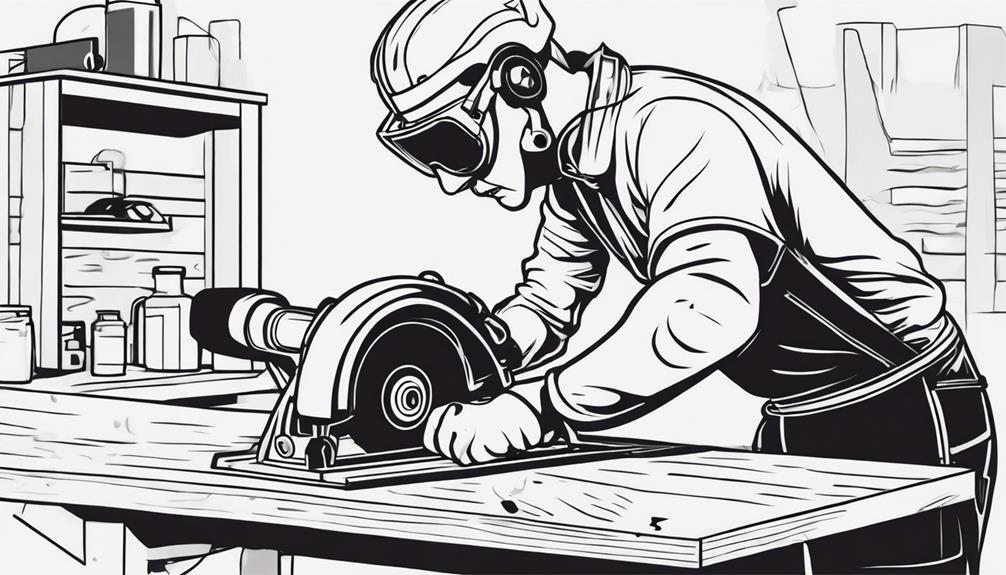
Measure and mark the birch butcher block with precision before making the necessary cuts to create your studio desk's main desktop.

Use a circular saw with a fine-tooth blade for accurate dimensions and then sand the edges and surfaces with fine-grit sandpaper for a smooth finish.

Don't forget to round off the corners for a polished look and wipe down the wood to remove any debris before moving on to staining.

Advertisement

Wood Measurements and Cuts

To guarantee a sturdy and professional-looking music production desk, accurately cut 35.5-inch squares of 3/4 inch MDF for the main desktop using precise measurements. The table below outlines the measurements needed for key components of the desk:

Component Material Measurement
Main Desktop 3/4 inch MDF 35.5-inch squares
Inner Spacing for Gear 3/4 inch MDF 19 1/16 inches
Cross Supports 2×3 Custom lengths
Back Support 1×8 Custom lengths

Ensure that the inner spacing for rack mount gear is accurately cut to 19 1/16 inches to accommodate your equipment. Use 2×3 for the cross supports to provide stability and 1×8 for the back support to reinforce the structure. Remember, precise measurements and clean cuts are essential for both the structural integrity and the visual appeal of your music production desk.

Sanding for Smoothness

Smooth out any rough surfaces and imperfections by sanding the wood before staining your music production desk.

Begin with coarser sandpaper, around 80 to 120 grit, for initial sanding to remove any prominent flaws. Make sure to follow the wood grain's direction to avoid creating scratches and maintain a uniform surface.

As you progress, switch to finer sandpaper, such as 220 to 400 grit, for a smoother finish. Thoroughly clean the wood after sanding to eliminate all dust and debris, ensuring a pristine base for staining.

Advertisement

Finishing Touches

When cutting and sanding the wood for your music production desk, prioritize precision and attention to detail to guarantee a professional and polished finish.

Start by measuring twice and cutting once to make sure accurate dimensions for each wood piece. Use a high-quality saw with a fine-tooth blade to make clean and precise cuts, reducing the risk of errors during assembly.

After cutting, sand the edges of the wood pieces to eliminate splinters and rough spots, creating a smooth surface for a refined look. Focus on the corners and edges while sanding to maintain a uniform appearance across the entire desk.

Smooth and properly finished wood not only enhances the aesthetics of your desk but also improves its durability and longevity. Remember, the effort put into cutting and sanding the wood will greatly impact the overall quality and appearance of your music production desk.

Assembling the Desk Frame

furniture assembly step by step

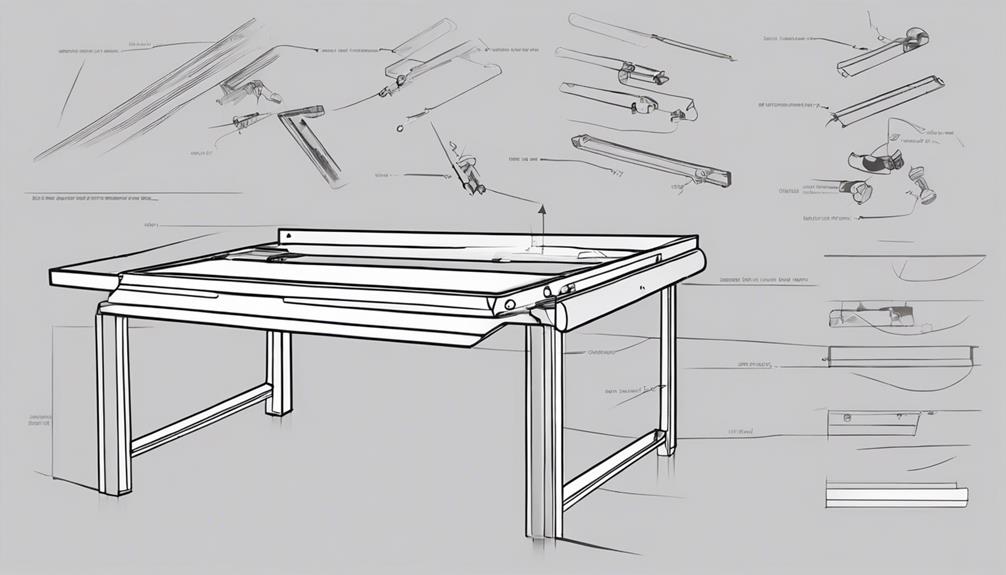
Begin by spacing out the side racks evenly to guarantee structural integrity and proper alignment when assembling the desk frame. This step is essential in ensuring that the desk frame is stable and can support the weight of your music production equipment.

Once the side racks are in position, secure them using half-inch screws and additional brackets for added stability during use.

Advertisement

Next, carefully place the desktop on the assembled side racks, making sure it fits snugly to create a solid foundation for your music gear. Use support pieces to attach the desktop to the side racks securely. This will provide a sturdy work surface for your equipment.

Before proceeding with the final touches, double-check the desk frame to ensure it's level. Make any necessary adjustments to guarantee a stable and balanced desk for your music production needs.

Following these steps will help you assemble a reliable and durable music production desk.

Adding Rack Mount Gear Spacing

rack mount equipment organization

To optimize your music production desk for rack mount gear spacing, determine the inner spacing needed for your equipment, typically around 19 1/16 inches.

When adding rack mount gear spacing to your desk, consider the following:

  • Use 2×3 Cross Supports: Incorporate 2×3 pieces for cross supports to guarantee stability for your rack mount gear.
  • Sturdy Back Support: Utilize a 1×8 back support to hold the sides together securely, especially when heavier gear is placed on the rack.
  • Wider Surface: Create a wider desk surface to accommodate all your gear on the same table, allowing for easy access and better organization of your equipment.
  • Accessibility Optimization: Optimize the design to make sure that the rack space is easily accessible from the sweet spot of your music production setup, enhancing workflow efficiency and convenience.

Installing the Countertop

setting up a countertop

Consider securing the countertop onto the assembled desk frame using screws or a suitable adhesive for a stable work surface.

Before attaching the countertop, make sure you have accurately measured its dimensions to guarantee a perfect fit. Once positioned, use screws or adhesive to firmly attach the countertop, ensuring it's level and flush with the edges of the desk for a polished look.

Advertisement

To enhance the durability of your countertop, seal its edges to safeguard against moisture damage and wear over time.

After installation, test the stability by applying pressure and making any necessary adjustments for a sturdy work surface. Maintaining a secure attachment won't only provide a reliable workspace for your music production needs but also add a professional touch to your DIY desk project.

Follow these steps diligently to create a functional and aesthetically pleasing music production desk.

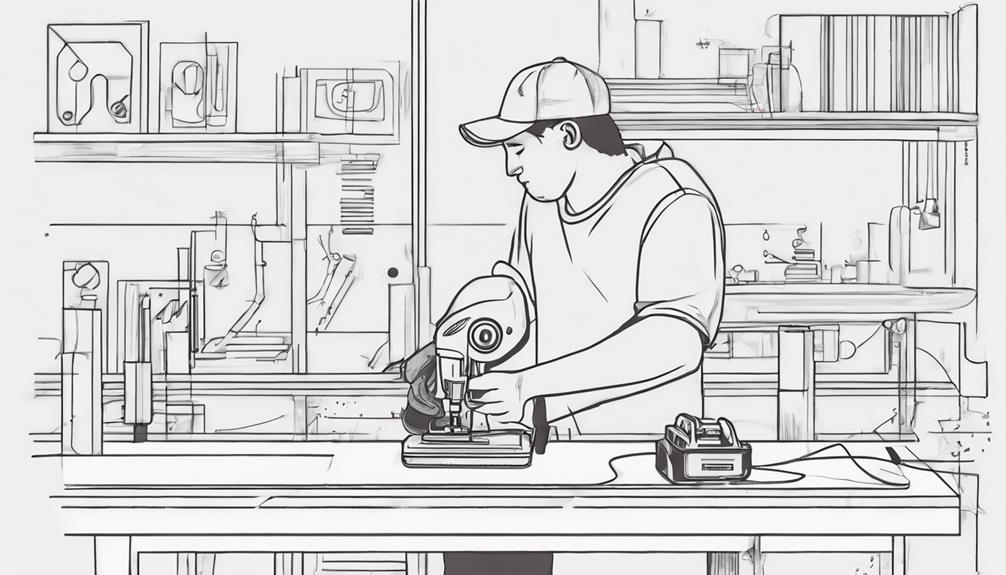
Sanding, Priming, and Painting

prepping surfaces for painting

You're about to tackle the essential steps of sanding, priming, and painting your music production desk.

Sanding will guarantee a smooth surface, while using an acrylic-based primer is key for proper paint adhesion.

Sanding Techniques

Smooth out imperfections in the wood surface by starting with an initial sanding using fine grit sandpaper before applying primer and paint for your music production desk. Essential sanding techniques are vital for achieving a professional finish.

Advertisement

Here are some tips to help you sand effectively:

  • Begin with a fine grit sandpaper (around 120-220) for the initial sanding process.
  • Use a super fine grit sandpaper (around 320-400) for a smoother finish before applying primer and paint.
  • Guarantee even sanding to help the primer adhere better to the wood surface.
  • Remember to sand between paint layers to remove imperfections and achieve a polished, smooth final look for your music production desk.

Priming Importance

Before painting your music production desk, make sure you understand the critical significance of priming the surface to achieve a flawless finish. Priming plays a key role in preparing the desk for painting by sealing the surface and enhancing paint adhesion.

By sanding the desk beforehand, you create a smooth canvas for the primer to adhere to, ensuring a uniform base for the paint application. This step is especially vital for MDF surfaces, as it prevents the material from absorbing paint unevenly, leading to a blotchy finish.

Opt for an acrylic-based primer and apply it in thin coats to effectively seal the surface and improve the overall durability of the paint job. Proper priming not only enhances the aesthetic appeal of your desk but also reduces the number of paint coats needed to achieve a professional look.

Painting Tips

Prepare your music production desk for a flawless finish by following these essential painting tips, including sanding, priming, and painting techniques.

Before painting, establish a smooth surface by sanding thoroughly to improve paint adhesion. Use an acrylic-based primer on MDF surfaces to help the paint adhere evenly and prevent blotching.

Advertisement

When painting, apply multiple thin coats of paint for a professional and durable finish. To achieve a polished look, remember to sand between paint layers using fine-grit sandpaper.

Attention to detail during the painting process is vital to guarantee a professional appearance for your finished music production desk.

  • Sanding before painting is essential for a smooth surface.
  • Use an acrylic-based primer on MDF surfaces for even paint adhesion.
  • Apply multiple thin coats of paint for a professional finish.
  • Sand between paint layers with fine-grit sandpaper for a polished look.

Staining and Finishing Touches

applying final finishes carefully

Consider pouring gel stain onto the surface of your music production desk and spreading it evenly with a dry cloth to achieve a consistent finish. When staining, keep in mind that applying multiple layers of gel stain can result in a darker color, but be cautious to prevent excess buildup.

After achieving the desired hue, a clear protective coat can be added to provide durability and a refined appearance. To guarantee a professional look, sanding between each layer of stain is recommended for a smooth texture.

Detail-oriented work during the staining process is vital for obtaining the desired aesthetic for your music production desk. Taking the time to apply the stain evenly and paying attention to any imperfections will contribute to a polished final result.

Cost Breakdown and Final Thoughts

analyzing expenses and conclusions

You're probably curious about how the costs break down for your DIY music production desk.

Let's discuss the budget breakdown analysis, tips for saving money, and the key takeaway points to think about as you undertake this project.

Advertisement

Budget Breakdown Analysis

For a thorough understanding of the cost breakdown and final reflections on constructing a music production desk, let's explore the budget breakdown analysis.

The total cost for a DIY music production desk amounts to approximately $544.32, with the primary expenses being:

  • Wood at $344.78
  • Hardware at $52.11
  • Tools at $49.97
  • Stain at $19.98
  • Miscellaneous items at $77.48

By choosing to build your own desk, you can save substantially compared to buying a pre-built one, which can cost between $1,000 to $2,500. Constructing a music production desk from wood allows for customization, cost-effectiveness, and a sense of accomplishment in creating a workspace tailored to your needs.

The DIY approach not only saves money but also offers a rewarding experience, providing a unique and personalized solution that meets your specific requirements.

  • Wood: The most significant cost, allowing for customization and durability.
  • Hardware: Essential for assembling the desk securely.
  • Tools: Necessary for the construction process.
  • Miscellaneous items: Additional components that enhance functionality.

Tips for Saving

To save on costs while building your music production desk, prioritize sourcing materials from budget-friendly suppliers. Seek out deals at local hardware stores, online marketplaces, or salvage yards to score discounts on wood, stain, hardware, tools, and miscellaneous items.

By being strategic in your material sourcing, you can greatly reduce the overall expenses associated with constructing your DIY music production desk. Additionally, consider repurposing materials from old furniture or items you already have to further cut down on costs.

Remember, the total estimated cost for building a DIY music production desk is approximately $544.32, which is a substantial saving compared to purchasing a pre-made studio desk. Embracing the DIY approach not only allows for customization but also frees up budget for investing in other studio equipment or upgrades.

Advertisement

Key Takeaway Points

When starting a DIY music production desk, being mindful of the cost breakdown and final thoughts is essential for a successful project. Here are some key points to keep in mind:

  • Cost Breakdown: Understanding the breakdown of costs, including materials like wood, stain, hardware, tools, and miscellaneous items, is vital for budgeting your DIY music production desk project effectively.
  • Cost-Effectiveness: Opting for a DIY music production desk can be a cost-effective choice compared to purchasing one, with the total materials cost ranging from $500 to $650 CAD.
  • Attention to Detail: Ensuring precise measurements, cuts, and attention to detail will result in a professional-looking DIY music production desk that meets your needs.
  • Customization: Take advantage of customization options to incorporate your personal preferences and design ideas into the DIY music production desk, making it uniquely yours.

Keep these key points in mind as you start on your DIY music production desk project, and enjoy the process of creating a workspace tailored to your music production needs.

Frequently Asked Questions

How Do You Set up a Room for Music Production?

To set up a room for music production, position your desk in the center for balanced acoustics. Add sound-absorbing panels, a monitor isolation pad, adjustable lighting, and a rug for improved audio quality, vibration prevention, comfort, and acoustics.

How Much Does It Cost to Build a Music Production Studio?

To build a music production studio, it can cost around $500-$650 CAD. This includes materials like MDF, hardware, paint, and a bamboo countertop. Opting for DIY can save you a lot compared to buying a ready-made desk.

How to Build a Music Studio Pc?

To construct a music studio PC, choose a powerful processor, ample RAM, fast SSD, and dedicated graphics card. Research best configurations balancing performance and budget. Select a reliable motherboard with adequate connectivity. Guarantee proper cooling and install a high-quality sound card for professional-grade output.

How Can I Build a Music Studio?

To build a music studio, start by determining your needs and gathering materials. Follow step-by-step instructions to assemble the setup, ensuring stability and functionality. Customize with rack plates and cable management for a professional finish.

Advertisement

Conclusion

Now that you've built your own music production desk, you've got a creative space that's truly music to your ears.

With the right materials and a little elbow grease, you've crafted a masterpiece that will inspire your next hit.

So go ahead, sit down at your new desk and let the music flow like a river through your fingertips.

Let your creativity soar on the wings of your homemade creation.

Advertisement
Continue Reading
Advertisement

Music Production

How to Choose Headphones for Music Production: Expert Advice!

Get expert advice on choosing headphones for music production, ensuring top-notch sound quality and professional results – learn more for a successful studio setup!

Published

on

selecting headphones for production

When selecting headphones for music production, prioritize sound quality. Opt for studio headphones with a flat frequency response and extended range for nuanced details. Guarantee accuracy by choosing closed-back for recording, open-back for natural sound, or hybrid for versatility. Explore top brands like Shure or Sennheiser for quality and precision. Comfort and impedance are important for long sessions. Frequency response and noise isolation techniques enhance your final mix. Select the right type of headphones based on your task, whether it's tracking, mixing, or on-stage monitoring. Giving priority to these factors leads to a professional outcome.

Key Takeaways

  • Prioritize flat frequency response for accurate sound reproduction.
  • Consider closed-back for noise isolation in recording, open-back for natural sound.
  • Choose reputable brands like Shure or Sennheiser for quality.
  • Select based on workflow: closed-back for tracking, open-back for mixing.
  • Look for extended frequency range and comfort for prolonged use.

Sound Quality Considerations

When selecting headphones for music production, prioritize sound quality above all else. Opt for studio headphones that offer a flat frequency response, ensuring a neutral audio representation without any coloration. This accuracy in sound reproduction is essential for capturing every detail in the mix with precision.

Look for headphones with an extended frequency range to capture subtle nuances in the music that might get lost with lower-quality options.

Superior sound quality in studio headphones is vital for achieving professional results in recording, mixing, and mastering tracks. The clarity and accuracy provided by high-quality headphones can make a significant difference in the final output of your music production.

Flat Frequency Response Importance

it helps minimize distortion

When selecting headphones for music production, recognizing the significance of flat frequency response is vital. This feature guarantees that the sound you hear accurately mirrors the original recording, aiding in identifying and fixing any mix issues.

Studio headphones with a flat frequency response provide a neutral sound profile, essential for achieving a balanced and professional final mix.

Frequency Response Basics

Having a clear understanding of the importance of flat frequency response is essential when selecting headphones for music production. In music production, the frequency response of headphones plays a critical role in achieving accurate audio reproduction.

Advertisement

Studio headphones with a flat frequency response are designed to deliver a balanced mix by ensuring that all frequencies are reproduced equally without any emphasis or attenuation on specific ranges. This feature is particularly important for professionals engaged in mixing and mastering, as it allows them to identify and address any imperfections in the sound accurately.

Professional-grade headphones with flat frequency response provide a true representation of the recorded audio, enabling producers and engineers to make informed decisions during the production process. When choosing headphones for music production, prioritizing models that offer a flat frequency response can greatly enhance the quality and precision of your work.

Neutral Sound Characteristics

Selecting headphones with neutral sound characteristics, especially a flat frequency response, is essential for achieving accurate audio reproduction in music production. Studio headphones with a flat frequency response guarantee that the sound you hear is faithful to the original recording, without artificially boosting or reducing certain frequencies.

This balanced sound is vital for making informed mixing decisions, as it allows you to hear all elements of the music accurately. By using headphones with a flat response, you can pick up on subtle details and nuances within the music that might otherwise be masked by headphones with colored sound profiles.

The transparent and uncolored sound provided by headphones with a flat frequency response enables precise monitoring during the mixing process, helping you create a well-balanced final product that accurately reflects your artistic vision. Make sure to prioritize the accuracy of your headphones' frequency response when selecting equipment for music production.

Advertisement

Studio Monitoring Consideration

Ensuring studio monitoring equipment maintains a flat frequency response is vital for accurate audio representation in music production.

When choosing studio headphones, prioritize models that offer a flat frequency response to guarantee that all frequencies are reproduced equally without any added coloration. This feature is essential for professionals as it allows them to hear every detail in the mix without bias towards specific frequencies.

With headphones providing a flat frequency response, imperfections in the mix can be easily identified and corrected, leading to a more precise final product.

Professional studio monitors and headphones are specifically designed to have a flat frequency response, making them ideal for monitoring and mixing tasks where accuracy is paramount.

Closed-Back Vs Open-Back Designs

headphone design comparison chart

Which design – closed-back or open-back – best suits your needs when choosing headphones for music production?

Closed-back headphones excel in noise isolation, making them ideal for recording sessions where external sounds need to be blocked out. They're perfect for tracking and initial recording stages to prevent sound leakage, ensuring a clean audio signal.

Advertisement

On the other hand, open-back headphones provide a more natural sound experience with a spacious soundstage, making them preferred for tasks like mixing and mastering. Their transparent sound quality is well-suited for critical listening and detailed audio editing, allowing for precise adjustments.

Some headphones, like the versatile SRH840A, offer a design that caters to both tracking and mixing tasks, providing flexibility for various production needs.

When deciding between closed-back and open-back designs, consider the specific requirements of your music production workflow to choose the option that best enhances your recording and editing processes.

Top Recommended Brands

highly rated brand recommendations

When considering top recommended brands for studio headphones in music production, Shure, Sennheiser, Audio-Technica, AKG, Beyerdynamic, and Steven Slate stand out as industry favorites known for their quality and accuracy in sound reproduction. These brands have earned their reputation for being reliable choices among audio professionals due to their commitment to delivering high-quality, durable headphones tailored for the demands of music production.

Whether you're a producer, engineer, or musician, each of these brands offers a diverse range of studio headphones designed to meet your specific needs. Steven Slate also deserves a mention for its excellent studio headphones designed to elevate your music production and mixing experience.

Trusted for their performance and precision in audio reproduction, these top brands make sure that you get the most out of your studio sessions when it comes to monitoring and producing music.

Advertisement

Studio Headphones for Precision

high quality studio headphones recommended

For achieving precision in music production, professional studio headphones play an essential role by accurately capturing all elements of the mix. These headphones are designed to help you detect subtle nuances and imperfections that might be overlooked with regular consumer headphones. With extended frequency responses, professional studio headphones guarantee that every note is heard clearly, allowing you to make informed mixing decisions. Additionally, the isolation provided by studio headphones shields you from external sounds, enabling you to focus solely on monitoring the recorded audio without distractions. It's worth noting that top producers rely heavily on studio headphones to deliver a polished and professional final mix.

Feature Description
Frequency Response Extended frequency range for precise audio reproduction.
Isolation Blocks out external noises, providing a focused monitoring environment.
Professional Designed for professionals in the music industry who require accuracy and reliability.

Comfort and Durability Factors

comfortable and durable materials

Guaranteeing comfort and durability in your studio headphones is essential for extended music production sessions. When considering which headphones to invest in, here are some key factors to keep in mind:

  1. Extended Wear Comfort: Opt for headphones with plush earpad materials and adjustable headbands to prevent discomfort during long hours of use.
  2. Open-Back Design: Choose open-back headphones for better airflow, reducing ear fatigue during extended wear compared to closed-back models.
  3. Durability: Look for headphones built with quality materials and sturdy construction to ensure they can withstand frequent use and potential wear and tear.
  4. Noise Isolation: If you work in a noisy environment, closed-back headphones provide better noise isolation, making them ideal for tracking and recording sessions.

Impedance and Sensitivity Insights

audio system specifications analysis

To optimize your music production setup, understanding the impedance and sensitivity of headphones is essential for achieving the desired audio quality and performance.

Headphone impedance measures the electrical resistance, with high-impedance headphones requiring a dedicated amplifier for best performance. Impedance affects volume adjustment, influencing how well headphones can be driven by different devices.

On the other hand, sensitivity in headphones indicates the loudness at a given power level, typically measured in decibels. High-sensitivity headphones can produce louder sound levels with less power input, making them suitable for certain audio equipment setups.

It's important to grasp the relationship between impedance and sensitivity to select headphones that not only match your audio equipment but also cater to your listening preferences. By considering these factors, you can ensure that your headphones deliver the best sound quality and performance for your music production needs.

Understanding Frequency Response

exploring frequency response characteristics

Professional studio headphones' extended frequency response plays a pivotal role in capturing all nuances in music beyond the standard 20 – 20,000 Hz range. When it comes to music production, understanding frequency response is vital for achieving accurate and detailed sound reproduction. Here's what you need to know:

  1. Extended Frequency Response: Studio headphones offer a broader frequency range, allowing you to hear low bass tones and high-frequency details with clarity.
  2. Accurate Frequency Reproduction: These headphones make sure that transient details, like drum hits or guitar plucks, are faithfully reproduced, aiding in precise music production.
  3. Nuances in Music: The extended frequency response helps in capturing subtle nuances such as vocal inflections and instrument overtones, enhancing the overall listening experience.
  4. Final Audio Output: By providing an accurate representation of the entire frequency spectrum, studio headphones contribute to a well-balanced and dynamic final mix for your music production projects.

Understanding frequency response in studio headphones is essential for achieving a polished and professional audio output in your music productions.

Noise Isolation Techniques

effective noise reduction methods

When selecting headphones for music production, consider the essential aspect of noise isolation techniques. These techniques help block out external sounds, allowing you to focus on the accuracy of your music.

Opting for headphones with soundproofing features and a closed-back design can greatly benefit your overall listening experience.

Soundproofing for Accuracy

Implement noise isolation techniques in headphones to guarantee accurate music production by eliminating external sounds and focusing solely on the recorded audio. By utilizing soundproofing techniques, you can make sure that distractions are minimized, allowing you to hear subtle details in your mix clearly.

Advertisement

Here are four reasons why soundproofing is essential for accuracy in music production:

  1. Eliminating External Sounds: Noise isolation in headphones blocks out unwanted background noise, creating a controlled environment for precise audio monitoring.
  2. Enhancing Focus: Soundproofing techniques help you concentrate on the recorded audio, enabling you to make critical decisions without external interruptions.
  3. Preventing Distractions: Studio headphones with good noise isolation keep you immersed in your work, maintaining your creative flow during recording and mixing sessions.
  4. Detail-Oriented Listening: Proper soundproofing ensures that you can pick up on the nuances and intricacies within your music, leading to a more polished final product.

Closed-Back Design Benefits

Closed-back headphones offer superior noise isolation capabilities, guaranteeing a focused listening experience essential for accurate audio monitoring and recording in a recording studio. By effectively blocking external sounds, closed-back headphones create an isolated environment, vital for tracking vocals, instruments, and live recordings with precision.

The closed design of these headphones prevents sound leakage, preserving the integrity of the audio being produced. This focused listening experience enables producers and musicians to capture clean and unaltered audio during recording sessions.

When tracking vocals or monitoring intricate details in a mix, closed-back headphones excel in providing the necessary isolation for a professional studio setting. The ability to block out external noise ensures that what you hear is an accurate representation of the recorded audio, aiding in making critical production decisions.

Whether you're a seasoned producer or a budding musician, closed-back headphones are a valuable tool for achieving high-quality and reliable audio recordings in any studio environment.

Selecting the Right Type of Headphones

choosing headphones that suit

For best results in music production, make sure you choose the appropriate type of headphones that align with your specific tasks, whether it be tracking, mixing, or mastering.

When selecting headphones for music production, consider the following options:

Advertisement
  1. Closed-back headphones: Ideal for tracking due to their ability to prevent sound leakage, which is essential during recording sessions.
  2. Open-back headphones: Perfect for mixing and editing as they offer natural sound reproduction and a spacious soundstage for accurate audio evaluation.
  3. Semi-open back headphones: Provide a balance between the isolation of closed-back and the open sound of open-back headphones, making them versatile for different production stages.
  4. In-ear monitors: Suitable for on-stage monitoring or situations where portability and noise isolation are essential, offering a compact and efficient solution for various music production needs.

Selecting the right type of headphones based on your intended use is key to achieving professional results in music production.

Frequently Asked Questions

What Headphones Do Most Producers Use?

Most producers opt for studio-quality headphones to guarantee accurate monitoring and mixing. Popular choices like the Shure SRH840A and SRH1540 are favored. These headphones are essential for catching imperfections and nuances, allowing you to focus on the audio.

How to Choose Earphones for Music?

When choosing earphones for music, consider the snug fit for immersive sound. Different types cater to noise isolation, portability, or sound quality preferences. Look for lightweight options for on-the-go listening and compact earbuds for workouts.

Do I Need Studio Headphones for Music Production?

You need studio headphones for music production. They provide accurate sound representation, isolate external noise, and guarantee you catch imperfections. Top producers rely on them for precise monitoring. Get the best for professional results in your productions.

What Do Audiophiles Look for in Headphones?

When selecting headphones for music production, you prioritize flat frequency response, high sensitivity, low THD, and high impedance. Don't overlook comfort, durability, and build quality. These factors guarantee accurate, detailed sound reproduction for your audiophile needs.

Conclusion

Now that you have all the expert advice on choosing headphones for music production, you're ready to immerse yourself in a world of crystal-clear sound and precision.

Advertisement

Picture yourself in your studio, surrounded by top-quality headphones that bring your music to life with every beat and note.

With the right headphones, your music production journey will reach new heights of creativity and clarity.

Get ready to elevate your sound like never before!

Continue Reading

Music Production

How to Choose a Laptop for Music Production: Top Tips!

Navigate the world of music production laptops with expert tips to improve your workflow and enhance your sound, starting with the letter 'N'.

Published

on

selecting a laptop wisely

When selecting a laptop for music production, prioritize processor power with Intel Core i5 or AMD Ryzen 5 for real-time effects. Opt for at least 8GB of RAM; 16GB or more recommended for complex tasks. Emphasize SSD storage for quick file access and shorter load times. Check for essential connectivity features like USB-C, USB-A, and Thunderbolt ports. Guarantee sufficient audio processing efficiency with powerful CPUs and dedicated GPUs. Consider external device compatibility for seamless integration. These tips will help you choose the right laptop to enhance your music production workflow.

Key Takeaways

  • Select laptops with Intel Core i5, AMD Ryzen 5, M1 Pro, or M1 Max processors for high performance.
  • Aim for a minimum of 8GB RAM, upgradeable to 16GB or more for multitasking.
  • Opt for SSD storage for fast data access, consider external options for capacity.
  • Ensure connectivity with USB-C, USB-A, Thunderbolt, HDMI, and SD card slots.
  • Consider a laptop with a dedicated GPU for optimized audio production performance.

Processor Power

When selecting a laptop for music production, prioritize the processor power by choosing models equipped with Intel Core i5 or AMD Ryzen 5 processors and above. These processors, including the M1 Pro and M1 Max found in MacBook Pro models, offer robust processing capabilities essential for running music production software effectively.

A high-performance CPU is essential for handling tasks like real-time effects, virtual instruments, and overall system responsiveness during music production. Processors with multiple cores and high clock speeds are ideal for managing complex audio processing requirements. The ability of the CPU to swiftly process data impacts the efficiency of recording, editing, and mixing tracks, making it essential to have a processor that can handle the demands of music production software.

RAM Capacity

4gb of memory space

When looking into RAM capacity for music production, you'll want to pay attention to both RAM speed and upgrade options. These factors can have a notable impact on your laptop's performance when working on music projects.

Ensuring you have the right RAM capacity is key to a smooth and efficient music production experience.

RAM Speed

Wondering how RAM speed impacts your music production workflow? When it comes to optimizing your music production setup, paying attention to RAM speed is essential.

Faster RAM speeds, such as DDR4, play a vital role in enhancing data access and processing capabilities. This means smoother multitasking and improved system responsiveness while working on your music projects.

Advertisement

For handling large projects and running multiple plugins simultaneously, consider investing in higher RAM capacities. Balancing RAM capacity with speed is fundamental for ensuring that your system can cope with the demands of music production software and tools.

With at least 8GB of RAM, you can expect a decent performance, but for more complex tasks, go for 16GB or more to avoid bottlenecks.

RAM Upgrade Options

To optimize your music production setup, consider exploring different RAM upgrade options, specifically focusing on RAM capacity. When selecting a laptop, prioritize models with upgradeable RAM to future-proof your system.

Look for laptops that come with easily accessible RAM slots, allowing you to conveniently upgrade your memory. For smooth music production performance, aim for at least 8GB of RAM in your laptop. Some laptops offer the flexibility to upgrade RAM up to 32GB or even higher, providing enhanced multitasking capabilities.

By upgrading your RAM, you can improve overall system performance, speed up processing, and seamlessly handle more tracks and plugins. Investing in a laptop with ample RAM capacity not only guarantees your system can meet current demands but also prepares you for future music production needs.

Advertisement

Make the most of your music production experience by considering RAM upgrade options that enhance your laptop's capabilities.

Storage Space

limited storage space available

When selecting a laptop for music production, opt for at least 512GB of SSD storage to guarantee faster data access.

Upgrading to 1TB or more can accommodate extensive music libraries and project files.

Consider SSDs over HDDs for quicker load times and smoother software operation in your music production endeavors.

SSD Vs HDD

Consider the storage dilemma between SSD and HDD when selecting a laptop for music production.

SSDs excel in data transfer speeds, important for efficiently handling large audio files and samples. They're also more durable due to their lack of moving parts, reducing the risk of mechanical failures compared to HDDs.

Advertisement

On the other hand, HDDs offer larger storage capacities at a lower cost per gigabyte, making them ideal for extensive music libraries.

However, SSDs greatly cut down boot and load times for music production software, enhancing workflow and productivity. Additionally, SSDs are more energy-efficient, contributing to longer laptop battery life, a crucial factor for on-the-go music production.

When choosing between SSD and HDD for your music production laptop, consider your storage needs, speed requirements, budget, and portability preferences to make the best decision for your creative endeavors.

External Storage Options

External storage options expand the storage capacity available for your music production projects, allowing you to store additional files and samples efficiently.

When contemplating external storage options, popular choices include external hard drives, solid-state drives (SSDs), and cloud storage solutions.

Advertisement

External SSDs stand out for their faster data transfer speeds, enhancing workflow efficiency by quickly accessing and saving music production files and samples.

Cloud storage services like Dropbox, Google Drive, or OneDrive offer convenient access to your projects from multiple devices, providing flexibility and easy collaboration with others.

To meet your music production needs effectively, it's essential to take into account the storage capacity, speed, and reliability of the external storage options you choose.

Whether opting for the high-speed performance of SSDs, the ample storage space of external hard drives, or the accessibility of cloud storage solutions, selecting the right external storage option can greatly impact your workflow and creativity.

Connectivity Options

versatile connectivity for all

Look for laptops equipped with a variety of ports to guarantee seamless connectivity for your music production needs. When selecting a laptop for music production, make sure it has essential connectivity options such as USB-C, USB-A, Thunderbolt, HDMI, and an SD card slot.

USB-C ports are vital for compatibility with modern audio interfaces and peripherals. Multiple USB-A ports allow you to connect external gear like MIDI controllers and audio interfaces easily. Thunderbolt ports provide high-speed data transfer capabilities, ideal for working with large audio files.

Advertisement

An HDMI port comes in handy for connecting to external monitors or audiovisual equipment, enhancing your workflow. Additionally, having an SD card slot on your laptop enables quick access to audio samples or project backups.

Prioritizing these connectivity options will ensure that your laptop can easily interface with various audio devices and peripherals for a smooth music production experience.

Audio Processing Efficiency

improving audio processing efficiency

To optimize audio processing efficiency in your music production endeavors, prioritize laptops equipped with powerful CPUs capable of handling multiple tracks and effects seamlessly. When selecting a laptop for music production, take into account the importance of real-time audio processing and the role a powerful CPU plays in ensuring smooth playback. Laptops with higher core counts and clock speeds excel in managing multiple tracks and effects without lag or dropouts. Additionally, having sufficient RAM is vital to prevent interruptions in audio playback and maintain workflow efficiency. SSD storage enhances overall performance by enabling quick data access and loading large audio files swiftly. For an extra boost, dedicated GPUs can offload graphical tasks, further optimizing the system for audio processing tasks. Check out the table below for a quick comparison of key factors to take into account for audio processing efficiency in your music production setup:

Key Factor Importance Why It Matters
Powerful CPU High Handles multiple tracks and effects seamlessly
Sufficient RAM High Prevents audio dropouts and ensures smooth playback
SSD Storage High Enables quick data access and loading of large audio files
Dedicated GPUs Medium-High Offloads graphical tasks, optimizing system performance

External Device Compatibility

external devices easily connect

When setting up your music production workspace, ensuring your laptop has compatible ports and driver support for external devices is essential for smooth integration and peak performance. Make sure your laptop features a variety of ports such as USB-C, USB-A, and Thunderbolt to connect external devices like audio interfaces and MIDI controllers.

Check for adequate driver support for these peripherals to guarantee they work seamlessly with your setup. Additionally, consider the power output of your laptop to ensure it can drive external devices effectively, especially power-hungry equipment like audio interfaces and mixers.

Having the right ports and driver support won't only enable peak performance but also allow you to connect multiple external devices simultaneously without any compatibility issues. Remember, compatibility with external devices is important for a hassle-free music production experience, so choose a laptop that meets these requirements for a seamless integration into your workflow.

Frequently Asked Questions

How to Pick a Laptop for Music Production?

When picking a laptop for music production, focus on processing power with Intel Core i5 or AMD Ryzen 5 and 8GB+ RAM. Opt for SSD storage for faster data transfer. Look for USB-C connectivity and consider portability and battery life.

Advertisement

What Laptops Do Top Music Producers Use?

When creating music, top producers rely on laptops that offer power, reliability, and performance. MacBook Pro and MacBook Air are favored choices for their stability and software compatibility. Features like high-res displays and long battery life are key.

What Are the Most Important Specs for Music Production Laptop?

For a music production laptop, focus on a powerful CPU like Intel Core i5 or AMD Ryzen 5, at least 8GB of RAM, and SSD storage. These specifications are essential for running DAWs and plugins smoothly.

Do You Need a Powerful Laptop to Make Music?

Absolutely, you need a powerful laptop for music creation. It's like having a high-performance sports car for a race – essential for managing the demands of software and plugins to guarantee seamless music production.

Conclusion

So, now that you've got the lowdown on what to look for in a music production laptop, it's time to hit the stores and find the perfect match.

Remember, don't just settle for the first shiny laptop you see – make sure it's got the processor power, RAM capacity, and connectivity options you need to make those beats pop.

Advertisement

Do your research, ask questions, and you'll be dropping those sick tracks in no time.

Happy hunting!

Continue Reading

Music Production

How to Build Your Own PC for Music Production: DIY Guide!

Craft your ultimate music production setup with a DIY PC build guide featuring top components and expert tips.

Published

on

diy music production pc

To build a PC for music production, select a powerful CPU like Ryzen 9 5900X. Choose a mid-range GPU such as NVIDIA GTX 1660 for performance. Opt for at least 16GB DDR4-3200 RAM. Install a 500GB NVMe SSD for speed. Get a compatible motherboard with ample slots. USB audio, DACs, and amplifiers enhance performance. Use software like Pro Tools for editing. Assemble components following the motherboard manual. Complete with cables from the power supply. Verify tight connections and airflow.

Key Takeaways

  • Select CPU with high core count for performance.
  • Choose mid-range GPU like NVIDIA GTX 1660.
  • Opt for at least 16GB DDR4 RAM.
  • Include NVMe SSD for fast storage.
  • Verify motherboard compatibility and features.

Selecting the Right CPU

When building your own PC for music production, selecting the right CPU is essential for top performance. For tasks like heavy audio processing, having a CPU with a higher core count, such as the Ryzen 9 5900X, can greatly enhance your workflow. The number of CPU cores directly impacts the CPU processing power, allowing for smoother handling of complex music production tasks.

It's important to take into account the impact of integrated graphics on CPU performance. CPUs like the Ryzen 7 7700X provide integrated graphics that can influence overall processing capabilities. Depending on your specific music production needs, you may need to assess CPUs like the Ryzen 9 5900X or even opt for a Xeon processor with more threads for intensive audio workloads.

When choosing a CPU, be mindful of the trade-offs between integrated and dedicated GPUs. While integrated graphics can save costs and space, dedicated GPUs offer superior performance for graphics-intensive applications. Make an informed decision based on your priorities when selecting a CPU for your music production PC.

Choosing Graphics Card for Performance

selecting high performance graphics card

Selecting a suitable graphics card is essential for optimizing performance in your music production PC. When choosing a graphics card for music production, consider these key factors:

  1. Opt for Mid-Range Cards: Look into options like the NVIDIA GTX 1660 or AMD RX 5600 for a good balance between performance and cost-effectiveness in handling visual plugins and audio visualization tasks.
  2. Check VRAM Capacity: Higher VRAM capacity on the graphics card enables smoother handling of textures and effects within audio software, enhancing overall performance.
  3. Ensure Compatibility: Verify that the graphics card is compatible with your motherboard and power supply to prevent any hardware conflicts or power-related issues that could hinder performance.
  4. Consider Upgrading: If you require more power for demanding audio software and visual effects, upgrading to a higher-end GPU like the NVIDIA RTX 3060 Ti can greatly boost your music production performance.

Optimal RAM Configuration

optimizing computer ram usage

To enhance your music production setup further, understanding the ideal RAM configuration is essential for efficient handling of multiple tracks and plugins. When building a custom music production PC, your RAM choice plays a significant role in meeting your music production needs. Opt for at least 16GB of RAM to ensure smooth operation with multiple tracks and plugins. For larger projects with extensive virtual instruments and effects, consider 32GB or more for optimal performance. Higher RAM speeds like DDR4-3200 or DDR5-4800 can further enhance your system's capabilities in audio processing tasks. Utilizing a dual-channel RAM configuration improves memory bandwidth, allowing for smoother multitasking capabilities during music production sessions. Ensure compatibility with your motherboard and CPU to maximize performance and avoid any potential bottlenecks in your workflow.

RAM Capacity Ideal for Speed Configuration Compatibility
16GB Multiple tracks and plugins DDR4-3200 Dual-channel Check motherboard
32GB+ Larger projects with many effects DDR5-4800 Dual-channel Verify with CPU

Storage Solutions for Speed

optimizing storage for efficiency

For faster data transfer speeds and seamless audio production workflows, consider incorporating NVMe SSDs as your storage solution. NVMe SSDs offer quicker data transfer rates compared to traditional SATA SSDs, making them ideal for swift access to audio files and samples.

M.2 NVMe SSDs, specifically, provide high-speed storage solutions tailored for uninterrupted audio project workflows. To guarantee peak performance, aim for a minimum of a 500GB NVMe SSD to store your audio projects and software efficiently.

Additionally, exploring RAID configurations can enhance both redundancy and overall storage performance. If you require even faster data speeds for demanding music production tasks, consider SSDs with PCIe 4.0 support.

Advertisement

Motherboard Considerations

motherboard selection and compatibility

When choosing a motherboard for your music production PC, it's essential to verify compatibility with your components and peripherals. Seek out ample PCIe slots for sound cards and interfaces. Look for high-quality audio components that can enhance sound output. Built-in Wi-Fi is also important for seamless connectivity. Additionally, opt for a motherboard with enough RAM slots. This will allow for future upgrades and help keep your system running smoothly.

Compatibility With Components

Confirm that your chosen motherboard is compatible with the components you plan to use for your music production PC, starting with the appropriate socket type for your CPU.

Here are some key considerations to guarantee compatibility:

  1. Motherboard Socket Compatibility: Verify that the motherboard supports the socket type of your chosen CPU.
  2. Chipset Compatibility: Check if the motherboard's chipset is suitable for your RAM and storage devices.
  3. PCIe Slots and USB Ports: Take into account the number of PCIe slots and USB ports for your expansion needs.
  4. Motherboard Features and Form Factor: Look for onboard audio, networking capabilities, and ensure the motherboard's form factor fits your chosen PC case.

Ports and Connections

Check the various ports and connections available on your chosen motherboard to guarantee seamless integration with your audio equipment and peripherals.

When selecting a motherboard for your music production PC, consider the inclusion of USB 3.2 Gen 2 and USB-C ports. These ports offer high-speed data transfer and compatibility with modern peripherals such as audio interfaces, MIDI controllers, and external gear.

Additionally, optical audio ports can provide a digital optical connection to audio equipment, guaranteeing high-quality audio transmission.

Look for HDMI and DisplayPort connections on the motherboard, which can be useful for connecting to external monitors or audio interfaces for a more versatile setup.

Advertisement

It's crucial to make sure that the motherboard has an adequate number of PCIe slots for expansion cards, such as sound cards or additional audio interfaces, allowing you to customize your setup based on your specific music production needs.

Power Supply Essentials

understanding power supply basics

Consider selecting a power supply unit (PSU) that meets the wattage requirements of your components when building your own PC for music production. To guarantee peak performance and longevity of your system, pay attention to the following essentials:

  1. Wattage: Choose a PSU with sufficient wattage to power all your components effectively.
  2. Efficiency Ratings: Look for high efficiency ratings like 80 Plus Bronze to reduce energy waste and heat output.
  3. Modular PSUs: Opt for modular PSUs for easier cable management, improved airflow within your case, and a cleaner build overall.
  4. Connectors and Warranty: Ensure the PSU has the necessary connectors for your motherboard, CPU, GPU, and storage devices. Additionally, consider the warranty offered by the manufacturer for long-term reliability.

Peripherals for Music Production

music production accessory options

When setting up your music production workstation, outfitting it with the right peripherals is key for achieving professional audio quality and efficient workflow. Essential peripherals like sound cards, DACs, and USB interfaces play a crucial role in providing high-quality audio inputs and outputs. Selecting the right microphone is vital for capturing clear and professional audio during recording sessions. Quality headphones and speakers are necessary for accurate sound reproduction and monitoring. Additionally, investing in specialized peripherals such as MIDI controllers can enhance creativity and streamline workflow efficiency in music production. External DACs and amplifiers can also be valuable additions to your setup, improving overall audio quality.

Peripherals Description
USB Audio Provides high-quality audio through USB connection
DACs Enhance audio quality and clarity
Amplifiers Boost audio signals for better sound output

Software for Audio Editing

audio editing software details

Exploring various digital audio workstations (DAWs) can provide you with a versatile array of tools for audio editing and music production. Here's what to keep in mind:

  1. DAWs Selection: Choose popular software like Ableton Live, Pro Tools, or FL Studio for extensive audio editing capabilities.
  2. Plugins and Virtual Instruments: Enhance your creativity by incorporating plugins and virtual instruments into your chosen DAW for a personalized sound production experience.
  3. Mixing and Mastering Tools: Utilize built-in tools within DAWs to achieve professional-level audio quality and ensure a balanced mix for your music productions.
  4. Audio Restoration and Real-Time Effects: Employ software like iZotope RX for audio restoration to clean up recordings, and utilize real-time effects within DAWs for live performances and recording enhancements.

Building and Assembling the PC

pc assembly and construction

Gather all the necessary components such as CPU, GPU, RAM, motherboard, storage, and power supply before beginning the assembly process. To guarantee a smooth building experience, have the right tools like screwdrivers, anti-static wrist straps, and thermal paste on hand.

Follow the motherboard manual meticulously to correctly install the CPU, RAM, GPU, and other components into their designated slots on the motherboard.

Connect all cables from the power supply to the motherboard, GPU, storage devices, and other components to provide power to the system. It's essential to double-check all connections, tighten screws, and ensure proper airflow in the case before powering on the PC for the first time.

Taking these steps will help prevent any issues and make certain that your PC is ready for music production tasks.

Building your own PC for audio production can be a rewarding experience, providing you with a customized and powerful tool for your music endeavors.

Advertisement

Frequently Asked Questions

Is DIY PC Cheaper?

Yes, DIY PC building can be cheaper. When you research and choose cost-effective components tailored to your needs and budget, you save money on markup costs. It's a smart way to optimize performance and value.

How to Configure PC for Music Production?

To configure your PC for music production, go for high-quality core counts and clock speeds for crazy fast performance. Load up on RAM for handling big files and plugins. SSD storage is a must for smooth workflow. Get a premium sound card for quality audio. Cool it well for intense sessions.

Can a Gaming PC Be Used for Music Production?

Yes, a gaming PC can be used for music production. Make sure it has a powerful CPU, ample RAM, and fast storage. Integrated graphics are sufficient. Customize it with components optimized for music production, like a high-core CPU and low-latency USB chipset.

What Is the Minimum Processor for Music Production?

For music production, you'll want a processor with at least 4 cores for efficient multitasking. Consider Intel Core i5 or AMD Ryzen 5 CPUs. Look for high clock speeds, multi-threading, and good single-core performance.

Conclusion

As you finish assembling your DIY music production PC, each component coming together symbolizes the harmony and creativity you'll be able to achieve with your new setup.

Advertisement

Get ready to tap into your musical genius with a custom-built machine that's tailored to your specific needs.

The possibilities are endless when you have the right tools at your fingertips.

Happy creating!

Continue Reading
Advertisement

Affiliate disclaimer

As an affiliate, we may earn a commission from qualifying purchases. We get commissions for purchases made through links on this website from Amazon and other third parties.

Advertisement
Advertisement

Trending

Copyright © 2024 The Sound of Music Guide Affiliate disclaimer As an affiliate, we may earn a commission from qualifying purchases. We get commissions for purchases made through links on this website from Amazon and other third parties.