Connect with us

Music Production

How to Become the Best Music Producer: Tips for Excellence!

Craft your path to becoming the best music producer by mastering key skills, networking with pros, and cultivating a unique sound.

Published

on

music producer excellence tips

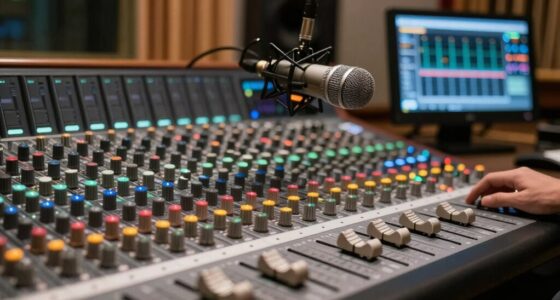
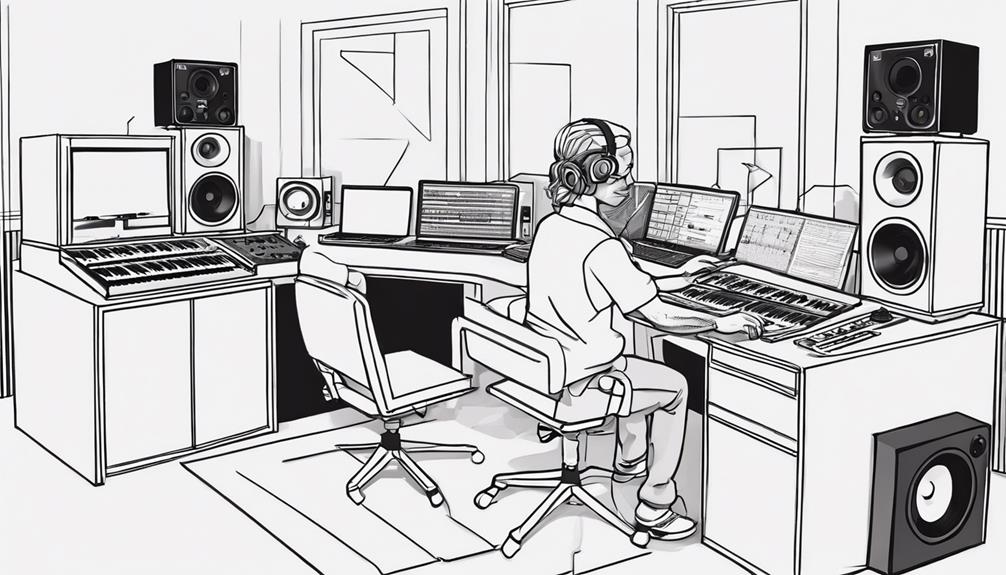
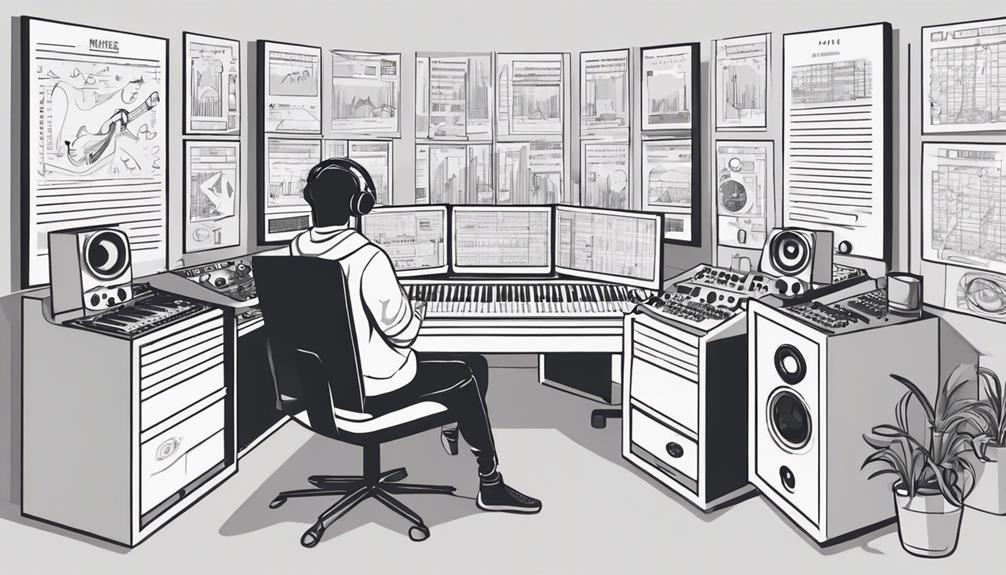
To become the best music producer, focus on mastering music theory, audio engineering, and production techniques. Build a unique sound by experimenting with blending genres. Network with industry pros for opportunities and collaborations. Stay persistent, set goals, and nurture a growth mindset. Keep updated with trends and attend workshops. Collaborate with artists for diverse styles and connections. Following these tips will help you on your journey to excellence in music production!

Key Takeaways

  • Master music theory, production techniques, and software.
  • Develop a unique style by blending genres and experimenting.
  • Network with industry professionals for collaborations and placements.
  • Maintain a growth mindset, focus, and persistence.
  • Stay updated with industry trends through workshops and collaborations.

Setting a Strong Foundation

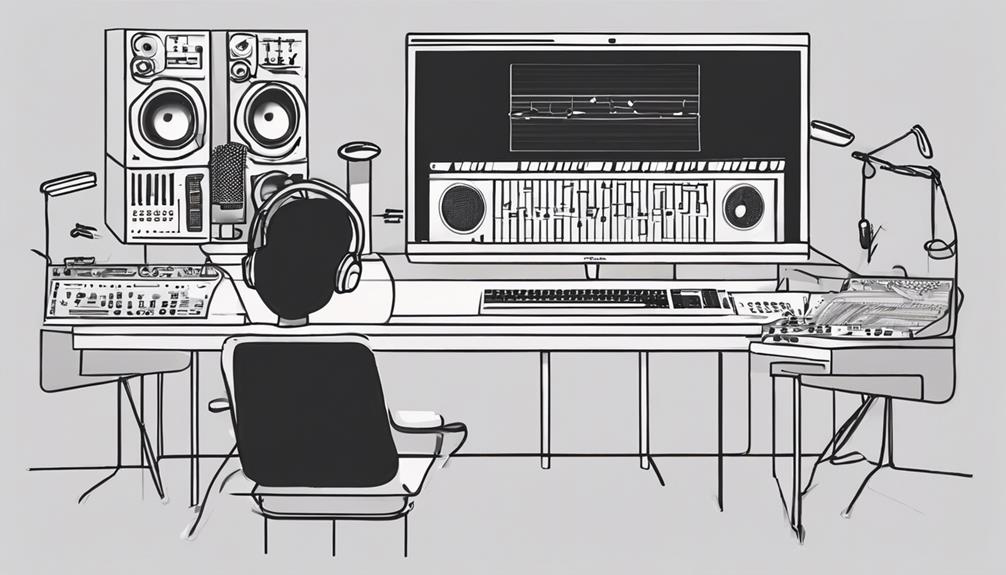
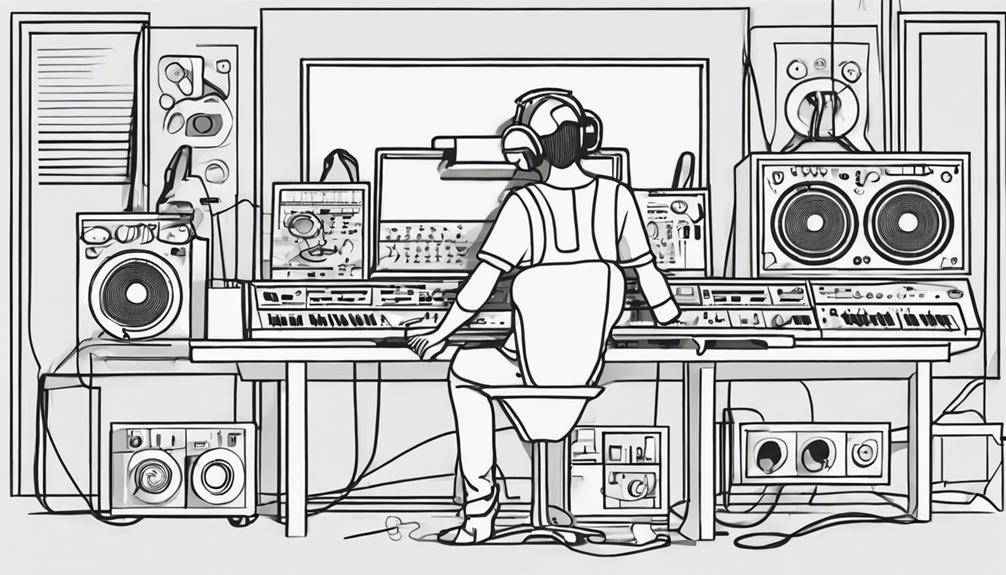
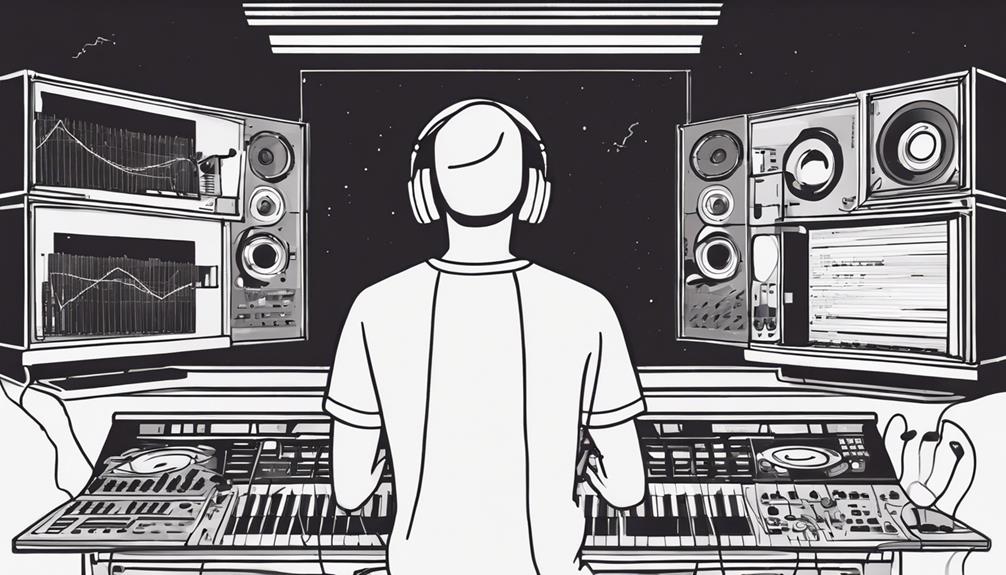
To become the best music producer, you must establish a solid foundation by learning essential skills such as music theory, audio engineering, and production techniques.

Many successful music producers have gained formal education or engaged in self-study to enhance their skills and knowledge. By learning new concepts and techniques, you can expand your creativity and improve your music production abilities.

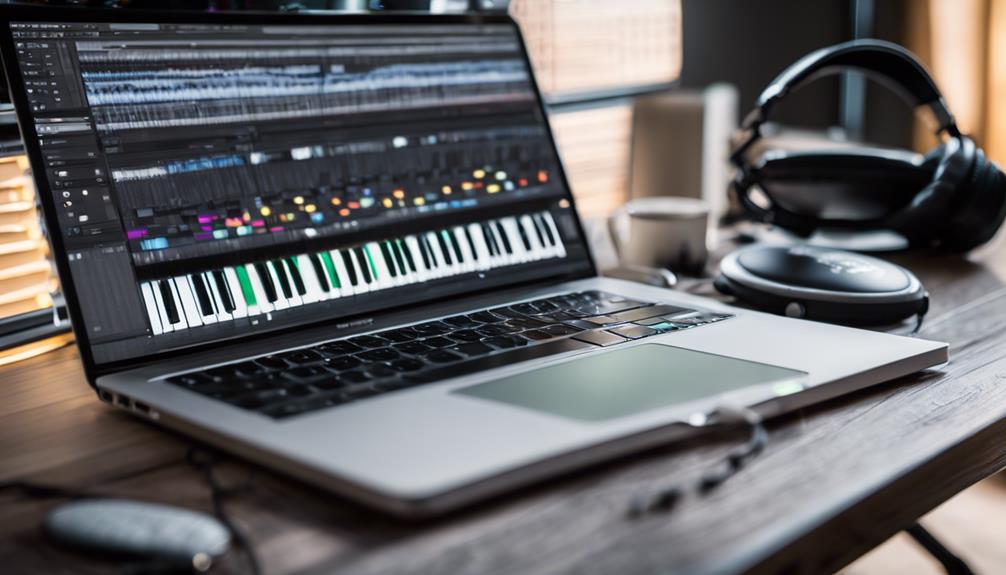
Familiarizing yourself with music software, hardware, and the technical aspects of music production is vital in today's industry. While some music producers like The Beatles succeeded without a deep understanding of music theory, having a strong foundation in these areas can give you a competitive edge.

Whether you choose formal education or self-study, focusing on mastering these fundamental skills will set you on the path to becoming a successful music producer.

Developing Unique Sound and Style

creating individualized music approach

Experimenting with blending different genres and musical elements can be a key strategy in developing a unique sound and style as a music producer. By combining elements from various genres, you have the opportunity to create a sound that's distinctive and memorable. Stay true to your artistic vision and authenticity to guarantee that your style stands out.

Exposure to diverse music genres can inspire creativity and help shape your signature sound. Crafting a unique sound requires dedication, time, and a willingness to explore new ideas. Actively listening to a wide range of music types can provide inspiration and allow you to incorporate fresh elements into your productions.

Advertisement

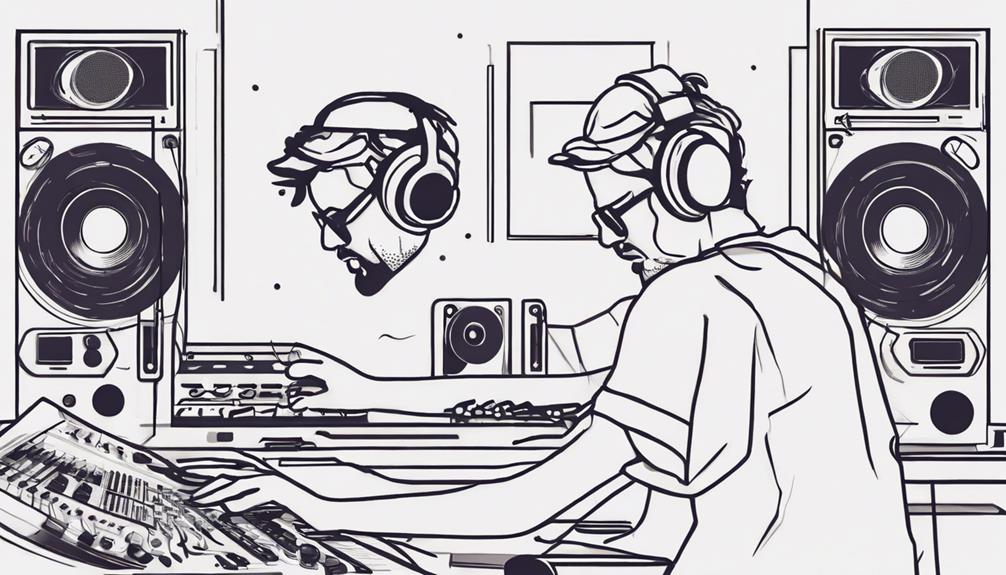
Networking and Relationship Building

effective networking strategies discussed

Engaging with industry professionals and building connections is essential for advancing your career as a music producer. Networking plays an important role in creating opportunities for placements, collaborations, and mentorship within the music production field.

To expand your network, consider attending industry events such as NAMM and ASCAP Expo, where you can connect with like-minded individuals and establish valuable relationships. Additionally, joining online music production communities like Gearslutz and Future Producers can provide you with networking opportunities and the chance to collaborate with artists, engineers, and other producers.

Furthermore, it's beneficial to actively follow and engage with music industry influencers and professionals on social media platforms like Instagram and LinkedIn. By interacting with these individuals, you can stay updated on industry trends, showcase your work, and potentially form meaningful connections that could advance your career.

Persistence and Focus

determination and hard work

Developing persistence and focus is essential for honing your skills and achieving success as a music producer. In the world of music production, a strong work ethic is vital. It involves consistently dedicating time to your craft, even when faced with challenges.

Setting specific goals and deadlines can help you stay on track and focused on improving your music production skills. Continuous practice is key to achieving excellence; the more you practice, the more you refine your techniques and develop your unique style.

Remember, success in music production isn't just about talent; it's about perseverance and a positive mindset. Maintain your focus by seeking feedback, learning from your mistakes, and staying dedicated to your growth.

Staying Updated With Industry Trends

keeping abreast of trends

To stay current with industry trends in music production, regularly seek out updates from reputable sources and engage with fellow producers for insights and knowledge exchange. Keeping up with the latest developments is essential for your growth as a music producer.

Here are some effective ways to stay updated:

Advertisement
  • Attend music production workshops and conferences to learn about cutting-edge techniques.
  • Follow industry news on platforms like iZotope Learn, Native Instruments Community, and Metapop for the latest updates.
  • Utilize online resources to access tutorials, articles, and forums that discuss emerging trends.
  • Actively engage with social media and online communities dedicated to music production to stay connected with the evolving landscape.
  • Collaborate with other producers to exchange knowledge, learn new techniques, and adapt to emerging trends.

Continuous Skill Enhancement

continuous improvement through learning

Invest time in honing your music production skills through consistent practice and exploration of various techniques and tools. Explore essential aspects like music theory to understand the foundation of composition, sound design to create unique sounds, and mastering mixing techniques for polished tracks.

Regular practice is key to improvement, so make it a habit to investigate different software and tools to expand your capabilities.

To further enhance your skills, take advantage of educational resources such as online courses, workshops, and tutorials. Consider attending music production masterclasses and workshops where you can learn from experienced industry professionals and gain valuable insights.

Stay updated on the latest trends and advancements in music production to continually evolve and refine your techniques. By dedicating yourself to continuous learning and improvement, you'll be on the path to becoming a top-tier music producer.

Active Participation in Music Communities

engagement in music groups

Joining online forums, attending music events, and collaborating with artists are essential steps in your journey as a music producer.

Engage in discussions, share your knowledge, and network with like-minded individuals to grow your skills.

Join Online Forums

Engage actively in online music forums to connect with fellow producers and expand your industry knowledge. Participating in platforms like Gearslutz, Reddit's r/WeAreTheMusicMakers, and Future Producers can offer valuable insights and opportunities for growth in the music production industry.

Advertisement

Here's why online forums are essential for your development:

  • Knowledge Sharing: Interact with a diverse community of producers to exchange ideas, techniques, and experiences.
  • Feedback Loop: Receive constructive criticism on your work and improve your skills through collaborative feedback.
  • Industry Trends: Stay updated on the latest trends, technologies, and practices within the music production landscape.
  • Networking: Connect with industry professionals and peers to forge valuable relationships that could lead to exciting opportunities.
  • Skill Enhancement: Engaging in discussions and sharing resources can enhance your abilities, knowledge, and visibility in the industry.

Attend Music Events

Make the most of your journey towards becoming the best music producer by actively participating in music events and engaging with various music communities. Attending industry events, such as music festivals like Coachella or Tomorrowland, provides a great opportunity to network with industry professionals and gain valuable insights.

Additionally, joining online music production forums like Gearslutz or Future Producers can offer a sense of community and a platform to share knowledge with fellow producers.

To stay updated on industry trends, consider participating in workshops and conferences like Ableton Loop or NAMM. These events not only provide valuable learning experiences but also offer networking opportunities that can help advance your career.

Social media platforms like Instagram and Twitter can also be powerful tools for connecting with music producers and industry experts.

Engaging in online communities such as Reddit's r/WeAreTheMusicMakers allows you to interact with like-minded individuals, share experiences, and learn from others in the field.

Advertisement

Collaborate With Artists

Collaborating with artists in music communities offers a dynamic opportunity to diversify your production skills and expand your network within the industry. By actively engaging in collaborations, you open the door to a myriad of benefits that can enhance your journey as a music producer. Here are some key advantages of collaborating with artists:

  • Diverse Musical Styles: Working with different artists allows you to explore a range of musical styles and perspectives, enriching your production skills.
  • Networking Opportunities: Active participation in music communities enables you to connect with talented artists seeking producers for their projects.
  • Building Relationships: Cultivating relationships with artists can lead to valuable industry connections and potential future collaborations.
  • Versatile Portfolio: Collaborating with various artists helps you build a versatile portfolio that showcases your adaptability and range as a music producer.
  • Creative Inspiration: Engaging with artists in music communities can spark unique creative experiences and provide inspiration for your productions.

Embrace the power of collaboration to elevate your skills and expand your presence in the music industry.

Frequently Asked Questions

How to Become Successful as a Music Producer?

To become successful as a music producer, collaborate with artists, stay updated on industry trends, create a unique sound, persevere through challenges, and build a strong portfolio. Networking, learning, experimenting, and resilience are key to achieving success in music production.

How Can I Be the Best Music Producer?

To be the best music producer, immerse yourself in music theory, master various genres, network with industry pros, persist through challenges, and stay updated on trends. Embrace growth, collaborate, and never stop learning.

How to Get Big as a Producer?

To get big as a producer, collaborate with established artists, utilize social media for exposure, attend industry events, submit music to competitions, and continuously hone your skills. Stay innovative and network to stand out in the industry.

How Many Hours Does It Take to Become a Good Music Producer?

Starting on the journey to becoming a good music producer requires dedication. It typically takes around 10,000 hours of deliberate practice. By investing 20 hours weekly, you could master the craft in about 10 years.

Advertisement

Conclusion

So, you want to be the best music producer, huh?

Well, just remember this: it's not about being the best, it's about being your best. Keep honing your craft, stay true to your unique style, and never stop pushing yourself to new heights.

In the end, it's not about being the best, it's about being the best version of yourself.

Keep grinding, keep growing, and let your passion for music shine through in everything you do.

Good luck!

Advertisement
Continue Reading
Advertisement

Music Production

How to Build a Studio Desk for Music Production: Step-by-Step!

Craft a professional studio desk for music production, taking your setup to the next level with step-by-step guidance.

Published

on

studio desk construction guide

To build a studio desk for music production, start by cutting and preparing the MDF with accurate measurements and smooth edges using a circular saw. Construct the desk structure by evenly spacing side racks, securing them with screws, and adding back support pieces for stability. Customize the bamboo countertop with gel wood stain and a clear coat. Sand and prime the MDF surfaces before painting for a polished finish. Assemble the desk, focusing on levelness and reinforcement. Add cable management for organization. By following these steps, you can create a professional studio desk to elevate your music production setup.

Key Takeaways

  • Use 3/4 inch MDF for durability and strength.
  • Incorporate wood cross supports for reinforcement.
  • Customize bamboo countertop for resilience and appearance.
  • Sand, prime, and paint with acrylic-based products.
  • Add cable management for a tidy setup.

Materials Needed

To build a studio desk for music production, gather the necessary materials including 3/4 inch MDF, wood for cross supports, screws, brackets, a bamboo countertop, acrylic-based primer, and gel wood stain. Studio desks require sturdy construction, making 3/4 inch MDF an ideal choice due to its strength and durability.

The wood cross supports play an important role in reinforcing the desk's structure, guaranteeing it can withstand the weight of equipment. When assembling the desk, using screws and brackets is essential for stability and security.

For the desk's surface, a bamboo countertop is recommended for its sleek appearance and resilience to daily wear and tear. Before painting the MDF parts, it's important to apply an acrylic-based primer to ensure a smooth and long-lasting finish.

To add a touch of color and protection to the bamboo countertop, using gel wood stain will help achieve the desired aesthetic while preserving the surface. By gathering these materials, you're one step closer to constructing your own functional and stylish studio desk for music production.

Cutting and Preparing MDF

mdf cutting and preparation

Consider using a circular saw to accurately cut the 35.5-inch squares on the MDF for the desk surface. Measure and mark the MDF according to the exact measurements needed for your desk, ensuring precision for a perfect fit.

When cutting, follow the marked lines precisely to achieve clean and professional-looking edges. Smooth out any roughness or splinters on the MDF pieces by sanding the edges gently.

Advertisement

It's vital to double-check all measurements and cuts to guarantee that the pieces align correctly during assembly. This step is important to make sure that your desk is stable and provides ample space for your computer monitor and other studio equipment.

Taking the time to cut and prepare the MDF accurately will result in a high-quality studio desk that meets your music production needs.

Constructing Side Racks

building storage for bicycles

To construct the side racks, make sure they're evenly spaced to maintain stability and balance in the overall desk structure. Begin by securing the side racks with half-inch screws for essential structural support. These screws will ensure durability and longevity in your studio desk. Additionally, consider adding extra brackets to the side racks for increased stability and weight-bearing capacity. By reinforcing the side racks in this manner, you guarantee a sturdy foundation for your workspace.

Once the side racks are securely in place, it's time to position the desktop on them to form the main working surface of the studio desk. Placing the desktop on the assembled side racks not only completes the basic structure but also sets the stage for the next steps in the construction process.

Adding Back Support Pieces

supporting with additional pieces

Now, let's focus on the vital step of adding back support pieces to your studio desk. These pieces are essential for providing stability and preventing any unwanted wobbling.

Ensuring they're securely attached will enhance the overall durability and structural integrity of your DIY desk design.

Back Support Design

Ensure the stability and durability of your DIY studio desk by incorporating sturdy back support pieces made from materials like 1×8 lumber. These back support pieces play an essential role in maintaining the structural integrity of your desk, preventing any potential wobbling or shifting that could occur during use. By adding these reinforcements, you guarantee that your desk can support the weight of all your music production equipment and accessories securely.

Advertisement

To help you visualize the importance of back support pieces, here is a table showcasing the key benefits they provide:

Benefits of Back Support Pieces
Ensures stability and durability
Prevents wobbling and shifting
Supports the weight of equipment
Enhances structural integrity
Improves overall desk reliability

Incorporating these back support pieces into your studio desk design is essential for creating a workspace that is both functional and long-lasting.

Securing Back Pieces

Consider fastening the back support pieces to firmly connect the sides of your studio desk, ensuring stability and durability in your music production workspace.

Use screws or nails to attach the back support pieces to the side racks securely. Make sure to align the back support pieces properly to distribute weight evenly across the desk, reinforcing its structure for long-term durability.

By securing the back pieces effectively, you'll prevent any wobbling or instability, providing a reliable foundation for your music production setup. This step is essential in ensuring that your studio desk can support the weight of your equipment and withstand the demands of daily use.

Advertisement

Take the time to double-check the alignment of the back support pieces before fastening them to guarantee a sturdy and robust construction that will serve you well during your music production sessions.

Aligning for Stability

To guarantee stability and durability in your music production workspace, aligning the back support pieces between the side racks is an essential step in reinforcing your studio desk structure.

These back support pieces, typically made from sturdy materials like 1×8 wood, play an important role in preventing any wobbling or shifting of your desk during intense music production sessions. By securely attaching these support pieces between the side racks, you create a solid foundation that ensures your studio desk can withstand the demands of your workflow.

Using sturdy materials for the back support pieces is critical to maintaining the overall strength and integrity of your studio desk. When aligning these pieces, make sure they're level and securely fixed to both side racks, providing maximum reinforcement to the structure.

Proper alignment and installation of the back support pieces are essential for establishing a stable and reliable workspace for your music production needs.

Advertisement

Customizing Bamboo Countertop

personalized bamboo countertop design

Customize the bamboo countertop for your studio desk by selecting a gel wood stain that complements your decor. Gel wood stains are ideal for enhancing the natural grain pattern of bamboo while offering a wide range of rich colors to choose from. The application of multiple layers of gel stain allows you to control the darkness and depth of the color, giving you the flexibility to achieve your desired look.

When customizing your bamboo countertop, consider the overall theme of your studio space. Opt for a gel wood stain that not only protects the bamboo but also adds a touch of sophistication to your workstation.

Once you have achieved the perfect color intensity, finish the countertop with a clear coat to provide added protection against daily wear and tear. This final step will also give your customized bamboo countertop a polished and professional appearance, elevating the aesthetic of your music production studio.

Sanding and Priming

preparing walls for painting

Sanding MDF surfaces is an essential step to achieve a smooth finish before priming. When prepping your studio desk for painting or staining, follow these key steps:

  • Use the right sandpaper: Opt for a fine grit sandpaper, typically between 220-400, to ensure the wood is properly prepped for the next steps.
  • Sand in the correct direction: Always sand in the direction of the wood grain to prevent unwanted scratches and to maintain a uniform surface for a professional finish.
  • Apply acrylic-based primer: After sanding, it's important to apply a coat of acrylic-based primer to the MDF surface. This primer enhances paint adhesion, providing a solid base for your chosen color.

Remember to allow the primer to dry completely before moving on to the painting phase. This process sets the foundation for a flawless and durable finish on your custom studio desk.

Painting and Staining

woodworking techniques for finishing

For a professional and durable finish on your studio desk, consider using gel wood stain as a common choice. Multiple coats of paint should be applied, ensuring a long-lasting and polished appearance. Sanding between each layer of paint is vital to achieve a smooth surface free of imperfections. Attention to detail during the painting and staining process will result in a high-quality final look that enhances the overall aesthetic of your studio desk. To prolong the lifespan of the desk and protect the finish, applying clear coats over the stain is recommended.

Painting and Staining Tips
Use gel wood stain for a smooth finish Multiple coats of paint are essential
Sand between paint layers for a polished look Attention to detail is vital
Clear coats add a protective layer

Assembling and Finishing Touches

craftsmanship in furniture making

Now it's time to finalize the desk structure by securely attaching the desktop to the side racks using half-inch screws.

Add extra brackets for reinforcement to guarantee the desk is sturdy and level before proceeding.

Finish up by adding finishing screws for additional stability and checking the overall quality and functionality of the desk before starting your music production sessions.

Finalizing Desk Structure

To guarantee the stability and quality of your studio desk for music production, securely attach the desktop to the assembled side racks using appropriate support pieces. Double-check the levelness of the desk to prevent any wobbling or unevenness. Add finishing screws to reinforce the structure and make certain all components are securely attached.

Advertisement

Make any necessary adjustments to the desk to assure a perfect fit and alignment of all parts. Review the finished desk for quality, ensuring that it meets your standards before using it for your music production setup.

Check the weight capacity of the desk to confirm it can support your studio monitors underneath the desk. Use a level to verify the desk is flat to avoid any issues with stability. Consider adding rubber or felt pads to the bottom of the desk legs to protect your floor and reduce vibrations.

Adding Cable Management

Install cable management grommets on the desk surface to neatly organize and route cables for a clean and efficient workspace setup.

Use cable clips to secure cables underneath the desk, ensuring a tidy appearance.

Consider incorporating a cable tray or rack beneath the desk to elevate cables off the floor, maintaining a clutter-free environment.

Advertisement

For easy identification and troubleshooting, label cables at both ends.

By utilizing Velcro straps or cable sleeves, you can efficiently bundle and manage multiple cables connecting your equipment.

These simple cable management solutions not only enhance the aesthetics of your studio desk but also contribute to a more organized and streamlined workflow.

With cables neatly arranged and secured, you can focus on your music production tasks without the distraction of tangled wires.

Implementing these cable management techniques won't only improve the look of your studio setup but also make maintenance and future changes easier to handle.

Advertisement

Frequently Asked Questions

What Is the Height of a Music Production Desk?

To determine the height of a music production desk, consider your comfort and ergonomics. Align monitors, keyboard, and equipment for best use. Account for chair and monitor stand heights. Custom desks can be built to your specific needs.

How to Set up a Music Studio at Home?

Creating a home music studio starts with selecting a quiet, well-acoustically treated space. Invest in quality gear like studio monitors and an audio interface. Organize efficiently with cable management. Personalize the setup for comfort and creativity.

How to Start a Music Production Studio?

To start a music production studio, research essential equipment, create a budget, choose a suitable space with good acoustics, invest in quality acoustic treatment, and consider hiring a designer. These steps will help optimize your studio for better sound quality.

How Do Recording Studios Work?

To understand how recording studios work, you'll witness skilled engineers capturing magic in soundproof rooms, mixing tracks for polished results. Renting studio time allows artists to create professional-quality audio productions, with every note sculpted to perfection.

Conclusion

Now that you've followed these steps and put in the work, you'll have a custom studio desk that fits your music production needs perfectly.

Advertisement

By taking the time to cut, construct, customize, and finish your desk, you've created a space that isn't only functional but also reflects your personal style and creativity.

So go ahead, sit down at your new desk, and let the music flow!

Continue Reading

Music Production

How to Build a PC for Music Production: Everything You Need!

Craft the perfect music production PC with powerful components and expert tips – elevate your studio setup with ease!

Published

on

pc for music production

When building a PC for music production, focus on a powerful CPU with at least 6 cores, 16GB of RAM, SSD storage, a dedicated sound card, and a motherboard with upgrade options. Choose components based on your performance needs and guarantee compatibility. Optimize with sufficient RAM for smoother multitasking. Balance speed and capacity with storage options like SSD and HDD. Consider the sound card's connectivity and DSP capabilities. Assembly tip: select a spacious case with good airflow for setup. Regular maintenance and upgrades are key. Make sure to update for best performance and back up your data consistently for a smooth music production experience.

Key Takeaways

  • Prioritize a CPU with 6+ cores for music production.
  • Opt for 16GB+ RAM to enhance multitasking.
  • Choose SSD storage for quick data access.
  • Invest in a dedicated sound card for high-quality audio.
  • Select a motherboard with ample upgrade options.

Hardware Considerations for Music Production PC

When building a PC for music production, prioritize a powerful CPU with at least 6 cores to efficiently handle audio production tasks. The CPU is the heart of your music production setup, responsible for processing the complex audio tasks required in music production.

Alongside a robust CPU, you should also consider investing in sufficient RAM, starting with a minimum of 16GB. This will guarantee smooth multitasking capabilities, allowing you to run multiple audio software and plugins simultaneously without any lag.

In addition to a powerful CPU and ample RAM, opt for SSD storage to enhance data access speed, essential for seamless workflow in music production. The faster read and write speeds of an SSD will greatly reduce loading times for your audio projects and software applications.

Moreover, consider incorporating a dedicated sound card into your setup to achieve high-quality audio inputs and outputs, vital for producing professional-grade music.

Lastly, when selecting a motherboard for your music production PC, prioritize one with ample upgrade options to future-proof your setup. This will allow you to easily expand your system in the future as your music production needs evolve.

Advertisement

Choosing the Right CPU for Music Production

optimal cpu for music

When selecting a CPU for music production, focus on your performance needs.

Consider whether you require a multicore processor for handling multiple tasks simultaneously or a strong single-core performance for CPU-intensive software.

Keep an eye out for budget-friendly options that offer the right balance of power and affordability.

CPU Performance Needs

Selecting the ideal CPU is crucial for optimizing performance in music production setups. When choosing a CPU for music production, consider your performance needs. For tasks like running CPU-intensive plugins such as Izotope Iris 2, CPUs with high single-core performance are recommended. If you engage in heavy multitasking and use numerous plugins simultaneously, AMD processors are known for their competitive multi-core performance.

To guarantee you select the right CPU, benchmarking tools like Passmark.com can help you compare relative performance levels. Popular choices among music producers include the Intel i9 13900K and AMD Ryzen 9 3900X due to their robust performance capabilities.

Take a look at the table below for a quick comparison of CPU options based on key factors like core count, clock speed, and price:

Advertisement
CPU Model Cores Clock Speed Price Performance Level
Intel i9 13900K 8-16 3.5-5.0 GHz High High
AMD Ryzen 9 3900X 12 3.8-4.6 GHz Moderate High

Make sure your selected CPU not only meets your performance needs but also fits within your budget and is compatible with the rest of your system components.

Multicore Vs Single-Core

For peak performance in music production setups, understanding the difference between multicore and single-core CPUs is crucial.

Multicore CPUs like the AMD Ryzen 9 3900X are proficient at handling multiple tasks simultaneously, making them well-suited for music production software that requires heavy multitasking.

On the other hand, single-core performance plays an important role in running CPU-intensive plugins like Izotope Iris 2 efficiently. Intel's i9-9900KF, known for its high single-core performance, is a good choice for tasks that heavily depend on quick single-core speed.

When deciding between multicore and single-core CPUs for music production, it's important to strike a balance between managing numerous tracks and running demanding plugins smoothly.

Advertisement

Utilizing benchmarking tools such as Passmark.com can aid in comparing CPUs based on their single-core and multicore performance, helping you select the most suitable processor for your music production needs.

Budget-Friendly Options

Considering budget-friendly options, opt for CPUs like the AMD Ryzen 5 3600 or Intel Core i5-9600K to enhance performance in music production tasks. These CPUs strike a balance between cost and performance, providing ample processing power for audio editing and production.

The AMD Ryzen 5 3600 boasts 6 cores and 12 threads, while the Intel Core i5-9600K offers 6 cores and 6 threads, both suitable for music production tasks.

Don't overlook the importance of single-core performance, essential for running plugins and software smoothly during music production. Choosing the right CPU within your budget can significantly impact the overall efficiency of your music production PC.

  • Opt for CPUs like AMD Ryzen 5 3600 or Intel Core i5-9600K for budget-friendly options.
  • Consider the balance between cost and performance offered by these CPUs.
  • Look at the core and thread specifications of AMD Ryzen 5 3600 and Intel Core i5-9600K.
  • Remember the significance of single-core performance in running music production software seamlessly.

Importance of RAM in Music Production PC

ram crucial for music

RAM plays an important role in optimizing the performance of a music production PC, enabling seamless handling of audio samples, virtual instruments, and effects in real-time. In music production, where large files and multiple processes run simultaneously, sufficient RAM is vital for smooth operation.

With more RAM, you can experience smoother multitasking, faster loading times, and improved performance, especially when working on complex music projects. Music production software such as Digital Audio Workstations (DAWs), plugins, and virtual instruments rely heavily on RAM for efficient operation without lags or latency issues.

Advertisement

While a minimum of 16GB RAM is recommended for music production, professionals working on larger projects may benefit from 32GB or more. Upgrading your RAM can greatly enhance the overall performance and responsiveness of your music production PC, allowing you to work with multiple tracks and effects seamlessly.

Prioritizing adequate RAM capacity is essential for a productive music production setup.

Selecting the Best Storage Solutions

optimal storage solutions selection

When evaluating the best storage solutions for your music production PC, it's crucial to assess the types of storage available, striking a balance between speed and capacity, and ensuring you have backup solutions in place.

SSDs offer fast data access for quicker loading times, while NVMe SSDs can provide even higher speeds for handling audio files and plugins efficiently.

Additionally, don't forget to plan for large storage capacities to accommodate extensive sample libraries and multiple projects.

Storage Types Overview

For peak performance in music production, choosing the best storage solution is essential to guarantee efficient data access and processing. When considering storage types, here are some key options to keep in mind:

Advertisement
  • SSD (Solid State Drive): Offers faster data access speeds, enhancing performance for music production tasks.
  • HDD (Hard Disk Drive): Provides larger storage capacities at a lower cost, although it's slower compared to SSDs.
  • RAID (Redundant Array of Independent Disks): Configurations that can boost storage performance and provide data redundancy, important for critical music projects.
  • NVMe SSD (Non-Volatile Memory Express SSD): Even faster than traditional SSDs, making them ideal for high-speed data transfer demands in music production.

These storage solutions each have their strengths, so selecting the right combination based on your needs is key to optimizing your music production workflow.

Speed Vs Capacity

Balancing speed and capacity when selecting storage solutions is essential for optimizing your music production workflow. In this regard, Solid State Drives (SSDs) stand out for their superior speed and performance compared to traditional Hard Disk Drives (HDDs).

SSDs offer quick access to audio files and plugins, notably reducing loading times and enhancing overall system performance. For even faster data transfer rates, Non-Volatile Memory Express (NVMe) SSDs are the way to go. These high-speed storage solutions are paramount for handling large audio projects and samples efficiently.

While SSDs may not match the capacity of HDDs, they strike a good balance between speed and storage space, making them ideal for music production tasks. Opting for SSDs, especially NVMe SSDs, can greatly improve your workflow by minimizing loading times and ensuring smooth operation when working on complex music projects.

Backup Solutions Needed

Consider incorporating a variety of storage solutions, such as external hard drives and cloud services, to guarantee robust backup options for your music production projects.

When it comes to backup solutions, external hard drives and NAS systems are essential for storing your music files and project data securely. Additionally, utilizing cloud storage services like Dropbox, Google Drive, or OneDrive can provide off-site backups for an added layer of protection.

Advertisement

Investing in redundant storage systems, such as RAID configurations, can help with data mirroring and protection against hardware failures. To streamline the backup process, use specialized backup software to automate backups and ensure the integrity of your music production files.

Remember to implement a thorough backup strategy that includes regular backups of both your music files and system settings to safeguard your work.

Sound Card Essentials for Music Production

key components for music

When setting up your music production system, selecting the right sound card is essential for peak performance and sound quality. Sound cards play a critical role in the audio production process, providing the necessary inputs and outputs for recording and playback. Whether you opt for USB audio devices, Thunderbolt, or PCI-E sound cards, each offers unique features to enhance your music production experience.

Considerations such as ASIO driver quality and latency are paramount for ensuring a smooth workflow during recording and editing sessions. Some sound cards come equipped with additional connectivity options like ADAT or DANTE connections, expanding your setup possibilities. Additionally, onboard DSP capabilities found in certain sound cards allow for running plugins directly on the hardware, reducing the strain on your computer's CPU.

Below is a table highlighting some key features to look out for when selecting a sound card for your music production needs:

Feature Description
Connectivity Options USB, Thunderbolt, PCI-E, ADAT, DANTE
ASIO Driver Quality Essential for low latency and stable performance
DSP Capabilities Ability to run plugins directly on the sound card hardware
Budget-Friendly Options Affordable choices for enhancing audio production setups

Graphics Card Selection Tips

graphics card buying guide

When selecting a graphics card for your music production PC, it's crucial to take into account compatibility with your audio software and budget-friendly options.

Make sure the GPU has sufficient VRAM and good driver support for your tasks, bearing in mind that performance is secondary to CPU and RAM for audio production.

Advertisement

Seek out a reputable brand known for stability and performance to manage any visual effects or GUI demands of your software.

GPU Compatibility Considerations

To guarantee peak performance in your music production tasks, prioritize selecting a GPU that aligns with the requirements of your software and digital audio workstation (DAW).

When considering GPU compatibility for music production, keep the following tips in mind:

  • Check Software Compatibility: Confirm your GPU is compatible with your music production software to avoid any potential performance issues.
  • Meet System Requirements: Make sure the GPU meets the minimum system requirements specified by your DAW for the best functionality.
  • VRAM Capacity: Opt for a GPU with ample VRAM to handle large audio files and multiple plugins simultaneously without lag.
  • Acceleration Support: Look for a GPU that supports OpenCL or CUDA acceleration to enhance the performance of audio processing tasks.

Budget-Friendly Options

Consider opting for budget-friendly graphics cards like the AMD Radeon RX 6600 when selecting a GPU for your music production PC build, focusing on cost-effectiveness without compromising performance. The AMD Radeon RX 6600 offers a good balance between price and capabilities, making it a suitable choice for handling visual elements in music production software efficiently.

When choosing a graphics card, prioritize ones with excellent driver support to avoid compatibility issues with your audio software. Ensuring stable performance is vital, so selecting a graphics card with dedicated VRAM can help meet the demands of your music production projects without lag or bottlenecks.

Remember to assess your specific needs, such as multiple monitor support or GPU-accelerated plugins, to tailor your graphics card choice accordingly. By balancing cost and performance, you can create a reliable music production setup that enhances your workflow without breaking the bank.

Advertisement

Assembling Your Music Production PC

building a music production

For peak performance, carefully assemble your music production PC by following these steps.

  • Choose a spacious case with good airflow to accommodate components comfortably.
  • Confirm compatibility between your chosen CPU, motherboard, RAM, and storage options.
  • Install the CPU, RAM, and storage devices onto the motherboard carefully.
  • Connect the power supply, GPU, and any additional components following the motherboard manual.

When assembling your PC build for music production, the motherboard serves as the foundation where all components are connected.

Begin by securing the motherboard in the case, ensuring it aligns with the standoffs.

Install the CPU, being cautious with the delicate pins, and then insert the RAM sticks into the designated slots.

Next, connect your storage devices, such as SSDs or HDDs, to the appropriate ports on the motherboard.

Refer to the motherboard manual to correctly attach the power supply, GPU, and any other components.

Double-check all connections before powering on your music production PC to prevent any potential issues.

Advertisement

Setting Up Audio Production Software

software for audio setup

When setting up audio production software for your music production PC, choose a Digital Audio Workstation (DAW) like Pro Tools, Ableton Live, or FL Studio. These DAWs offer a wide range of features to help you create, record, and mix your music efficiently.

Install plugins and virtual instruments within your chosen DAW to enhance creativity and access a broader sound palette.

Next, configure your audio settings both in your operating system and DAW to guarantee peak performance and compatibility with your hardware. Adjust buffer sizes, sample rates, and audio input/output settings to minimize latency and achieve high-quality audio production.

Additionally, connect and set up your audio interface properly to enable professional-grade audio inputs and outputs for recording and playback.

Remember to regularly update your software, including the operating system, DAW, plugins, and drivers. Staying up to date ensures that you have access to the latest features and improvements, enhancing your overall music production experience.

Maintaining Your Music Production PC

optimizing music production computer

To keep your music production PC running smoothly, regularly clean and dust your components to prevent overheating and maintain peak performance.

Here are some essential tips for maintaining your music production PC:

Advertisement
  • PC maintenance: Regularly clean and dust your PC components to prevent overheating and maintain top performance.
  • Software updates: Keep your software, drivers, and plugins up to date to maintain compatibility and access the latest features for your music production tasks.
  • Hardware upgrades: Consider upgrading components like RAM, storage, or GPU to improve performance and handle more complex music production tasks effectively.
  • Data backup: Back up your important music projects and files regularly to prevent data loss in case of hardware failure or software issues.

Upgrading Components for Improved Performance

enhancing performance with upgraded components

Consider enhancing your music production PC's performance by upgrading key components such as RAM, SSD, CPU, sound card, and graphics card.

Upgrading the RAM can boost multitasking abilities, allowing you to run more plugins and software simultaneously, leading to improved overall system performance.

Adding a faster SSD or increasing storage capacity can decrease load times, enhancing your workflow efficiency by allowing for quicker access to project files and samples.

When upgrading the CPU, you'll experience a significant increase in processing power, enabling smoother operation of resource-intensive music production tools.

A dedicated sound card or audio interface upgrade can enhance audio quality and decrease latency during recording and playback sessions.

While upgrading the graphics card may not directly impact music production performance, it can improve visual editing and provide a smoother software interface experience.

Advertisement

Frequently Asked Questions

What Kind of PC Is Needed for Music Production?

For music production, you need a PC with a powerful CPU (at least 6 cores), 16GB+ RAM for multitasking, and NVMe/SATA SSDs for fast access. A dedicated sound card with ASIO drivers guarantees high-quality audio. Consider a GPU for visual tasks.

Do You Need a High End PC for Music Production?

You don't have to, but a high-end PC is essential for music production. It guarantees smooth operation with complex software and large files, boosting efficiency and audio quality. Invest wisely for a seamless music-making experience.

Would a Gaming PC Be Good for Music Production?

A gaming PC can work well for music production with its robust processing power and multitasking abilities. Prioritize strong CPUs and ample RAM. Check compatibility with music production gear like audio interfaces.

What Is the Best Computer for a Music Producer?

For a music producer, the best computer blends power and precision. Think Intel i9 or AMD Ryzen CPUs for seamless audio work. RAM matters too; aim for 32GB+. Speedy NVMe SSDs and premium sound cards seal the deal.

Conclusion

So there you have it – you're all set to rock and roll with your brand new music production PC!

Advertisement

Remember, with the right hardware and software, you'll be churning out hits in no time.

And hey, if you ever feel like your setup needs a little boost, don't be afraid to upgrade those components.

The sky's the limit when it comes to creating your next chart-topping track!

Continue Reading

Music Production

How to Build a Music Production Desk: DIY Guide!

Leverage this DIY guide to craft your personalized music production desk, ensuring a stylish and functional workspace that suits your needs perfectly.

Published

on

diy music production desk

Craft your personalized music production desk by following a detailed DIY guide. Gather materials like MDF, supports, and a bamboo countertop. Consider dimensions carefully for stability and comfort. Prepare your workspace with ample lighting and organization. Cut and sand the wood precisely for a flawless finish. Assemble the frame securely and install the countertop accurately. Finish off with sanding, priming, and painting for durability. Gain insights into cost breakdown and final touches. Explore the steps further to build a functional and stylish desk just for you.

Key Takeaways

  • Use 3/4 inch MDF & bamboo countertop for stability and sleek finish.
  • Customize desk height for ergonomic comfort.
  • Optimize workflow with spacious design for gear organization.
  • Secure frame with proper spacing and supports for stability.
  • Sand, prime, paint, and seal for a durable, professional finish.

Materials Needed

To construct a music production desk, gather 3/4 inch MDF, 2×3 supports, a 1×8 back support, and a bamboo countertop. These materials form the foundation for your DIY project.

The use of 3/4 inch MDF guarantees a robust structure, while the 2×3 supports provide stability to the desk. Additionally, incorporating a 1×8 back support adds further reinforcement to the design, ensuring durability over time.

When working on your music production desk, remember to cut specific measurements such as 35.5-inch squares for the desk itself. For accommodating rack mount gear, the inner spacing should be set at 19 1/16 inches.

Lastly, the choice of a bamboo countertop not only adds a sleek finish to the desk but also provides a smooth surface for your equipment.

Desk Design Considerations

desk ergonomic design tips

Considering the width of your desk is important to guarantee all your gear remains within easy reach during your music production sessions. When designing your studio desk, make sure that it accommodates the width of your equipment, such as your computer, MIDI controllers, and audio interfaces. This setup will optimize your workflow by keeping everything you need nearby.

Another significant aspect to take into account is easy access to rack space from your sweet spot. This allows you to adjust your gear and settings conveniently without disrupting your creative process.

Advertisement

Additionally, opt for a design that provides stability, especially if you have heavy equipment like studio monitors or multiple screens.

Customizing the desk height is crucial for your comfort and working preferences. Ensure the desk is ergonomically suitable to prevent strain during long hours of music production.

Preparing the Workspace

setting up your space

Clear out a spacious area in your workspace to accommodate the size of the desk you plan to build before starting the construction process. Guarantee that your workspace has proper lighting and ventilation for a comfortable working environment during the construction phase.

Have all necessary tools and materials organized and easily accessible within your workspace to facilitate efficient assembly. Consider using a drop cloth or protective covering to prevent any damage to the floor or surrounding surfaces while you work on building the desk. Double-check measurements and plans in your workspace to avoid mistakes and ensure a smooth construction process.

Cutting and Sanding the Wood

crafting wooden pieces carefully

Measure and mark the birch butcher block with precision before making the necessary cuts to create your studio desk's main desktop.

Use a circular saw with a fine-tooth blade for accurate dimensions and then sand the edges and surfaces with fine-grit sandpaper for a smooth finish.

Don't forget to round off the corners for a polished look and wipe down the wood to remove any debris before moving on to staining.

Advertisement

Wood Measurements and Cuts

To guarantee a sturdy and professional-looking music production desk, accurately cut 35.5-inch squares of 3/4 inch MDF for the main desktop using precise measurements. The table below outlines the measurements needed for key components of the desk:

Component Material Measurement
Main Desktop 3/4 inch MDF 35.5-inch squares
Inner Spacing for Gear 3/4 inch MDF 19 1/16 inches
Cross Supports 2×3 Custom lengths
Back Support 1×8 Custom lengths

Ensure that the inner spacing for rack mount gear is accurately cut to 19 1/16 inches to accommodate your equipment. Use 2×3 for the cross supports to provide stability and 1×8 for the back support to reinforce the structure. Remember, precise measurements and clean cuts are essential for both the structural integrity and the visual appeal of your music production desk.

Sanding for Smoothness

Smooth out any rough surfaces and imperfections by sanding the wood before staining your music production desk.

Begin with coarser sandpaper, around 80 to 120 grit, for initial sanding to remove any prominent flaws. Make sure to follow the wood grain's direction to avoid creating scratches and maintain a uniform surface.

As you progress, switch to finer sandpaper, such as 220 to 400 grit, for a smoother finish. Thoroughly clean the wood after sanding to eliminate all dust and debris, ensuring a pristine base for staining.

Advertisement

Finishing Touches

When cutting and sanding the wood for your music production desk, prioritize precision and attention to detail to guarantee a professional and polished finish.

Start by measuring twice and cutting once to make sure accurate dimensions for each wood piece. Use a high-quality saw with a fine-tooth blade to make clean and precise cuts, reducing the risk of errors during assembly.

After cutting, sand the edges of the wood pieces to eliminate splinters and rough spots, creating a smooth surface for a refined look. Focus on the corners and edges while sanding to maintain a uniform appearance across the entire desk.

Smooth and properly finished wood not only enhances the aesthetics of your desk but also improves its durability and longevity. Remember, the effort put into cutting and sanding the wood will greatly impact the overall quality and appearance of your music production desk.

Assembling the Desk Frame

furniture assembly step by step

Begin by spacing out the side racks evenly to guarantee structural integrity and proper alignment when assembling the desk frame. This step is essential in ensuring that the desk frame is stable and can support the weight of your music production equipment.

Once the side racks are in position, secure them using half-inch screws and additional brackets for added stability during use.

Advertisement

Next, carefully place the desktop on the assembled side racks, making sure it fits snugly to create a solid foundation for your music gear. Use support pieces to attach the desktop to the side racks securely. This will provide a sturdy work surface for your equipment.

Before proceeding with the final touches, double-check the desk frame to ensure it's level. Make any necessary adjustments to guarantee a stable and balanced desk for your music production needs.

Following these steps will help you assemble a reliable and durable music production desk.

Adding Rack Mount Gear Spacing

rack mount equipment organization

To optimize your music production desk for rack mount gear spacing, determine the inner spacing needed for your equipment, typically around 19 1/16 inches.

When adding rack mount gear spacing to your desk, consider the following:

  • Use 2×3 Cross Supports: Incorporate 2×3 pieces for cross supports to guarantee stability for your rack mount gear.
  • Sturdy Back Support: Utilize a 1×8 back support to hold the sides together securely, especially when heavier gear is placed on the rack.
  • Wider Surface: Create a wider desk surface to accommodate all your gear on the same table, allowing for easy access and better organization of your equipment.
  • Accessibility Optimization: Optimize the design to make sure that the rack space is easily accessible from the sweet spot of your music production setup, enhancing workflow efficiency and convenience.

Installing the Countertop

setting up a countertop

Consider securing the countertop onto the assembled desk frame using screws or a suitable adhesive for a stable work surface.

Before attaching the countertop, make sure you have accurately measured its dimensions to guarantee a perfect fit. Once positioned, use screws or adhesive to firmly attach the countertop, ensuring it's level and flush with the edges of the desk for a polished look.

Advertisement

To enhance the durability of your countertop, seal its edges to safeguard against moisture damage and wear over time.

After installation, test the stability by applying pressure and making any necessary adjustments for a sturdy work surface. Maintaining a secure attachment won't only provide a reliable workspace for your music production needs but also add a professional touch to your DIY desk project.

Follow these steps diligently to create a functional and aesthetically pleasing music production desk.

Sanding, Priming, and Painting

prepping surfaces for painting

You're about to tackle the essential steps of sanding, priming, and painting your music production desk.

Sanding will guarantee a smooth surface, while using an acrylic-based primer is key for proper paint adhesion.

Sanding Techniques

Smooth out imperfections in the wood surface by starting with an initial sanding using fine grit sandpaper before applying primer and paint for your music production desk. Essential sanding techniques are vital for achieving a professional finish.

Advertisement

Here are some tips to help you sand effectively:

  • Begin with a fine grit sandpaper (around 120-220) for the initial sanding process.
  • Use a super fine grit sandpaper (around 320-400) for a smoother finish before applying primer and paint.
  • Guarantee even sanding to help the primer adhere better to the wood surface.
  • Remember to sand between paint layers to remove imperfections and achieve a polished, smooth final look for your music production desk.

Priming Importance

Before painting your music production desk, make sure you understand the critical significance of priming the surface to achieve a flawless finish. Priming plays a key role in preparing the desk for painting by sealing the surface and enhancing paint adhesion.

By sanding the desk beforehand, you create a smooth canvas for the primer to adhere to, ensuring a uniform base for the paint application. This step is especially vital for MDF surfaces, as it prevents the material from absorbing paint unevenly, leading to a blotchy finish.

Opt for an acrylic-based primer and apply it in thin coats to effectively seal the surface and improve the overall durability of the paint job. Proper priming not only enhances the aesthetic appeal of your desk but also reduces the number of paint coats needed to achieve a professional look.

Painting Tips

Prepare your music production desk for a flawless finish by following these essential painting tips, including sanding, priming, and painting techniques.

Before painting, establish a smooth surface by sanding thoroughly to improve paint adhesion. Use an acrylic-based primer on MDF surfaces to help the paint adhere evenly and prevent blotching.

Advertisement

When painting, apply multiple thin coats of paint for a professional and durable finish. To achieve a polished look, remember to sand between paint layers using fine-grit sandpaper.

Attention to detail during the painting process is vital to guarantee a professional appearance for your finished music production desk.

  • Sanding before painting is essential for a smooth surface.
  • Use an acrylic-based primer on MDF surfaces for even paint adhesion.
  • Apply multiple thin coats of paint for a professional finish.
  • Sand between paint layers with fine-grit sandpaper for a polished look.

Staining and Finishing Touches

applying final finishes carefully

Consider pouring gel stain onto the surface of your music production desk and spreading it evenly with a dry cloth to achieve a consistent finish. When staining, keep in mind that applying multiple layers of gel stain can result in a darker color, but be cautious to prevent excess buildup.

After achieving the desired hue, a clear protective coat can be added to provide durability and a refined appearance. To guarantee a professional look, sanding between each layer of stain is recommended for a smooth texture.

Detail-oriented work during the staining process is vital for obtaining the desired aesthetic for your music production desk. Taking the time to apply the stain evenly and paying attention to any imperfections will contribute to a polished final result.

Cost Breakdown and Final Thoughts

analyzing expenses and conclusions

You're probably curious about how the costs break down for your DIY music production desk.

Let's discuss the budget breakdown analysis, tips for saving money, and the key takeaway points to think about as you undertake this project.

Advertisement

Budget Breakdown Analysis

For a thorough understanding of the cost breakdown and final reflections on constructing a music production desk, let's explore the budget breakdown analysis.

The total cost for a DIY music production desk amounts to approximately $544.32, with the primary expenses being:

  • Wood at $344.78
  • Hardware at $52.11
  • Tools at $49.97
  • Stain at $19.98
  • Miscellaneous items at $77.48

By choosing to build your own desk, you can save substantially compared to buying a pre-built one, which can cost between $1,000 to $2,500. Constructing a music production desk from wood allows for customization, cost-effectiveness, and a sense of accomplishment in creating a workspace tailored to your needs.

The DIY approach not only saves money but also offers a rewarding experience, providing a unique and personalized solution that meets your specific requirements.

  • Wood: The most significant cost, allowing for customization and durability.
  • Hardware: Essential for assembling the desk securely.
  • Tools: Necessary for the construction process.
  • Miscellaneous items: Additional components that enhance functionality.

Tips for Saving

To save on costs while building your music production desk, prioritize sourcing materials from budget-friendly suppliers. Seek out deals at local hardware stores, online marketplaces, or salvage yards to score discounts on wood, stain, hardware, tools, and miscellaneous items.

By being strategic in your material sourcing, you can greatly reduce the overall expenses associated with constructing your DIY music production desk. Additionally, consider repurposing materials from old furniture or items you already have to further cut down on costs.

Remember, the total estimated cost for building a DIY music production desk is approximately $544.32, which is a substantial saving compared to purchasing a pre-made studio desk. Embracing the DIY approach not only allows for customization but also frees up budget for investing in other studio equipment or upgrades.

Advertisement

Key Takeaway Points

When starting a DIY music production desk, being mindful of the cost breakdown and final thoughts is essential for a successful project. Here are some key points to keep in mind:

  • Cost Breakdown: Understanding the breakdown of costs, including materials like wood, stain, hardware, tools, and miscellaneous items, is vital for budgeting your DIY music production desk project effectively.
  • Cost-Effectiveness: Opting for a DIY music production desk can be a cost-effective choice compared to purchasing one, with the total materials cost ranging from $500 to $650 CAD.
  • Attention to Detail: Ensuring precise measurements, cuts, and attention to detail will result in a professional-looking DIY music production desk that meets your needs.
  • Customization: Take advantage of customization options to incorporate your personal preferences and design ideas into the DIY music production desk, making it uniquely yours.

Keep these key points in mind as you start on your DIY music production desk project, and enjoy the process of creating a workspace tailored to your music production needs.

Frequently Asked Questions

How Do You Set up a Room for Music Production?

To set up a room for music production, position your desk in the center for balanced acoustics. Add sound-absorbing panels, a monitor isolation pad, adjustable lighting, and a rug for improved audio quality, vibration prevention, comfort, and acoustics.

How Much Does It Cost to Build a Music Production Studio?

To build a music production studio, it can cost around $500-$650 CAD. This includes materials like MDF, hardware, paint, and a bamboo countertop. Opting for DIY can save you a lot compared to buying a ready-made desk.

How to Build a Music Studio Pc?

To construct a music studio PC, choose a powerful processor, ample RAM, fast SSD, and dedicated graphics card. Research best configurations balancing performance and budget. Select a reliable motherboard with adequate connectivity. Guarantee proper cooling and install a high-quality sound card for professional-grade output.

How Can I Build a Music Studio?

To build a music studio, start by determining your needs and gathering materials. Follow step-by-step instructions to assemble the setup, ensuring stability and functionality. Customize with rack plates and cable management for a professional finish.

Advertisement

Conclusion

Now that you've built your own music production desk, you've got a creative space that's truly music to your ears.

With the right materials and a little elbow grease, you've crafted a masterpiece that will inspire your next hit.

So go ahead, sit down at your new desk and let the music flow like a river through your fingertips.

Let your creativity soar on the wings of your homemade creation.

Advertisement
Continue Reading
Advertisement

Affiliate disclaimer

As an affiliate, we may earn a commission from qualifying purchases. We get commissions for purchases made through links on this website from Amazon and other third parties.

Advertisement
Advertisement

Trending

Copyright © 2024 The Sound of Music Guide Affiliate disclaimer As an affiliate, we may earn a commission from qualifying purchases. We get commissions for purchases made through links on this website from Amazon and other third parties.