
To optimize your studio room layout, position your desk so you can comfortably reach controls and gear without clutter. Place your monitors at ear level, forming an equilateral triangle with your listening position, and keep them a few inches from walls to prevent sound reflections. Treat reflection points behind and beside monitors with acoustic panels and add bass traps if needed. Properly arranged, your space will sound clearer and work more efficiently—continue exploring to refine your setup even further.
Key Takeaways
- Position monitors in an equilateral triangle with your listening position at the center, at ear level, and a few inches from walls.
- Place acoustic panels behind and beside monitors at reflection points identified via mirror method for optimal sound clarity.
- Keep the desk clutter-free and arrange gear to maximize space, workflow, and easy access to controls.
- Slightly angle monitors and make small room adjustments to minimize reflections and improve sound accuracy.
- Incorporate bass traps and acoustic treatments strategically to manage low frequencies and reduce sound distortions.
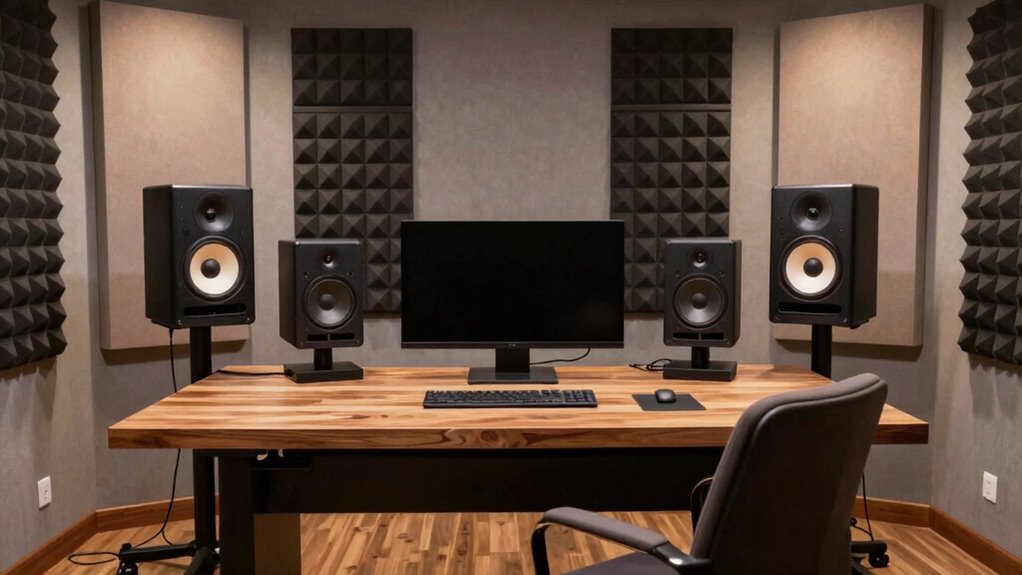
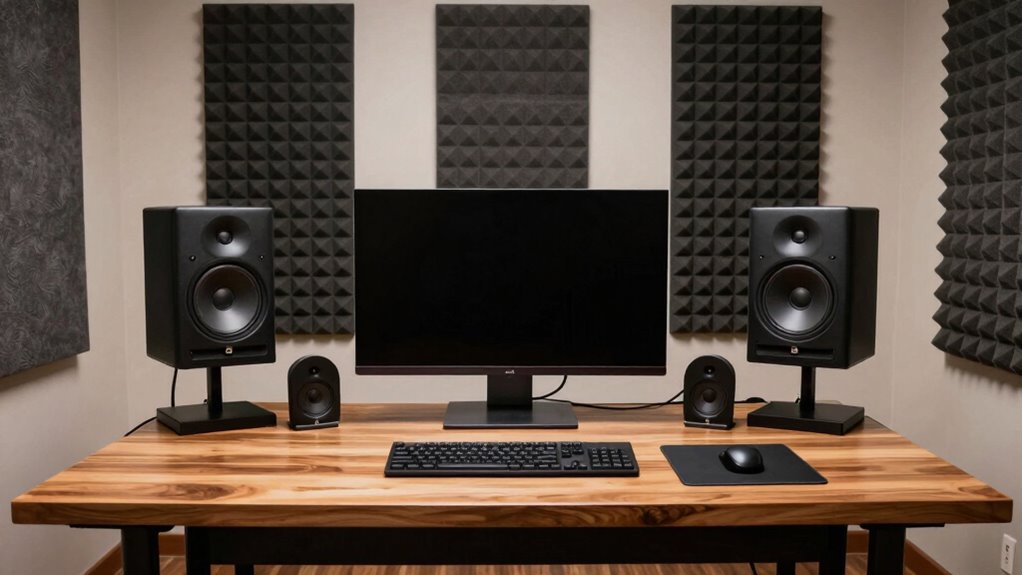
Are you struggling to make the most of your small studio space? It’s a common challenge, but with smart placement and thoughtful planning, you can create a functional and inspiring environment. Your goal should be to optimize the layout so that your monitor positioning, acoustic treatment, and workspace flow work together seamlessly. Start by considering the placement of your monitors, as they are the heart of your studio. Position your speakers so that they form an equilateral triangle with your sitting position—this means your monitors should be roughly the same distance apart as they are from you. Keep them at ear level to ensure accurate sound reproduction, which is critical for mixing and mastering. Avoid placing monitors directly against walls; instead, keep them a few inches out from the surface to prevent sound reflections that can muddy your audio.
Once your monitor positioning is set, focus on acoustic panels. These panels are essential for controlling reflections, reducing echo, and creating a balanced listening environment. In a small studio space, sound waves bounce off walls and surfaces, causing distortions that make it harder to judge your audio accurately. Installing acoustic panels strategically around your room—especially behind and beside your monitors—can dramatically improve sound clarity. Don’t forget to treat the first reflection points; these are spots where sound from your monitors first hits the walls and reflects toward your ears. To find them, sit in your listening position and have someone move a mirror along the wall until you see the monitors’ reflections. Mark those spots and mount acoustic panels there. This targeted placement reduces harsh reflections and helps you hear your mix more precisely.
When arranging your desk, keep it clear of clutter and position it so that you have easy access to your controls, keyboard, and gear without feeling cramped. To maximize your space, consider floating your desk away from the walls or using compact furniture. Ensure there’s enough room for movement and proper cable management to avoid tangled wires that can interfere with your workflow. As you set up, pay attention to the room’s natural acoustics and how sound interacts with your equipment. Small adjustments—like angling your monitors slightly or adding bass traps—can make a significant difference. Additionally, understanding the field-of-view and imaging of your setup helps optimize sound perception and workflow. Remember, the goal is to create an environment where sound is balanced, reflections are minimized, and you can work comfortably without feeling boxed in. With careful placement of acoustic panels and monitor positioning, you’ll find your small studio transforms into a professional-sounding space that inspires creativity.
Frequently Asked Questions
How Do I Optimize Airflow in My Studio Room?
To optimize airflow in your studio, implement effective ventilation strategies like installing exhaust fans or air vents to promote fresh air circulation. Keep air moving by using small fans or air circulators, avoiding stagnant air. Position vents or fans near windows or doors for better airflow, and regularly clean filters to make certain of efficiency. These steps help maintain a comfortable environment, reduce humidity, and improve overall airflow optimization.
What Lighting Options Enhance My Studio Workspace?
To enhance your studio workspace illumination, opt for adjustable, soft LED lighting that reduces glare and creates a comfortable environment. Use a combination of task lighting for precision work and ambient lighting to set the mood. Consider studio lighting options like dimmable desk lamps and wall-mounted fixtures, ensuring even distribution of light. Proper lighting boosts focus and reduces eye strain, making your workspace more productive and enjoyable.
How Should I Organize Cable Management Effectively?
Think of your cables as a garden needing neat rows. You should carefully plan cable routing to keep everything tidy and prevent tangles. Use cable labels to identify each cord easily, saving you time when troubleshooting or reconfiguring. Secure loose cables with clips or sleeves, and avoid crossing power and audio cords. This organized approach keeps your workspace clear, safe, and efficient, making your studio feel as polished as a well-tended garden.
What Are the Best Materials for Studio Flooring?
For studio flooring, opt for materials like carpet, cork, or vinyl, which help with sound absorption and reduce echo. Acoustic treatments work best when combined with these materials to improve sound quality. Carpets and cork provide natural damping, while vinyl is durable and easy to clean. Choose a flooring material that complements your acoustic treatments, minimizes sound reflection, and creates an ideal environment for accurate audio monitoring.
How Can I Soundproof My Studio on a Budget?
Like a true pioneer of sound, you can soundproof your studio on a budget by DIY insulation and adding acoustic panels. Seal gaps around doors and windows with weatherstripping or heavy curtains. Use thick rugs and furniture to absorb sound reflections. DIY insulation in walls and ceiling helps block noise. These simple, cost-effective steps transform your space into a quieter sanctuary without breaking the bank.
Conclusion
Designing your studio room with the right desk, speaker placement, and treatment can substantially improve your sound quality. Did you know that proper room treatment can reduce sound reflections by up to 60%, creating a clearer mix? By carefully positioning your equipment and treatments, you’ll enjoy more accurate audio and a more inspiring workspace. Take the time to optimize your layout—you’ll notice the difference every time you hit record or mix.