Connect with us

Performance Optimization

Latency-Free Recording Setup Tips for Any DAW

Unlock the secrets to a latency-free recording setup that can transform your sessions—discover essential tips that every DAW user should know!

Published

on

optimize daw recording efficiency

To set up a latency-free recording environment, first, lower your buffer size to around 64 or 128 samples during tracking. This reduces the delay you experience while recording. Choose a sample rate like 44.1 kHz to balance audio quality and CPU load. Make sure your system meets your DAW's specifications and keep your audio drivers updated. Disable unnecessary apps running in the background to maximize CPU performance. Each DAW has unique features to help manage latency, so familiarize yourself with these. Stick around to discover more tips tailored specifically for your DAW to enhance your recording experience.

Key Takeaways

  • Use low buffer sizes (64 or 128 samples) during tracking to minimize latency and improve real-time audio feedback.
  • Select a sample rate of 44.1 kHz for a balance between audio quality and CPU performance, increasing only if hardware allows.
  • Regularly update audio drivers and software to prevent latency issues and ensure optimal DAW functionality.
  • Disable unnecessary background applications to free up CPU resources for your DAW, enhancing overall recording performance.
  • Familiarize yourself with your DAW's specific settings for managing buffer size and latency to optimize your recording setup.

Understanding Latency in Recording
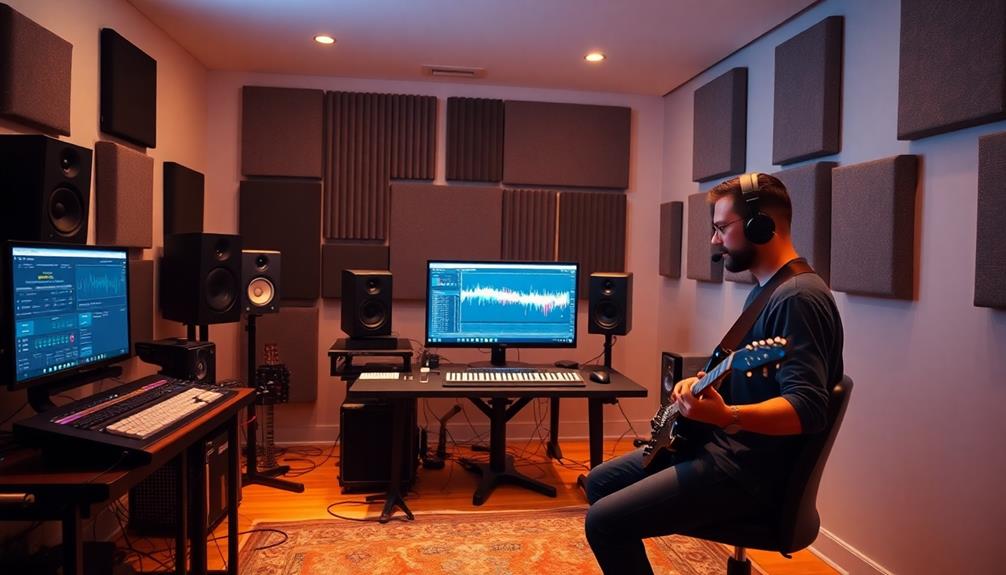
latency in audio recording

Latency can be a frustrating hurdle in recording, affecting your performance and the quality of your tracks. It refers to the time delay between your audio or MIDI input and the output, becoming noticeable around 20-30 ms. When latency exceeds 200-300 ms, it can markedly disrupt your recording process.

You'll often need to manually align recorded performances, as complete elimination of latency isn't possible, but you can minimize it with the right setup.

Several factors influence latency, including your audio drivers, hardware specifications, buffer size, and sample rate. Adjusting these audio settings plays an essential role in achieving better recording quality and responsiveness.

For instance, reducing the buffer size can help lower latency, but it may increase CPU usage, which could affect performance if your system can't handle it.

To enhance your recording experience, consider utilizing real-time recording solutions like zero-latency monitoring. This feature, often found in modern operating systems, can markedly reduce the perceived delay when tracking.

Advertisement

Understanding and managing latency is vital for effective audio production, as high latency can hinder both your performance and overall recording experience.

Optimizing Buffer Size

buffer size optimization techniques

When you're recording, fine-tuning your buffer size is vital for achieving the best performance. A lower buffer size, like 64 or 128 samples, reduces latency, offering immediate audio feedback when tracking live instruments or vocals.

However, you need to balance this with CPU load; smaller buffer sizes increase the demand on your CPU, which might lead to audio dropouts if your system can't keep up.

Most DAWs recommend starting with a buffer size of 256 or 512 samples for mixing. Then, during tracking sessions, drop it down to 64 or 128 samples for peak performance.

Remember, this relationship between buffer size and audio interface sample rate is significant. Lower buffer sizes work better at standard sample rates, such as 44.1 kHz, while higher sample rates, like 96 kHz, require more powerful hardware to maintain performance.

Regularly monitoring and adjusting your buffer settings based on the complexity of your audio production will help you maintain a latency-free recording environment without sacrificing audio quality.

Advertisement

Managing Sample Rate Settings

adjusting audio sample rate

After optimizing your buffer size, it's important to focus on managing your sample rate settings. The sample rate you choose greatly impacts both the quality of your audio and the performance of your DAW. Make certain your audio interface's sample rate matches your DAW's; a common choice is 44.1 kHz for most digital music projects.

While higher sample rates, like 96 kHz or 192 kHz, can enhance audio quality, they also increase CPU load, so evaluate your project's needs before deciding.

Regularly check your DAW's settings in the preferences menu to avoid mismatches that can lead to distortion and other audio performance issues. If you're using multiple audio devices, verify they're all set to the same sample rate to maintain consistency throughout your recording session.

Remember, sample rate can also affect latency; lower rates generally reduce processing demand but may compromise sound quality. Striking the right balance between sample rate and performance is essential for achieving the best possible recording experience.

Tips for System Optimization
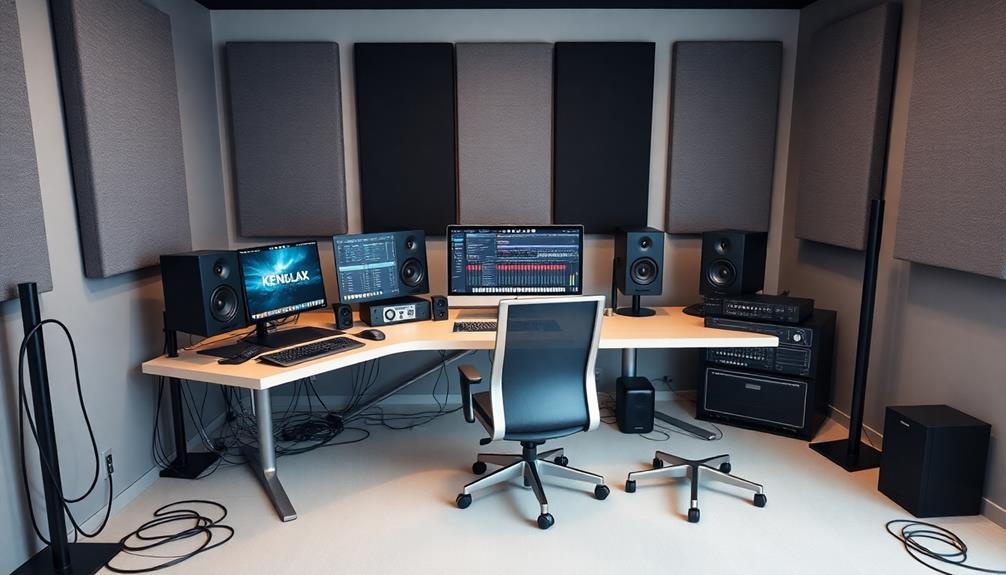
enhance system performance efficiently

To get the most out of your DAW, optimizing your system is vital. Start by confirming your CPU and RAM meet or exceed your DAW's recommended specifications. Regularly update your audio driver and software; outdated components can create latency issues and hinder your recording experience.

Additionally, consider implementing a high refresh rate monitor for improved visual feedback while recording, much like the benefits seen in top projectors for gaming enthusiasts.

Adjust your buffer size carefully: set it lower (like 64 or 128 samples) during tracking to reduce latency, then increase it (to 512 or 1024 samples) while mixing to free up CPU and system resources.

Advertisement

Disabling unnecessary background apps is essential; this maximizes CPU availability for your DAW, preventing sound dropouts and glitches during recording.

Consider utilizing a dedicated audio interface with optimized drivers designed for low-latency performance. This can greatly enhance responsiveness in your recording setup.

Also, don't forget to switch your computer to high-performance mode to make sure it prioritizes your DAW's needs even more effectively.

DAW-Specific Adjustments and Features
digital audio workstation enhancements

Optimizing your system sets the stage for getting the most out of your DAW, but you'll also want to explore specific adjustments and features unique to your software. Each DAW has its own way of handling buffer size and latency management, so understanding these can greatly enhance your recording experience.

Here's a quick reference for adjusting buffer sizes in popular DAWs:

DAW Adjustment Location Notes
Ableton Live Playback Engine Requires session restart for changes
FL Studio Audio Settings Menu Select preferred size from dropdown
Pro Tools Setup Tab in Playback Engine Tailor latency for recording vocals

In Cubase, you can access buffer size through the Device Setup menu, enabling adjustments for your audio devices. For Bitwig, check Preferences under the Options menu for flexible performance tuning. Remember, using CPU-intensive effect plugins may require you to adjust your buffer size to maintain peak performance while recording. By tailoring these settings, you can guarantee a smoother and more efficient recording process.

Advertisement

Frequently Asked Questions

How to Reduce Latency on DAW?

To reduce latency on your DAW, lower your buffer size, guarantee consistent sample rates, use direct monitoring, update your software, and close unnecessary apps. These steps can greatly enhance your recording experience.

Which DAW Is Best for Latency?

Imagine trying to shoot a basketball through a hoop while it's constantly moving. For low-latency DAWs, Ableton Live often shines, but Pro Tools and Logic Pro X also excel. Choose what fits your workflow best!

How Can I Reduce Latency Without Audio Interface?

To reduce latency without an audio interface, update your audio drivers, lower your buffer size, close unnecessary applications, and explore direct monitoring options. These steps can greatly improve your recording experience and reduce delays.

What Is Acceptable Latency in a DAW?

Acceptable latency in a DAW usually ranges from 10 to 20 milliseconds. If it exceeds 30 milliseconds, you'll notice delays that can disrupt your performance. Aim for lower latency for a more natural recording experience.

Conclusion

By implementing these latency-free recording tips, you can greatly enhance your recording experience. Many believe that achieving zero latency is impossible, but with the right settings and optimizations, you can get remarkably close. Adjusting your buffer size, managing sample rates, and fine-tuning your DAW can lead to smoother recordings. So, don't let latency hold you back—experiment with these strategies and see how they transform your workflow. You might just be surprised by the results!

Advertisement
Advertisement

Performance Optimization

How to Allocate CPU Resources for Better DAW Performance

Conquer CPU limitations for superior DAW performance with essential tips that can transform your music production experience into something extraordinary. Discover how inside!

Published

on

optimize cpu for daw

To allocate CPU resources effectively for better DAW performance, start by adjusting your audio buffer size. Lower sizes work great for live recording, while higher ones are better for mixing. Next, close unnecessary background apps to free up CPU power. Consider using return tracks for effects, which conserves resources by applying a single instance across multiple tracks. Don't forget to freeze or bounce tracks to reduce CPU load. Finally, make sure you maintain enough free space on your system drive for peak performance. Stick around to discover even more advanced tips to boost your DAW efficiency!

Key Takeaways

  • Adjust audio buffer size based on project needs; lower for recording, higher for mixing to balance latency and CPU load.
  • Close unnecessary background applications and set the power plan to "High Performance" to free CPU resources for DAW tasks.
  • Use track freezing and bouncing to reduce CPU load by rendering effects and minimizing audio glitches.
  • Optimize plugin usage by smart disabling idle plugins and utilizing return tracks for shared effects across multiple tracks.
  • Regularly monitor system drive space, ensuring at least 15% free on mechanical drives and 25% on SSDs to maintain performance.

Adjusting Audio Buffer Size

optimizing sound performance settings

Adjusting your audio buffer size is essential for optimizing your DAW's performance. The buffer size directly impacts both CPU usage and audio latency, so you need to find the right balance.

For live recording, lower buffer sizes, like 128 samples, are ideal, as they minimize latency and allow for real-time monitoring. However, if you're mixing or mastering, higher buffer sizes, such as 1024 or 2048 samples, are recommended. These larger settings give your CPU more time to process audio, reducing performance issues like clicks, pops, and dropouts.

It's important to remember that while increasing your buffer size lightens the CPU load, it also results in increased latency. This trade-off can be vital for tasks requiring precise timing.

Regularly testing different buffer sizes based on your specific workflow can help you optimize your CPU and maintain a smooth playback experience. By understanding these dynamics, you can effectively manage your DAW's performance.

Stay mindful of your project needs, and don't hesitate to adjust the buffer size as necessary to enhance your overall audio production experience.

Advertisement

Managing Latency and Sample Rate

latency and sample rate management

Finding the right balance in audio buffer size sets the stage for managing latency and sample rate effectively.

Latency refers to the delay between your input and output during playback, and you want it as low as possible for the best performance. Smaller buffer sizes, like 128 samples, enhance responsiveness but can strain your CPU performance. Larger sizes, like 1024-2048 samples, are better for mixing and mastering since they alleviate that strain.

Here are four key points to keep in mind:

  1. Balance is essential: Too low a buffer causes clicks and pops; too high introduces noticeable latency.
  2. Standard sample rates: 44.1 kHz works for most music, but unless you need higher quality, don't push it to 192 kHz.
  3. ASIO GUARD: Utilize this feature in DAWs like Cubase to reduce latency by pre-processing channels, easing the CPU load.
  4. Live recording needs: For live performances, prioritize low buffer sizes to maintain responsiveness.

Optimizing CPU Usage

maximizing processor efficiency

To optimize CPU usage in your DAW, start by closing any unnecessary background applications that could be hogging resources.

Next, adjust your power settings to "High Performance" mode to maximize your CPU's capabilities.

Disable Unused Background Applications

When you're deep into a resource-intensive session with your DAW, disabling unused background applications can be a game changer for your CPU performance. Every bit of processing power matters when you're recording or mixing audio.

By closing unnecessary apps, you free up valuable CPU resources, allowing your DAW to function more efficiently.

Advertisement

Here are four steps to help you optimize your performance:

  1. Use Task Manager or Activity Monitor: Identify which background applications are hogging your CPU and RAM, and terminate them to reclaim resources.
  2. Disable Startup Programs: Prevent certain applications from launching at startup to keep your CPU focused on your DAW tasks.
  3. Regularly Restart Your Computer: This clears out background processes that may be consuming precious CPU resources, guaranteeing maximum capacity for your session.
  4. Implement System Maintenance: Regular disk cleanup and defragmentation (if you use HDDs) can greatly enhance overall system efficiency, reducing CPU load during your audio work.

Taking these steps will guarantee your DAW has the CPU performance it needs for a seamless recording experience.

Adjust Power Settings

Optimizing your power settings is vital for achieving peak CPU performance while working in your DAW. Start by setting your power plan to High Performance in Windows. This change maximizes CPU speed and prevents throttling, especially during intensive audio tasks.

You'll want to disable energy-saving features like sleep mode and core parking to keep your CPU fully engaged, guaranteeing ideal performance.

Next, adjust processor scheduling to prioritize Background Services. This tweak can enhance audio driver performance and considerably reduce latency during playback.

It's also important to regularly check and update your system's power management settings. This makes sure they align with your DAW's requirements for consistent CPU allocation.

Advertisement

Optimize Plugin Usage

Effective plugin management is essential for maximizing CPU efficiency in your DAW. By optimizing your plugin usage, you can create a smoother workflow and avoid frustrating performance hiccups. Incorporating techniques from the 10 Steps to Recording Songs on Cassette Tapes can also enhance your overall production quality.

Here are some strategies to contemplate:

  1. Smart Disable Plugins: Enable this feature to automatically deactivate idle plugins, greatly reducing CPU load when they're not in use.
  2. Use Return Tracks: Route multiple tracks to a single return track with an effect plugin. This minimizes the number of plugin instances and keeps your mix cohesive while conserving CPU resources.
  3. Render to Audio: Bounce or render your MIDI tracks and effect-heavy audio files. Doing this frees up CPU resources, allowing you to close unnecessary plugin instances.
  4. Avoid Bridged Plugins: Stick to 64-bit versions of plugins. Bridged 32-bit options can drain more CPU power and create compatibility issues.

Don't forget to regularly monitor plugin usage in your DAW. By identifying and optimizing resource-heavy plugins, you'll guarantee a smoother performance during your sessions.

Implementing these tips can transform your music production experience.

Freezing and Bouncing Tracks

chilly rebound sound waves

Freezing and bouncing tracks can drastically improve your DAW's performance by reducing CPU load.

When you render MIDI or plugin-heavy tracks to audio, you free up valuable resources for smoother playback and mixing.

This efficient resource management not only streamlines your workflow but also helps maintain sound quality throughout the process.

Advertisement

Track Rendering Benefits

When working on a complex music project, managing CPU resources can be a real challenge. That's where track rendering benefits come into play. By utilizing freezing and bouncing tracks, you can greatly reduce CPU load, enabling smoother playback and a more efficient workflow.

Here are some advantages of rendering tracks:

  1. Reduced CPU Load: Freezing tracks allows you to temporarily render audio with all effects, freeing essential CPU resources.
  2. Enhanced Stability: Bouncing tracks transforms processed MIDI or audio into a single file, minimizing the potential for audio glitches and dropouts.
  3. Future Edit Flexibility: You can still make changes after freezing or bouncing, keeping your creative options open while alleviating strain on your system.
  4. Improved Focus: With less CPU strain, you're free to concentrate on mixing and arranging without interruptions caused by heavy plugin usage.

Implementing these track rendering techniques is particularly beneficial in larger projects where multiple effects are applied.

Efficient Resource Management

Efficient resource management in a DAW is essential for maintaining ideal performance, especially during demanding projects. One effective way to achieve this is by freezing tracks. When you freeze a track, you're rendering the audio from processed tracks, which considerably reduces real-time CPU load. Plus, you can easily unfreeze and edit later if needed.

Bouncing tracks is another valuable technique. This method commits the processed audio to a new file, cutting down on the number of active plugins. By doing this, you can free up CPU resources, leading to smoother performance during mixing sessions.

Flattening tracks also helps; it permanently renders the audio and eliminates the need for CPU-intensive effects, enhancing processing efficiency.

Advertisement

Consider utilizing return tracks for common effects as well. This allows you to share a single instance of a plugin across multiple tracks, conserving CPU resources while promoting a cohesive mix.

Regularly freezing or bouncing tracks in your project can help maintain a manageable CPU load, particularly in complex sessions with numerous plugins and effects. By mastering these techniques, you'll optimize your audio interface's performance and guarantee a more seamless workflow.

Monitoring System Drive Space

drive space monitoring system

Monitoring your system drive space is essential for maintaining high-quality DAW performance. If your drive space runs low, you risk slowing down your CPU, leading to frustrating interruptions while working on your projects.

To keep your DAW running smoothly, consider the following tips:

  1. Keep at least 15% free space on mechanical hard drives and 25% on solid-state drives to avoid performance issues.
  2. Regularly clean up unnecessary files and applications to free up valuable drive space and prevent resource constraints.
  3. Organize your sample libraries to reduce file access times, enhancing your overall DAW functionality.
  4. Utilize disk usage analysis tools to identify large files or applications that might be consuming your precious drive space.

Closing Unnecessary Background Applications

optimizing system performance efficiency

To keep your DAW performing at its best, closing unnecessary background applications is key. When you eliminate these non-essential apps, you free up valuable CPU resources that your DAW can utilize, especially during demanding tasks like mixing and recording. Applications like web browsers or cloud storage services can greatly increase CPU load, so shutting them down helps improve DAW performance and reduce latency during playback.

You can use Task Manager on Windows or Activity Monitor on macOS to identify and terminate these applications. Doing so can enhance your DAW's efficiency by 20-30%. Additionally, regularly restarting your computer clears out accumulated background processes, ensuring your DAW has the necessary resources at its disposal.

Here's a quick overview of common background applications and their impact on CPU usage:

Advertisement
Application Type Impact on CPU Resources Recommended Action
Web Browsers High Close
Cloud Storage Services Moderate Close
Music Streaming Services Moderate Close
Office Applications Low Close if not in use
System Updates Variable Schedule for later

Utilizing Return Tracks Effectively

maximizing return track utilization

Using return tracks effectively can greatly improve your DAW's performance while mixing. By using return tracks, you can apply a single instance of a CPU-intensive effect plugin across multiple tracks. This approach considerably reduces overall CPU usage, allowing you to maintain a smooth workflow.

Here are four reasons to start utilizing return tracks:

  1. Conserve Processing Power: Route several audio tracks to a return track instead of inserting plugins on each track.
  2. Cohesive Mix: Maintain a unified sound by applying effects like reverb or delay across multiple tracks simultaneously.
  3. Streamlined Workflow: Adjust effect levels and parameters easily, since changes on the return track affect all routed tracks.
  4. Efficient Monitoring: Regularly check your CPU load to guarantee you're optimizing performance, especially in larger sessions.

To set up a return track, create an auxiliary channel, insert your desired effect plugin, and route audio from various tracks via sends.

This method not only conserves processing power but also enhances your mixing options, allowing for creativity without the burden of high CPU usage.

Frequently Asked Questions

How to Reduce CPU Usage in DAW?

To reduce CPU usage in your DAW, close unnecessary apps, use "Smart Disable" for idle plugins, render tracks to audio, increase buffer size during mixing, and monitor CPU usage for heavy processes.

How Do I Optimize My Computer for DAW?

Did you know that 70% of music producers struggle with performance issues? To optimize your computer for a DAW, set power options to "High Performance," manage drive space, and disable unnecessary background apps for smoother sessions.

How Do I Optimize My CPU Resources?

To optimize your CPU resources, disable energy-saving settings, restart your computer regularly, and monitor CPU load. Use smart disable features for idle plugins and guarantee adequate system drive space to maintain efficient performance.

Advertisement

How to Choose CPU for Music Production?

When choosing a CPU for music production, visualize your tracks flowing seamlessly. Pick a processor with higher clock speeds, at least 4 cores, and make certain it's compatible with your DAW for peak performance during intense sessions.

Conclusion

Imagine your DAW as a bustling city, where each track is a busy street. By allocating CPU resources wisely, you're the mayor ensuring smooth traffic flow. Adjust audio buffer size, freeze tracks, and close unnecessary apps to keep the roads clear. Manage latency like a skilled traffic cop, guiding data safely to its destination. With these strategies, your city thrives, creating a harmonious symphony instead of a chaotic jam. Embrace the role, and watch your music flourish!

Continue Reading

Performance Optimization

Stream Samples at Lightning Speed: SSD Organization Tips You Need

Harness the power of SSD organization to streamline your sample streaming—discover the essential tips that could transform your audio production workflow.

Published

on

lightning fast ssd organization

To stream samples at lightning speed, you need to organize your SSD effectively. Start by creating a clear folder structure, grouping samples by type, like drums or synths. Limit subfolders to enhance retrieval speed, and always maintain consistent naming conventions. Keep at least 10-15% of your SSD capacity free for peak performance. Consider using high-speed NVMe drives for larger libraries and remember to periodically clean up unused files. With these tips, you can reduce load times and boost creativity. Stick around, and you'll discover even more strategies to enhance your audio production setup.

Key Takeaways

  • Create a clear folder structure to group samples by type for quick access and improved organization.
  • Implement consistent naming conventions to enhance file identification and reduce search time.
  • Limit subfolder depth to streamline retrieval, ensuring files are accessible within three clicks.
  • Regularly clean up unused files and maintain SSD space to optimize loading performance.
  • Store frequently used samples in a dedicated favorites folder for instant access during production.

Importance of SSDs in Music Production

ssds enhance music production efficiency

In today's fast-paced music production landscape, SSDs are game-changers. They greatly enhance your audio production workflows by providing faster load times for large orchestral sample libraries, which is vital in modern environments.

With SSDs, you can access your samples almost instantly, allowing you to focus on creativity rather than waiting around for files to load. Additionally, as highlighted in music education's rich landscape, integrating technology effectively can lead to more innovative practices in music creation.

The random access times of SSDs improve your ability to handle complex arrangements, enabling more simultaneous sample voices with lower latency. This means you can record or play back intricate pieces without hiccups. If you're using M.2 NVMe drives, you can achieve read speeds exceeding 3,200 Mbps, greatly outperforming traditional SATA SSDs and making sample streaming a breeze.

To maintain ideal performance, keep your SSDs under 85-90% capacity. This guarantees your audio projects load smoothly without lag or bottlenecks.

Regularly monitoring and organizing your SSD storage is equally important; it helps prevent data loss and guarantees quick access to essential samples. By prioritizing SSDs in your setup, you're setting yourself up for a streamlined production process that boosts your creativity and efficiency.

Advertisement

Types of SSDs for Sample Libraries

ssd types for libraries

Choosing the right type of SSD for your sample libraries can greatly affect your music production experience.

With various options available, you'll want to select the one that best fits your needs and budget. Here are the main types of SSDs to evaluate:

  • SATA SSDs: Affordable and suitable for many audio applications, with speeds around 500 MB/sec.
  • NVMe drives: These excel in sample loading, offering speeds that can exceed 3,200 MB/sec, making them ideal for large, complex libraries.
  • M.2 format SSDs: These provide remarkably faster read and write speeds compared to traditional SATA drives, perfect for high-performance audio workloads.
  • Thunderbolt 3 SSDs: Future-proof your setup with these, as they can deliver speeds up to 40 Gbps, accommodating advances in technology.

When selecting your SSD, evaluate your workload type.

If you're working with orchestral libraries or large sample collections, NVMe drives are the way to go.

They'll guarantee you experience quicker load times and reduced latency, enhancing your overall workflow.

Effective SSD Organization Techniques

optimizing ssd storage management

To keep your SSD organized, start by creating a clear folder structure that groups your samples by type, like drums or synths.

Implement a consistent naming convention to make it easier for you to find what you need quickly.

Additionally, consider utilizing actionable tips and strategies to streamline your organization process.

Advertisement

Folder Structure Optimization

A well-structured folder system is crucial for maximizing your SSD's efficiency and accessibility. To boost your SSD speed and streamline your workflow, follow these effective folder structure enhancement techniques:

  • Limit Subfolders: Keep the number of subfolders to a minimum. This helps in quick sample retrieval and guarantees thorough categorization. Proper organization can prevent unnecessary clutter, much like maintaining your air purifier for peak performance.
  • Organize by Category: Sort samples by company, pack name, or type (e.g., drums, vocals, FX). This familiarity makes navigation faster and easier on your SSD.
  • Apply the 3 Click Rule: Design your folder structure so you can access any sample within three clicks. This rule boosts your workflow efficiency considerably.
  • Regular Cleanup: Periodically remove unused files to maximize SSD space and keep your sample library organized.

Naming Conventions Strategy

Effective naming conventions can greatly enhance your SSD organization, making it easier to identify and access files quickly. Start by implementing straightforward naming conventions for your drives. Use clear descriptors that indicate the contents or purpose of each drive, like "Orchestral_Library_1" or "Sample_Pack_Vocals."

Consistency is key, so maintain uniform folder names within your SSDs. Avoid complex or whimsical names that could confuse you during high-pressure production sessions.

To create an organized file system, utilize a product-based tree structure for your samples and libraries. This approach reduces redundancy and enhances clarity in locating specific sounds or instruments.

Additionally, consider adding prefixes to your folder names based on categories, such as "DRUMS_" or "SYNTHS_." This strategy streamlines navigation and prioritizes visibility within your SSD's hierarchy.

Optimizing Performance and Heat Management

enhancing efficiency and cooling

Managing heat is essential for getting the best performance from your SSD, especially during demanding tasks like audio processing. Effective heat management prevents throttling, guaranteeing your SSD operates seamlessly under heavy loads.

Here are some tips to optimize performance:

Advertisement
  • Use Heatsinks: Adding heatsinks can greatly improve heat dissipation, particularly in desktop setups.
  • Maintain Airflow: Verify your system has adequate airflow. Good ventilation helps keep temperatures down.
  • Monitor Temperature: Regularly check your SSD temperatures using monitoring software. Keeping track can alert you to potential overheating issues.
  • Consider Liquid Cooling: If you're serious about performance, explore liquid cooling options for your SSD. Though not widely available, they can further enhance heat management.

Community Insights and Resources

local knowledge sharing hub

Engaging with online forums like Gearspace can really enhance your approach to SSD organization.

You'll find a wealth of performance tips and exclusive resources from industry experts that can help you optimize your setup.

Plus, sharing your own experiences can lead to valuable insights and connections within the community.

Engage With Online Forums

Participating in online forums like Gearspace can considerably enhance your understanding of pro audio gear and technology. Engaging with fellow enthusiasts and industry experts provides you with invaluable insights into optimizing SSD performance for sample streaming and managing your hard drives effectively.

Here are a few key benefits of joining these communities:

  • Real-World Experience: Members share personal experiences with various SSD models, helping you make informed purchasing decisions.
  • Performance Tips: Discussions often include valuable tips on maximizing SSD efficiency and organizing sample libraries.
  • Expert Q&A: Many forums host exclusive Q&A sessions with industry professionals, giving you access to best practices for audio production and storage solutions.
  • Collaborative Knowledge: Utilizing these resources fosters collaboration, enhancing your overall productivity and creativity in your audio production workflow.

Share Performance Tips

Sharing performance tips from community insights can greatly enhance your SSD's efficiency in audio production. Engaging with forums like Gearspace allows you to tap into valuable experiences and strategies regarding SSD performance, especially when working with orchestral libraries.

Many users emphasize the importance of optimizing both CPU and SSD settings to achieve peak performance in high-demand audio environments.

Advertisement

Utilizing benchmarking tools such as Crystal Disk is another smart move. These tools help you assess the speed and reliability of different SSD models, guiding your purchasing decisions effectively. By comparing performance metrics, you can guarantee your SSD can handle the demands of your audio projects.

Moreover, participating in exclusive Q&A sessions with industry experts can deepen your understanding of SSD performance maximization. These interactions often reveal insider tips that can greatly impact your workflow.

Lastly, staying updated on user experiences and recommendations can point you to reliable SSD brands and models tailored for your specific needs. By leveraging these community insights, you'll be well on your way to optimizing your SSD for seamless audio production and efficient orchestral library management.

Access Exclusive Resources

Community forums like Gearspace offer a treasure trove of insights and resources that can greatly elevate your audio production experience.

By engaging with fellow audio enthusiasts, you can tap into a wealth of shared experiences and expert advice. These communities are invaluable when it comes to optimizing SSD performance and managing cloud storage effectively.

Advertisement

Here are some benefits you can enjoy by participating:

  • Access to performance tips tailored for audio workflows.
  • Exclusive Q&A sessions with industry experts for troubleshooting.
  • Benchmarking tools like Crystal Disk to assess SSD performance.
  • Networking opportunities through community events and giveaways.

Managing Storage Capacity Effectively

optimizing storage space utilization

To manage storage capacity effectively, keep your SSDs under 85-90% full to guarantee peak performance and speed. When you exceed this limit, you'll notice slower access times and reduced efficiency, which can hinder your workflow.

For extensive sample libraries, consider investing in larger capacity SSDs, ranging from 1TB to several TB, to consolidate multiple smaller drives into a single, organized solution.

Regularly monitoring the available space on your SSDs is vital. Implementing compression techniques can optimize storage utilization, especially for audio projects where file sizes can quickly add up.

Remember, SSDs generally come at a higher cost per GB compared to traditional hard drives, so it's important to plan your storage strategy wisely.

A balanced approach involves utilizing multiple drives: SSDs for frequently accessed libraries and HDDs for less critical data. This way, you can maintain quick access to important files while managing overall storage capacity efficiently.

Advertisement

Recommended SSD Brands and Models

top ssd brands reviewed

When you're looking for dependable SSDs, several brands stand out for their performance and reliability, particularly in audio production.

Choosing the right model can greatly impact your workflow, so it's vital to take into account a few key options.

  • Vital MX500: Known for excellent value and performance, making it a favorite among audio professionals.
  • Samsung 870 EVO: Renowned for its reliability and efficiency, especially in high-demand audio applications.
  • WD SN750/SN770: These NVMe drives provide superior performance, enhancing sample loading times compared to cheaper SATA options.
  • Samsung T7: A reliable external hard drive option, though internal drives may offer better speed and performance for many users.

While it's tempting to take into account budget models like the Vital BX500 or Samsung QVO, it's best to avoid them for long-term use due to reliability concerns.

Investing in these recommended SSD brands will help guarantee that your audio projects run smoothly and efficiently, allowing you to focus on what you love—creating great music.

Best Practices for File Organization

efficient file organization techniques

Effective file organization is essential for any audio professional, as it not only saves time but also enhances your creative workflow. Start by implementing a clear folder structure with a limited number of subfolders. This makes accessing samples and presets intuitive, allowing you to retrieve what you need quickly.

Follow the 3 Click Rule to guarantee you can reach your files within three clicks from the main directory.

Store your presets in the plugin's native folder and categorize them by type—like bass, lead, or FX—to streamline your music production sessions. Regularly clean up unused files to maximize your hard disk space while maintaining a robust backup system to prevent data loss.

Creating a dedicated favorites folder for frequently used samples and presets can save you valuable time. Additionally, using a consistent naming convention will enhance identification and retrieval speed, making your workflow even more efficient.

Advertisement

Frequently Asked Questions

How Do You Organize Your Samples?

You can organize your samples by grouping them by company or pack name. Use a clear folder structure with three subfolders, and implement a consistent naming convention for easy identification and quick access during your workflow.

How Do I Maximize My SSD Speed?

To maximize your SSD speed, use M.2 NVMe drives, keep storage under 85% capacity, maintain a tidy folder structure, regularly clean up unused files, and manage heat effectively during intensive audio tasks.

What Not to Do With SSD?

Avoid filling your SSD like a packed suitcase; it won't open easily. Don't skip backups, use budget models, mix drive types, or ignore heat management. Keep it light, organized, and cool for peak performance!

How to Fix Slow SSD Speed?

To fix slow SSD speed, keep your drive under 85% capacity, update the firmware, run the TRIM command, disable unnecessary background processes, and consider upgrading to an NVMe SSD for faster performance.

Conclusion

By streamlining your SSD organization, optimizing performance, and managing storage, you'll release your creativity like never before. You'll access your samples with lightning speed, collaborate effortlessly, and produce high-quality music that resonates. Embrace the power of effective file management, invest in reliable SSDs, and watch your workflow transform. With these tips in hand, you'll not only enhance your music production but also enjoy a smoother, more efficient creative process. Let the music flow!

Advertisement
Continue Reading

Performance Optimization

Say Goodbye to Lag! The Ultimate Guide to Optimizing Ableton Live for Low Latency

Harness the power of low latency in Ableton Live and discover key strategies to enhance your music production—your creative flow depends on it!

Published

on

optimize ableton live latency

You can elevate your music production experience by optimizing Ableton Live for low latency. Start by adjusting your buffer size in the Audio Preferences—aim for 128 or 256 samples for a balance between performance and stability. Utilize ASIO drivers to minimize delay and regularly update your audio interface drivers. It's also essential to manage your sample rates and disable unnecessary plugins that can hog CPU resources. Implementing these steps will greatly reduce lag, giving you a smoother creative flow. There's plenty more to explore to guarantee your setup runs flawlessly!

Key Takeaways

  • Adjust buffer size in Ableton Live's Preferences, targeting 128 or 256 samples for a balance between low latency and CPU performance.
  • Utilize ASIO drivers on Windows to directly access audio hardware, significantly lowering latency during audio processing.
  • Regularly assess and optimize sample rates, with 48 kHz being a standard choice to maintain performance without excessive CPU demands.
  • Freeze and flatten tracks to manage device and plug-in latency, ensuring audio synchronization and reducing delay compensation issues.
  • Keep your computer's specifications above Ableton Live's requirements and maintain at least 20% free disk space to prevent audio dropouts.

Understanding Audio Latency

exploring sound delay issues

When you're making music in Ableton Live, understanding audio latency is essential, as it directly impacts your performance. Latency refers to the delay between your input—like triggering a MIDI note—and hearing the audio output. This delay can be divided into input latency, which affects how quickly recorded sounds playback, and output latency, which impacts the time it takes to hear sounds from virtual instruments.

To manage latency effectively, you need to pay attention to buffer size. A higher buffer size can help prevent audio dropouts but will increase latency, while a lower buffer size can reduce latency at the risk of overloading your CPU.

Typically, musicians aim for latency below 10 milliseconds for a seamless experience, while latencies between 10 ms and 20 ms can still be manageable for live performances.

Regularly updating your audio drivers and optimizing your audio settings in Ableton Live can help mitigate latency issues. By understanding these factors, you can make informed adjustments that enhance your overall performance and keep your creative flow uninterrupted.

Reducing Audio Interface Latency

minimizing audio interface delay

To reduce audio interface latency, you should start by adjusting your latency settings in Ableton Live's Preferences under Audio.

If you're on a Windows system, utilizing ASIO drivers can greatly enhance performance and lower latency.

Advertisement

Don't forget to regularly assess your system's performance to find the right balance between low latency and stable audio processing.

Adjust Latency Settings

Adjusting latency settings is essential for achieving ideal performance in Ableton Live, especially when you're aiming for low latency during recordings or live performances.

Start by accessing Live's Preferences and finding your way to the Audio tab. Here, you can modify your buffer sizes to find a balance between low latency and CPU performance. Lowering the buffer size will help reduce latency, but be mindful that it can also increase CPU load. Choose a size that aligns with your system's capabilities to prevent glitches.

If you're not recording externally, set the Audio Input Device to 'No device' to further lower latency during playback.

Regularly monitor and adjust your buffer size and sample rates, as higher sample rates can indeed reduce latency but may also strain your CPU resources.

Advertisement

If you're using a dedicated audio interface, make certain it's optimized for your workflow to achieve the best results.

Utilize ASIO Drivers

Using ASIO drivers is a game-changer for reducing audio interface latency in Ableton Live.

These Audio Stream Input/Output drivers are specifically designed for Windows systems, allowing you to access your audio hardware directly. This bypasses the overhead of standard Windows audio drivers, resulting in considerably lower latency, often below 10 milliseconds—ideal for both production and live performances.

To optimize your setup, follow these steps:

  1. Install the Latest ASIO Drivers: Check your audio interface manufacturer's website for the latest ASIO drivers and updates.
  2. Select Your ASIO Driver in Ableton Live: Head to Preferences, then the Audio tab, and choose your ASIO driver from the dropdown menu.
  3. Adjust Buffer Size: Lower your buffer size for reduced latency, but be cautious not to set it too low, as it may cause audio dropouts.
  4. Optimize Performance Settings: Disable unnecessary background applications and services to guarantee your CPU is focused on audio processing.

Optimizing Buffer Size

efficient buffer management techniques

When optimizing buffer size in Ableton Live, you need to strike a balance between low latency and CPU performance.

Smaller buffer sizes can reduce latency, but they might also lead to audio dropouts if your CPU struggles to keep up.

Advertisement

Experimenting with different settings helps you find the sweet spot for stable audio output while maintaining responsiveness.

Effects of Buffer Size

Buffer size plays an essential role in your audio production experience, directly affecting latency and system performance. Choosing the right buffer can be the difference between a smooth session and frustrating dropouts.

Here's how buffer size impacts your workflow:

  1. Latency: Smaller buffer sizes (32-128 samples) reduce latency, making your recordings feel more immediate.
  2. CPU Load: Lower buffer sizes increase CPU load, which could lead to audio dropouts if your system can't handle it.
  3. Performance Stability: Larger buffer sizes (512-2048 samples) stabilize performance but come at the cost of higher latency, making them less ideal for live recording.
  4. Optimal Settings: A buffer size of 128 or 256 samples strikes a balance between low latency and manageable CPU performance for most scenarios.

To find your ideal setting, start with a higher buffer size and gradually decrease it while testing for audio stability.

Regularly assess your CPU load and adjust as necessary to maintain audio quality without introducing unwanted latency. Monitoring these factors will help you optimize your experience in Ableton Live, ensuring that you can focus on your creativity rather than technical issues.

Balancing Latency and CPU

Finding the right balance between latency and CPU load is vital in optimizing your Ableton Live experience. Lowering the buffer size reduces latency, which is the delay between your input and the sound output. However, this comes at the cost of increased CPU power usage, so you need to strike a balance that maintains performance without causing audio dropouts. A buffer size of 128 or 256 samples often achieves low latency while keeping CPU usage in check.

Advertisement

Regularly monitor your CPU performance as you adjust buffer sizes. Smaller buffer sizes can lead to more strain on your system, resulting in crackling or dropouts, especially when using multiple MIDI instruments. If you encounter these issues, incrementally increasing the buffer size can help stabilize audio output.

Experimenting with various buffer sizes is important since the best setting varies based on your project's complexity and your computer's capabilities.

Take the time to test different configurations to find what works best for you. By effectively balancing latency and CPU load, you'll enjoy a smoother, more responsive Ableton Live experience without compromising audio quality.

Adjusting for Performance Stability

Optimizing your buffer size is key to achieving performance stability in Ableton Live. A proper buffer size can help you strike the right balance between low latency and stable audio output. Here's how to adjust your settings effectively:

  1. Start with a moderate buffer size: Begin with settings around 256 or 512 samples to guarantee a smooth experience.
  2. Monitor CPU usage: Keep an eye on your CPU load while experimenting with lower buffer sizes. This is vital, especially when using multiple MIDI instruments or demanding plugins.
  3. Gradually decrease the buffer size: Test audio output as you reduce the buffer size to find the sweet spot that minimizes latency without causing audio dropouts.
  4. Adjust based on project complexity: Regularly evaluate your buffer size depending on the demands of your project, as higher settings like 1024 or 2048 samples can stabilize performance but might introduce noticeable latency.

Managing Sample Rates

sample rate management strategies

Managing sample rates effectively is vital for achieving low latency in your Ableton Live setup. Higher sample rates, like 96 kHz or 192 kHz, allow for more samples per second, which can greatly reduce latency during audio processing.

However, keep in mind that increasing the sample rate demands more CPU processing power and system resources. It's important to balance these factors to prevent performance issues such as audio dropouts.

Advertisement

Experiment with different sample rates to find the best setting for your specific workflow and hardware. Common ranges from 44.1 kHz to 96 kHz can offer varying benefits. A sample rate of 48 kHz is often a standard choice in many professional audio applications, providing a solid compromise between audio quality and resource usage.

While utilizing higher sample rates can enhance audio reproduction and clarity, always monitor your CPU load to avoid high latency and potential dropouts.

Ultimately, the goal is to maintain a stable and efficient setup, allowing you to focus on creativity without getting bogged down by technical issues. Choose wisely, and you'll enjoy smoother performance in your music production endeavors.

Device and Plug-in Latency

latency in devices and plugins

Device and plug-in latency can considerably impact your Ableton Live experience, making it essential to keep this in check for a seamless workflow.

Here are some strategies to manage latency effectively:

  1. Freeze and Flatten Tracks: For any tracks using latency-inducing devices, freeze and flatten them while ensuring that delay compensation is active. This maintains audio synchronization without compromising your project's integrity.
  2. Monitor Plugins: Regularly check for plugins that inherently introduce latency. Some may add significant delays during processing, affecting your overall performance and workflow.
  3. Close Unused Windows: Close Max for Live editor windows when they're not in use. Open interfaces can contribute to additional latency, slowing you down.
  4. Optimize Audio Interface Settings: Assess and optimize your audio interface settings and plugin configurations to achieve the lowest possible latency while maintaining audio quality.

Recommended Audio Setup Practices

optimal audio configuration techniques

To achieve the best performance in Ableton Live, focusing on your audio setup is just as important as managing device and plug-in latency. Start by utilizing a dedicated audio interface with native drivers. This guarantees better audio quality and helps lower the latency during both performance and recording. Avoid Bluetooth or wireless audio streaming devices, as they often increase latency compared to cabled connections like USB, Firewire, or Thunderbolt.

Regularly check and update your audio interface drivers and software to maintain peak performance and compatibility with Ableton Live. Additionally, when you're not recording externally, set the Audio Input Device to 'No device'. This simple step minimizes latency and streamlines processing.

Advertisement

Here's a quick reference table for your audio setup:

Practice Benefit
Use a dedicated audio interface Better quality, lower latency
Avoid Bluetooth devices Reduced latency
Set Audio Input to 'No device' Minimizes processing latency

Consult Ableton's resources and community forums for further guidance on enhancing your audio setup and troubleshooting latency issues effectively.

Minimizing MIDI Latency

reducing midi response time

To minimize MIDI latency in Ableton Live, you'll want to focus on adjusting your hardware latency settings and optimizing your buffer size.

Setting your buffer size to 128 or 256 samples can strike a balance between low latency and CPU performance.

Additionally, fine-tuning these settings can lead to a more responsive workflow and an overall smoother experience.

Hardware Latency Adjustments

While optimizing your setup for low-latency performance in Ableton Live, adjusting hardware latency settings is essential for minimizing MIDI latency.

Advertisement

Start by accessing the Audio Preferences to fine-tune your hardware latency settings. Typically, settings around 128 or 256 samples strike a good balance for low latency performance.

Here are some key adjustments you can make:

  1. Use a Dedicated Audio Interface: This offers better drivers and considerably reduces MIDI latency compared to standard sound cards.
  2. Disable Monitor Function: When recording, turning off the Monitor function can lead to a more responsive experience by cutting down latency.
  3. Monitor CPU Load: As you lower buffer sizes, keep an eye on your CPU performance to avoid dropouts that can disrupt your workflow.
  4. Consult Hardware Documentation: Regularly review the specifics of your equipment to fine-tune settings and experiment with various values for the best configuration.

Buffer Size Optimization

Adjusting buffer size is essential for minimizing MIDI latency in your Ableton Live setup, as it directly impacts the responsiveness of your audio processing. To achieve the finest performance, consider starting with a buffer size of 128 or 256 samples. These settings strike a balance between low latency and CPU performance for most setups.

Keep in mind that smaller buffer sizes can lead to audio dropouts, so always monitor your CPU load when making adjustments. Here's a quick reference table to guide you through buffer size enhancement:

Buffer Size (Samples) Latency (ms) Recommended Use
32 0.75 Ideal for live performance
128 3.0 Good for MIDI recording
512 11.6 Suitable for mixing
2048 46.4 Best for heavy processing

Experiment with different buffer sizes and regularly monitor your performance. By adjusting settings incrementally, you'll find the best configuration for minimal latency in your music production with Ableton Live.

System Performance Optimization

enhancing system efficiency metrics

A well-tuned computer is essential for optimizing Ableton Live's performance and minimizing latency issues. To achieve effective system performance optimization, follow these vital steps:

  1. Meet System Requirements: Confirm your computer meets or exceeds Ableton Live's recommended specifications for smooth operation.
  2. Update Plugins: Regularly update all plugins to enhance compatibility and eliminate inefficiencies caused by outdated software.
  3. Free Disk Space: Maintain at least 20% free disk space. This helps your system run efficiently and reduces the chances of audio dropouts during performances.
  4. Monitor CPU Usage: Keep a close eye on your CPU usage, especially when using multiple MIDI instruments. High usage can lead to performance drops and increased latency.

Additionally, consider reducing the buffer size for improved responsiveness.

If you're still facing issues, think about offloading processing tasks by using a dedicated computer for tracks and another for MIDI.

Advertisement

By following these tips, you can greatly enhance your setup, guaranteeing a smoother experience while creating and performing in Ableton Live.

Fixing Audio Crackling Issues

resolving audio crackling problems

Audio crackling can disrupt your creative flow in Ableton Live, making it vital to address this issue promptly. Start by checking your buffer size; if it's set to 32 samples, incrementally increase it while monitoring CPU usage. You might find that a buffer size of up to 2048 samples stabilizes your audio output, allowing for smoother playback.

Additionally, just as regular cleaning is vital for peak performance of air purifiers, maintaining your audio setup can help prevent performance issues.

Another effective method is to freeze or flatten tracks. This converts MIDI to audio, reducing the processing load and alleviating crackling during playback. Also, keep an eye on background applications consuming CPU resources, as they can contribute to performance issues and crackling sounds.

Don't forget to verify your audio drivers are up to date. Outdated drivers can lead to compatibility problems, causing unwanted audio artifacts during your sessions.

Enhancing Live Performance Efficiency

optimizing live performance workflow

Efficiency during live performances can make or break your set, so it's vital to optimize your workflow in Ableton Live. You can enhance your live performance efficiency by implementing a few key strategies that focus on latency monitoring and overall performance stability.

  1. Organize and Label Tracks: Clear track organization allows you to navigate swiftly and make quick adjustments, guaranteeing smooth shifts between songs in your live set.
  2. Utilize Reduced Latency Monitoring: This option gives you better responsiveness and immediate feedback, which is essential for maintaining the flow during your performance.
  3. Freeze Unused Tracks: By freezing tracks you're not actively using, you conserve CPU resources. This guarantees that your performance remains stable, even when multiple instruments and effects are in play.
  4. Implement Backup Strategies: Always record your performance set and explore alternative playback methods. This protects you against potential crashes that could disrupt your live show.

Frequently Asked Questions

How Do I Get Lowest Latency in Ableton?

To achieve the lowest latency in Ableton, lower your buffer size, use ASIO drivers, disable monitoring while recording, and freeze tracks with heavy plugins. Always monitor your CPU to prevent dropouts during sessions.

How Do I Optimize Ableton for Live Performance?

To optimize Ableton for live performance, organize your tracks, freeze unused ones, and use reduced latency monitoring. Leverage session view for smooth changes, and always back up your set to prevent unexpected crashes.

Advertisement

Why Is Ableton Live so Slow?

Ableton Live can feel slow due to high buffer sizes, CPU-intensive plugins, or running multiple MIDI instruments. Background applications and insufficient resources, like low disk space, also contribute to sluggish performance and audio dropouts.

Will a Better Audio Interface Reduce Latency?

Yes, a better audio interface will reduce latency. By using high-quality interfaces with native drivers and ASIO support, you'll experience real-time monitoring and improved sound quality, enhancing your overall recording and playback experience.

Conclusion

By optimizing your setup, you can achieve impressively low latency levels—often under 5 milliseconds! This can make a huge difference in your live performances and studio sessions. Remember, even small adjustments in buffer size and sample rates can lead to smoother playback and recording. Don't forget to regularly check your system performance and update your plugins. Say goodbye to lag, and release your creativity with a responsive Ableton Live experience!

Continue Reading

Affiliate disclaimer

As an affiliate, we may earn a commission from qualifying purchases. We get commissions for purchases made through links on this website from Amazon and other third parties.

Advertisement

Vetted

affordable home studios guide affordable home studios guide
Vetted5 days ago

15 Best Professional Home Studios Under $1000 for Aspiring Creators

Learn how to build your dream home studio for under $1000 with expert tips and gear recommendations that will elevate...

christmas gifts for musicians christmas gifts for musicians
Vetted5 days ago

The Ultimate Gift Guide: 14 Best Christmas Music Production Gifts for Every Aspiring Musician

With 14 unique gift ideas for aspiring music producers, discover the perfect present that will elevate their creative journey this...

affordable thunderbolt audio interfaces affordable thunderbolt audio interfaces
Vetted5 days ago

15 Best Thunderbolt Audio Interfaces Under $500: Affordable Options for Aspiring Musicians

The top 15 Thunderbolt audio interfaces under $500 offer exceptional quality and features—discover which one will elevate your music production...

affordable dynamic microphones guide affordable dynamic microphones guide
Vetted5 days ago

15 Best Dynamic Microphones Under $150 for Every Budget and Need

Hunt for the perfect dynamic microphone under $150? Discover the top 15 picks that cater to every budget and need,...

optimal studio monitor placement optimal studio monitor placement
Vetted5 days ago

15 Best Monitor Positioning Tips for Optimal Studio Acoustics

Get ready to transform your sound with these 15 essential monitor positioning tips that will elevate your studio acoustics to...

top wireless studio peripherals top wireless studio peripherals
Vetted5 days ago

13 Best Wireless Peripherals for Studio Use – Enhance Your Creative Workflow

Discover the 13 best wireless peripherals that can elevate your studio experience, but wait until you see how they can...

affordable guitar audio interfaces affordable guitar audio interfaces
Vetted5 days ago

15 Best Audio Interfaces for Guitar Under $250 – Affordable Picks for Every Musician

Navigate through our top 15 audio interfaces for guitar under $250, and discover which affordable pick could elevate your music...

top easter music sales top easter music sales
Vetted5 days ago

The 9 Best Easter Music Production Sales You Can’t Miss This Season

Unlock incredible deals on Easter music production sales, including must-have resources that promise to elevate your craft—discover what you can't...

optimal studio monitor stands optimal studio monitor stands
Vetted5 days ago

15 Best Monitor Stands for an Optimal Studio Setup – Enhance Your Workspace Today

Boost your studio setup with the 15 best monitor stands that enhance sound and organization—discover which options will transform your...

top drum pads for producers top drum pads for producers
Vetted6 days ago

15 Best Drum Pads for Beat Making: Elevate Your Music Production Game

Looking to enhance your music production? Discover the 15 best drum pads that will take your beat-making skills to the...

top spring sale gear top spring sale gear
Vetted6 days ago

The 2 Best Spring Sale Studio Gear Picks You Can’t Miss

Discover the top two must-have studio gear picks this spring that will elevate your workouts and photography skills—find out what...

affordable music production kits affordable music production kits
Vetted6 days ago

14 Best Complete Music Production Setups Under $1000 for Aspiring Producers

Explore the 14 best music production setups under $1000 that will elevate your creativity and gear up your journey—discover the...

Trending

Copyright © 2024 The Sound of Music Guide Affiliate disclaimer As an affiliate, we may earn a commission from qualifying purchases. We get commissions for purchases made through links on this website from Amazon and other third parties.