
Creative use of markers and Arrangement View allows you to organize your track visually, making complex projects more manageable. You can assign different colors to sections like intros, drops, or breakdowns to quickly identify parts and enhance your workflow. Markers help you jump between scenes for precise edits and experimentation with transitions. By strategically placing and coding markers, you turn your workflow into a dynamic, artistic process that boosts both efficiency and creativity—exploring these techniques further will open even more potential.
Key Takeaways
- Use color-coded markers to visually distinguish song sections, enhancing organization and quick navigation during editing.
- Place markers strategically to mark transitions or key moments, aiding in precise scene changes and storytelling flow.
- Experiment with scene transitions in Arrangement View to create dynamic builds, drops, or emotional shifts.
- Leverage markers as reference points for arranging and rearranging sections, increasing workflow efficiency and creativity.
- Incorporate markers to visualize the song’s narrative arc, helping craft a cohesive and engaging musical story.

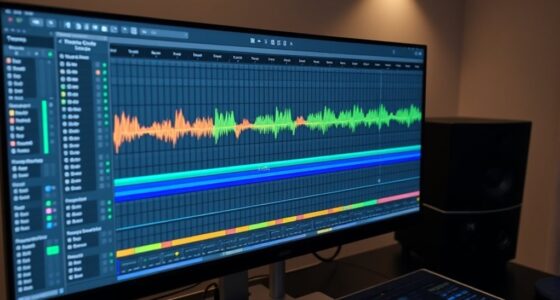
Markers and Arrangement View are powerful tools that can elevate your music production process. They act as your navigational aids and organizational systems, helping you structure your ideas efficiently. When you start working on a track, it’s easy to get lost in endless clips and layers, but markers provide a clear roadmap. By placing markers at key points—such as the intro, verse, chorus, or bridge—you create reference points that make editing and arrangement much smoother. This is especially helpful when you’re experimenting with scene transitions, as markers give you a visual cue to switch between different parts of your song seamlessly.
Markers help you create a clear roadmap for smoother editing and scene transitions.
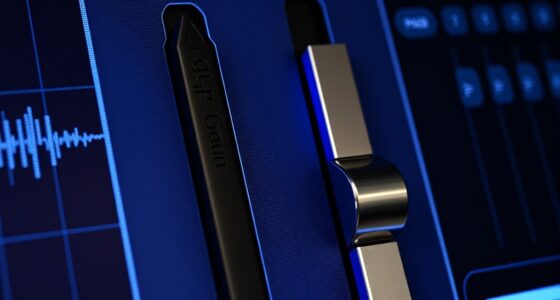
Color coding your markers takes this organization a step further. Assign different colors to various sections or scene transitions, so your workspace visually communicates the flow of your track. For example, you might use green markers for build-ups, red for drops, and blue for breakdowns. This quick visual reference saves time and minimizes confusion, allowing you to focus on creativity rather than navigation. When you’re ready to move from one scene to another, these color-coded markers help you identify the exact points to make *shift* between different parts of your song smoothly.
Arrangement View itself is like a canvas where your musical ideas come to life. Its grid layout allows you to place clips, automate parameters, and experiment with different arrangements. When combined with markers, Arrangement View becomes a powerful environment for storytelling. You can easily jump between sections by clicking on markers, making edits or adding effects precisely where needed. This approach encourages you to think of your song as a narrative—each marker and scene transition is a chapter or scene that contributes to the overall story. You can experiment with different arrangements, try out scene transitions, and see how they affect the flow of your track, all within a visual, intuitive space.
Using markers and Arrangement View creatively means more than just organization; it’s about enhancing your artistic process. By strategically placing markers, color coding them, and planning scene transitions, you gain better control over your track’s structure. This technique allows you to focus on crafting compelling musical moments instead of fumbling through endless clips. Whether you’re building tension, creating a surprise drop, or smoothly shifting between moods, these tools empower you to shape your music with precision and clarity. Ultimately, mastering the creative use of markers and Arrangement View transforms your production workflow into a more efficient, inspiring experience. Additionally, understanding how to utilize tuning options like ECU remapping or suspension upgrades can help you optimize your vehicle’s performance, much like fine-tuning your music for the best possible sound.
Frequently Asked Questions
How Can Markers Enhance Live Performance Setups?
Markers enhance your live performance setups by providing visual cues that keep you oriented and confident during your set. You can quickly navigate your arrangement view, jumping to specific sections effortlessly. This streamlines set navigation, allowing you to focus on your performance instead of searching for the right spot. By using markers effectively, you create a smoother flow, ensuring your handovers are seamless and your audience stays engaged throughout your performance.
What Are Some Advanced Marker Color Coding Techniques?
Think of your markers as a painter’s palette—advanced techniques let you craft a vivid hierarchy through color coding. Use contrasting colors for different sections, like a vibrant sunset fading into night, to prioritize cues. Implement subtle shades for related elements, creating a seamless flow. By establishing a marker hierarchy, you guide your performance smoothly, making complex arrangements feel intuitive—like a conductor leading an orchestra with precise, colorful baton strokes.
Can Arrangement View Be Customized for Specific Workflows?
Yes, you can customize Arrangement View for specific workflows by creating custom marker templates that suit your project needs. You can also set up marker automation workflows to streamline your editing process, making it easier to navigate and organize your session. By tailoring marker colors and positions, you improve efficiency, enabling you to quickly access key sections and maintain a clear overview of your project’s structure.
How Do Markers Help in Collaborative Music Production?
Did you know that projects with clear markers are 30% easier to navigate? Markers help in collaborative music production by pinpointing key sections, making it simple for everyone to stay aligned. You can use markers to coordinate track automation and organize clip grouping, ensuring seamless shifts. They act as shared reference points, reducing confusion and speeding up the workflow, so everyone stays on the same page from start to finish.
Are There Keyboard Shortcuts for Faster Marker Placement?
Yes, there are keyboard shortcuts for faster marker placement. You can quickly add a marker by pressing the “M” key when your playhead is at the desired spot. To navigate between markers, use “Shift + Up/Down Arrow.” These shortcuts streamline marker placement and navigation, making your workflow more efficient. Practice these commands, and you’ll find it easier to organize your project and collaborate seamlessly with others.
Conclusion
By mastering the creative use of markers and arrangement view, you unleash a symphony of visual storytelling, turning your workspace into a vibrant canvas. Each marker becomes a brushstroke, guiding your journey through the intricate dance of ideas. As you weave these elements together, your projects evolve into living murals—dynamic, layered, and full of purpose. Embrace this artistry, and watch your work transform from mere function into a masterpiece that breathes with intention and flair.